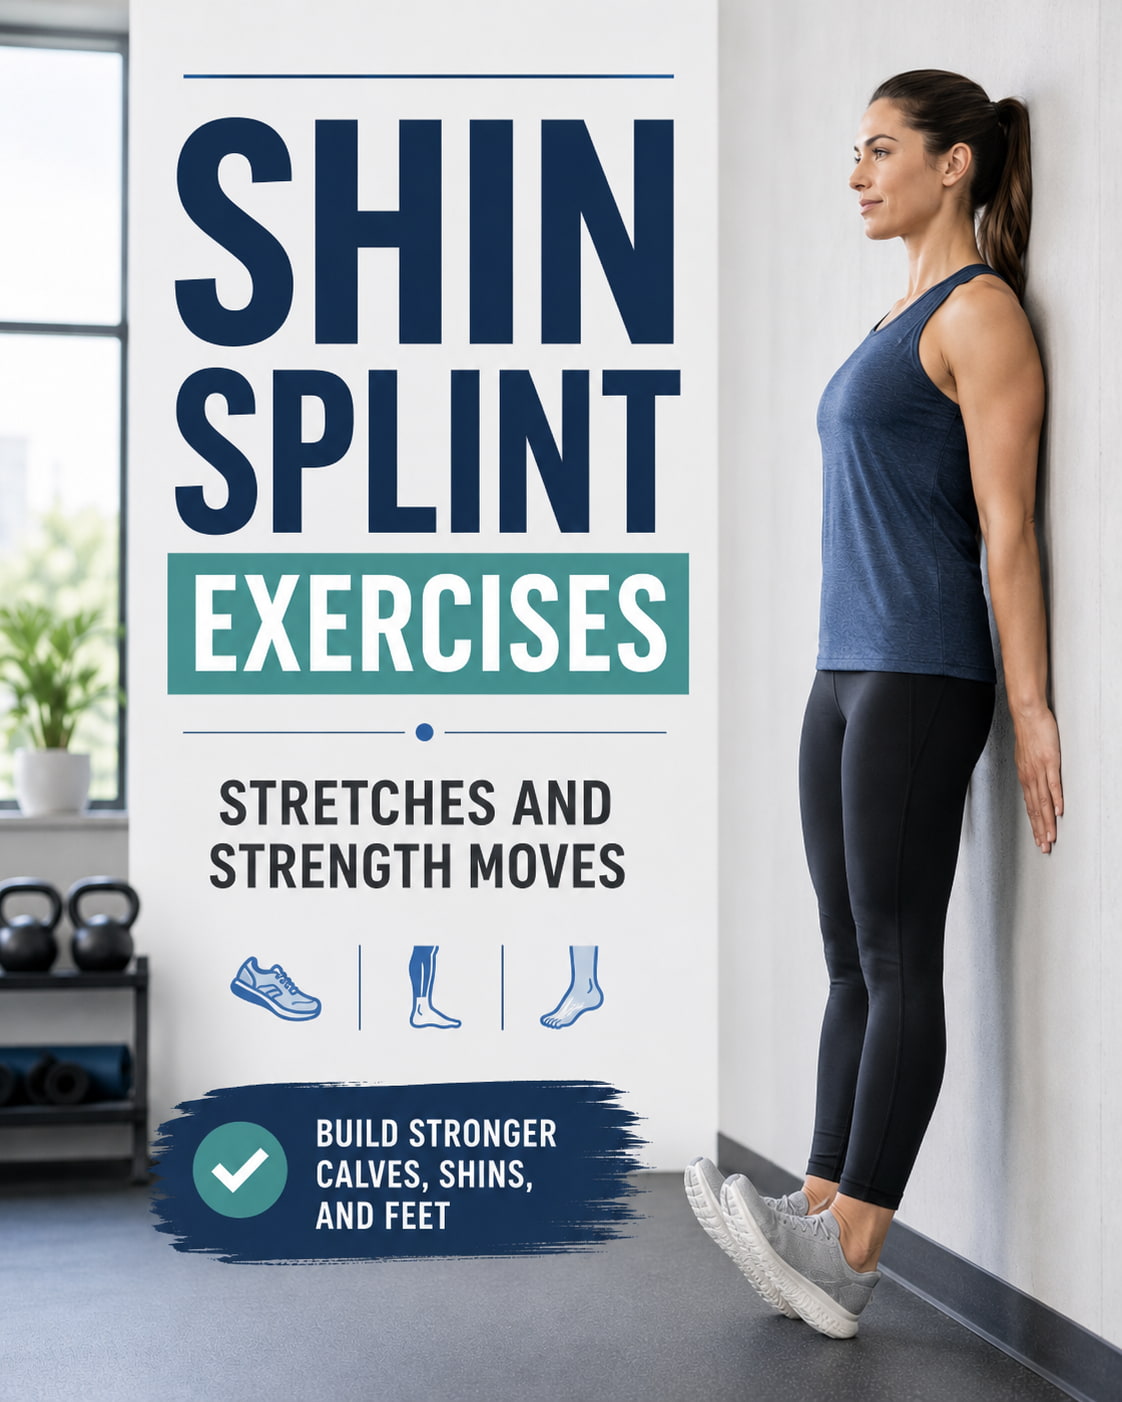
Shin splint exercises should combine gentle stretching, shin strengthening, calf strength, foot control, and gradual return-to-impact training. The best approach is not one magic move. It is a simple routine that helps your lower legs tolerate walking, running, jumping, and sports more effectively.
Shin splint exercises are often used by runners, walkers, athletes, dancers, and gym beginners who feel discomfort along the front or inside of the lower leg. These exercises may help support better ankle mobility, calf flexibility, foot strength, and lower-leg control. They should not be used to push through sharp pain or replace medical care when symptoms are severe or persistent.
In this guide, you will learn the best shin splint stretches and strength moves, how to perform each exercise, which muscles they work, common mistakes to avoid, and how to build a beginner-friendly routine.
What Are Shin Splints
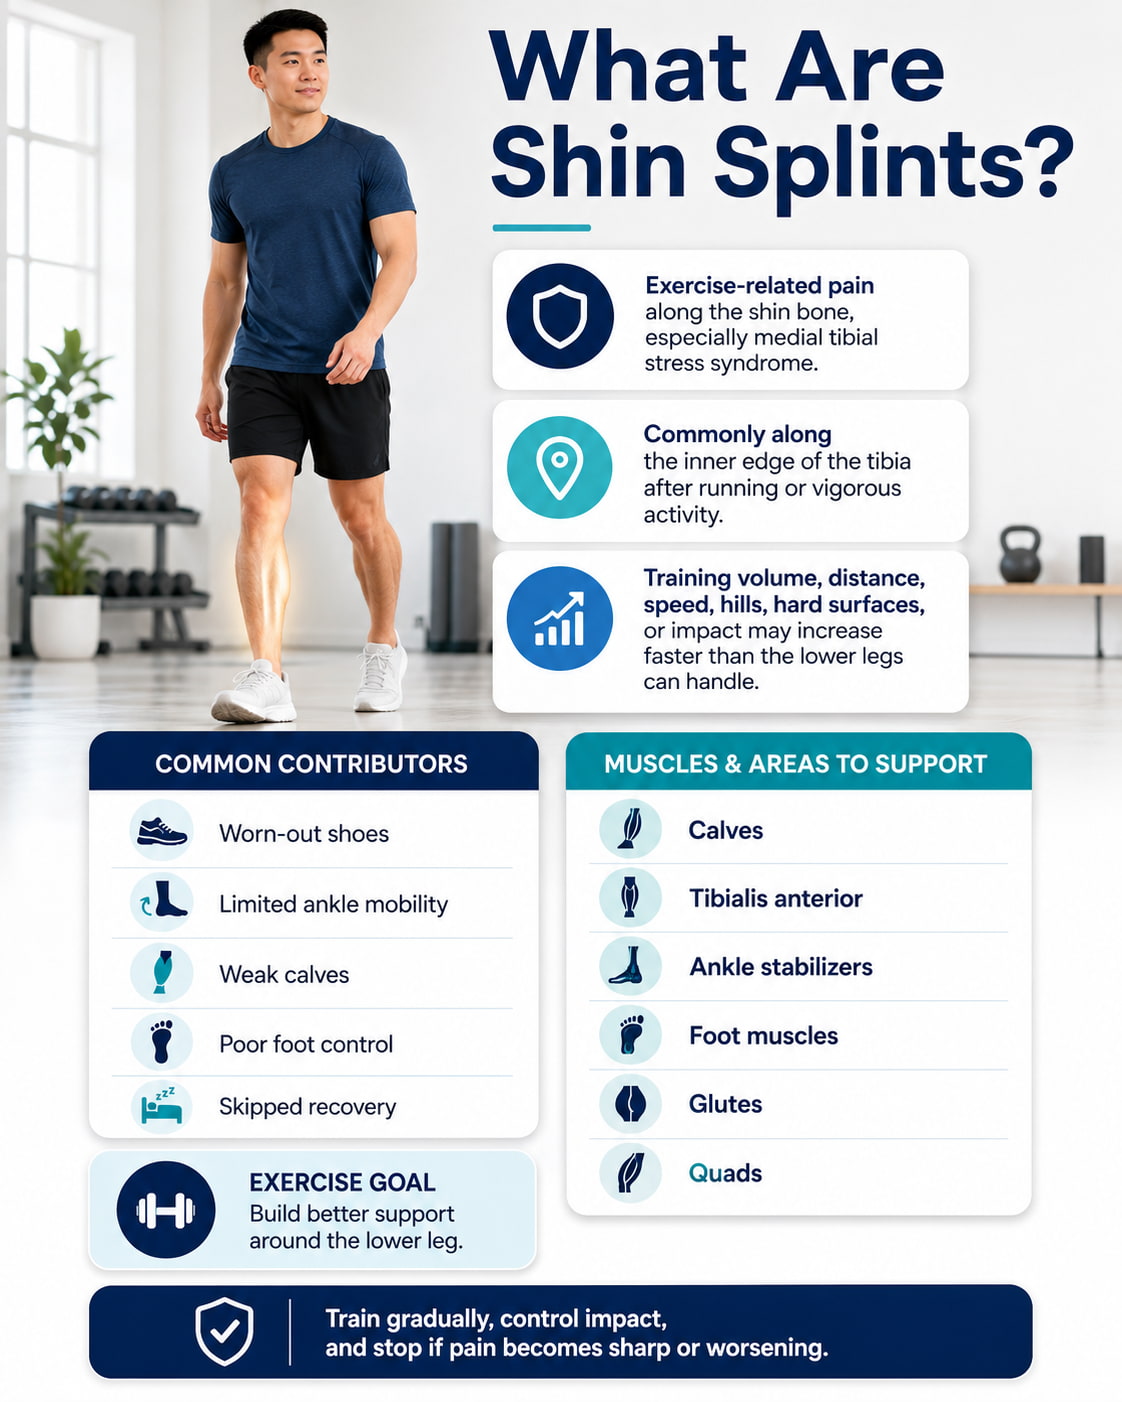
Shin splints are commonly used to describe exercise-related pain along the shin bone, especially medial tibial stress syndrome. The American Academy of Orthopaedic Surgeons explains that shin splints often cause pain along the inner edge of the tibia and are common after running or vigorous physical activity.
They often show up when training volume, running distance, speed, hills, hard surfaces, or impact work increases faster than the lower legs can handle. Worn-out shoes, limited ankle mobility, weak calves, poor foot control, and skipped recovery may also contribute.
The goal of shin splint exercises is to improve the support system around the lower leg. That includes the calves, tibialis anterior, ankle stabilizers, foot muscles, glutes, and quads.
Shin Splint Exercises Should Train More Than the Shins

A good shin splint routine should not only stretch the area that hurts. It should help the whole lower leg handle load better.
Calf flexibility matters because tight calves can limit ankle movement and increase stress through the lower leg. Shin strength matters because the tibialis anterior helps lift the foot and control foot strike. Foot strength matters because the arch and small foot muscles help manage force with each step. Hip and knee control also matter because poor alignment can increase stress farther down the chain.
The Mayo Clinic recommends avoiding activities that cause pain, swelling, or discomfort while staying active with low-impact options such as swimming, cycling, or water running during recovery. That means your routine should build capacity without forcing painful impact too early.
Safety First Before Doing Shin Splint Exercises
Do not use these exercises to force your way through pain. Mild muscular effort is normal. Sharp pain, worsening shin pain, limping, numbness, swelling that does not settle, dizziness, chest pain, or unusual symptoms are not normal training signals.
Stop the exercise and seek professional help if symptoms are sharp, worsening, or do not improve with rest and basic self-care. Shin pain can overlap with other issues such as stress fractures, tendon irritation, or exertional compartment problems, so persistent pain should be checked.
Start with pain-free or low-discomfort movements. Keep the first few sessions easy. Progress by adding control, range of motion, reps, or sets before adding running, jumping, hills, or speed work.
9 Best Shin Splint Exercises
These shin splint exercises focus on strengthening the shins, calves, ankles, and feet while improving lower-leg control.
Start with slow, pain-free movements and progress gradually before returning to running, jumping, or high-impact training.
1. Straight-Knee Calf Wall Stretch
Best for: Improving gastrocnemius flexibility and reducing excessive calf tightness that may affect ankle movement.
Muscles worked: Gastrocnemius, soleus, Achilles tendon region, and ankle stabilizers.
Equipment needed: Wall, counter, or sturdy support.
Why it stands out: This is one of the simplest shin splint stretches because it targets the larger calf muscle with the knee straight. Better calf flexibility may help the ankle move more comfortably during walking, running, and squatting. It is also easy to control, which makes it useful for beginners.
Suggested sets and reps: Hold for 20 to 30 seconds per side. Perform 2 to 4 rounds.
Beginners: Use a shorter stance and keep the stretch mild. The goal is gentle tension, not pain.
Intermediate: Move the back foot slightly farther away and hold the stretch longer while keeping the heel down.
Advanced: Use it after lower-leg training or running sessions as part of a cooldown, but do not force the range.
Rest: Rest 10 to 20 seconds between sides or repeat the other leg while one side rests.
How to do it:
- Stand facing a wall with both hands on the wall.
- Step one foot back and keep both feet pointing forward.
- Keep the back knee straight and the back heel on the floor.
- Bend the front knee slightly and shift your body toward the wall.
- Hold when you feel a stretch in the upper calf of the back leg.
- Switch sides and repeat.
Common mistakes: Letting the back heel lift, turning the back foot outward, bouncing in the stretch, or pushing into sharp discomfort.
Expert tip: Keep the back foot straight and the heel heavy. A small change in foot angle can change where you feel the stretch.
Exercise variations: You can perform this stretch with hands on a counter, rack, tree, or stair rail.
Easier variation: Stand closer to the wall and reduce the stretch intensity.
Harder variation: Step the back foot farther away while keeping the heel flat and the knee straight.
2. Bent-Knee Soleus Stretch
Best for: Targeting the deeper calf muscle and improving ankle mobility with the knee bent.
Muscles worked: Soleus, Achilles tendon region, deep calf muscles, and ankle stabilizers.
Equipment needed: Wall or sturdy support.
Why it stands out: The soleus works heavily during walking and running because it helps control the ankle when the knee is slightly bent. The AAOS Foot and Ankle Conditioning Program includes a bent-knee heel cord stretch to target this deeper calf area.
Suggested sets and reps: Hold for 20 to 30 seconds per side. Perform 2 to 4 rounds.
Beginners: Use light pressure and keep the stretch comfortable.
Intermediate: Add a slightly deeper knee bend while keeping the heel down.
Advanced: Use this stretch after calf raises or running drills to maintain ankle mobility.
Rest: Rest 10 to 20 seconds between sides.
How to do it:
- Stand facing a wall with one foot forward and one foot back.
- Keep both heels on the floor.
- Bend both knees slightly.
- Shift your hips and chest toward the wall.
- Keep the back heel down as you feel the stretch lower in the calf.
- Hold, breathe, and switch sides.
Common mistakes: Lifting the back heel, collapsing the arch, turning the foot out, or leaning so far forward that the stretch becomes uncomfortable.
Expert tip: Think about bending the back knee while gently pressing the heel into the floor. That helps shift the stretch toward the soleus.
Exercise variations: Try it with your hands on a chair or with the back foot slightly closer if your ankles feel stiff.
Easier variation: Use a shorter stance and bend the knee less.
Harder variation: Hold the stretch longer or perform it after a gentle warm-up when the lower leg feels more mobile.
3. Seated Shin Muscle Stretch
Best for: Gently stretching the front of the lower leg.
Muscles worked: Tibialis anterior area, ankle dorsiflexors, and top-of-foot tissues.
Equipment needed: Chair.
Why it stands out: Many shin splint routines focus only on the calves. This stretch helps the front of the lower leg relax after repeated dorsiflexion work such as toe raises, heel walks, or running. Kaiser Permanente includes a seated shin muscle stretch as part of its shin splint exercise guidance.
Suggested sets and reps: Hold for 15 to 30 seconds per side. Perform 2 to 4 rounds.
Beginners: Keep the pressure light and avoid forcing the foot into the floor.
Intermediate: Hold the stretch a little longer while keeping the ankle relaxed.
Advanced: Pair it with shin strengthening work as a cooldown stretch.
Rest: Rest 10 to 20 seconds between sides.
How to do it:
- Sit tall on a chair with both feet on the floor.
- Slide one foot slightly behind you.
- Place the top of that foot lightly against the floor.
- Gently point the toes back until you feel a stretch along the front of the shin.
- Hold without forcing the ankle.
- Switch sides and repeat.
Common mistakes: Pressing too hard into the top of the foot, twisting the ankle, rounding the posture, or trying to create an intense stretch.
Expert tip: This should feel gentle. If the front of the ankle feels pinched, reduce the range or skip the stretch.
Exercise variations: You can do a similar stretch standing by placing the top of the foot lightly on the floor behind you.
Easier variation: Keep the foot closer to your body and use less pressure.
Harder variation: Hold the stretch slightly longer while keeping the pressure controlled and pain-free.
4. Wall Toe Raises
Best for: Strengthening the front of the shins and improving ankle dorsiflexion control.
Muscles worked: Tibialis anterior, ankle dorsiflexors, and lower-leg stabilizers.
Equipment needed: Wall.
Why it stands out: Wall toe raises are one of the most useful shin splint exercises because they directly train the muscles that lift the toes and control the foot during walking and running. They are simple, scalable, and easy to perform without gym equipment.
Suggested sets and reps: Perform 2 to 3 sets of 10 to 20 reps.
Beginners: Stand closer to the wall and use a smaller range of motion.
Intermediate: Step the feet slightly farther away from the wall and control each rep slowly.
Advanced: Use a 2-second lift and 3-second lowering phase to build more control.
Rest: Rest 30 to 60 seconds between sets.
How to do it:
- Stand with your back against a wall.
- Place your feet a comfortable distance in front of you.
- Keep your heels on the floor.
- Lift your toes and the balls of your feet toward your shins.
- Pause briefly at the top.
- Lower under control and repeat.
Common mistakes: Rocking the whole body, lifting the heels, rushing the lowering phase, or doing too many reps after the shins start to burn.
Expert tip: Keep the movement at the ankle. The goal is controlled toe lift, not body momentum.
Exercise variations: Try alternating reps, slow eccentrics, or a small pause at the top.
Easier variation: Stand more upright with the feet closer to the wall.
Harder variation: Move the feet farther from the wall or slow down each lowering phase.
5. Resisted Band Dorsiflexion
Best for: Building shin strength with more targeted resistance.
Muscles worked: Tibialis anterior, ankle dorsiflexors, and foot stabilizers.
Equipment needed: Light resistance band and a stable anchor point.
Why it stands out: This exercise trains the shin muscles through a controlled range of motion. It can be especially useful when wall toe raises feel too easy or when you want a more isolated strengthening option. Sanford Health’s medial tibial stress syndrome rehabilitation guideline includes ankle motor control and resistance-based lower-leg work as part of a progressive approach.
Suggested sets and reps: Perform 2 to 3 sets of 10 to 15 reps per side.
Beginners: Use a very light band and focus on smooth motion.
Intermediate: Add a longer pause at the top of each rep.
Advanced: Use a slower 3-second lowering phase or slightly stronger band resistance.
Rest: Rest 30 to 60 seconds between sets.
How to do it:
- Sit on the floor or on a bench with one leg extended.
- Anchor a light band in front of your foot.
- Loop the band around the top of your foot.
- Start with the toes pointed slightly away from you.
- Pull the toes toward your shin against the band.
- Pause, then slowly return to the start.
Common mistakes: Using a band that is too heavy, moving through pain, letting the knee twist, or rushing the return phase.
Expert tip: Keep the movement smooth and quiet. Your ankle should move without the rest of your leg swinging around.
Exercise variations: Perform the exercise seated on the floor, seated on a chair, or with a cable ankle strap if you have gym access.
Easier variation: Use less band tension or move closer to the anchor point.
Harder variation: Use a stronger band or slow the lowering phase.
6. Standing Calf Raises
Best for: Building calf strength and lower-leg load tolerance.
Muscles worked: Gastrocnemius, soleus, Achilles tendon region, foot stabilizers, and ankle stabilizers.
Equipment needed: Wall, chair, step, or sturdy support.
Why it stands out: Calf strength is important because the calves help absorb and produce force during walking, running, jumping, and stair climbing. The AAOS foot and ankle conditioning program includes calf raises, and rehab progressions commonly move from double-leg calf raises to single-leg and eccentric-focused versions.
Suggested sets and reps: Perform 2 to 4 sets of 8 to 15 reps.
Beginners: Start with both feet on the floor and use a wall or chair for balance.
Intermediate: Use a slow tempo and pause briefly at the top.
Advanced: Progress to single-leg calf raises or eccentric lowering when basic reps are pain-free.
Rest: Rest 45 to 90 seconds between sets.
How to do it:
- Stand tall with feet about hip-width apart.
- Hold a wall or chair lightly for balance.
- Press through the balls of your feet.
- Lift your heels until you are standing on your toes.
- Pause at the top.
- Lower slowly until your heels return to the floor.
Common mistakes: Bouncing, rolling the ankles outward, cutting the range short, leaning forward, or doing too much too soon.
Expert tip: Control the lowering phase. The down portion is where many people lose alignment and turn the exercise into a bounce.
Exercise variations: Try double-leg calf raises, single-leg calf raises, seated calf raises, step calf raises, or slow eccentric calf raises.
Easier variation: Use both legs and hold a support for balance.
Harder variation: Perform single-leg calf raises or lower for 3 seconds each rep.
7. Towel Curls
Best for: Strengthening the small muscles of the foot.
Muscles worked: Foot intrinsics, toe flexors, arch-supporting muscles, and lower-leg stabilizers.
Equipment needed: Towel.
Why it stands out: The foot helps control how force travels up the leg. Towel curls are simple, low-impact, and useful for improving foot awareness. The AAOS foot and ankle conditioning program includes towel curls and notes they can be progressed by adding weight to the towel.
Suggested sets and reps: Perform 2 to 3 sets of 30 to 60 seconds per foot.
Beginners: Use a thin towel on a smooth floor.
Intermediate: Use a thicker towel or perform longer sets.
Advanced: Place a small light object on the towel for added challenge.
Rest: Rest 30 to 60 seconds between sets.
How to do it:
- Sit in a chair with a towel flat under one foot.
- Keep your heel on the floor.
- Use your toes to scrunch the towel toward you.
- Reset the towel when it bunches up.
- Keep the movement slow and controlled.
- Switch feet and repeat.
Common mistakes: Lifting the whole foot, curling so hard that the foot cramps, rushing through the set, or letting the knee collapse inward.
Expert tip: Keep the heel down and move from the toes. The goal is foot control, not speed.
Exercise variations: Try marble pickups, short-foot holds, or towel curls with a light weight on the towel.
Easier variation: Use a lighter towel and shorter sets.
Harder variation: Use a heavier towel or add a small object for resistance.
8. Heel Walks
Best for: Building tibialis anterior endurance and active dorsiflexion control.
Muscles worked: Tibialis anterior, ankle dorsiflexors, foot stabilizers, and lower-leg stabilizers.
Why it stands out: Heel walks train the shins in a way that feels more dynamic than seated or wall-based exercises. They can be helpful for building endurance in the front of the lower leg, but they should be kept short and controlled because they can create a strong burn quickly.
Suggested sets and reps: Perform 2 to 4 short walks of 10 to 20 seconds.
Beginners: Start with 10-second walks and stop before form breaks down.
Intermediate: Increase to 15 to 20 seconds per walk while keeping the toes lifted.
Advanced: Use longer walks or slower steps, but only if symptoms stay calm.
Rest: Rest 30 to 60 seconds between walks.
How to do it:
- Stand tall with your feet hip-width apart.
- Lift your toes and the balls of your feet off the floor.
- Keep your weight on your heels.
- Walk forward with short, controlled steps.
- Keep your toes lifted the whole time.
- Stop before your shins fatigue heavily.
Common mistakes: Taking large steps, leaning backward, slapping the feet down, or continuing after the shins become painful.
Expert tip: Think “small steps, tall posture, quiet control.” This drill should train endurance, not turn into a painful test.
Exercise variations: Try heel walks in place, forward heel walks, or short backward heel walks.
Easier variation: March in place on your heels for a few seconds at a time.
Harder variation: Increase the duration gradually or slow each step down.
9. Step-Ups With Knee Control
Best for: Building lower-body strength, hip control, and knee-foot alignment.
Muscles worked: Quadriceps, glutes, calves, hamstrings, foot stabilizers, and core.
Equipment needed: Low step, sturdy box, or stair.
Why it stands out: Shin splints are often linked to how the whole leg manages impact and alignment. Step-ups train the quads and glutes while teaching the foot, knee, and hip to work together. Sanford Health’s medial tibial stress syndrome guideline includes lower-extremity strengthening such as step-ups, step-downs, squats, lunges, bridges, and band walks as part of a broader progression.
Suggested sets and reps: Perform 2 to 3 sets of 8 to 12 reps per side.
Beginners: Use a low step and hold a railing or wall for support.
Intermediate: Use a slightly higher step and control the lowering phase.
Advanced: Add light dumbbells or use a slower tempo.
Rest: Rest 60 to 90 seconds between sets.
How to do it:
- Stand in front of a low step.
- Place one foot fully on the step.
- Keep the knee tracking in line with the toes.
- Push through the whole foot to stand up.
- Bring the other foot onto the step with control.
- Step down slowly and repeat on the same side or alternate sides.
Common mistakes: Pushing mostly off the back leg, letting the knee cave inward, using a step that is too high, or dropping down quickly.
Expert tip: Your front foot should do most of the work. If you have to bounce off the back leg, the step may be too high.
Exercise variations: Try lateral step-ups, slow step-downs, or step-ups with a knee drive.
Easier variation: Use a lower step and hold support.
Harder variation: Add light dumbbells or use a 3-second lowering phase.
Sample Shin Splint Exercise Routine
This routine is designed for people who can walk without sharp pain and want a simple strength-and-mobility plan. If walking hurts or symptoms are worsening, rest from impact and speak with a qualified professional.
| Exercise | Sets and reps | Rest | Effort |
|---|---|---|---|
| Straight-knee calf wall stretch | 2 rounds of 20 to 30 seconds per side | 10 to 20 seconds | Gentle |
| Bent-knee soleus stretch | 2 rounds of 20 to 30 seconds per side | 10 to 20 seconds | Gentle |
| Wall toe raises | 2 sets of 10 to 15 reps | 30 to 60 seconds | Moderate |
| Standing calf raises | 2 to 3 sets of 8 to 12 reps | 45 to 90 seconds | Moderate |
| Towel curls | 2 sets of 30 to 45 seconds per foot | 30 to 60 seconds | Easy to moderate |
| Step-ups with knee control | 2 sets of 8 to 10 reps per side | 60 to 90 seconds | Moderate |
Perform this routine 2 to 4 days per week. Keep at least one rest day between harder lower-leg sessions at first. Stretching can be done more often if it feels good and does not increase symptoms.
Progress by adding a few reps, adding one set, slowing the tempo, or improving control before adding running or jumping. When symptoms stay calm during daily walking and basic strengthening, you can gradually return to short, low-intensity running intervals.
How to Progress Back to Running or Impact
Return to impact slowly. The American Academy of Orthopaedic Surgeons recommends returning at a lower intensity and for shorter periods if the same pain comes back, then increasing training more slowly than before.
Start with walking, cycling, swimming, or other low-impact conditioning if running still irritates your shins. When walking is comfortable, use short run-walk intervals on flat, forgiving surfaces. Avoid hills, sprints, hard surfaces, and plyometrics until your lower legs tolerate basic strength work.
A practical progression is to increase only one variable at a time. Do not add distance, speed, hills, and jumping in the same week. If shin pain increases during or after training, step back and return to the last level that felt manageable.
Common Mistakes With Shin Splint Exercises
The most common mistake is doing exercises while ignoring pain signals. Mild muscle fatigue is fine, but sharp or worsening shin pain is a sign to stop and modify.
Another mistake is only stretching. Stretching can help with calf tightness, but shin splints usually need a broader plan that includes strength, load management, footwear awareness, surface selection, and gradual training increases.
Many people also return to running too quickly. If your shins calm down after a few rest days, that does not always mean your lower legs are ready for full mileage, hills, or speed work. Build back gradually.
Poor exercise form can also limit results. Toe raises should come from the ankle, not body momentum. Calf raises should be controlled, not bounced. Step-ups should keep the knee aligned with the toes instead of collapsing inward.
What Exercises Should You Avoid With Shin Splints
Avoid exercises that increase sharp pain, change your gait, or make symptoms worse the next day. This may include hard running, sprinting, hill repeats, box jumps, jump rope, high-volume burpees, heavy loaded carries, or long walks on hard surfaces during a flare-up.
You do not have to stop moving completely unless a professional tells you to. Low-impact options such as cycling, swimming, or water running are often easier to tolerate while symptoms settle.
How Often Should You Do Shin Splint Exercises
Most people can start with 2 to 4 focused sessions per week. Calf and shin strengthening need recovery, especially if your lower legs are already irritated from running or sports.
Gentle stretches can be done most days if they feel comfortable. Strength exercises should be progressed more carefully. Start with fewer sets and moderate effort, then build up as your symptoms allow.
A good rule is simple: you should feel the exercise working, but your shin pain should not spike during the session or feel noticeably worse later that day or the next morning.
FAQ
What are the best shin splint exercises
The best shin splint exercises usually include calf stretches, soleus stretches, wall toe raises, resisted dorsiflexion, calf raises, towel curls, heel walks, and controlled step-ups. A complete routine should train flexibility, shin strength, calf strength, foot control, and lower-body alignment.
Should I stretch or strengthen shin splints
Both can be useful. Stretching may help if your calves are tight, while strengthening helps your lower legs tolerate more load. A stretch-only routine may miss important areas such as the tibialis anterior, foot muscles, calves, glutes, and quads.
Can I run while doing shin splint exercises
You may be able to run if symptoms are mild, do not worsen during the run, and do not feel worse afterward. If running causes pain, limping, or increasing discomfort, switch to low-impact conditioning and return more gradually.
How long do shin splints take to improve
The timeline depends on severity, training load, recovery, footwear, surfaces, and whether you reduce the activity that caused the problem. Mild cases may settle with rest and better load management, while persistent cases may need professional evaluation and a longer progression.
Are calf raises good for shin splints
Calf raises can be useful because the calves help absorb and produce force during walking and running. Start with double-leg calf raises, use slow control, and avoid pushing into pain. Progress to single-leg or eccentric versions only when basic reps are well tolerated.
Are heel walks good for shin splints
Heel walks can help strengthen the tibialis anterior, but they should be used carefully. Keep them short, controlled, and pain-free. If they cause sharp shin discomfort, use wall toe raises or band dorsiflexion first.
When should I see a doctor for shin pain
Seek professional help if pain is sharp, localized, worsening, associated with swelling, causes limping, does not improve with rest, or returns every time you exercise. You should also get checked if you have numbness, unusual weakness, chest pain, dizziness, or symptoms that feel different from normal exercise soreness.
Conclusion
Shin splint exercises work best when they are part of a complete lower-leg plan. Stretch the calves, strengthen the shins, build calf capacity, train the feet, improve step control, and return to running gradually.
Start with the easiest versions, keep pain low, and progress only when your lower legs tolerate the current level well. Consistency, patience, and smart loading matter more than forcing harder exercises too soon.
This content is for informational purposes only and is not a substitute for professional medical advice.