
Arm and shoulder exercises for seniors can help maintain upper-body strength, shoulder mobility, and confidence with daily tasks like reaching, lifting, pushing, and carrying. The goal is not to train like a bodybuilder. The goal is to build useful strength with controlled, joint-friendly movements.
This guide covers 11 beginner-friendly arm and shoulder exercises for seniors, including how to do each one, muscles worked, common mistakes, and how to use them in a simple weekly routine.
Why Arm and Shoulder Exercises for Seniors Matter
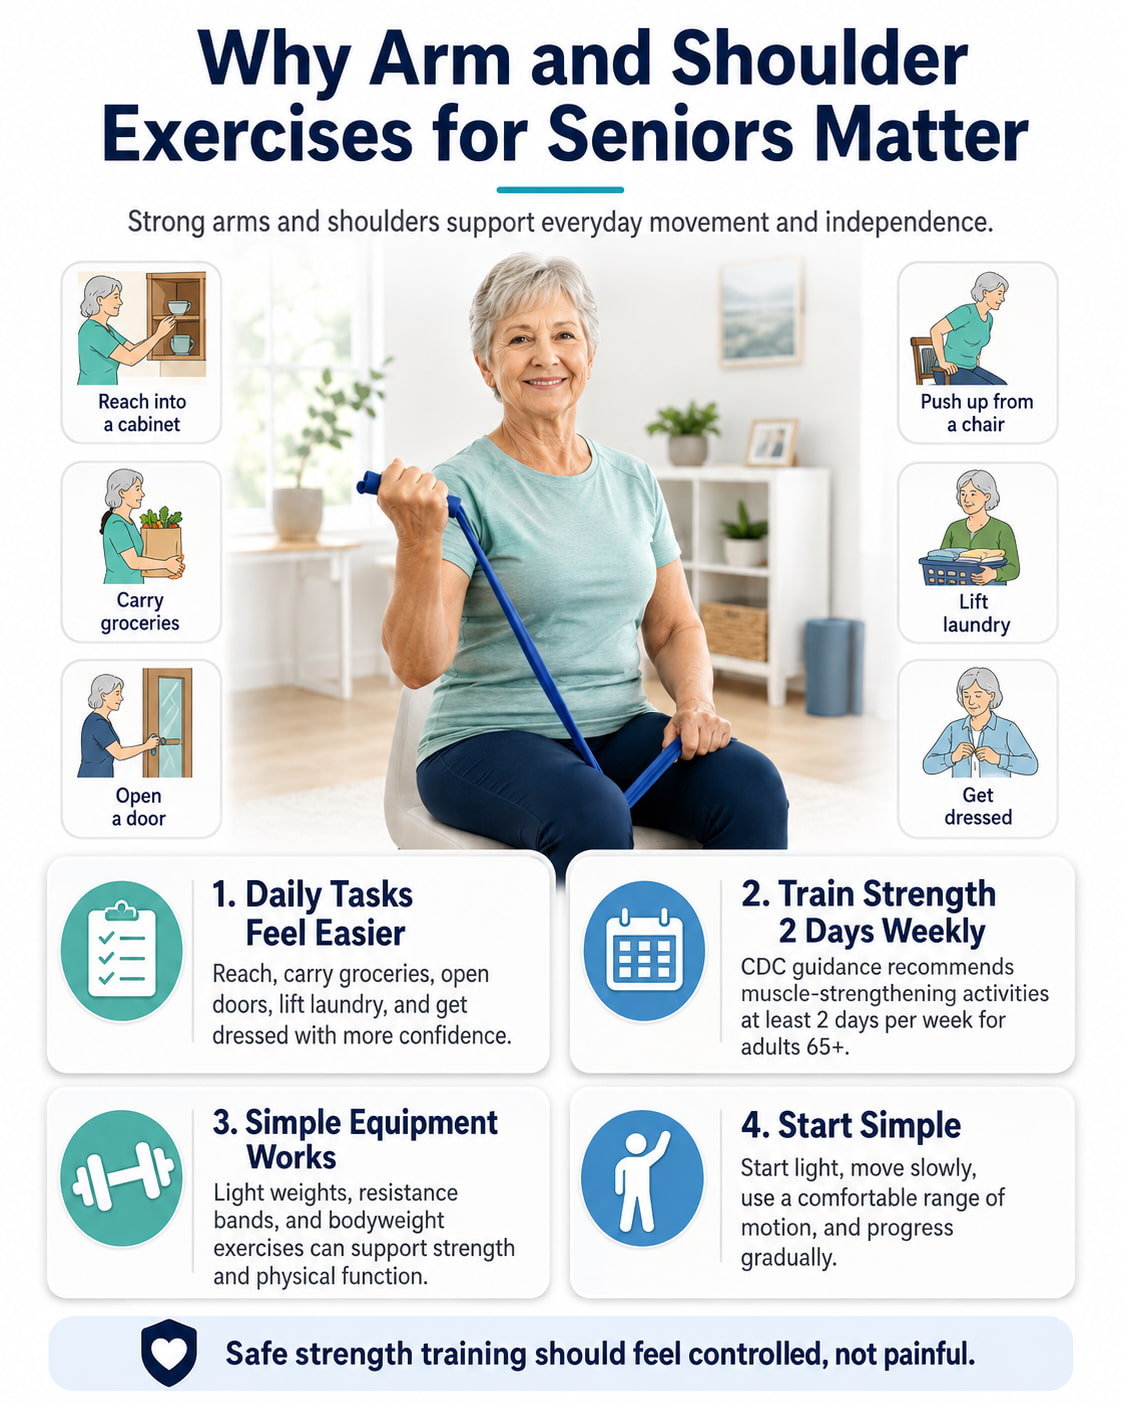
Strong arms and shoulders help with everyday movements: reaching into a cabinet, carrying groceries, opening doors, pushing up from a chair, lifting laundry, and getting dressed.
The CDC recommends that adults 65 and older include muscle-strengthening activities at least 2 days per week, working major muscle groups including the chest, shoulders, and arms.
Strength training does not have to require heavy gym equipment. MedlinePlus notes that strength exercises for older adults can include lifting weights or using resistance bands. The American College of Sports Medicine also notes that elastic bands, bodyweight exercises, and home-based routines can support strength and physical function.
For seniors, the best approach is simple: start light, move slowly, use a comfortable range of motion, and progress gradually.
Safety Tips Before You Start
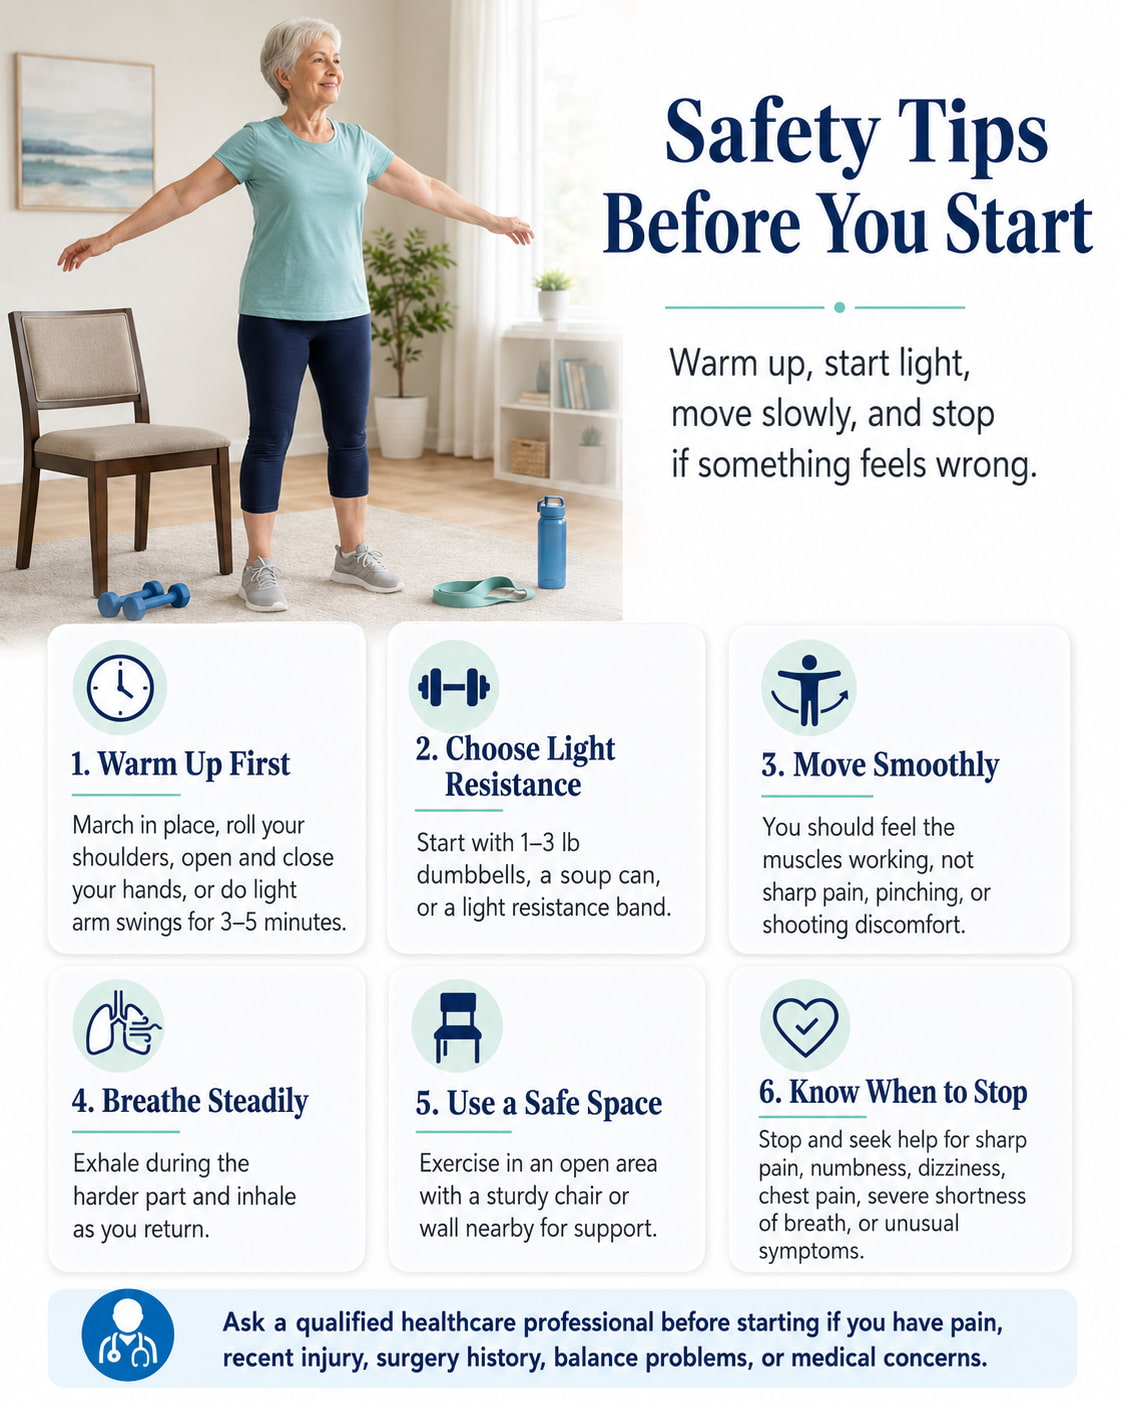
Before doing arm and shoulder exercises, warm up for 3–5 minutes. You can march in place, roll your shoulders gently, open and close your hands, or do light arm swings.
Choose a resistance level that lets you move smoothly. A 1–3 lb dumbbell, a soup can, or a light resistance band may be enough at first. You should feel the working muscles, but you should not feel sharp pain or pinching.
Keep your breathing steady. Exhale during the harder part of the movement and inhale as you return to the starting position.
Exercise in a safe area with enough space around you. NHS Inform advises doing shoulder exercises in a safe environment and stopping immediately if you feel unwell.
Stop and seek professional help if an exercise causes sharp pain, shooting pain, numbness, dizziness, chest pain, severe shortness of breath, or unusual symptoms. If you have shoulder pain, a recent injury, surgery history, balance problems, or a medical condition, ask a qualified healthcare professional before starting.
Equipment Needed for These Exercises
Most of these arm and shoulder exercises for seniors can be done at home with simple equipment.
You may use a sturdy chair, a clear wall, light dumbbells, soup cans, water bottles, or a light resistance band. Resistance bands are helpful because they are light, portable, and easy to adjust by changing your hand position or band tension.
11 Arm and Shoulder Exercises for Seniors
1. Pendulum Arm Swing
Best for: Gentle shoulder warm-up, shoulder relaxation, and preparing the arm before strengthening exercises.
Muscles worked: Deltoids, rotator cuff muscles, upper back stabilizers, and shoulder joint-supporting muscles.
Why it stands out: The pendulum arm swing is very gentle. It can help seniors ease into shoulder movement without forcing the arm overhead.
Suggested sets and reps: Do 30–60 seconds per arm. Use 1–2 rounds before your workout.
Beginners: Start with small swings and keep the arm relaxed.
Intermediate: Add small circles in both directions while staying controlled.
Advanced: Use it as a warm-up before resistance band or dumbbell work.
Rest: Rest 30 seconds between arms if needed.
How to do it:
- Stand beside a table, countertop, or sturdy chair.
- Place one hand on the support and lean forward slightly.
- Let the working arm hang down relaxed.
- Gently swing the arm forward and back, side to side, or in small circles.
- Keep the movement smooth and easy.
Common mistakes: Swinging too aggressively, shrugging the shoulder, twisting the back, or trying to make the circle too large.
Expert tip: Let your body create the motion. Your arm should feel relaxed, not forced.
Exercise variations: Forward-and-back swings, side-to-side swings, and small circular swings.
Easier variation: Sit in a chair and let the arm hang beside your body while making very small movements.
Harder variation: Increase the time to 60 seconds per arm, but do not add heavy weight.
2. Wall Slide
Best for: Overhead reaching strength, shoulder mobility, and better control when lifting the arms.
Muscles worked: Deltoids, serratus anterior, lower traps, upper back, and rotator cuff muscles.
Equipment needed: Wall.
Why it stands out: Wall slides train the shoulders in a controlled way while giving feedback from the wall. They are useful for seniors who want to improve reaching ability without rushing into overhead pressing.
Suggested sets and reps: Do 1–2 sets of 8–12 reps.
Beginners: Slide only as high as feels comfortable.
Intermediate: Pause for 1 second at the top of each rep.
Advanced: Add a light resistance band around the wrists if you can keep good form.
Rest: Rest 45–60 seconds between sets.
How to do it:
- Stand with your back near a wall or face the wall with your forearms on it.
- Keep your ribs down and shoulders relaxed.
- Slowly slide your arms upward.
- Stop before your shoulders shrug or your back arches.
- Lower your arms with control.
Common mistakes: Arching the lower back, forcing the arms too high, shrugging, or moving too quickly.
Expert tip: Think “reach long,” not “lift high.” Comfort and control matter more than range.
Exercise variations: Forearm wall slide, back-to-wall slide, or banded wall slide.
Easier variation: Perform the movement seated facing a wall.
Harder variation: Add a small pause at the top or use a very light band.
3. Seated Band Row
Best for: Posture, pulling strength, upper-back strength, and shoulder blade control.
Muscles worked: Rhomboids, middle traps, rear delts, lats, biceps, and forearms.
Equipment needed: Resistance band and a sturdy anchor or secure setup.
Why it stands out: Many seniors do more reaching and pushing than pulling. Rows help balance the shoulders by strengthening the upper back and rear shoulder muscles.
Suggested sets and reps: Do 1–3 sets of 8–12 reps.
Beginners: Use a very light band and focus on squeezing the shoulder blades gently.
Intermediate: Add a 1-second hold when your elbows reach your sides.
Advanced: Use a slightly stronger band while keeping the same slow tempo.
Rest: Rest 60 seconds between sets.
How to do it:
- Sit tall on a chair with your feet flat.
- Hold a resistance band with both hands.
- Keep your chest lifted and shoulders relaxed.
- Pull your elbows back toward your sides.
- Squeeze your shoulder blades gently, then return slowly.
Common mistakes: Leaning backward, pulling with the neck, shrugging, or jerking the band.
Expert tip: Lead with your elbows and keep your shoulders away from your ears.
Exercise variations: Standing band row, seated towel row, or shoulder blade squeeze without a band.
Easier variation: Do shoulder blade squeezes with no equipment.
Harder variation: Use a stronger band or pause longer at the back of the row.
4. Wall Push-Up
Best for: Beginner pushing strength, chest strength, arm strength, and shoulder stability.
Muscles worked: Chest, triceps, front shoulders, serratus anterior, and core.
Equipment needed: Wall.
Why it stands out: Wall push-ups are easier on the wrists, shoulders, and lower back than floor push-ups. They help seniors build pushing strength for daily tasks like opening heavy doors or pushing up from a surface.
Suggested sets and reps: Do 1–3 sets of 8–12 reps.
Beginners: Stand closer to the wall to make the exercise easier.
Intermediate: Step slightly farther from the wall.
Advanced: Progress to an incline push-up using a sturdy countertop.
Rest: Rest 60 seconds between sets.
How to do it:
- Stand facing a wall.
- Place your hands on the wall around chest height.
- Step your feet back slightly and keep your body in a straight line.
- Bend your elbows and bring your chest toward the wall.
- Push the wall away and return to the starting position.
Common mistakes: Letting the hips sag, flaring the elbows too wide, shrugging, or dropping the head forward.
Expert tip: Keep your body straight from head to heels, even though the movement is done against a wall.
Exercise variations: Wall push-up, countertop push-up, or incline push-up.
Easier variation: Stand closer to the wall.
Harder variation: Move your feet farther back or use a lower sturdy surface.
5. Seated or Standing Biceps Curl
Best for: Lifting strength, carrying strength, and stronger arms for daily tasks.
Muscles worked: Biceps, brachialis, brachioradialis, forearms, and grip muscles.
Equipment needed: Light dumbbells, soup cans, water bottles, or resistance band.
Why it stands out: Biceps curls are simple and practical. They strengthen the front of the upper arm, which helps with lifting bags, holding objects, and pulling movements.
Suggested sets and reps: Do 1–3 sets of 8–12 reps.
Beginners: Start seated with very light weights.
Intermediate: Use a slow 2-second lift and 3-second lower.
Advanced: Use slightly heavier dumbbells only if you can avoid swinging.
Rest: Rest 45–60 seconds between sets.
How to do it:
- Sit or stand tall with one weight in each hand.
- Keep your elbows close to your sides.
- Curl the weights toward your shoulders.
- Pause briefly at the top.
- Lower the weights slowly until your arms are nearly straight.
Common mistakes: Swinging the weights, leaning backward, moving too fast, or letting the elbows drift forward.
Expert tip: Keep your upper arms still. The movement should happen mostly at the elbows.
Exercise variations: Dumbbell curl, hammer curl, band curl, or alternating curl.
Easier variation: Curl one arm at a time while seated.
Harder variation: Use a slightly heavier weight or slow down the lowering phase.
6. Seated Triceps Extension
Best for: Strengthening the back of the upper arms and improving pushing support.
Muscles worked: Triceps, shoulders, upper back stabilizers, and core.
Equipment needed: Light dumbbell or resistance band.
Why it stands out: The triceps help straighten the elbow. Stronger triceps can support pushing movements, reaching tasks, and getting up from supported positions.
Suggested sets and reps: Do 1–2 sets of 8–12 reps.
Beginners: Use a very light weight and a small comfortable range.
Intermediate: Use a slow tempo and control both directions.
Advanced: Use a slightly heavier dumbbell only if your shoulders stay comfortable.
Rest: Rest 60 seconds between sets.
How to do it:
- Sit tall in a sturdy chair.
- Hold one light dumbbell with both hands.
- Bring the weight behind your head only as far as comfortable.
- Keep your elbows pointing mostly forward.
- Straighten your elbows to lift the weight, then lower slowly.
Common mistakes: Flaring the elbows wide, arching the back, dropping the weight too low, or forcing overhead range.
Expert tip: If overhead movement bothers your shoulder, switch to a triceps kickback or band press-down instead.
Exercise variations: Overhead triceps extension, triceps kickback, or band triceps press-down.
Easier variation: Do a seated triceps kickback with one light weight.
Harder variation: Add reps first, then increase weight slightly.
7. Band External Rotation
Best for: Shoulder stability, rotator cuff strength, and better control of the upper arm.
Muscles worked: Infraspinatus, teres minor, rear delts, and shoulder stabilizers.
Equipment needed: Light resistance band.
Why it stands out: External rotation strengthens small shoulder muscles that help control the ball-and-socket joint. The AAOS includes external rotation in its shoulder conditioning guidance and emphasizes slow, controlled movement.
Suggested sets and reps: Do 1–2 sets of 8–12 reps per side.
Beginners: Use the lightest band and keep your elbow close to your body.
Intermediate: Pause for 1 second when the hand moves outward.
Advanced: Use more band tension while keeping the same range and control.
Rest: Rest 45–60 seconds between sides.
How to do it:
- Stand or sit tall with your elbow bent to 90 degrees.
- Keep your elbow close to your side.
- Hold the band with light tension.
- Rotate your forearm outward without moving your elbow away from your body.
- Return slowly to the starting position.
Common mistakes: Letting the elbow drift away, twisting the torso, using too much band tension, or rushing the return.
Expert tip: Place a small towel between your elbow and ribs to help keep the elbow in position.
Exercise variations: Standing band external rotation, seated band external rotation, or side-lying external rotation with a light dumbbell.
Easier variation: Practice the motion without a band.
Harder variation: Increase band tension slightly or slow the lowering phase.
8. Band Internal Rotation
Best for: Rotator cuff control, shoulder stability, and balanced shoulder strengthening.
Muscles worked: Subscapularis, pectoralis major, anterior deltoid, and shoulder stabilizers.
Equipment needed: Light resistance band.
Why it stands out: Internal rotation pairs well with external rotation. Together, they help train the shoulder through controlled rotation instead of only pressing and lifting.
Suggested sets and reps: Do 1–2 sets of 8–12 reps per side.
Beginners: Use a small range of motion and light tension.
Intermediate: Keep the elbow pinned close to your side for every rep.
Advanced: Use a slightly stronger band while keeping the shoulder relaxed.
Rest: Rest 45–60 seconds between sides.
How to do it:
- Stand or sit tall with your elbow bent to 90 degrees.
- Keep your elbow close to your side.
- Hold the band so there is gentle tension.
- Rotate your forearm inward across your body.
- Return slowly without letting the band snap back.
Common mistakes: Twisting the body, shrugging, using too much resistance, or moving the elbow forward and backward.
Expert tip: Keep the movement small and precise. This is a control exercise, not a heavy strength move.
Exercise variations: Standing internal rotation, seated internal rotation, or towel-supported internal rotation.
Easier variation: Do the movement with no band first.
Harder variation: Add a pause at the inward position.
9. Front Raise
Best for: Reaching strength, lifting light objects forward, and shoulder control.
Muscles worked: Front deltoids, upper chest, serratus anterior, traps, and core.
Equipment needed: Light dumbbells, soup cans, or water bottles.
Why it stands out: Front raises train the motion used when lifting something in front of the body. For seniors, this can support daily tasks like placing a light item on a shelf.
Suggested sets and reps: Do 1–2 sets of 8–12 reps.
Beginners: Raise only to chest height.
Intermediate: Raise to shoulder height if comfortable.
Advanced: Add a slow 3-second lowering phase.
Rest: Rest 60 seconds between sets.
How to do it:
- Sit or stand tall with light weights at your sides.
- Keep your palms facing down or slightly inward.
- Lift one or both arms forward.
- Stop around shoulder height or lower if needed.
- Lower the weights slowly.
Common mistakes: Swinging, leaning back, shrugging, or lifting higher than your shoulder can control.
Expert tip: Use less weight than you think. A clean front raise should feel smooth, not strained.
Exercise variations: Alternating front raise, seated front raise, or band front raise.
Easier variation: Lift one arm at a time with no weight.
Harder variation: Use light dumbbells and slow down the lowering phase.
10. Scaption Raise
Best for: Shoulder-friendly raising strength and controlled arm elevation.
Muscles worked: Deltoids, supraspinatus, serratus anterior, upper back, and rotator cuff muscles.
Equipment needed: Light dumbbells or no equipment.
Why it stands out: Scaption raises are done slightly in front of the body, which often feels more natural than lifting straight out to the side. This makes them a useful shoulder exercise for seniors who want to build strength without forcing an uncomfortable angle.
Suggested sets and reps: Do 1–2 sets of 8–12 reps.
Beginners: Do the movement without weight.
Intermediate: Add very light dumbbells.
Advanced: Pause briefly at shoulder height and lower slowly.
Rest: Rest 60 seconds between sets.
How to do it:
- Stand or sit tall with your arms by your sides.
- Turn your thumbs slightly upward.
- Raise your arms diagonally, about 30–45 degrees forward from your sides.
- Stop at shoulder height or lower.
- Lower slowly with control.
Common mistakes: Turning the thumbs down, shrugging, lifting too high, or using heavy weights.
Expert tip: Imagine forming a wide letter “V” in front of your body.
Exercise variations: Seated scaption raise, standing scaption raise, or single-arm scaption raise.
Easier variation: Use no weight and lift only halfway.
Harder variation: Add light dumbbells and slow the lowering phase.
11. Band Pull-Apart
Best for: Rear shoulder strength, upper-back strength, posture support, and shoulder balance.
Muscles worked: Rear delts, rhomboids, middle traps, rotator cuff muscles, and forearms.
Equipment needed: Light resistance band.
Why it stands out: Band pull-aparts strengthen the muscles across the upper back. This helps balance pushing movements and supports better shoulder positioning during daily activities.
Suggested sets and reps: Do 1–2 sets of 8–15 reps.
Beginners: Use a very light band and a smaller range.
Intermediate: Pull the band to chest level with a 1-second pause.
Advanced: Use a slightly stronger band or slow tempo.
Rest: Rest 45–60 seconds between sets.
How to do it:
- Sit or stand tall and hold a band in both hands.
- Extend your arms in front of your chest.
- Keep your shoulders down.
- Pull the band apart until your hands move toward your sides.
- Return slowly to the starting position.
Common mistakes: Shrugging, bending the elbows too much, pulling behind the body aggressively, or using a band that is too strong.
Expert tip: Keep the ribs down and think about spreading the band with your upper back, not your neck.
Exercise variations: Seated band pull-apart, diagonal band pull-apart, or band horizontal abduction.
Easier variation: Hold the band wider or use a lighter band.
Harder variation: Hold the band closer together or pause at the open position.
Beginner Arm and Shoulder Workout for Seniors
Use this routine 2 days per week with at least 1 rest day between sessions. The Community Preventive Services Task Force recommends home-based exercise interventions for adults 65 and older to improve physical fitness, including muscle strength and endurance.
Start with this simple structure:
| Exercise | Sets | Reps or Time | Rest |
|---|---|---|---|
| Pendulum Arm Swing | 1 | 30–60 seconds per arm | 30 seconds |
| Wall Slide | 1–2 | 8–10 reps | 45 seconds |
| Seated Band Row | 1–2 | 8–12 reps | 60 seconds |
| Wall Push-Up | 1–2 | 8–12 reps | 60 seconds |
| Biceps Curl | 1–2 | 8–12 reps | 45–60 seconds |
| Seated Triceps Extension | 1 | 8–10 reps | 60 seconds |
| Band External Rotation | 1 | 8–10 reps per side | 45 seconds |
| Band Pull-Apart | 1 | 8–12 reps | 45–60 seconds |
Keep the effort around 5–7 out of 10. You should finish each set feeling like you could do 2–3 more good reps.
How to Progress Safely
Progress slowly. First, improve control. Then add reps. After that, add a small amount of resistance.
A simple progression is to start with 8 reps, build toward 12 reps, then add a slightly stronger band or a small weight increase. For many seniors, a 1 lb increase can be enough.
Do not progress if your form gets worse. Stay at the same level if you start shrugging, swinging, holding your breath, or feeling joint discomfort.
You can also progress by adding a second set instead of using heavier resistance. This is often a good choice for seniors because it builds strength practice without forcing heavy loads.
Common Mistakes to Avoid
Using Too Much Weight
Heavy weights are not necessary at the beginning. If you have to swing, lean back, or hold your breath, the resistance is too high.
Rushing the Reps
Fast reps reduce control. Move slowly enough that you can feel the target muscles working.
Shrugging the Shoulders
Many arm and shoulder exercises become neck-dominant when the shoulders rise toward the ears. Keep the neck relaxed and shoulders down.
Forcing Overhead Motion
Not every senior needs to press overhead. If overhead movement feels uncomfortable, focus on wall slides, rows, band rotations, and raises within a comfortable range.
Ignoring Pain
Mild muscle effort is normal. Sharp pain, pinching, numbness, or shooting symptoms are not. Stop the exercise and get professional guidance if those symptoms appear.
How Often Should Seniors Do Arm and Shoulder Exercises?
Most seniors can start with 2 upper-body strength sessions per week. This fits the general recommendation for muscle-strengthening activities on 2 or more days per week.
If recovery is good, some gentle mobility exercises like pendulum swings or easy wall slides may be done more often. Strength exercises with bands or weights should usually have rest days between sessions, especially for beginners.
FAQ
What are the best arm and shoulder exercises for seniors?
The best options are controlled, low-impact exercises such as wall push-ups, wall slides, seated band rows, biceps curls, triceps extensions, band external rotations, scaption raises, and band pull-aparts. These exercises train useful strength without requiring heavy equipment.
Can seniors build arm strength with light weights?
Yes. Light dumbbells, soup cans, water bottles, and resistance bands can all help build strength when used consistently. The key is controlled movement, enough effort, and gradual progression.
Are resistance bands good for seniors?
Yes. Resistance bands are useful because they are light, affordable, portable, and easy to modify. Seniors can make a band exercise easier by using less tension or harder by stepping farther away or shortening the band.
Can these exercises be done seated?
Many of them can be done seated, including biceps curls, band rows, band pull-aparts, external rotations, internal rotations, front raises, and scaption raises. A seated position can be helpful for seniors who need more balance support.
How heavy should dumbbells be for senior arm exercises?
Many beginners can start with 1–3 lb dumbbells or household items. The right weight should feel challenging near the end of the set while still allowing smooth, pain-free reps.
What shoulder exercises should seniors avoid?
Seniors should avoid exercises that cause sharp pain, pinching, numbness, or loss of control. Heavy overhead pressing, deep chair dips, fast swinging raises, and behind-the-neck movements are often poor choices for beginners or anyone with shoulder discomfort.
Conclusion
Arm and shoulder exercises for seniors should be simple, controlled, and useful for daily life. Start with gentle mobility, add light resistance, and focus on clean reps before increasing difficulty.
A good routine does not need to be long. Two weekly sessions using wall slides, rows, wall push-ups, curls, triceps work, rotator cuff exercises, and band pull-aparts can help seniors stay stronger, move better, and feel more confident with everyday upper-body tasks.
This content is for informational purposes only and is not a substitute for professional medical advice.