The kettlebell windmill is a controlled hip-hinge and rotation exercise that trains core strength, shoulder stability, and hip mobility. Unlike a basic side bend or toe-touch, the kettlebell windmill asks you to keep a weight stacked overhead while your hips shift back, your torso rotates, and your core stabilizes the movement.
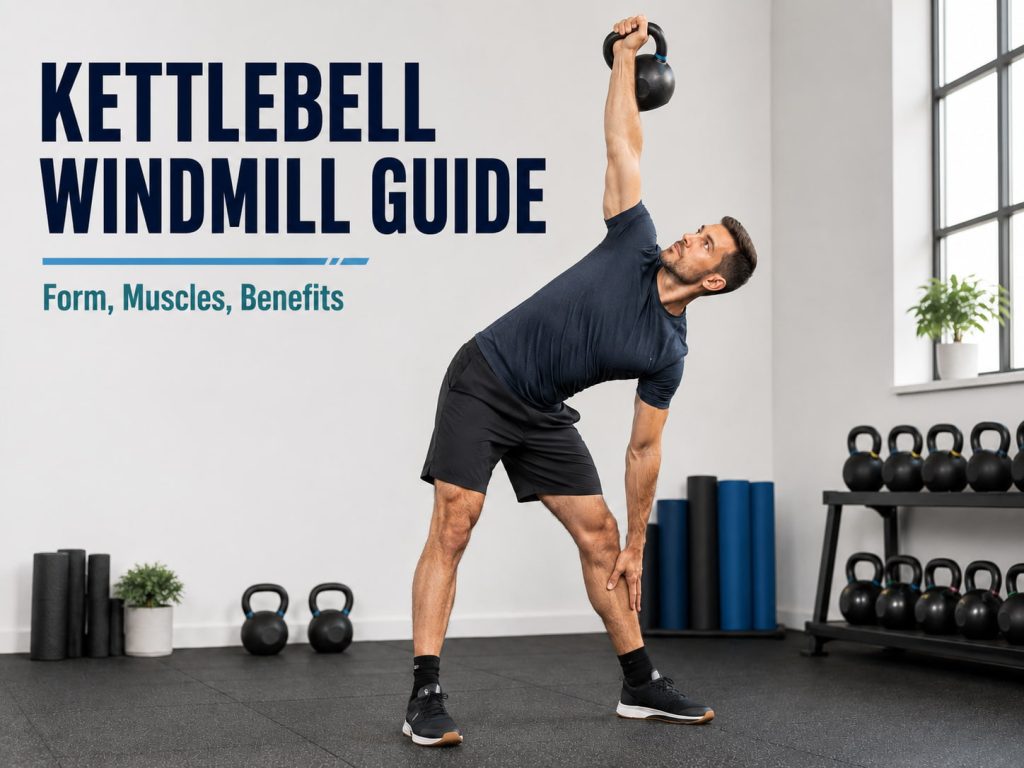
This guide explains how to do the kettlebell windmill with proper form, which muscles it works, common mistakes to avoid, the best beginner regressions, advanced progressions, and how to use it in a real workout.
What Is the Kettlebell Windmill?
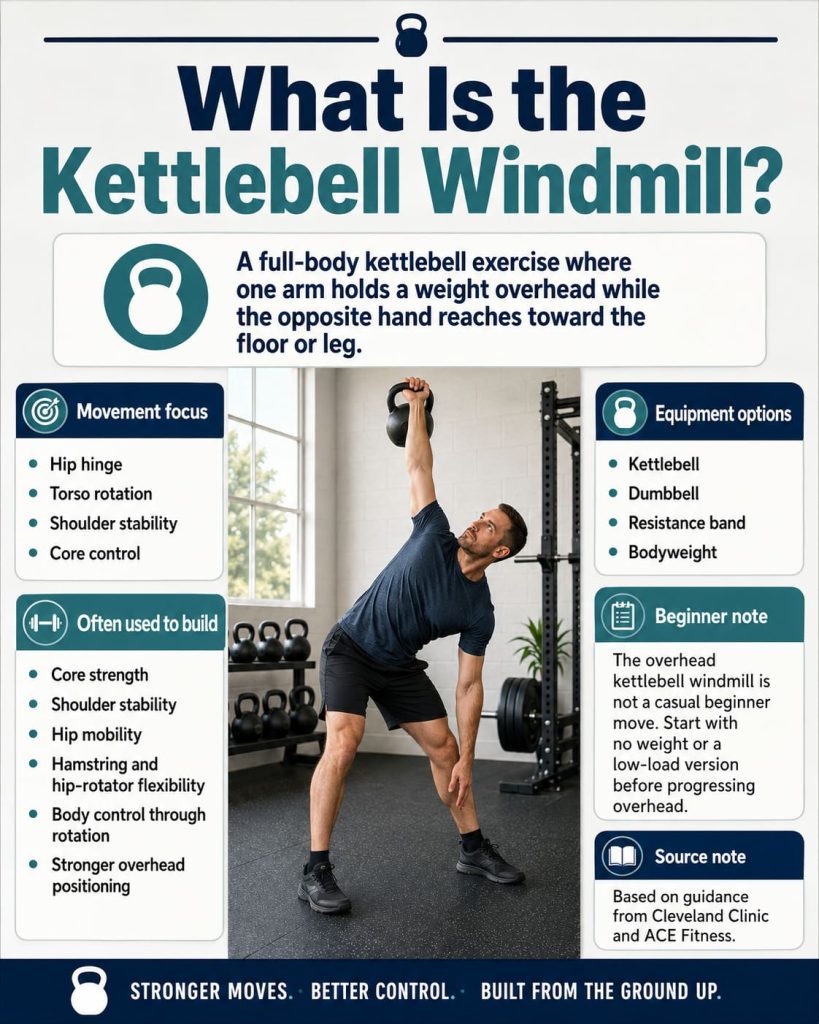
The kettlebell windmill is a full-body kettlebell exercise where one arm holds a kettlebell overhead while the opposite hand reaches down toward the floor or leg. The movement combines a hip hinge, torso rotation, overhead shoulder stability, and core control.
It is often used to build:
- Core strength
- Shoulder stability
- Hip mobility
- Hamstring and hip-rotator flexibility
- Body control through rotation
- Stronger overhead positioning
The windmill can be done with a kettlebell, dumbbell, resistance band, or no weight at all. Cleveland Clinic describes the windmill as a full-body movement that can be performed with a kettlebell, dumbbell, or bodyweight variation, and notes that it can help strengthen the core, hips, and shoulders when performed correctly.
That said, the overhead kettlebell windmill is not a casual beginner move. ACE Fitness classifies the high windmill and low windmill as advanced kettlebell exercises, which is why most lifters should learn the pattern with no weight or a low-load version first.
Kettlebell Windmill: Quick Training Overview
Exercise name: Kettlebell Windmill
Best for: Core control, shoulder stability, hip mobility, rotational strength, and overhead confidence
Muscles worked: Obliques, transverse abdominis, rectus abdominis, glutes, hamstrings, hip rotators, lats, rotator cuff, deltoids, upper back, and spinal stabilizers
Equipment needed: Kettlebell; optional dumbbell, resistance band, or no weight
Skill level: Intermediate to advanced for the overhead version; beginner-friendly only when regressed
Best rep range: 3–5 reps per side for strength and control; 5–10 reps per side for light technique practice
Best use: Warm-up drill, accessory core exercise, shoulder-stability drill, or loaded mobility movement
Why the Kettlebell Windmill Stands Out
The kettlebell windmill is valuable because it trains strength and mobility at the same time. You are not just stretching your hamstrings or holding a kettlebell overhead. You are learning how to keep your shoulder packed, rotate through the upper back, hinge through the hips, and control your trunk under load.
StrongFirst describes the kettlebell windmill as both a loaded stretch and a strengthening exercise, with emphasis on the hips, midsection, shoulder stability, and posterior chain.
The key is control. The windmill should feel smooth, stable, and deliberate. It should not feel like you are collapsing sideways, forcing your hand to the floor, or fighting to keep the kettlebell from drifting out of position.
How to Do the Kettlebell Windmill With Proper Form
Setup
Start with a light kettlebell. If you are new to the movement, practice without weight first.
- Stand with your feet about hip-width to shoulder-width apart.
- Hold a kettlebell in your right hand.
- Press or assist the kettlebell to a locked-out overhead position.
- Turn both feet slightly away from the loaded arm. If the right arm is overhead, turn your feet slightly to the left.
- Keep your right arm vertical, wrist straight, and shoulder stable.
- Let your left arm hang toward your left thigh.
- Brace your core and keep your ribs from flaring.
Execution
- Keep your eyes on the kettlebell or raised hand.
- Shift your right hip back and slightly to the side.
- Let your left hand slide down the inside of your left leg.
- Rotate your torso so your chest opens slightly toward the ceiling.
- Keep the kettlebell stacked over your shoulder.
- Lower only as far as you can while keeping control.
- Pause briefly at your comfortable bottom position.
- Drive through your feet and squeeze your glutes to return to standing.
- Repeat for the target reps, then switch sides.
ACE’s high windmill instructions emphasize keeping the kettlebell arm straight, sinking back into the hip, looking up at the raised hand, and standing back up by pushing into the floor and driving the hips forward.
Coaching Cue
Think: “Hips back, chest rotates, kettlebell stays stacked.”
Do not think of the kettlebell windmill as a side bend. The goal is not to fold sideways. The goal is to hinge, rotate, and stabilize.
Kettlebell Windmill Form Checklist
Use this checklist before every set:
- Feet are stable and slightly turned away from the loaded arm.
- Kettlebell is stacked over the shoulder, not drifting behind you.
- Wrist stays straight.
- Shoulder stays active but not shrugged.
- Core stays braced.
- Hips shift back before the torso lowers.
- Spine stays long and neutral.
- Free hand slides down the leg without forcing depth.
- Eyes stay on the raised hand or kettlebell.
- Reps are slow and controlled.
If any of these positions break down, reduce the range of motion, use a lighter weight, or switch to a regression.
Muscles Worked by the Kettlebell Windmill
The kettlebell windmill is often called a core exercise, but it is better understood as a full-body stability and mobility drill. Different muscles have different jobs during the movement.
Obliques
The obliques are heavily involved because they help control rotation and resist unwanted side bending. They keep your torso from collapsing as you hinge and rotate under the kettlebell.
Transverse Abdominis
The transverse abdominis acts like a deep stabilizing belt around your midsection. During the windmill, it helps you maintain trunk stiffness while your hips and upper back move.
Rectus Abdominis
The rectus abdominis helps stabilize the front of your trunk. It is not the main driver of the exercise, but it supports a strong rib and pelvis position.
Glutes
The glutes help control the hip hinge and drive you back to standing. The glute on the loaded-arm side often plays a major role as you shift that hip back and then extend the hips to return upright.
Hamstrings
The hamstrings help control the lowering phase and assist the hip extension on the way up. You may feel a stretch through the hamstrings, but you should not chase that stretch by rounding your back or forcing your hand lower.
Hip Rotators
The hip rotators help you find and control the angled hinge position. StrongFirst highlights the hip rotators as a key area involved in the loaded stretch portion of the windmill.
Lats
The lat on the loaded side helps connect your shoulder to your trunk. A strong lat position can make the overhead kettlebell feel more stable and less loose.
Rotator Cuff and Shoulder Stabilizers
The rotator cuff, deltoids, and scapular stabilizers work to keep the shoulder steady while the kettlebell stays overhead. This is one reason the windmill is useful for overhead control, but also why it should not be rushed or overloaded.
Upper Back and Spinal Stabilizers
The upper back helps maintain posture and rotation, while the spinal stabilizers help keep your torso organized. Your spine should stay controlled rather than flexing, twisting aggressively, or bending sideways under load.
Benefits of the Kettlebell Windmill
1. Builds Core Strength Beyond Crunches
The kettlebell windmill trains the core in a more athletic way than basic floor exercises. Instead of simply flexing your spine, your core has to stabilize your trunk while your hips hinge and your upper body rotates.
This makes it useful for lifters who want stronger obliques, better trunk control, and improved stability during overhead or single-sided exercises.
2. Improves Shoulder Stability
Holding a kettlebell overhead during the windmill challenges your shoulder to stay stacked and controlled. The weight should remain vertical over the shoulder while your torso moves underneath it.
This can help build confidence in overhead positions, especially when used with light-to-moderate weight and excellent form.
3. Trains Hip Mobility and Hinge Control
The windmill teaches you to move through the hips instead of dumping stress into the low back. As you shift the hip back, you train a diagonal hinge pattern that can challenge the glutes, hamstrings, and hip rotators.
This is especially useful for kettlebell training because strong hip control carries over to swings, cleans, snatches, deadlifts, and Turkish get-ups.
4. Develops Rotational Control
Many gym exercises happen mostly forward and backward. The windmill adds controlled rotation, which can help you become stronger and more coordinated through a wider range of movement.
Cleveland Clinic notes that the windmill is a multi-planar exercise, meaning it trains movement beyond a single forward-and-back plane.
5. Helps Identify Side-to-Side Differences
Because the windmill is performed one side at a time, it can reveal differences between your left and right sides. One side may feel tighter, less coordinated, or less stable overhead.
Do not force the weaker or tighter side to match the stronger side immediately. Use the cleaner side as a reference, then train both sides with the same controlled range of motion.
6. Works Well as a Loaded Mobility Drill
The kettlebell windmill is not just a strength exercise. When done lightly and slowly, it can work as a loaded mobility drill for the hips, upper back, and shoulders.
The key word is “lightly.” Loaded mobility should feel controlled and smooth, not strained.
Common Kettlebell Windmill Mistakes
Mistake 1: Treating It Like a Side Bend
The most common mistake is turning the windmill into a weighted side bend. This usually happens when the lifter reaches straight down without shifting the hips back or rotating the torso.
Fix: Start the movement by sending the hip back. Keep the spine long and think about rotating your chest open instead of folding sideways.
Mistake 2: Chasing the Floor
Touching the floor is not the goal. Many lifters lose position because they care more about depth than control.
StrongFirst specifically notes that touching the ground is not the goal and that depth should depend on your mobility and ability to keep good position.
Fix: Stop when you reach your cleanest position. Your bottom range may be the thigh, knee, shin, ankle, or floor depending on your mobility.
Mistake 3: Using Too Much Weight
A heavy kettlebell can pull your shoulder out of position, make your torso collapse, or cause you to rush the movement.
Cleveland Clinic recommends starting light and focusing on stance and form before increasing load.
Fix: Use no weight, a light dumbbell, or a light kettlebell until the movement feels consistent on both sides.
Mistake 4: Letting the Kettlebell Drift Behind You
If the kettlebell moves behind your shoulder, the overhead position becomes harder to control and may feel uncomfortable.
Fix: Keep your arm vertical and stacked. Your shoulder, elbow, wrist, and kettlebell should stay aligned.
Mistake 5: Shrugging the Shoulder
Shrugging the loaded shoulder toward your ear can create neck tension and reduce stability.
Fix: Keep the shoulder active, but not jammed upward. Think about reaching tall through the kettlebell while keeping your neck relaxed.
Mistake 6: Rounding the Back
The windmill requires rotation and hip movement, but it should not turn into a rounded-back reach.
Fix: Keep your spine long. Lower only as far as your hips and upper back allow.
Mistake 7: Rushing the Reps
Fast windmills usually become sloppy windmills. This exercise works best when each rep is controlled.
Fix: Use a slow tempo. Try 3 seconds down, a 1-second pause, and 2 seconds up.
Mistake 8: Training It Under Fatigue
The windmill requires coordination, shoulder control, and trunk stability. Doing it when exhausted can reduce form quality.
StrongFirst recommends avoiding windmills under fatigue and not treating the exercise like a max-effort lift.
Fix: Place windmills early in your workout after your warm-up, or use them as low-volume accessory work before fatigue builds.
Kettlebell Windmill Regressions and Progressions
The best way to learn the kettlebell windmill is to progress gradually. Do not start with a heavy overhead kettlebell if you cannot control the bodyweight pattern first.
Regression 1: Bodyweight Windmill
Best for: Learning the hinge and rotation pattern
Equipment needed: None
How to do it:
- Stand with your feet hip-width to shoulder-width apart.
- Raise one arm overhead without weight.
- Turn your feet slightly away from the raised arm.
- Shift the hip under the raised arm back.
- Slide the opposite hand down your leg.
- Rotate your chest open.
- Stand back up with control.
This is the best starting point for most beginners.
Regression 2: Partial-Range Windmill
Best for: Tight hamstrings, limited hip mobility, or early technique practice
Equipment needed: Optional kettlebell or dumbbell
Instead of reaching toward the ankle or floor, stop at the thigh, knee, or upper shin. This lets you train the pattern without forcing range of motion.
Coaching cue: Stop where your spine and shoulder still look strong.
Regression 3: Low Kettlebell Windmill
Best for: Learning the loaded pattern before going overhead
Equipment needed: Kettlebell
In the low windmill, the kettlebell is held in the lower hand instead of overhead. ACE’s low windmill instructions describe holding the kettlebell down by the thigh, reaching the opposite arm overhead, sinking back into the hips, and lowering the kettlebell along the inside of the leg.
This version reduces the overhead stability demand while still training the hinge and rotation.
Regression 4: Dumbbell Windmill
Best for: Lifters who do not have a kettlebell or want a simpler grip
Equipment needed: Dumbbell
A dumbbell windmill can be done overhead or in the low position. Because the load sits differently than a kettlebell, some lifters find it easier to control at first.
Progression 1: High Kettlebell Windmill
Best for: Core strength, shoulder stability, and loaded mobility
Equipment needed: Kettlebell
This is the classic overhead version. Use it only when you can keep the kettlebell stacked, control your hip shift, and return to standing without twisting or rushing.
Progression 2: Heavier Kettlebell Windmill
Best for: Intermediate lifters with consistent technique
Equipment needed: Heavier kettlebell
Add weight only after your reps look the same from start to finish. Increase load gradually and keep the rep range low.
A good progression rule: move up in weight only when you can complete 2–3 sets of 5 smooth reps per side with no shoulder drift, back rounding, or forced depth.
Progression 3: Double Kettlebell Windmill
Best for: Advanced lifters
Equipment needed: Two kettlebells
The double kettlebell windmill uses one kettlebell overhead and one kettlebell in the lower hand. This increases total loading and coordination demands.
Do not rush into this variation. StrongFirst recommends progressing from bodyweight to low windmill to overhead windmill before using the double kettlebell windmill for more advanced practice.
How Heavy Should You Go?
The kettlebell windmill is not a max-strength lift. You should choose a weight that lets you move slowly, breathe, and maintain a stacked shoulder position.
Use these general guidelines:
- Beginner technique practice: no weight or 5–10 pounds
- Light practice: 10–20 pounds
- Intermediate strength work: a kettlebell you can hold overhead with full control for every rep
- Advanced work: heavier loads only if your shoulder, hips, and trunk stay organized
Keep at least 2–4 reps in reserve. If the kettlebell wobbles, pulls behind your shoulder, or makes you shorten your breath, it is probably too heavy for that set.
Suggested Sets, Reps, Tempo, and Rest
For Technique
- Sets: 2–3
- Reps: 3–5 per side
- Tempo: 3 seconds down, 1-second pause, 2 seconds up
- Rest: 45–75 seconds between sides or sets
- Effort: Easy to moderate
For Loaded Mobility
- Sets: 1–3
- Reps: 3–5 per side
- Tempo: Slow and controlled
- Rest: 45–90 seconds
- Effort: Moderate, never forced
For Accessory Strength
- Sets: 3–4
- Reps: 3–6 per side
- Rest: 60–120 seconds
- Effort: Moderate, with clean form on every rep
StrongFirst gives practical programming examples such as 1–2 sets of 3–5 reps per side after get-ups or near the end of a practice session.
How to Use the Kettlebell Windmill in a Workout
The kettlebell windmill fits best as a skill-based strength exercise, not a high-rep conditioning drill.
Use it in one of these places:
Option 1: After Your Warm-Up
This works well if your main workout includes overhead pressing, Turkish get-ups, kettlebell swings, or snatches.
Example:
- Warm up hips and shoulders.
- Perform bodyweight or light kettlebell windmills.
- Move into your main strength work.
Option 2: As an Accessory Core Exercise
Place windmills after your main lifts.
Example:
- Deadlift or squat variation
- Pressing movement
- Row or pull
- Kettlebell windmill
- Carry or plank variation
Option 3: As a Loaded Mobility Finisher
Use light windmills at the end of a session to reinforce hip mobility, trunk control, and shoulder position.
Keep the reps low and smooth. This should not feel like a burnout set.
Sample Kettlebell Windmill Routine
Beginner Technique Routine
Use this if you are learning the pattern.
Frequency: 2–3 times per week
Effort level: Easy to moderate
Rest: 45–60 seconds between exercises
| Exercise | Sets | Reps |
|---|---|---|
| Bodyweight Windmill | 2 | 5 per side |
| Partial-Range Windmill | 2 | 3–5 per side |
| Low Kettlebell Windmill | 2 | 3 per side |
| Suitcase Carry | 2 | 20–40 steps per side |
Progression: Add range of motion before adding weight. Move to the overhead version only when the bodyweight and low windmill feel stable.
Intermediate Strength and Stability Routine
Use this after your warm-up or after Turkish get-up practice.
Frequency: 1–2 times per week
Effort level: Moderate
Rest: 60–90 seconds between sets
| Exercise | Sets | Reps |
|---|---|---|
| Turkish Get-Up | 2–3 | 1 per side |
| Kettlebell Windmill | 3 | 3–5 per side |
| Single-Arm Kettlebell Press | 3 | 5–6 per side |
| Farmer Carry | 3 | 30–60 seconds |
Progression: When all windmill reps are smooth, add one rep per side or increase load slightly. Do not increase both at the same time.
Advanced Accessory Routine
Use this only if you already have strong overhead control.
Frequency: 1 time per week
Effort level: Moderate to challenging, never max effort
Rest: 90–120 seconds between sets
| Exercise | Sets | Reps |
|---|---|---|
| High Kettlebell Windmill | 3 | 3–5 per side |
| Double Kettlebell Windmill | 2 | 2–3 per side |
| Bottoms-Up Carry | 2–3 | 20–30 steps per side |
Progression: Improve control first. Add load only when the kettlebell stays stacked and your bottom position remains clean.
Who Should Use the Kettlebell Windmill?
The kettlebell windmill can be useful for:
- Intermediate kettlebell trainees
- Lifters working on overhead stability
- People who want stronger obliques and trunk control
- Athletes who need controlled rotation
- Lifters who already understand the hip hinge
- People using kettlebells for strength and mobility
It may not be the best first choice for someone who cannot comfortably reach overhead, hinge at the hips, or keep the spine neutral during loaded movement.
Who Should Be Careful With the Kettlebell Windmill?
Use extra caution if you have current shoulder pain, back pain, dizziness, balance issues, or trouble controlling overhead positions. Cleveland Clinic advises people with pre-existing shoulder pain or back problems to check with a healthcare provider before starting the windmill.
Stop the exercise and seek professional guidance if you feel sharp pain, numbness, dizziness, chest pain, unusual symptoms, or a feeling that the shoulder is unstable.
The windmill should feel challenging, but it should not feel forced.
FAQ
Is the kettlebell windmill good for beginners?
The overhead kettlebell windmill is usually not ideal for complete beginners. However, beginners can practice bodyweight windmills, partial-range windmills, or low windmills to learn the pattern safely before adding an overhead kettlebell.
What muscles does the kettlebell windmill work?
The kettlebell windmill works the obliques, deep core, glutes, hamstrings, hip rotators, lats, rotator cuff, shoulders, upper back, and spinal stabilizers. It is a full-body movement, but most people feel it most in the core, hips, hamstrings, and shoulder stabilizers.
Should the kettlebell windmill feel like a hamstring stretch?
You may feel a mild hamstring or hip stretch, but that should not be the main goal. If you are forcing the stretch, rounding your back, or shifting out of position, reduce your range of motion.
Do I need to touch the floor?
No. Touching the floor is optional and depends on your mobility. A clean rep to the thigh, knee, shin, or ankle is better than a sloppy rep to the floor.
Is the kettlebell windmill a side bend?
No. The kettlebell windmill should be a hip hinge with torso rotation and overhead stability. If you feel like you are crunching sideways, reset your stance, shift your hip back, and reduce the range of motion.
Can I do the windmill with a dumbbell?
Yes. A dumbbell windmill is a useful substitute if you do not have a kettlebell or if the dumbbell feels easier to control. You can also practice the movement with no weight.
How often should I do kettlebell windmills?
Most lifters can use kettlebell windmills 1–3 times per week, depending on training experience and recovery. Keep the volume low, focus on quality reps, and avoid doing them when fatigued.
Conclusion
The kettlebell windmill is a powerful exercise for building core control, shoulder stability, hip mobility, and full-body coordination. The best way to train it is to start light, move slowly, and treat every rep like a skill drill.
Do not rush to touch the floor or lift the heaviest kettlebell possible. Master the bodyweight windmill, progress to the low windmill, then earn the overhead kettlebell version with clean, repeatable form.
This content is for informational purposes only and is not a substitute for professional medical advice.