Warm-up exercises for seniors should use gentle, controlled movements that gradually prepare the muscles, joints, balance, breathing, and heart rate for the workout ahead. A good routine usually takes 5–10 minutes and should leave you feeling warmer and more mobile—not tired.
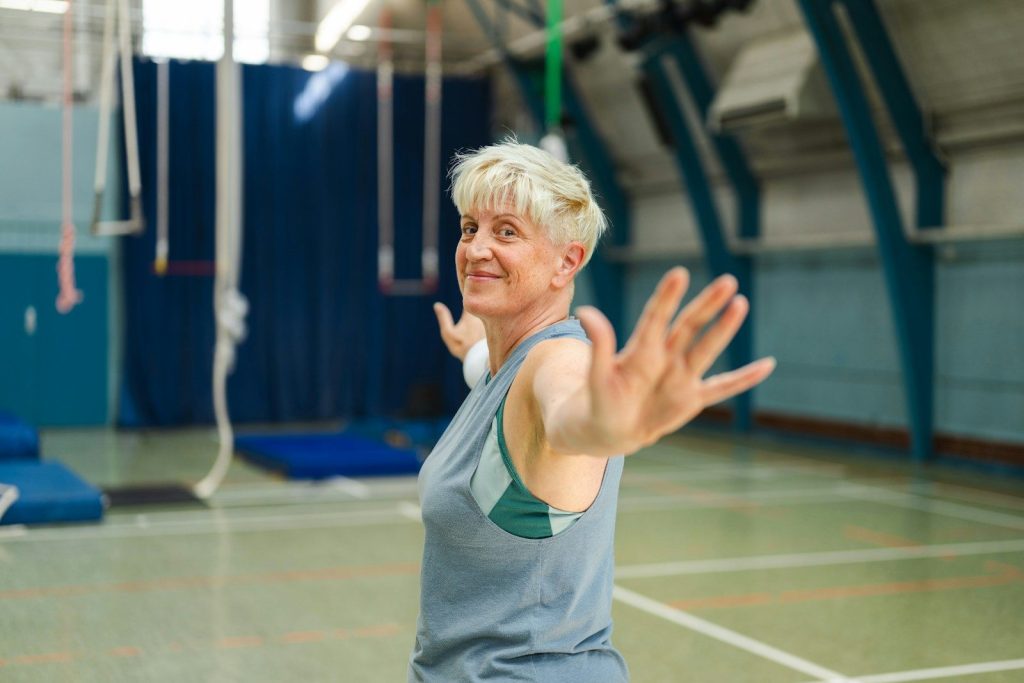
The exercises below can be performed before walking, strength training, balance exercises, chair workouts, or other low-impact activities. Each movement includes a seated or supported option so you can adjust the routine to your current mobility and balance.
Why Warm-Up Exercises Matter for Seniors
Going directly from sitting or resting into a workout can make the first few minutes feel uncomfortable. A gradual warm-up gives your body time to transition into more demanding movement.
According to the American Heart Association’s warm-up guidance, most people should warm up for approximately 5–10 minutes. More demanding activities may require a longer warm-up, while lighter sessions may need less time.
A well-planned senior warm-up may help:
- Gradually increase heart rate and breathing
- Prepare the ankles, knees, hips, shoulders, and spine for movement
- Practice coordination before faster exercise
- Rehearse movements used in the main workout
- Identify stiffness or discomfort before adding resistance
- Make the transition into exercise feel smoother
A warm-up cannot guarantee that an injury will not occur. Its purpose is to prepare you for exercise, improve movement readiness, and help you increase intensity gradually.
How Long Should Seniors Warm Up?
Most seniors can begin with a 5–10-minute warm-up.
Use the shorter end of that range before a light chair workout or an easy walk. Move closer to 10 minutes before strength training, faster walking, longer cardio sessions, or exercise in cold conditions.
Your warm-up is probably complete when:
- Your body feels slightly warmer
- Your breathing has increased a little
- Your joints feel more comfortable moving
- Your steps feel coordinated and steady
- You can still speak in complete sentences
- You feel prepared rather than fatigued
The final part of the warm-up should resemble the workout you are about to perform. For example, walk slowly before brisk walking or practice a squat without weight before completing loaded squats. The National Institute on Aging recommends warming up for strength exercise with a lighter resistance or no weight.
Dynamic Movement Versus Static Stretching
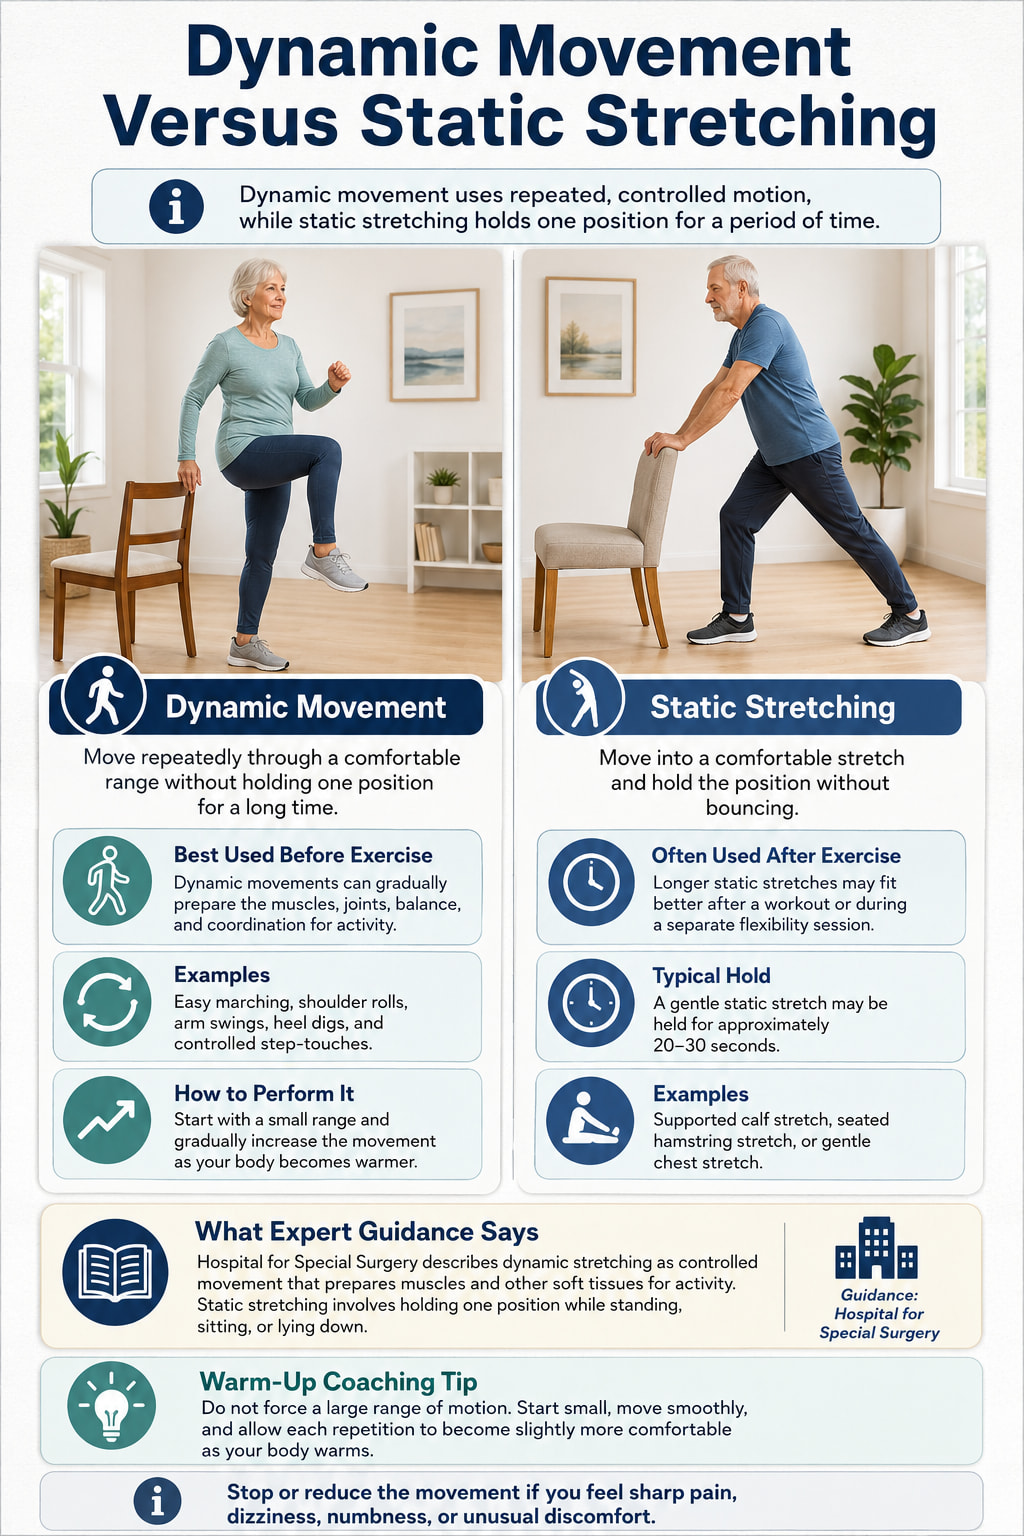
These warm-up exercises mainly use dynamic movement, meaning you move repeatedly through a comfortable range instead of holding one position for a long time.
Dynamic movements can gradually prepare the muscles and joints for activity. Longer static stretches—where a position is held for 20–30 seconds—can be used after a workout or during a separate flexibility session.
Hospital for Special Surgery describes dynamic stretches as controlled movements that prepare muscles and other soft tissues for activity. Static stretching involves holding a single position while standing, sitting, or lying down.
You do not need to force a large range of motion during the warm-up. Start small and allow each movement to become slightly more comfortable as your body warms.
Before Starting the Senior Warm-Up
You do not need exercise equipment, but a sturdy chair or counter can make the routine safer and more accessible.
Choose a chair that:
- Does not have wheels
- Does not slide when you touch it
- Allows your feet to rest flat on the floor
- Is placed away from rugs, cords, or clutter
Wear comfortable clothing and supportive footwear. Keep water nearby and complete the routine on a dry, level surface.
The NHS recommends using a stable chair, sitting with the feet flat, wearing comfortable clothing, and building exercise up gradually.
Use a wall, counter, or chair whenever you feel unsteady. Support is a training tool, not a sign that the exercise is ineffective.
10 Easy Warm-Up Exercises for Seniors
Complete the exercises in order for a full-body warm-up. Move slowly during the first few exercises, then gradually increase your rhythm without rushing.
1. Easy March in Place
Best for: Gradually raising your heart rate and preparing your hips and legs for walking or exercise.
Muscles worked: Hip flexors, quadriceps, hamstrings, calves, glutes, shoulders, and core.
Suggested time: March for 45–60 seconds. Start slowly and increase your rhythm only if you feel stable.
How to do it:
- Stand upright beside a sturdy chair or counter.
- Place your feet about hip-width apart.
- Shift your weight onto one leg.
- Lift the opposite foot a comfortable distance from the floor.
- Lower it gently and repeat with the other leg.
- Allow your arms to swing naturally.
- Keep your chest lifted and look forward.
Common mistakes: Leaning backward, lifting the knees too high, stomping the feet, holding the breath, or marching faster than your balance allows.
Expert tip: Think about lifting each foot rather than pulling the knee toward your chest. A small, controlled march is more useful than a high, unstable one.
Seated option: Sit toward the front of a stable chair with both feet flat. Lift one foot, lower it quietly, and alternate sides.
Progression: Increase the arm swing or gradually extend the exercise to 90 seconds.
2. Heel-to-Toe Rocks
Best for: Preparing the ankles and lower legs for walking, stepping, and balance exercises.
Muscles worked: Calves, tibialis anterior, ankle stabilizers, and intrinsic foot muscles.
Suggested time: Perform 10–15 controlled rocks or continue for approximately 30 seconds.
How to do it:
- Stand tall with your fingertips resting on a sturdy chair.
- Keep both feet facing forward.
- Shift your weight toward the balls of your feet and gently raise your heels.
- Lower the heels with control.
- Shift your weight backward and lift the front of your feet slightly.
- Continue rocking smoothly between the heels and toes.
Common mistakes: Bouncing, rolling onto the outer edges of the feet, locking the knees, or pulling hard on the chair.
Expert tip: Keep the movement small enough that you remain in control from start to finish.
Seated option: Sit upright with both feet flat. Lift the heels, lower them, and then lift the toes while keeping the heels down.
Progression: Pause for one second at the top of each heel raise.
3. Shoulder Rolls
Best for: Preparing the shoulders and upper back for arm exercises, walking, resistance training, or chair workouts.
Muscles worked: Trapezius, rhomboids, deltoids, and other shoulder-blade stabilizers.
Suggested time: Complete 5–8 rolls backward, followed by 5–8 rolls forward.
How to do it:
- Stand or sit upright with your arms relaxed.
- Gently lift your shoulders toward your ears.
- Move them backward.
- Draw them down away from your ears.
- Bring them forward to complete the circle.
- Repeat slowly before changing direction.
Common mistakes: Moving too quickly, forcing a large circle, arching the lower back, or holding tension in the jaw.
Expert tip: Imagine drawing slow circles with the tops of your shoulders rather than moving your arms.
Easier variation: Roll one shoulder at a time.
Progression: Add a gentle arm bend and allow the elbows to follow the shoulder movement.
4. Low Arm Swings
Best for: Preparing the shoulders, chest, upper back, and arms for walking or upper-body exercise.
Muscles worked: Deltoids, chest, upper back, biceps, triceps, and trunk stabilizers.
Suggested time: Continue for 30–45 seconds.
How to do it:
- Stand or sit upright with your arms by your sides.
- Keep your elbows soft rather than locked.
- Swing both arms gently forward.
- Allow them to move backward within a comfortable range.
- Begin with small swings.
- Gradually increase the range without forcing the shoulders.
Common mistakes: Throwing the arms forcefully, shrugging the shoulders, leaning backward, or swinging into pain.
Expert tip: Keep your hands below shoulder height unless overhead movement is already comfortable for you.
Seated option: Sit tall and swing one arm at a time if moving both arms affects your balance.
Progression: Alternate the arms in a natural walking pattern.
5. Gentle Head Turns
Best for: Preparing comfortable neck rotation and reinforcing upright posture.
Muscles worked: Neck rotators and upper-back postural muscles.
Suggested reps: Perform 3–5 slow repetitions per side.
How to do it:
- Sit or stand with your chest lifted.
- Keep your chin approximately level with the floor.
- Look slowly toward your right.
- Stop at a comfortable point without forcing the movement.
- Return to the center.
- Repeat toward your left.
Common mistakes: Tilting the head, lifting the chin, turning the entire torso, moving rapidly, or pushing into discomfort.
Expert tip: Imagine your head turning around a tall central axis.
Easier variation: Use a smaller range and move only the eyes and head.
Safety note: Do not perform full neck circles. Stop if the movement causes dizziness, pain, numbness, or visual disturbance.
6. Side Step-Touches
Best for: Preparing the hips and legs for lateral movement while gently challenging coordination.
Muscles worked: Gluteus medius, hip adductors, quadriceps, calves, and ankle stabilizers.
Suggested time: Continue for 30–45 seconds.
How to do it:
- Stand behind or beside a sturdy chair.
- Step your right foot a short distance to the right.
- Bring your left foot toward it and tap the floor.
- Step to the left with your left foot.
- Bring your right foot in and tap.
- Continue alternating at a controlled pace.
- Keep your toes and knees pointing mostly forward.
Common mistakes: Taking overly large steps, dragging the feet, crossing the legs, allowing the knees to collapse inward, or looking at the floor.
Expert tip: Keep the steps short enough that your body remains centered between your feet.
Seated option: Extend one foot to the side and tap the floor. Return to the center and alternate sides.
Progression: Add a small arm swing once the stepping pattern feels steady.
7. Alternating Heel Digs
Best for: Preparing the hamstrings, knees, calves, and ankles for walking or lower-body exercise.
Muscles worked: Hamstrings, quadriceps, calves, tibialis anterior, and hip stabilizers.
Suggested time: Continue for 30–45 seconds.
How to do it:
- Stand tall with your feet hip-width apart.
- Place one heel slightly in front of you.
- Keep the toes pointing upward.
- Return the foot to the starting position.
- Repeat with the opposite heel.
- Alternate sides at a comfortable rhythm.
- Keep a soft bend in the supporting knee.
Common mistakes: Locking the knee, reaching the foot too far forward, leaning backward, or placing the heel down heavily.
Expert tip: Think “tap and return” rather than trying to stretch the back of the thigh deeply.
Seated option: Sit upright and slide one heel forward. Pull it back underneath the knee and alternate sides.
Progression: Add a gentle opposite-arm reach without rounding the spine.
8. Supported Hip Hinges
Best for: Preparing the hips and practicing the bending pattern used in deadlifts, rows, lifting, and many daily tasks.
Muscles worked: Glutes, hamstrings, spinal erectors, and core stabilizers.
Suggested reps: Complete 8–10 controlled repetitions.
How to do it:
- Stand behind a sturdy chair with your hands resting lightly on it.
- Place your feet approximately hip-width apart.
- Soften your knees.
- Keep your chest open and spine long.
- Push your hips backward as your torso leans slightly forward.
- Stop before your back begins to round.
- Press your feet into the floor and squeeze your glutes to stand tall.
Common mistakes: Rounding the spine, turning the movement into a deep squat, locking the knees, looking sharply upward, or pulling against the chair.
Expert tip: Imagine closing a car door behind you with your hips.
Seated option: Sit near the front of a chair. Lean forward slightly from the hips with a long spine, then return to an upright position.
Progression: Remove one hand from the chair when your balance and technique are reliable.
Osteoporosis note: People with osteoporosis or a history of spinal fracture may need individualized movement guidance. The Bone Health and Osteoporosis Foundation advises avoiding forward spinal flexion and forceful twisting when osteoporosis affects the spine.
9. Supported Mini Squats
Best for: Preparing the thighs, hips, knees, and ankles for strength exercises, stairs, and sit-to-stand movements.
Muscles worked: Quadriceps, glutes, hamstrings, calves, and core.
Suggested reps: Complete 8–10 repetitions.
How to do it:
- Stand behind a chair with your feet about hip-width apart.
- Rest your hands lightly on the chair.
- Keep your chest lifted.
- Bend your knees and push your hips slightly backward.
- Lower only as far as you can control comfortably.
- Keep your heels on the floor.
- Press through both feet to return to standing.
Common mistakes: Dropping too low, allowing the knees to collapse inward, lifting the heels, rounding the back, or pulling yourself upward with the arms.
Expert tip: Think about sitting toward a high stool behind you.
Easier variation: Sit in a chair and alternate straightening one knee at a time.
Progression: Use less hand support or perform a controlled sit-to-stand from a high chair.
10. Supported Calf Raises
Best for: Preparing the calves and ankles for walking, stepping, and standing balance exercises.
Muscles worked: Gastrocnemius, soleus, and ankle stabilizers.
Suggested reps: Complete 10–15 repetitions.
How to do it:
- Stand tall behind a stable chair.
- Keep your feet about hip-width apart.
- Press evenly through the balls of both feet.
- Lift your heels slowly.
- Pause briefly at the top.
- Lower the heels with control.
- Keep your knees soft and your body upright.
Common mistakes: Rocking forward, rolling the ankles outward, bending the knees excessively, bouncing, or lowering the heels too quickly.
Expert tip: Rise straight upward rather than leaning your chest toward the chair.
Seated option: Sit with your feet flat and raise both heels while keeping the balls of your feet on the floor.
Progression: Slow the lowering phase to approximately three seconds.
Follow-Along 5-Minute Warm-Up for Seniors
Use this shorter routine before an easy walk, chair workout, or light exercise session.
| Exercise | Time or repetitions |
|---|---|
| Easy march in place | 60 seconds |
| Heel-to-toe rocks | 30 seconds |
| Shoulder rolls | 5 each direction |
| Low arm swings | 30 seconds |
| Gentle head turns | 3 each side |
| Side step-touches | 30 seconds |
| Alternating heel digs | 30 seconds |
| Supported hip hinges | 8 reps |
| Supported mini squats | 8 reps |
| Supported calf raises | 10 reps |
Move directly from one exercise to the next, taking additional transition time whenever needed.
Aim for an effort level of approximately 2–3 out of 10. You should be able to breathe comfortably and speak in full sentences.
How to Create a 10-Minute Senior Warm-Up
For a longer routine:
- Complete all ten exercises once.
- Repeat the march, side step-touches, heel digs, hip hinges, mini squats, and calf raises.
- Finish with one or two minutes of movement that resembles your planned workout.
The second round does not need to be faster. Focus on smoother movement, a slightly larger comfortable range, and better coordination.
How to Adjust the Warm-Up for Your Workout
Before walking
Finish with one or two minutes of slow walking. Gradually lengthen your steps and increase your pace.
The American Heart Association recommends beginning a planned activity such as walking or cycling at a slower pace before increasing intensity.
Before strength training
After the general warm-up, practice the first strength exercise with:
- Body weight
- No added resistance
- A lighter resistance band
- Lighter dumbbells
- A reduced range of motion
Complete approximately 8–10 controlled practice repetitions before using your normal training resistance.
Before balance exercises
Use both hands on a chair or counter while rehearsing the planned foot position. Reduce support only after you feel steady.
The NHS recommends performing balance exercises near a wall or stable chair in case support is needed.
Before a chair workout
Perform the seated options for each exercise. Sit upright with the feet flat and avoid leaning heavily against the backrest.
Increase the marching rhythm and arm movement gradually, but keep your breathing controlled.
Before faster cardio
Extend the warm-up toward 10 minutes. Gradually increase your stepping speed during the final two or three minutes rather than starting with rapid movement.
Common Senior Warm-Up Mistakes
Starting too quickly
The first minute should be the easiest part of the routine. Beginning with fast marching or large arm movements can make the transition from rest unnecessarily abrupt.
Turning the warm-up into a workout
A warm-up should improve readiness, not create fatigue. Reduce the speed, range of motion, or repetitions if your legs feel heavy before the main workout begins.
Forcing stiff joints
Your range may improve as you warm up, but you should not force a joint through pain. Use small movements and allow the range to increase gradually.
Holding the breath
Breathe continuously during every exercise. Exhale naturally during the more demanding part of mini squats, hip hinges, and calf raises.
Using unstable support
Do not rely on a lightweight folding chair, wheeled office chair, or furniture that may slide.
Looking down throughout the routine
Looking constantly at the feet can encourage a rounded posture and may affect balance. Keep the area clear, then look forward whenever possible.
Relying only on static stretching
Holding one stretch does not gradually increase whole-body movement or rehearse the activity ahead. Use controlled dynamic movements first and save longer stretches for later when appropriate.
Skipping the activity-specific warm-up
A general routine prepares the whole body, but it should still lead into the planned activity. Practice slow walking before brisk walking and lighter repetitions before resistance training.
How Often Should Seniors Warm Up?
Complete a warm-up before every planned workout, including:
- Walking sessions
- Strength workouts
- Balance training
- Cardio exercise
- Chair workouts
- Group fitness classes
- Home exercise routines
You may not need the full ten-movement routine before brief, comfortable daily activities. However, a few minutes of easy marching, ankle movement, and practice repetitions can still be useful when you have been sitting for a long time.
The warm-up is preparation for exercise. It does not replace the aerobic, strength, and balance training recommended for older adults. Current CDC guidance encourages adults aged 65 and older to include all three types of activity in their weekly routines, adjusted to their abilities and health status.
When Should You Stop the Warm-Up?
Stop exercising if you experience:
- Sharp or increasing pain
- Chest pain, pressure, or unusual discomfort
- Dizziness or faintness
- Sudden balance loss
- Numbness or unusual weakness
- Severe or unusual shortness of breath
- Confusion
- A new rapid or irregular heartbeat
- Any symptom that feels concerning or different from normal effort
Chest discomfort combined with dizziness, fainting, or shortness of breath may require urgent medical attention.
Speak with a healthcare professional before beginning a new program when you have been inactive for a long time, recently had surgery or a fall, or have a medical condition that affects exercise tolerance, balance, bones, joints, or heart function.
Older adults with chronic conditions can often remain physically active, but the National Institute on Aging recommends building activity gradually and developing a plan that accounts for the condition.
Frequently Asked Questions
Is walking in place a good warm-up for seniors?
Yes. Walking or marching in place can gradually increase lower-body movement, breathing, and heart rate. It is also easy to modify by using a chair or performing the movement while seated.
Marching alone may be enough before a short, easy walk. Before a full-body or strength workout, add ankle, shoulder, hip, and knee movements.
Can seniors complete this entire warm-up while seated?
Yes. Every exercise can be completed seated or replaced with a seated movement.
Keep both feet supported when possible, sit toward the front of a stable chair, and maintain an upright posture. A seated warm-up is particularly useful for people who cannot stand continuously or who have significant balance concerns.
Should seniors stretch before or after a workout?
Use controlled dynamic movements before exercise. Longer, still stretches may fit better after the workout or during a separate flexibility routine.
Do not stretch into pain or bounce at the end of a movement.
Should seniors warm up before a short walk?
A long routine may not be necessary before a relaxed walk, but begin with several minutes at an easy pace. Gradually increase your walking speed once your steps feel smooth and comfortable.
How do I know whether I am warmed up?
You should feel slightly warmer, more coordinated, and comfortable moving through the range required by your workout. Your breathing may be a little quicker, but you should not feel tired or out of breath.
What if one warm-up exercise causes joint pain?
Stop that movement and reduce the range, slow the speed, or use the seated variation. Replace it when necessary rather than pushing through pain.
Persistent or worsening pain should be assessed by a qualified healthcare professional.
Can I perform the same warm-up every day?
Yes, provided the exercises remain comfortable and appropriate for your planned activity. A familiar routine can make it easier to notice changes in balance, stiffness, or exercise tolerance.
However, the final part should still match the workout. A walking session and a strength workout may use the same general warm-up but require different practice movements at the end.
Conclusion
The best warm-up exercises for seniors are simple, controlled, and easy to modify. Start with gentle marching and ankle movement, prepare the upper body, then progress to supported steps, hip hinges, mini squats, and calf raises.
Use the five-minute version before light activity and extend the routine toward ten minutes before longer or more demanding workouts. Keep a sturdy support nearby, move through a comfortable range, and finish by practicing a slower or easier version of the activity you are about to perform.
References
- American Heart Association: Warm Up, Cool Down
- National Institute on Aging: Three Types of Exercise Can Improve Your Health
- CDC: Physical Activity Guidelines for Older Adults
- Hospital for Special Surgery: Static and Dynamic Stretching
- NHS: Sitting Exercises
- NHS: Balance Exercises
- Bone Health and Osteoporosis Foundation: Protecting Your Spine
This content is for informational purposes only and is not a substitute for medical advice.