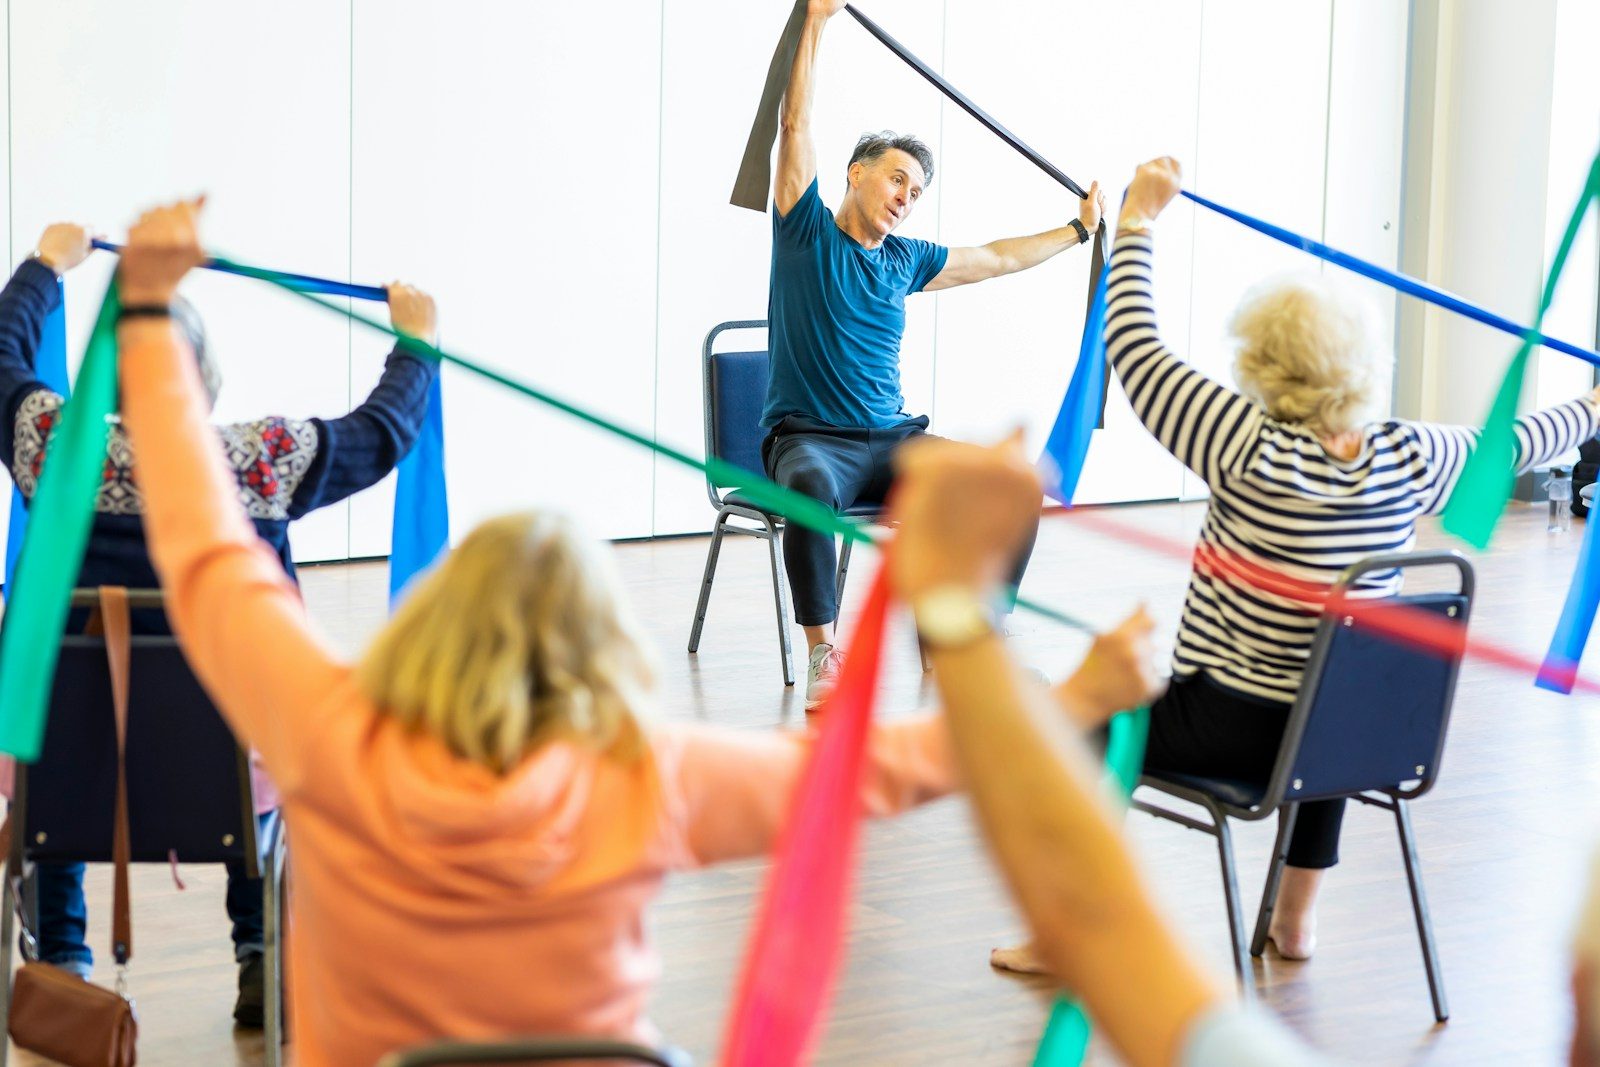
This chair yoga for seniors 30-day challenge provides a free, beginner-friendly plan of short seated routines that gradually build mobility, movement control, and exercise consistency. Most exercises can be performed entirely while seated, and optional chair-supported movements are clearly identified.
You do not need to be flexible or experienced with yoga. You only need a stable chair, enough space to move comfortably, and a willingness to practice for a few minutes at a time.
The challenge begins with five-minute sessions and gradually progresses toward complete 15- to 20-minute routines. Recovery days and rest days are included so that completing the challenge does not mean pushing through discomfort every day.
What Is Chair Yoga?
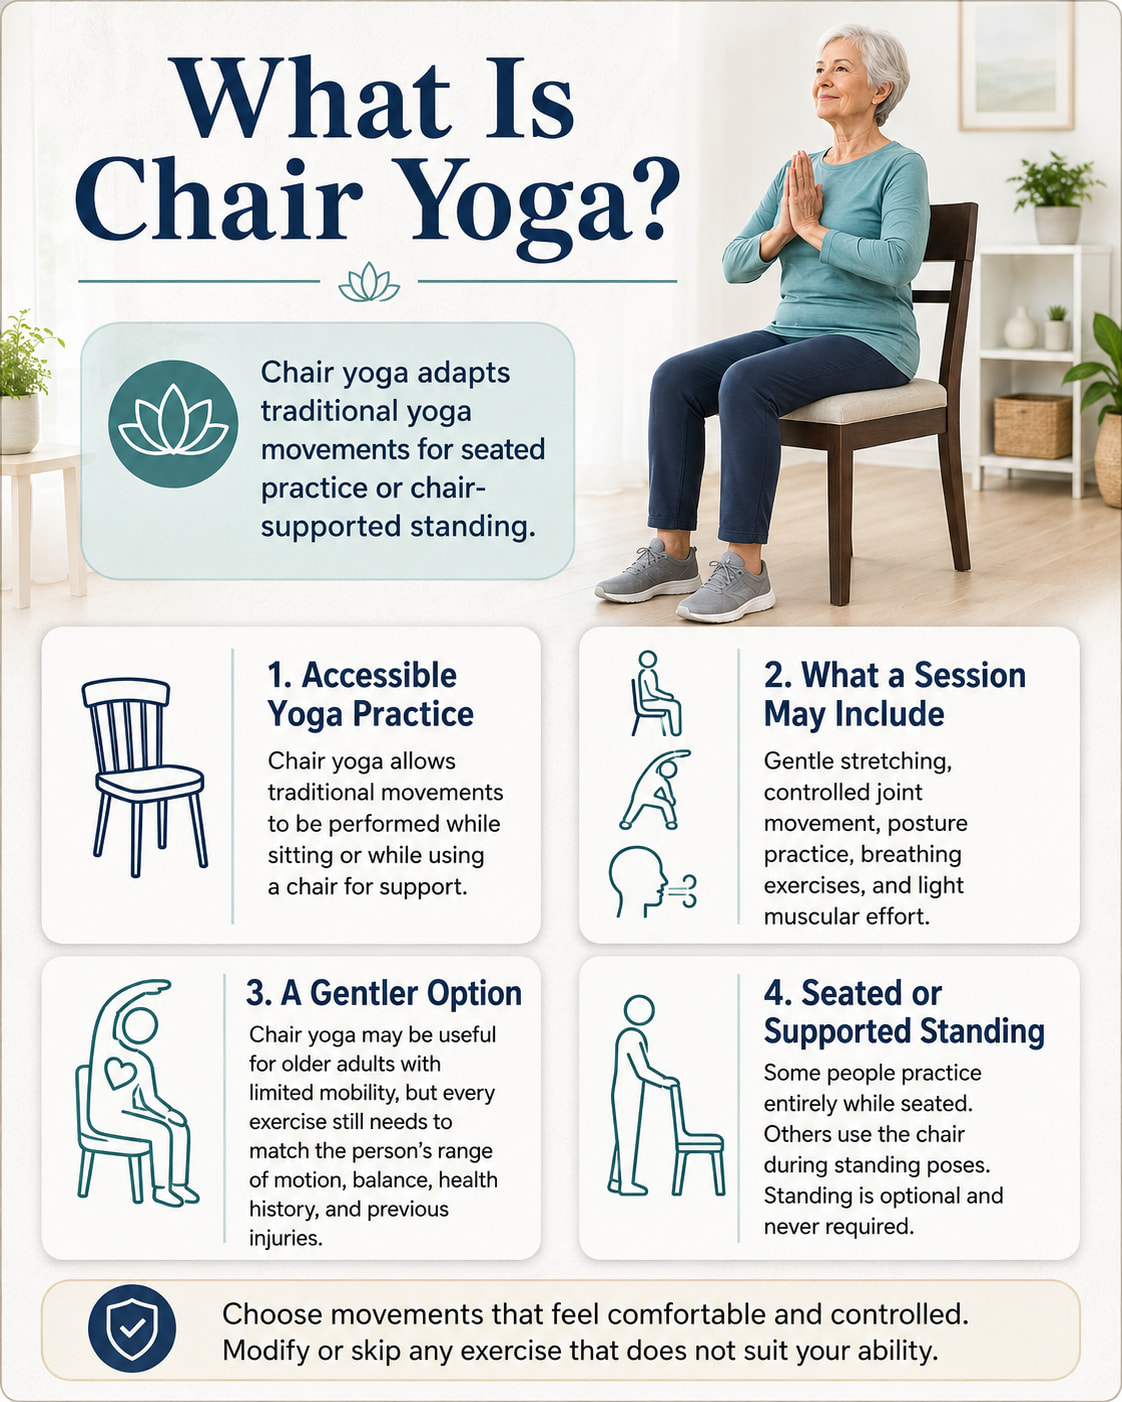
Chair yoga adapts traditional yoga movements so they can be performed while sitting or while holding a chair for support. A session may combine gentle stretching, controlled joint movement, posture practice, breathing, and light muscular effort.
The National Center for Complementary and Integrative Health describes chair yoga as a gentler option for older adults with limited mobility. However, “gentler” does not mean every exercise is appropriate for every person. Range of motion, balance ability, health conditions, and previous injuries still need to be considered.
Some people complete chair yoga entirely while seated. Others use the chair as support during standing poses. This challenge provides both options, but standing is never required.
Who Is This Challenge For?
This free chair yoga challenge may be suitable for:
- Seniors who are new to structured exercise
- People who find floor-based yoga difficult
- Older adults who cannot comfortably kneel or get down to the floor
- People returning to activity after a period of inactivity
- Anyone looking for a short seated mobility routine
- Caregivers searching for simple, supervised movement ideas
A seated routine may make exercise more accessible, but it is not automatically suitable for every health condition. Speak with an appropriate healthcare professional before starting when you have significant balance problems, recent surgery, an unstable health condition, unexplained symptoms, or movement restrictions provided by a clinician.
Potential Benefits of Chair Yoga for Seniors
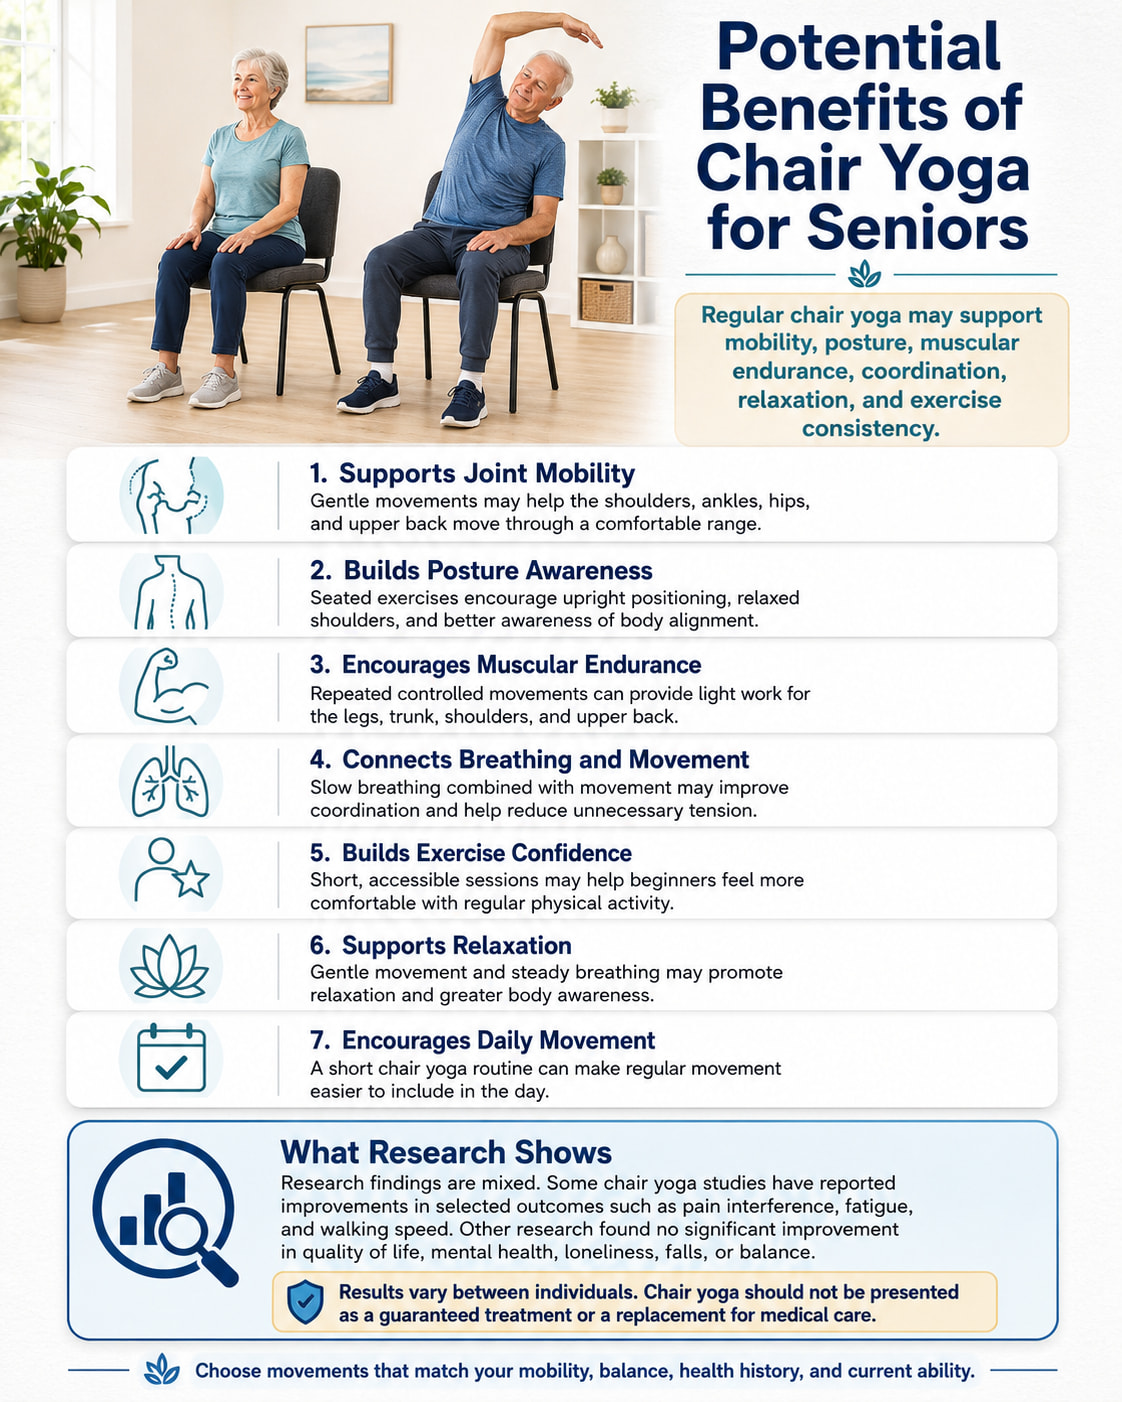
Chair yoga can provide a practical way to move the major joints without getting onto the floor. Depending on the exercises and effort used, regular practice may help support:
- Shoulder, ankle, hip, and upper-back mobility
- Posture awareness
- Gentle muscular endurance
- Coordination between breathing and movement
- Confidence with regular physical activity
- Relaxation and body awareness
- A more consistent daily movement habit
Research should be interpreted realistically. In one randomized trial, an eight-week chair yoga program for older adults with lower-extremity osteoarthritis was associated with improvements in selected outcomes, including pain interference, fatigue, and gait speed. The trial did not find a balance improvement, and most benefits were not maintained after the intervention ended.
A larger 2024 trial studied a 12-week chair-based Gentle Years Yoga program involving 454 adults aged 65 and older with multiple health conditions. The program was considered safe and acceptable, but it did not produce statistically significant improvements in the study’s main quality-of-life outcome, mental health, loneliness, or falls.
These findings do not mean chair yoga is ineffective. They show that results differ among people and that a short challenge should not be promoted as a guaranteed treatment.
What Results Can You Expect in 30 Days?
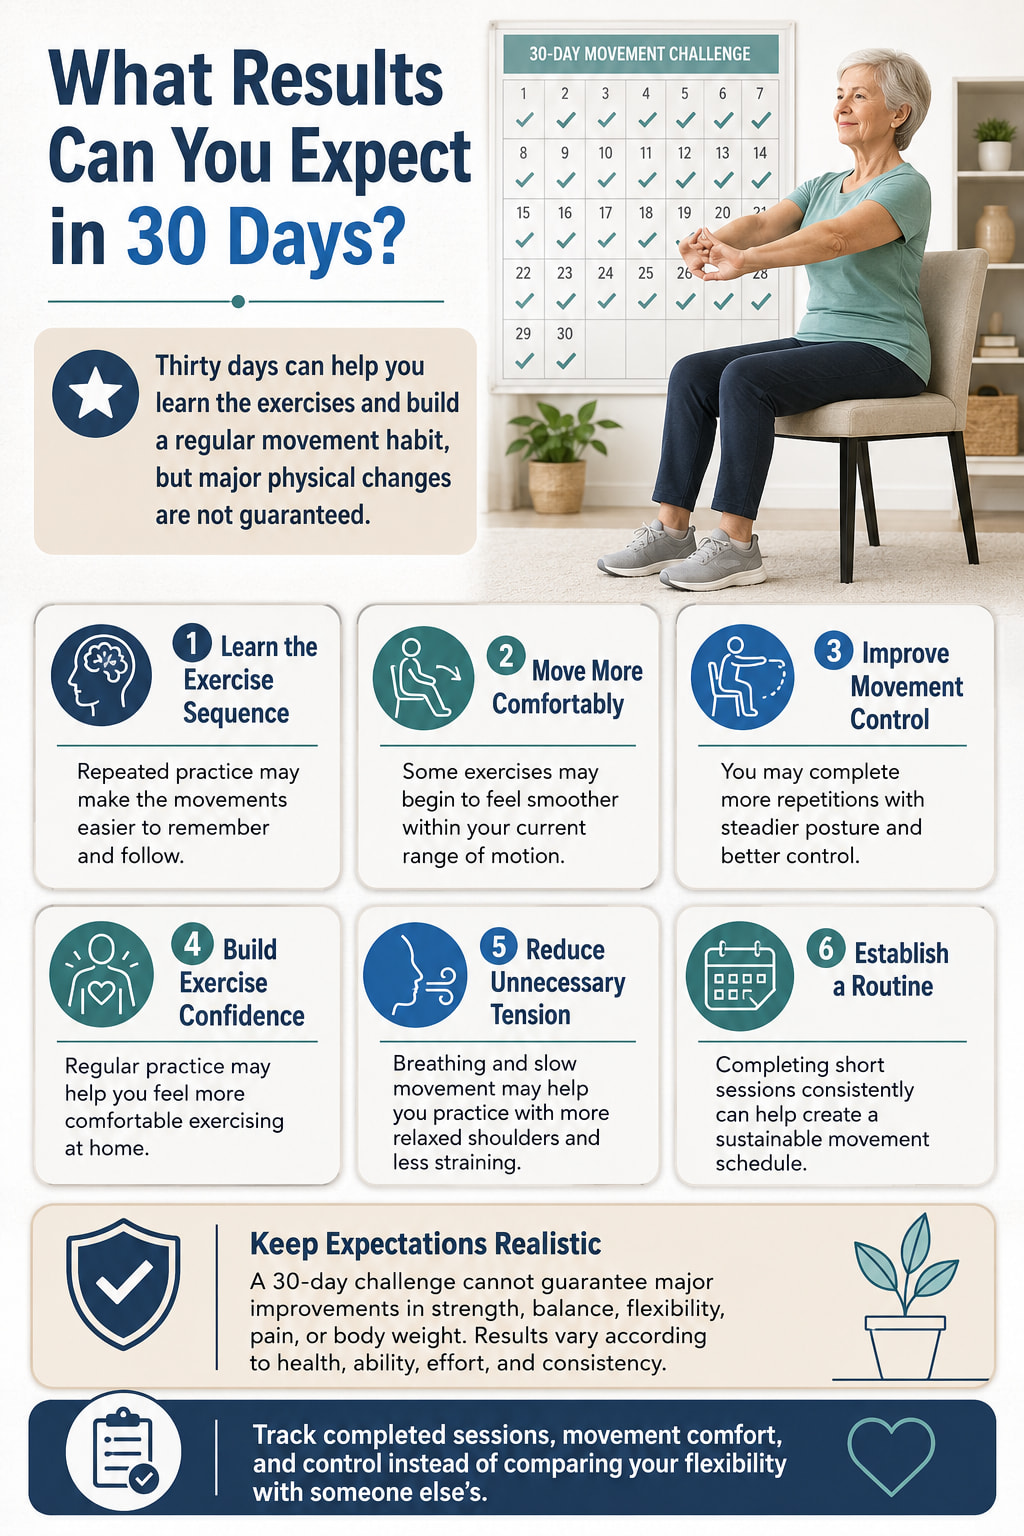
Thirty days is enough time to become familiar with the exercises and establish a routine, but it is not enough to guarantee major changes in strength, balance, flexibility, pain, or body weight.
Realistic improvements may include:
- Remembering the exercise sequence more easily
- Moving through a slightly more comfortable range
- Completing more repetitions with control
- Feeling more confident about exercising at home
- Practicing with less unnecessary tension
- Developing a regular movement schedule
Track consistency and comfort instead of comparing your range of motion with someone else’s.
What You Need
You need:
- A solid, stable chair without wheels
- A clear, nonslip area around the chair
- Comfortable clothing
- Supportive shoes for standing exercises
- Water nearby
- A timer, clock, or phone when desired
The NHS seated exercise guidance recommends a stable chair that allows the feet to rest flat on the floor with the knees bent at approximately a right angle. Armrests can restrict some movements, so an armless chair is often easier to use.
Place the chair against a wall when you are concerned that it may move. Do not use a folding chair unless it locks securely and is designed to remain stable during exercise.
How to Sit for Chair Yoga
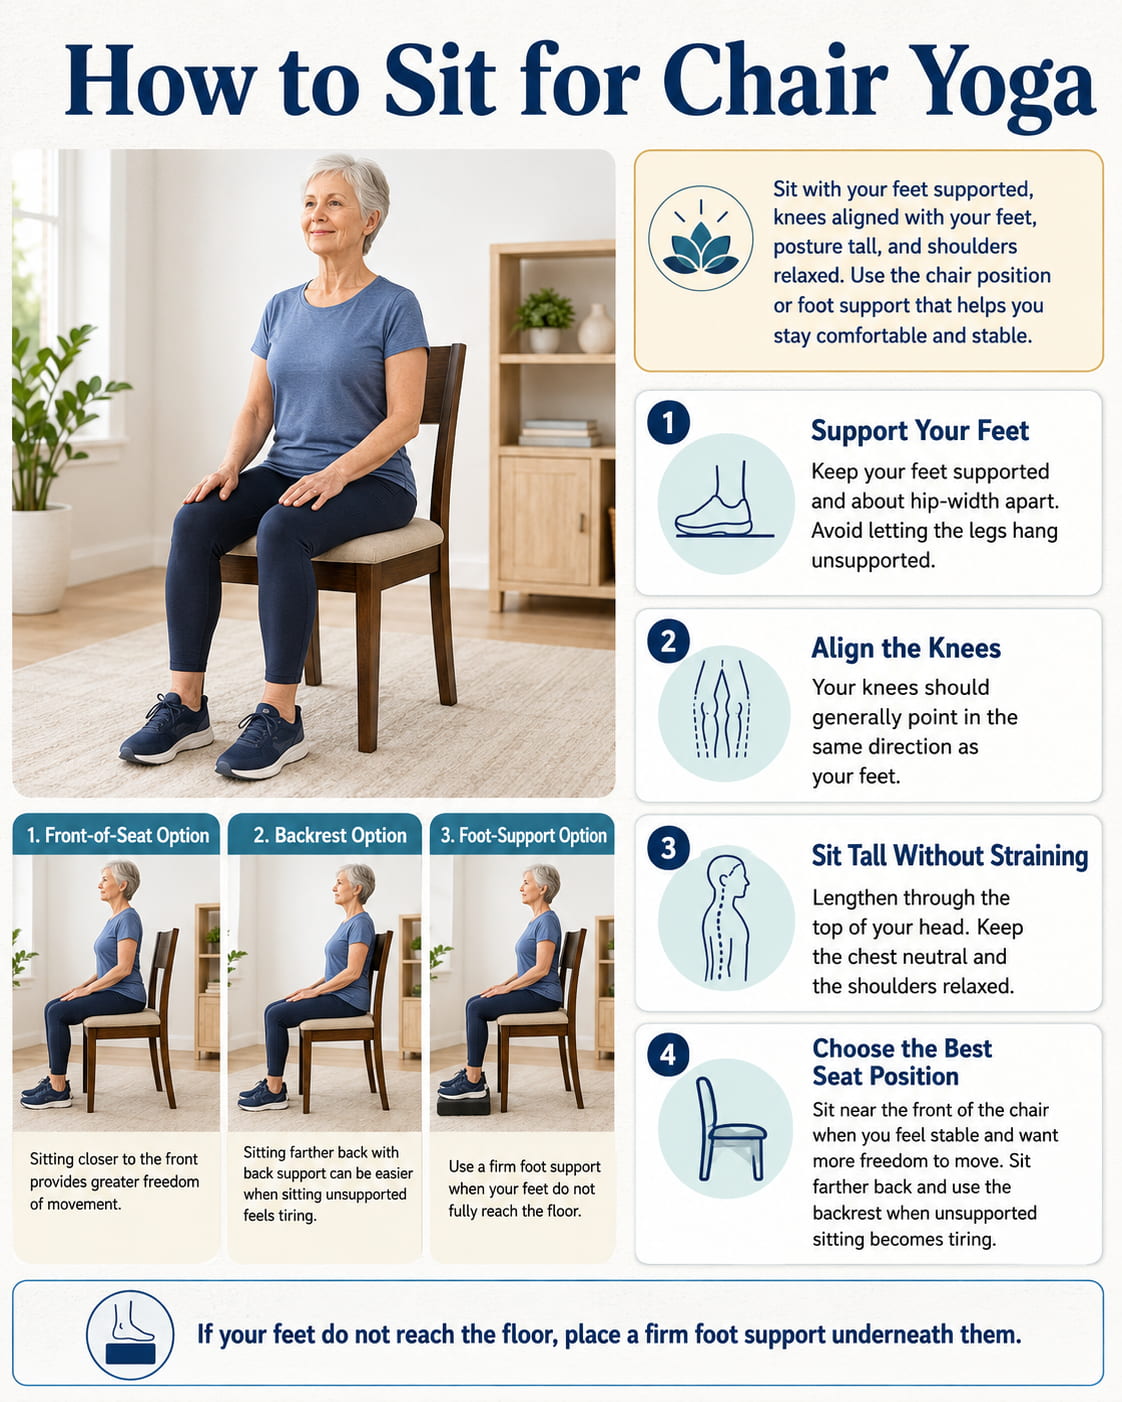
Sit with your feet supported and approximately hip-width apart. Your knees should generally point in the same direction as your feet.
Lengthen through the top of your head without forcing your chest upward. Keep the shoulders relaxed rather than pulled tightly backward.
You can sit near the front of the seat when you feel stable and need more freedom to move. Sit farther back and use the backrest when unsupported sitting is tiring.
Place a firm foot support under your feet if they do not reach the floor. Avoid allowing the legs to hang unsupported.
Safety Before Starting
Begin with a range of motion that feels comfortable. A movement does not need to be large to be useful.
Follow these basic rules:
- Move slowly without bouncing or jerking.
- Continue breathing instead of holding your breath.
- Do not force a stretch.
- Use the backrest whenever you need additional support.
- Keep at least one hand on the chair during standing movements.
- Skip any movement that aggravates a joint or symptom.
- Do not use a painful range simply to complete the listed repetitions.
The NCCIH advises older adults and people with health conditions to discuss individual needs with their healthcare professional and instructor. Knee or hip injuries, lumbar spine conditions, severe high blood pressure, glaucoma, and balance problems are among the issues that may require yoga modifications.
Stop exercising and seek appropriate help if you experience chest pain, faintness, dizziness, unusual shortness of breath, numbness, new weakness, sharp pain, or other unusual symptoms.
Osteoporosis Considerations
People with osteoporosis or osteopenia may need to avoid deep spinal rounding, forceful forward bending, and strong twisting.
The University of Arkansas Cooperative Extension Service recommends hinging forward from the hips while keeping the back straighter and avoiding extreme spinal rotation. Follow any restrictions given by your healthcare professional.
How the Chair Yoga for Seniors 30-Day Challenge Works
The plan uses five repeatable routines. You will learn the movements gradually instead of attempting a completely different exercise every day.
Most sessions should feel easy to moderate, around 2 to 4 on a 10-point effort scale. You should be able to breathe comfortably and speak in complete sentences.
The challenge includes:
- Main practice days
- Short recovery sessions
- Complete rest days
- Optional chair-supported standing work
- Gradual increases in repetitions, rounds, or session length
You can repeat a previous week when the next stage feels too demanding. Progress is based on control and comfort, not the calendar date.
Chair Yoga Exercises Used in the Challenge
1. Seated Mountain and Relaxed Breathing
Best for: Beginning a session, posture awareness, and reducing unnecessary tension.
Muscles worked: Deep trunk muscles, upper-back muscles, and breathing muscles work gently to support the seated position.
Suggested sets and reps: Practice 3 to 6 slow, comfortable breaths.
How to do it:
- Sit upright with both feet supported.
- Rest your hands on your thighs.
- Let your shoulders move down away from your ears.
- Keep your chin approximately level with the floor.
- Inhale slowly without lifting your shoulders.
- Exhale comfortably without forcing all the air out.
Common mistakes: Forcing a rigid posture, shrugging the shoulders, holding the breath, or leaning heavily to one side.
Coaching cue: Imagine the top of your head moving gently upward while your shoulders remain relaxed.
Easier option: Sit against the backrest.
Progression: Sit slightly away from the backrest while maintaining an easy, natural posture.
2. Shoulder Rolls
Best for: Gently moving the shoulders before reaching or stretching.
Muscles worked: Upper trapezius, middle trapezius, rhomboids, and muscles surrounding the shoulder blades.
Suggested sets and reps: Perform 5 rolls backward and 5 rolls forward.
How to do it:
- Begin in seated mountain.
- Lift both shoulders slightly toward your ears.
- Move them backward, down, and forward in a smooth circle.
- Complete the repetitions slowly.
- Reverse the direction.
Common mistakes: Moving too quickly, forcing a large circle, or thrusting the head forward.
Coaching cue: Make smooth circles without squeezing or straining the neck.
Easier option: Roll one shoulder at a time.
Progression: Add one or two repetitions while keeping the movement controlled.
3. Seated Chest Opener
Best for: Chest and front-of-shoulder mobility.
Muscles worked: The upper-back muscles gently hold the torso upright while the chest and front shoulder tissues are lengthened.
Suggested sets and reps: Hold for 2 to 3 comfortable breaths and repeat twice.
How to do it:
- Sit upright with your arms by your sides.
- Turn your palms slightly forward.
- Move your hands a little away from your body.
- Gently open across the front of your chest.
- Keep your lower ribs controlled rather than arching your lower back.
- Return your arms to your sides.
Common mistakes: Forcing the arms behind the body, lifting the chin, or overextending the lower back.
Coaching cue: Widen across the collarbones without pushing the ribs forward.
Easier option: Keep your hands resting on your thighs and gently draw your shoulders back.
Progression: Extend the arms slightly farther out to the sides.
4. Seated Cat-Cow
Best for: Controlled movement of the pelvis, upper back, and trunk.
Muscles worked: Abdominals, spinal erectors, upper-back muscles, and muscles around the pelvis.
Suggested sets and reps: Perform 5 to 8 slow cycles.
How to do it:
- Sit with your hands resting on your thighs.
- Inhale and gently lift your breastbone while allowing a small forward pelvic tilt.
- Keep your neck long and shoulders relaxed.
- Exhale and gently draw your abdomen inward.
- Allow a small, comfortable rounding through the upper back.
- Return to the starting position.
Common mistakes: Throwing the head backward, moving too far, or creating all the motion through the neck.
Coaching cue: Let the movement travel gradually through your trunk rather than forcing one area.
Easier option: Make the movement smaller or use only a gentle pelvic tilt.
Progression: Pause briefly in each position without holding your breath.
Osteoporosis modification: Use a small pelvic movement while keeping the spine closer to neutral unless a qualified professional has approved spinal rounding.
5. Seated Side Bend
Best for: Gentle side-body and shoulder mobility.
Muscles worked: Obliques, quadratus lumborum, upper-back muscles, and shoulder muscles.
Suggested sets and reps: Hold for 2 to 3 breaths per side and repeat twice.
How to do it:
- Sit upright with your left hand holding the side of the chair.
- Raise your right arm only as high as comfortable.
- Exhale and lean slightly to the left.
- Keep both sides of your seat in contact with the chair.
- Inhale and return to the center.
- Repeat on the other side.
Common mistakes: Rotating the torso, lifting one side of the hips, or forcing the reaching arm overhead.
Coaching cue: Think about making one side of your waist longer.
Easier option: Keep the reaching hand on your shoulder.
Progression: Reach the arm higher or hold for one additional breath.
6. Gentle Seated Rotation
Best for: Controlled upper-back rotation.
Muscles worked: Obliques, multifidus, spinal rotators, and upper-back muscles.
Suggested sets and reps: Perform 3 to 5 controlled repetitions per side.
How to do it:
- Sit upright with your hands crossed over your chest or resting on your thighs.
- Exhale and rotate your chest slightly to the right.
- Keep your knees facing forward.
- Inhale and return to the center.
- Repeat to the left.
- Use a small range that does not cause strain.
Common mistakes: Pulling against the chair, forcing the neck, or moving the knees with the torso.
Coaching cue: Turn from the rib cage without trying to look behind you.
Easier option: Rotate only a few degrees.
Progression: Pause for one comfortable breath before returning to the center.
Osteoporosis modification: Avoid strong or end-range rotation. A very small upper-body turn—or skipping this exercise—may be more appropriate.
7. Seated March
Best for: Hip movement, coordination, and light lower-body activity.
Muscles worked: Hip flexors, quadriceps, abdominals, and muscles that stabilize the pelvis.
Suggested sets and reps: Perform 8 to 15 repetitions per leg.
How to do it:
- Sit upright with both feet flat.
- Hold the sides of the chair when needed.
- Lift one foot a small distance from the floor.
- Lower it with control.
- Repeat with the other leg.
- Continue alternating sides.
Common mistakes: Leaning far backward, lifting the knee too high, or allowing the foot to drop heavily.
Coaching cue: Lift the foot only as high as you can while keeping your torso steady.
Easier option: Slide one foot forward and back without lifting it.
Progression: Pause for one second with the foot raised or add a few alternating repetitions.
8. Seated Knee Extension
Best for: Gentle thigh strengthening and knee control.
Muscles worked: Quadriceps, with the hip and trunk muscles helping maintain posture.
Suggested sets and reps: Perform 8 to 12 repetitions per leg.
How to do it:
- Sit upright with both feet supported.
- Slowly straighten your right knee.
- Stop before locking or forcing the joint.
- Pause briefly.
- Lower the foot with control.
- Complete the repetitions and change legs.
Common mistakes: Swinging the lower leg, leaning backward, or forcing the knee completely straight.
Coaching cue: Lift smoothly and lower even more slowly.
Easier option: Straighten the knee only halfway.
Progression: Hold the extended position for two seconds.
9. Ankle Pumps and Circles
Best for: Ankle mobility and preparing the feet for standing or walking.
Muscles worked: Calves, tibialis anterior, and smaller muscles surrounding the ankle.
Suggested sets and reps: Perform 10 ankle pumps, followed by 5 circles in each direction per foot.
How to do it:
- Sit upright with one foot slightly forward.
- Keep the heel down and lift the toes.
- Lower the toes and lift the heel.
- Repeat the pumping motion.
- Lift the foot slightly if comfortable.
- Draw small circles with the toes before changing direction.
Common mistakes: Moving through pain, making uncontrolled circles, or twisting the entire leg.
Coaching cue: Lead the movement with the foot while keeping the knee relatively still.
Easier option: Perform only heel and toe lifts with the foot on the floor.
Progression: Increase to 15 pumps or make the circles slightly larger.
10. Seated Heel Raise
Best for: Calf endurance and controlled ankle movement.
Muscles worked: Gastrocnemius, soleus, and smaller stabilizing muscles around the ankle.
Suggested sets and reps: Perform 10 to 15 repetitions.
How to do it:
- Sit with both feet flat and approximately hip-width apart.
- Keep the balls of your feet on the floor.
- Raise both heels slowly.
- Pause briefly at the top.
- Lower the heels with control.
Common mistakes: Rolling the feet outward, bouncing, or rushing the lowering phase.
Coaching cue: Press evenly through the base of the big toe and the base of the little toe.
Easier option: Raise one heel at a time.
Progression: Pause for two seconds at the top of each repetition.
11. Seated Hamstring Stretch
Best for: Gentle mobility at the back of the thigh.
Muscles worked: The hamstrings are lengthened while the trunk muscles maintain posture.
Suggested sets and reps: Hold for 15 to 20 seconds per side and repeat once or twice.
How to do it:
- Sit near the front of the chair if you feel stable.
- Keep your left foot flat.
- Extend your right leg with the heel resting on the floor.
- Point your right toes upward.
- Place your hands on your left thigh.
- Hinge slightly forward from your hips while keeping your back long.
- Return upright and change sides.
Common mistakes: Rounding deeply through the back, reaching for the toes, or forcing the knee straight.
Coaching cue: Move your chest forward rather than dropping your head toward your knee.
Easier option: Keep a small bend in the extended knee.
Progression: Hinge slightly farther while maintaining the same back position.
12. Supported Standing Mountain and Heel Raise
Best for: An optional introduction to chair-supported standing.
Muscles worked: Calves, thighs, glutes, trunk muscles, and muscles supporting standing posture.
Suggested sets and reps: Hold standing mountain for 3 breaths, followed by 5 to 10 heel raises.
How to do it:
- Stand behind the chair with both hands on the backrest.
- Position your feet approximately hip-width apart.
- Stand tall without locking your knees.
- Take three comfortable breaths.
- Keep your toes and the balls of your feet on the floor.
- Slowly lift both heels.
- Lower them with control.
Common mistakes: Pulling on the chair, leaning far forward, locking the knees, or using an unstable chair.
Coaching cue: Use the chair for support rather than hanging your body weight from it.
Easier option: Perform seated heel raises.
Progression: Use lighter hand pressure on the chair, but do not remove your hands unless an appropriate professional has confirmed that unsupported practice is suitable.
Five Routines Used in the Challenge
Routine A: Seated Reset
Approximate time: 5 to 8 minutes.
Complete:
- Seated mountain: 5 breaths
- Shoulder rolls: 5 in each direction
- Seated cat-cow: 5 repetitions
- Ankle pumps: 10 per foot
- Relaxed seated breathing: 5 breaths
Routine B: Upper-Body Mobility
Approximate time: 8 to 12 minutes.
Complete:
- Seated mountain: 5 breaths
- Shoulder rolls: 5 in each direction
- Seated chest opener: 2 holds
- Seated cat-cow: 5 to 8 repetitions
- Seated side bend: 2 holds per side
- Gentle seated rotation: 3 repetitions per side
- Relaxed breathing: 5 breaths
Routine C: Lower-Body Mobility and Control
Approximate time: 8 to 12 minutes.
Complete:
- Seated march: 8 to 12 per leg
- Seated knee extension: 8 to 10 per leg
- Seated heel raise: 10 to 15 repetitions
- Ankle pumps: 10 per foot
- Ankle circles: 5 each direction
- Seated hamstring stretch: 15 to 20 seconds per side
Routine D: Complete Chair Yoga Flow
Approximate time: 12 to 20 minutes.
Complete:
- Seated mountain: 5 breaths
- Shoulder rolls: 5 in each direction
- Seated chest opener: 2 holds
- Seated cat-cow: 5 to 8 repetitions
- Seated side bend: 2 per side
- Gentle seated rotation: 3 per side
- Seated march: 10 per leg
- Seated knee extension: 8 per leg
- Seated heel raise: 12 repetitions
- Seated hamstring stretch: 20 seconds per side
- Relaxed breathing: 5 breaths
Complete one round initially. Repeat selected exercises only when the first round feels comfortable and controlled.
Routine E: Optional Chair-Supported Practice
Approximate time: 5 to 8 minutes.
Complete:
- Seated mountain: 3 breaths
- Seated march: 8 per leg
- Supported standing mountain: 3 breaths
- Supported heel raise: 5 to 10 repetitions
- Return to seated mountain: 3 breaths
Remain seated and repeat seated heel raises when standing is not appropriate.
Free Chair Yoga for Seniors 30-Day Challenge
Week 1: Learn the Foundation
The first week introduces basic breathing, posture, and joint movement. Keep every range small and comfortable.
| Day | Practice | Target |
|---|---|---|
| Day 1 | Routine A | Complete one easy round. Focus on chair setup and steady breathing. |
| Day 2 | Seated mountain, shoulder rolls, and chest opener | Practice for 5 to 6 minutes. |
| Day 3 | Ankle pumps, ankle circles, heel raises, and relaxed breathing | Perform one set of each exercise. |
| Day 4 | Recovery practice | Complete seated mountain, 5 shoulder rolls, and 5 relaxed breaths. |
| Day 5 | Seated cat-cow and side bend | Perform 5 cat-cow cycles and 2 side bends per side. |
| Day 6 | Routine A | Repeat the routine and notice whether the movements feel more familiar. |
| Day 7 | Rest day | Rest completely or practice 3 to 5 relaxed seated breaths. |
Week 2: Build a Repeatable Routine
The second week combines the movements into short upper- and lower-body sessions.
| Day | Practice | Target |
|---|---|---|
| Day 8 | Routine B | Complete one round using a small range. |
| Day 9 | Routine C | Use 8 repetitions per leg for marching and knee extensions. |
| Day 10 | Short full-body flow | Complete the first six movements in Routine D, followed by seated heel raises. |
| Day 11 | Recovery practice | Practice shoulder rolls, ankle pumps, and relaxed breathing for 5 minutes. |
| Day 12 | Routine B | Add one repetition only where the movement remains smooth. |
| Day 13 | Routine C | Use 10 repetitions per leg if 8 feels comfortable. |
| Day 14 | Rest day | Take a complete rest day or repeat seated mountain for 5 breaths. |
Week 3: Improve Control and Endurance
The third week gradually increases the amount of continuous movement. Optional standing practice is introduced, but the seated alternative remains equally acceptable.
| Day | Practice | Target |
|---|---|---|
| Day 15 | Routine D | Complete one full round in approximately 12 to 15 minutes. |
| Day 16 | Routine E or seated alternative | Try supported standing only when appropriate. Otherwise repeat Routine C. |
| Day 17 | Routine B | Hold the chest opener and side bends for one additional comfortable breath. |
| Day 18 | Recovery practice | Complete Routine A slowly without adding repetitions. |
| Day 19 | Routine C | Use slow lowering during knee extensions and heel raises. |
| Day 20 | Routine D | Complete one controlled round. Repeat ankle pumps and shoulder rolls if desired. |
| Day 21 | Rest day | Rest and note which exercises felt best during the week. |
Week 4: Practice Complete Chair Yoga Flows
The fourth week uses longer sessions, but no day should feel like a test. Reduce the routine whenever your energy or symptoms require it.
| Day | Practice | Target |
|---|---|---|
| Day 22 | Routine D | Complete one round at an easy-to-moderate effort. |
| Day 23 | Routine E or seated alternative | Add up to 10 supported heel raises or perform 15 seated heel raises. |
| Day 24 | Routine B | Emphasize breathing, posture, and controlled upper-body movement. |
| Day 25 | Recovery practice | Complete Routine A for 5 to 8 minutes. |
| Day 26 | Routine C | Complete one round, rest, and repeat heel raises and marching if comfortable. |
| Day 27 | Routine D | Take 15 to 18 minutes, including brief pauses when needed. |
| Day 28 | Rest day | Rest completely or practice relaxed breathing. |
Days 29 and 30: Complete the Challenge
| Day | Practice | Target |
|---|---|---|
| Day 29 | Choose your preferred routine | Repeat Routine A, B, C, D, or E based on your needs and energy. |
| Day 30 | Complete chair yoga flow | Perform Routine D for up to 20 minutes, shortening any section as needed. Finish by reviewing your progress. |
How to Progress Safely
Progress only after the current version feels controlled and comfortable.
Change one variable at a time:
- Add one or two repetitions.
- Hold a position for one additional breath.
- Increase the range slightly.
- Slow the lowering phase.
- Add one exercise to a short session.
- Repeat one section instead of the entire routine.
- Progress from seated to supported standing only when appropriate.
Do not progress by forcing deeper twists, stronger forward bends, faster repetitions, or more difficult balance positions.
A smaller movement performed well is more useful than a larger movement performed with strain.
How to Modify the Challenge
When Sitting Upright Is Tiring
Use the backrest and shorten the session. Complete one movement at a time with a rest between exercises.
When the Feet Do Not Reach the Floor
Use a firm, stable foot support. Avoid balancing on the front edge of the chair with the feet unsupported.
When Overhead Reaching Is Uncomfortable
Keep your hands on your shoulders or reach forward instead of overhead.
When Marching Is Difficult
Slide one foot forward and back along the floor. You can also reduce how high the foot is lifted.
When Knee Extension Is Uncomfortable
Use a smaller range and avoid forcing the knee straight. Skip the exercise if it continues to aggravate symptoms.
When Standing Is Not Appropriate
Remain seated. Supported standing is an optional progression, not a requirement for completing the challenge.
When a Full Session Feels Too Long
Complete the first three or four exercises. Five comfortable minutes still count as meaningful practice.
How Chair Yoga Fits Into a Complete Fitness Plan
Chair yoga can provide useful mobility practice and light activity, but it may not fully meet every part of an older adult’s exercise needs.
The CDC physical activity guidelines for older adults recommend a weekly combination of aerobic activity, muscle-strengthening activity, and balance work. The general target includes at least 150 minutes of moderate-intensity aerobic activity and muscle-strengthening exercise on at least two days per week, along with activities that improve balance. People who cannot meet the full target are encouraged to be as active as their abilities and health allow.
A gentle seated yoga session may not raise your heart rate enough to count as moderate aerobic exercise. It may also provide less resistance than progressive strength training.
According to your ability and professional guidance, a more complete weekly program may combine:
- Chair yoga for mobility and relaxation
- Walking, cycling, swimming, or another suitable aerobic activity
- Resistance exercises for the major muscle groups
- Appropriate standing balance practice
- Regular breaks from prolonged sitting
How Often Should Seniors Do Chair Yoga?
Gentle chair yoga can be practiced regularly when it is comfortable and well tolerated. Beginners may start with three or four main sessions per week and use brief mobility or breathing practices on other days.
This challenge includes rest and recovery because daily participation does not require completing a full workout every day.
After the challenge, a practical schedule could be:
- Two complete chair yoga sessions per week
- One upper-body mobility session
- One lower-body session
- Short breathing or movement breaks on other days
- Additional aerobic, strength, and balance activity as appropriate
Does Chair Yoga Help With Weight Loss?
Chair yoga increases movement, but a short, gentle seated routine is unlikely to produce substantial weight loss by itself.
Weight change is influenced by total activity, eating habits, health, medications, sleep, and other factors. Chair yoga may contribute by helping someone become more active and establish a routine, but it should not be promoted as a rapid weight-loss or belly-fat solution.
Common Chair Yoga Mistakes
Using an Unstable Chair
A rolling, rocking, or lightweight chair can move unexpectedly. Use a stable chair on a nonslip surface.
Forcing a Larger Range
Yoga is not a flexibility competition. Stop before the movement becomes painful or causes you to lose control.
Holding the Breath
Continue breathing naturally. Do not force long breath holds or forceful breathing patterns.
Moving Too Quickly
Fast repetitions can turn a controlled mobility exercise into an uncontrolled swing. Move slowly enough to stop at any point.
Leaning Away From the Backrest Before You Are Ready
Sitting unsupported requires trunk endurance. Use the backrest when maintaining posture becomes tiring.
Treating Standing as Mandatory
Standing variations are optional. Fully seated participation still completes the challenge.
Doing More Because a Session Feels Easy
The early routines are intentionally short. Build consistency before adding more volume or range.
Frequently Asked Questions
Is chair yoga safe for seniors?
Chair yoga is generally a gentler form of movement, but its suitability depends on the person, exercise, health history, and setup. Use a stable chair, begin with a comfortable range, and obtain professional guidance when a health condition or movement restriction may affect participation.
Can seniors do chair yoga every day?
A short, gentle session may be practiced daily when it feels comfortable. However, every day does not need to be a full workout. Recovery breathing, easy mobility, and complete rest days can all be part of a 30-day challenge.
How long should a chair yoga session last?
A beginner can start with approximately 5 to 10 minutes. Sessions may gradually increase to 15 or 20 minutes as the movements become familiar. Longer is not automatically better.
Can chair yoga improve balance?
Chair yoga may support posture, coordination, mobility, and movement confidence. However, fully seated exercise does not challenge standing balance in the same way as appropriately supervised standing balance training. One chair yoga trial involving older adults with osteoarthritis did not find a significant improvement in balance.
Can I do chair yoga with arthritis?
Some people with arthritis may find seated movement more accessible than floor-based exercise. Exercise selection and range still need to be individualized. Do not force painful joints, and follow guidance from a healthcare professional familiar with your condition.
Can I do chair yoga with osteoporosis?
People with osteoporosis may require modifications, particularly for spinal rounding, forward bending, and rotation. Avoid strong or end-range movements and follow individualized medical or physical therapy guidance.
What is the best chair for chair yoga?
Use a solid chair without wheels. It should not rock, fold unexpectedly, or slide on the floor. Your feet should be supported, and the seat should be high enough that getting up is manageable when standing exercises are included.
What to Do After Day 30
Do not feel that you need to start a harder challenge immediately. First identify which routines you can maintain consistently.
Choose two or three goals for the next month, such as:
- Complete Routine D twice per week.
- Use Routine A as a morning mobility break.
- Practice Routine C before a regular walk.
- Add professionally approved resistance exercises.
- Attend a qualified senior or gentle yoga class.
- Continue tracking completed sessions.
The best next step is usually the routine you can perform safely and repeat consistently.
Conclusion
The chair yoga for seniors 30-day challenge is designed to make regular movement more approachable, not to test flexibility or endurance. Begin with the short seated sessions, use the backrest whenever needed, and treat every standing movement as optional.
Focus on controlled breathing, comfortable motion, and consistency. At the end of 30 days, continue with the routines that fit your ability and combine them with suitable aerobic, strength, and balance activities for a more complete fitness plan.
This content is for informational purposes only and is not a substitute for professional medical advice.
References
- CDC: Older Adult Activity Overview
- CDC: Adding Activity Recommendations for Older Adults
- NCCIH: Yoga for Health—What the Science Says
- NCCIH: Yoga Effectiveness and Safety
- PubMed: Chair Yoga and Lower-Extremity Osteoarthritis Trial
- PubMed: Gentle Years Yoga Trial
- NHS: Sitting Exercises
- University of Arkansas Cooperative Extension: Chair Yoga