Chair yoga for seniors over 60 provides a gentle way to practice mobility, controlled breathing, and light muscle activation without getting down onto the floor. The exercises can be performed from a stable chair, making the routine accessible to beginners and people who feel uncomfortable with standing yoga poses.
This guide covers seven gentle chair-yoga exercises, correct form, easier and harder options, common mistakes, safety considerations, and a simple routine you can complete at home.
What Is Chair Yoga?
Chair yoga is a gentle form of yoga performed while seated or using a chair for support. It can be a practical option for older adults who want to improve mobility and breathing without getting down on the floor.
Potential Benefits of Chair Yoga for Adults Over 60
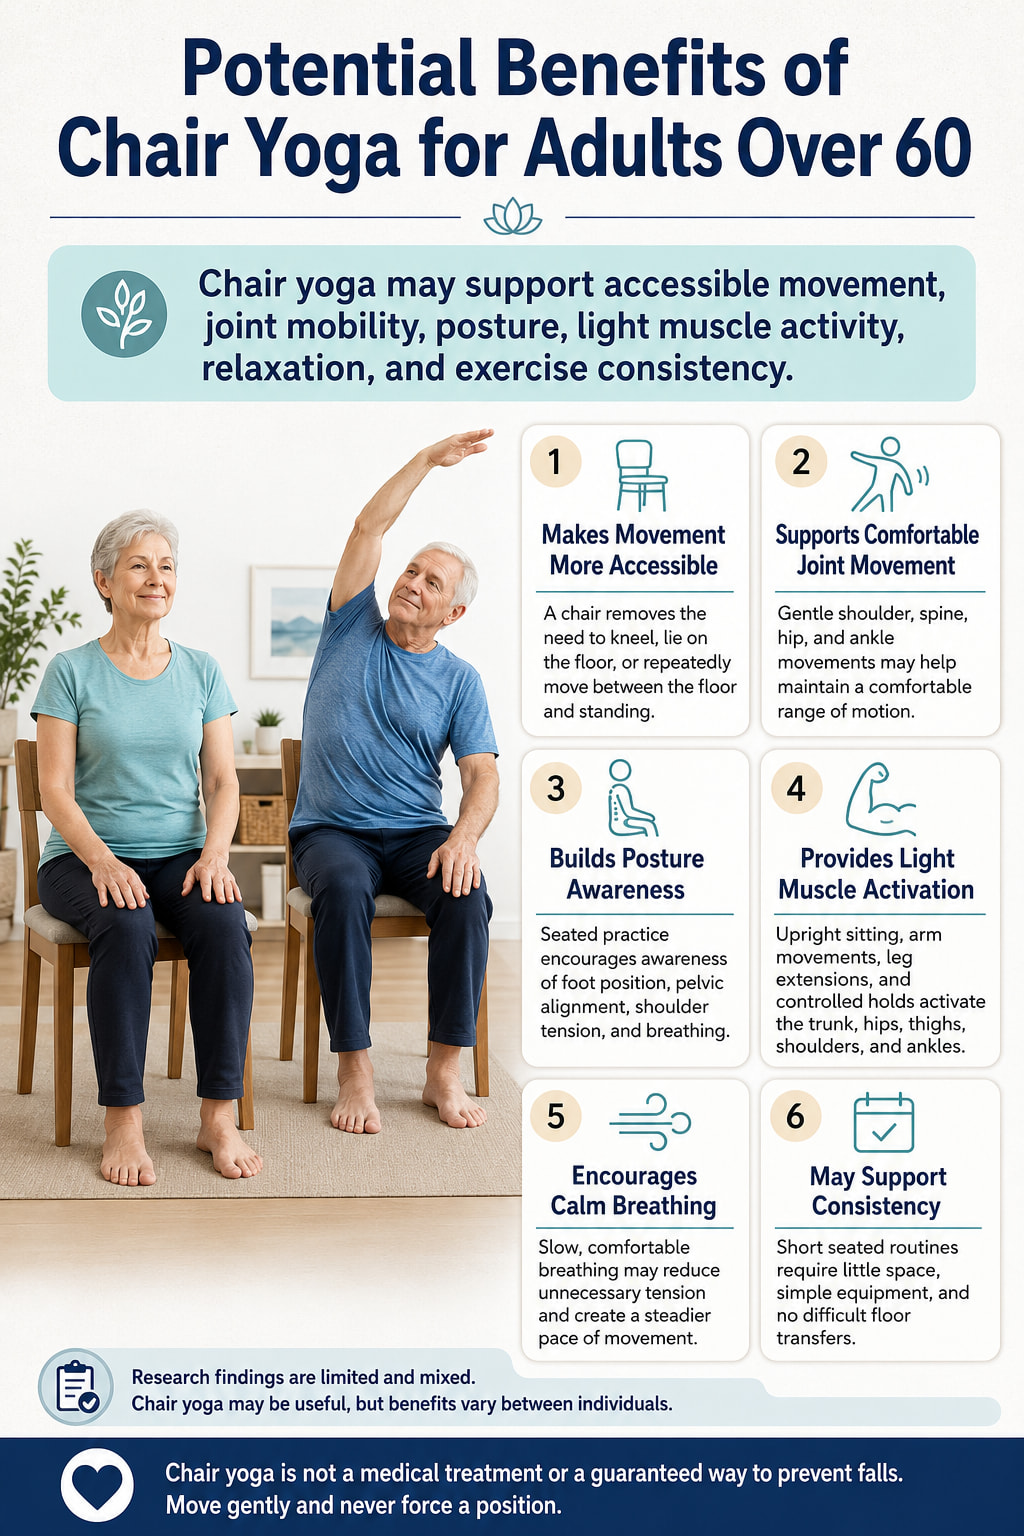
Chair yoga can make gentle movement more accessible for older adults, especially when floor-based exercise is difficult.
- Supports mobility: Gentle movements may help maintain comfortable motion in the shoulders, spine, hips, and ankles.
- Improves posture awareness: Seated practice encourages better awareness of foot position, trunk alignment, and shoulder tension.
- Provides light muscle activity: Upright sitting and controlled arm and leg movements engage the core, back, hips, and legs.
- Encourages relaxed breathing: Slow breathing can help reduce unnecessary tension and create a calmer exercise pace.
- Easy to practice regularly: Chair yoga requires little space, minimal equipment, and no floor transfers.
Research on chair-based exercise suggests possible improvements in physical function, although evidence specifically for chair yoga is still limited and mixed. (Klempel et al., 2021; Park et al., 2017; Tew et al., 2024)
Chair yoga should complement, not replace, appropriate strength, aerobic, and balance exercise.
Before Starting Chair Yoga for Seniors Over 60
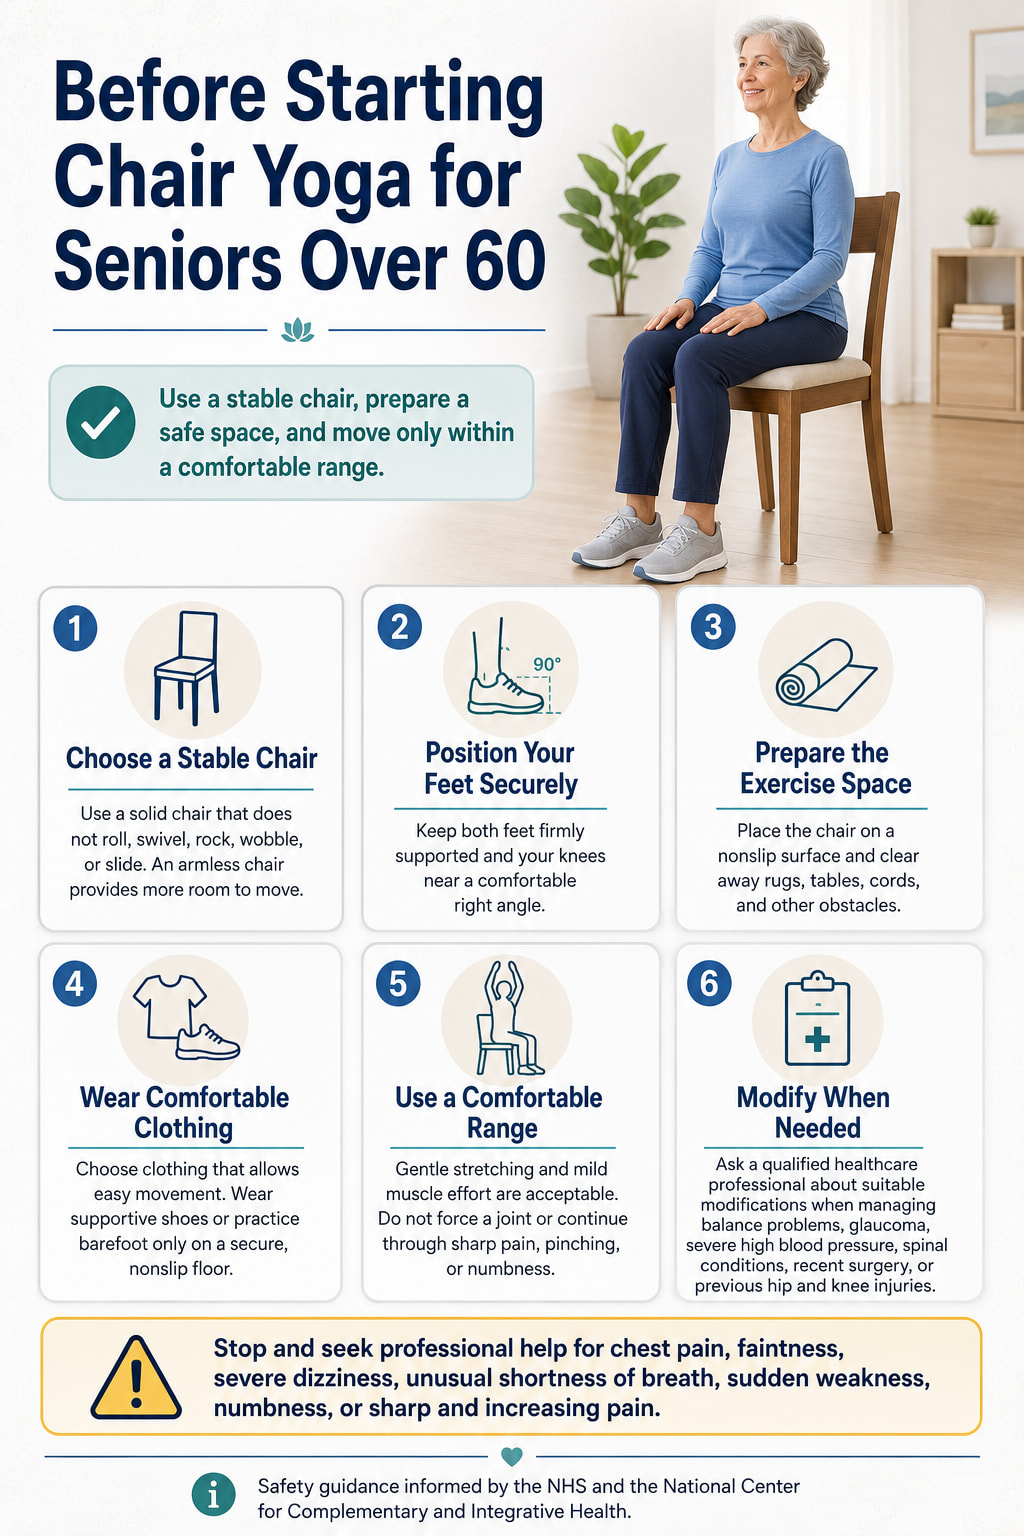
Choose a solid chair that does not have wheels, rock, swivel, or slide across the floor. An armless chair usually provides more space for side bends and arm movements.
Sit with both feet resting firmly on the floor and your knees bent at approximately right angles. The United Kingdom’s National Health Service also recommends using a stable chair without wheels and building seated exercise up gradually. (NHS sitting exercises)
Place the chair on a non-slip surface. Keep enough open space around you so your arms and legs will not strike a wall, table, or other object.
Wear comfortable clothing that does not restrict movement. Supportive shoes may provide more secure floor contact, although some people prefer practicing barefoot when the floor is warm and non-slip.
Move only through a range you can control. A gentle stretch or mild muscular effort is acceptable, but sharp pain, pinching, numbness, or joint pressure is not.
Older adults may need additional yoga modifications, especially when managing balance problems, severe high blood pressure, glaucoma, spinal conditions, or previous knee and hip injuries. The National Center for Complementary and Integrative Health recommends that older adults and people with health conditions discuss their individual needs with an appropriate healthcare professional and qualified instructor. (NCCIH yoga safety guidance)
Stop exercising and seek professional help if you experience chest pain, unusual shortness of breath, faintness, severe dizziness, sudden weakness, numbness, or sharp and increasing pain.
Chair Yoga Exercises at a Glance
| Exercise | Main purpose | Beginner target | |
|---|---|---|---|
| 1 | Seated Mountain Pose with Breathing | Posture and breathing control | 4–6 breaths |
| 2 | Shoulder Rolls with Arm Sweeps | Shoulder and upper-back mobility | 5–8 repetitions |
| 3 | Seated Cat-Cow | Gentle spinal mobility | 5–8 repetitions |
| 4 | Seated Crescent Side Bend | Side-body and shoulder mobility | 2–4 breaths per side |
| 5 | Gentle Seated Spinal Twist | Controlled upper-back rotation | 2–4 breaths per side |
| 6 | Seated Figure-Four Stretch | Hip mobility | 15–20 seconds per side |
| 7 | Seated Staff Pose with Ankle Flex | Thigh activation and ankle mobility | 5–8 repetitions per side |
Chair Yoga for Seniors Over 60: 7 Gentle Exercises
The seven gentle chair yoga exercises below support mobility, posture, breathing, and light muscle activation without requiring floor work. Perform each movement slowly, stay within a comfortable range, and use a sturdy chair for support.
1. Seated Mountain Pose with Slow Breathing
Best for: Establishing upright posture, reducing unnecessary upper-body tension, and preparing for the rest of the routine.
Muscles worked: Spinal extensors, abdominal muscles, diaphragm, pelvic-floor muscles, and smaller postural muscles around the trunk and shoulders.
Equipment needed: A sturdy armless chair without wheels.
Why it stands out: Seated Mountain Pose creates the foundation for every exercise that follows. It teaches you to sit tall without becoming rigid, over-arching the lower back, or pulling the shoulders too far backward.
Suggested sets and reps: Hold the position for four to six comfortable breaths. Complete one or two rounds.
Rest: Rest for 15 to 30 seconds or return to normal breathing before continuing.
How to do it:
- Sit near the middle or front half of the chair.
- Place your feet approximately hip-width apart with the toes pointing forward.
- Stack your knees over your ankles as comfortably as possible.
- Rest your hands on your thighs with the palms facing down or up.
- Lengthen the top of your head toward the ceiling without lifting your chin.
- Allow your shoulders to move gently away from your ears.
- Inhale slowly through your nose if comfortable.
- Exhale without forcing all the air from your lungs.
- Maintain the upright position for four to six breaths.
Common mistakes: Lifting the chin, shrugging the shoulders, forcing the chest upward, pressing the feet unevenly into the floor, or taking breaths that feel strained.
Expert tip: Think about becoming taller rather than pulling your shoulders backward. Good posture should feel supported and relaxed, not stiff.
2. Shoulder Rolls with Gentle Arm Sweeps
Best for: Warming up the shoulders, upper back, chest, elbows, and arms before larger movements.
Muscles worked: Deltoids, trapezius, rhomboids, rotator-cuff muscles, biceps, triceps, and muscles around the shoulder blades.
Equipment needed: A sturdy chair.
Why it stands out: Many people carry unnecessary tension around the neck and shoulders. Combining shoulder rolls with controlled arm sweeps introduces movement without requiring the arms to remain overhead.
Suggested sets and reps: Perform five to eight shoulder rolls followed by five to eight arm sweeps.
Rest: Rest for 15 to 20 seconds between shoulder rolls and arm sweeps if needed.
How to do it:
- Begin in Seated Mountain Pose with your arms relaxed beside you.
- Slowly lift both shoulders toward your ears.
- Move the shoulders backward, then gently down.
- Continue in a smooth circular motion.
- Reverse direction after completing the planned repetitions.
- Return your arms to your sides.
- Inhale as you sweep the arms outward and upward.
- Stop before the shoulders shrug or become uncomfortable.
- Exhale as you lower the arms with control.
Common mistakes: Moving too quickly, making forceful neck movements, arching the lower back, pushing painful shoulders overhead, or holding the breath.
Expert tip: The arms do not need to reach above the head. Stop at the highest point where your shoulders remain relaxed.
3. Seated Cat-Cow
Best for: Gentle spinal movement, pelvic control, breathing coordination, and reducing stiffness after prolonged sitting.
Muscles worked: Spinal extensors, abdominal muscles, multifidus, upper-back muscles, and muscles that control pelvic positioning.
Equipment needed: A sturdy chair.
Why it stands out: Seated Cat-Cow moves the spine through a controlled range without requiring hands-and-knees floor positioning. The goal is smooth motion, not maximum rounding or arching.
Suggested sets and reps: Perform five to eight slow repetitions.
Rest: Rest for 20 to 30 seconds after completing the set.
How to do it:
- Sit upright with your feet planted and hands resting on your thighs.
- Inhale as you gently tilt the pelvis forward.
- Allow the chest to lift slightly while keeping the neck long.
- Avoid throwing the head backward.
- Exhale as you gently tilt the pelvis backward.
- Let the upper back round slightly without collapsing deeply.
- Keep both feet in contact with the floor.
- Continue alternating between the two positions at a comfortable pace.
Common mistakes: Forcing a deep spinal curve, lifting the feet, pulling aggressively with the hands, moving only the neck, or rushing through the exercise.
Expert tip: Imagine the pelvis initiating the movement while the rest of the spine follows gradually.
4. Seated Crescent Side Bend
Best for: Improving comfortable side-body movement and reaching ability.
Muscles worked: Obliques, quadratus lumborum, latissimus dorsi, intercostal muscles, deltoids, and spinal stabilizers.
Equipment needed: A sturdy chair.
Why it stands out: The exercise lengthens one side of the trunk while the other side remains active. It may be useful for practicing controlled reaching without twisting or collapsing forward.
Suggested sets and reps: Hold for two to four breaths per side. Complete one or two rounds.
Rest: Return to the center and take one normal breath before changing sides.
How to do it:
- Sit tall with both feet flat on the floor.
- Place your right hand on the right side of the chair.
- Raise your left arm to a comfortable height.
- Inhale and lengthen through the left side of your body.
- Exhale and lean slightly toward the right.
- Keep your chest facing forward instead of rotating downward.
- Keep both sides of your pelvis in contact with the chair.
- Breathe comfortably for two to four breaths.
- Return to the center and repeat on the other side.
Common mistakes: Lifting one side of the pelvis, rotating the chest toward the floor, forcing the raised arm backward, or collapsing into the supporting shoulder.
Expert tip: Think about reaching up before reaching sideways. A small, lengthened bend is more useful than a deep collapsed position.
5. Gentle Seated Spinal Twist
Best for: Controlled upper-back rotation and practicing trunk movement without shifting the hips.
Muscles worked: Obliques, multifidus, spinal rotators, erector spinae, and muscles around the shoulder blades.
Equipment needed: A sturdy chair.
Why it stands out: Daily activities frequently require turning to look beside or behind you. This exercise practices gentle rotation while keeping the pelvis and feet stable.
Suggested sets and reps: Hold for two to four breaths per side or perform three slow repetitions in each direction.
Rest: Return to the center and take one breath before turning to the opposite side.
How to do it:
- Sit tall with both feet flat and your knees pointing forward.
- Cross your arms over your chest or rest your hands on your thighs.
- Inhale and lengthen through the top of your head.
- Exhale and slowly rotate your rib cage toward the right.
- Keep your hips and knees facing forward.
- Stop when you feel a gentle, controlled rotation.
- Maintain normal breathing without pulling yourself farther.
- Return to the center.
- Repeat on the left side.
Common mistakes: Pulling against the chair, moving the knees, rotating through pain, leaning backward, or turning the head much farther than the trunk.
Expert tip: Let your breastbone lead the movement. The head should follow the chest rather than twisting independently.
People with osteoporosis, previous spinal fractures, or other spinal conditions may need to limit or avoid forceful bending and twisting. Use a small range and seek individualized guidance when necessary. (Mayo Clinic osteoporosis exercise guidance)
6. Seated Figure-Four Stretch
Best for: Gentle hip mobility and stretching the gluteal and deep hip muscles.
Muscles worked: Gluteus maximus, gluteus medius, piriformis, deep hip rotators, and hip stabilizers.
Equipment needed: A sturdy chair.
Why it stands out: The seated position allows you to adjust the stretch without placing your full body weight on the hip or moving onto the floor.
Suggested sets and reps: Hold for 15 to 30 seconds per side. Complete one or two rounds.
Rest: Lower the foot and rest for 15 to 20 seconds before changing sides.
How to do it:
- Sit toward the front half of the chair with both feet flat.
- Lift your right foot slowly.
- Place the right ankle across the left thigh or lower on the left shin.
- Keep the right foot gently flexed.
- Allow the right knee to move outward without pressing it down.
- Sit tall and breathe normally.
- Remain upright or hinge forward slightly from the hips.
- Stop when you feel a comfortable stretch around the right hip.
- Lower the foot with control and repeat on the other side.
Common mistakes: Pressing forcefully on the knee, rounding deeply through the back, twisting the pelvis, holding the breath, or continuing through hip or knee pain.
Expert tip: The crossed leg does not need to become parallel with the floor. Your comfortable hip range determines the position.
People with a recent hip replacement, specific movement restrictions, or significant hip or knee pain should obtain professional guidance before using a figure-four position.
7. Single-Leg Seated Staff Pose with Ankle Flex
Best for: Light thigh activation, ankle mobility, hamstring awareness, and finishing the routine with controlled lower-body movement.
Muscles worked: Quadriceps, hamstrings, calf muscles, tibialis anterior, hip flexors, and trunk stabilizers.
Equipment needed: A sturdy chair.
Why it stands out: This exercise combines a gentle yoga position with active ankle movement. It trains the leg without requiring standing balance.
Suggested sets and reps: Perform five to eight ankle points and flexes per leg. Hold the final flexed position for two or three breaths if comfortable.
Rest: Rest for 15 to 20 seconds before changing legs.
How to do it:
- Sit tall with both feet flat on the floor.
- Slide your right foot forward until the heel rests on the floor.
- Straighten the right knee only as far as comfortable.
- Keep the chest upright and avoid rounding toward the leg.
- Point the toes gently away from you.
- Draw the toes back toward the shin.
- Continue for five to eight controlled repetitions.
- Hold the toes-back position for two comfortable breaths if desired.
- Return the foot to the floor and repeat with the left leg.
Common mistakes: Locking the knee aggressively, leaning backward, rounding the spine to reach the foot, moving the ankle too quickly, or forcing the toes toward the shin.
Expert tip: Think about lengthening the leg forward rather than pushing the knee downward.
10-Minute Beginner Chair-Yoga Routine
Complete the exercises in the following order. Keep the effort around 2 to 4 on a 10-point scale, where 10 represents your maximum effort.
| Exercise | Amount |
|---|---|
| Seated Mountain Pose | 4–6 breaths |
| Shoulder Rolls | 5 each direction |
| Gentle Arm Sweeps | 5 repetitions |
| Seated Cat-Cow | 6 repetitions |
| Seated Crescent Side Bend | 3 breaths per side |
| Gentle Seated Spinal Twist | 3 breaths per side |
| Seated Figure-Four Stretch | 15–20 seconds per side |
| Seated Staff Pose with Ankle Flex | 6 repetitions per side |
| Relaxed Seated Breathing | 30–60 seconds |
Move directly from one exercise to the next when you feel comfortable. Take 15 to 30 seconds of rest whenever your breathing becomes strained, your posture becomes difficult to control, or you need to reposition your feet.
Beginners can complete one round. After several weeks of comfortable practice, you may repeat selected movements or complete a second round.
How Often Should Seniors Over 60 Do Chair Yoga?
A practical starting schedule is two to four short sessions per week. Each session can last approximately 10 to 15 minutes.
Some people may enjoy practicing gentle breathing and mobility exercises daily. Daily practice is not required, and more is not automatically better. Your frequency should reflect your current activity level, recovery, health conditions, and response to the exercises.
Reduce the range, repetitions, or frequency if you experience lingering joint discomfort, unusual fatigue, or symptoms that become worse after the routine.
How to Progress Chair Yoga Safely
Progress should come from better control before greater range.
Begin by learning the positions and completing one comfortable round. Once you can maintain steady breathing and stable posture, add one or two repetitions to the moving exercises or one additional breath to the held positions.
You can then progress by slowing each repetition, improving your seated posture, extending selected holds, or completing a second round.
Chair-supported standing exercises may be introduced later when appropriate, but they should be considered a separate progression. Examples include a supported Mountain Pose, supported heel raise, or short supported Warrior stance.
Do not use deeper bends, more aggressive twists, or faster movement as your main form of progression.
Common Chair-Yoga Mistakes to Avoid
Using an unstable chair
A rolling, folding, swiveling, or lightweight chair may move unexpectedly. Use a solid chair placed on a secure surface.
Forcing a stretch
A deeper position is not always a better position. Stop when you feel gentle tension and can continue breathing normally.
Holding the breath
Breath-holding often appears when a position is too difficult. Reduce the range and return to slow, comfortable breathing.
Shrugging during arm movements
Only raise the arms as high as you can without pulling the shoulders toward the ears.
Rounding deeply during hip stretches
During Figure-Four or Staff Pose, keep the spine long and hinge from the hips when leaning forward.
Pulling into a twist
Using the chair to force rotation can place unnecessary stress on the spine. Create the movement with your trunk muscles and stop at a comfortable range.
Comparing your range with someone else
Hip structure, injury history, flexibility, and experience differ from one person to another. Use your own controlled range as the standard.
Progressing too quickly
Increase only one variable at a time, such as repetitions, hold duration, range, or number of rounds.
Is Chair Yoga Enough Exercise for Seniors?
Chair yoga can be a valuable part of an active lifestyle, but a gentle seated routine may not provide enough cardiovascular, strength, or balance training to serve as a complete fitness program.
The Centers for Disease Control and Prevention’s current guidelines for adults 65 and older recommend working toward at least 150 minutes of moderate-intensity aerobic activity per week, muscle-strengthening activity on at least two days, and activities that improve balance. People who cannot meet the full recommendations should be as active as their abilities and health conditions allow.
Depending on your abilities, a balanced weekly plan might combine chair yoga with walking, water exercise, stationary cycling, resistance-band exercises, dumbbell training, sit-to-stands, or professionally selected balance exercises.
Chair yoga works particularly well as a morning mobility routine, a warm-up, a recovery-day activity, or a movement break after prolonged sitting.
Frequently Asked Questions
Is chair yoga safe for seniors over 60?
Chair yoga can be appropriate for many older adults when exercises are properly modified and performed with a stable chair. However, age alone does not determine whether a movement is safe.
People with recent surgery, severe osteoporosis, spinal fractures, uncontrolled blood pressure, glaucoma, significant balance problems, or movement restrictions should seek individualized guidance before starting.
Can complete beginners do chair yoga?
Yes. The seated format removes floor transfers and reduces standing-balance demands. Beginners should start with small ranges, short holds, and one round of the routine.
Can chair yoga improve balance?
Some chair-yoga movements may strengthen postural awareness and trunk control, but a fully seated routine does not directly challenge standing balance enough to replace a structured balance program.
People who can stand safely may eventually add chair-supported balance exercises under appropriate guidance.
Is chair yoga good for arthritis?
Gentle movement may feel comfortable and manageable for some people with arthritis. Research involving older adults with lower-extremity osteoarthritis has reported promising results, but chair yoga does not cure or treat arthritis.
Avoid forcing painful joints, and ask a qualified healthcare professional about movements that match your symptoms and limitations.
Can seniors with osteoporosis do chair yoga?
Many people with osteoporosis can remain physically active, but some yoga movements may require modification. Forceful spinal bending, deep rounded forward folds, and aggressive twisting may be inappropriate, particularly for someone with previous vertebral fractures.
Seek guidance from a clinician or physical therapist familiar with osteoporosis when choosing exercises.
Can chair yoga help with weight loss?
Chair yoga uses energy, but a short gentle session is unlikely to create substantial weight loss on its own. Weight management usually requires a broader approach that includes nutrition, overall physical activity, sleep, and sustainable habits.
Should chair yoga be done barefoot or with shoes?
Either may be appropriate. Supportive shoes can improve grip and provide more stability for some participants. Bare feet may make ankle movement easier when the floor is warm, clean, and non-slip.
Choose the option that provides the most secure and comfortable foot contact.
Conclusion
Chair yoga for seniors over 60 offers an accessible way to practice gentle mobility, breathing, posture, and light muscle activation from a stable seated position.
Start with one controlled round of the seven exercises. Keep your range comfortable, breathe continuously, and progress by improving control before increasing duration or difficulty. For a more complete weekly fitness plan, combine chair yoga with appropriate aerobic, strengthening, and balance activities.
References
- Centers for Disease Control and Prevention: Physical Activity Guidelines for Older Adults
- National Center for Complementary and Integrative Health: Yoga Effectiveness and Safety
- National Health Service: Sitting Exercises
- Klempel et al.: The Effect of Chair-Based Exercise on Physical Function in Older Adults
- Park et al.: Chair Yoga for Older Adults With Lower-Extremity Osteoarthritis
- Tew et al.: Chair-Based Yoga for Older Adults With Multiple Long-Term Conditions
- Mayo Clinic: Exercising Safely With Osteoporosis
This content is for informational purposes only and is not a substitute for professional medical advice.