Foam roller exercises for seniors are gentle self-massage movements that may help ease muscle stiffness, support mobility, and make daily movement feel more comfortable when done with light pressure and control. A foam roller is not a cure for pain or a replacement for strength, balance, or walking, but it can be a useful tool before exercise, after activity, or during a short mobility routine.
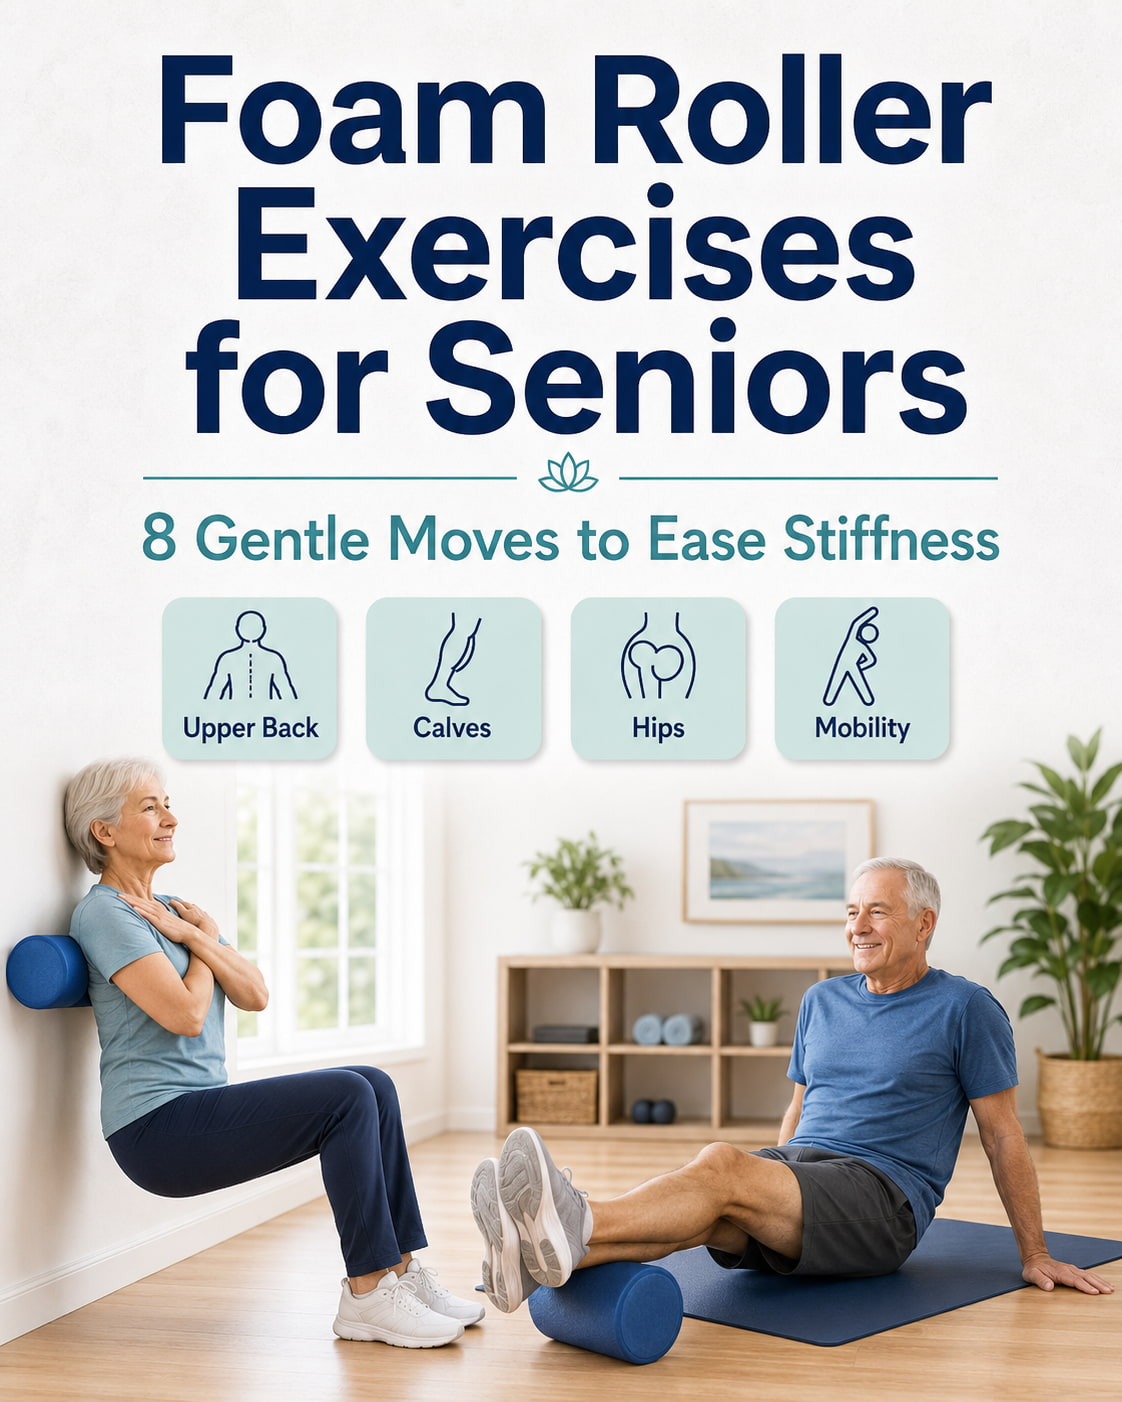
This guide covers senior-friendly foam roller exercises, how to do them safely, which areas to avoid, and how to build a simple routine without using aggressive pressure.
Foam Roller Exercises for Seniors: What They Do
Foam rolling is a form of self-myofascial release. In simple terms, you use a foam cylinder to apply gentle pressure to tight or stiff muscle areas. The goal is not to crush the muscle or force pain. The goal is to create enough pressure to help the area relax, improve body awareness, and make movement feel smoother.
The Cleveland Clinic describes foam rolling as a technique that may help with muscle tightness, soreness, inflammation, range of motion, blood flow, recovery, and relaxation. For seniors, the best approach is slow, light, and controlled.
Foam rolling works best as part of a bigger movement plan. The CDC recommends that adults age 65 and older include aerobic activity, muscle-strengthening activity, and balance work each week. Foam rolling can support that plan, but it should not replace regular exercise.
Safety Rules Before Seniors Use a Foam Roller
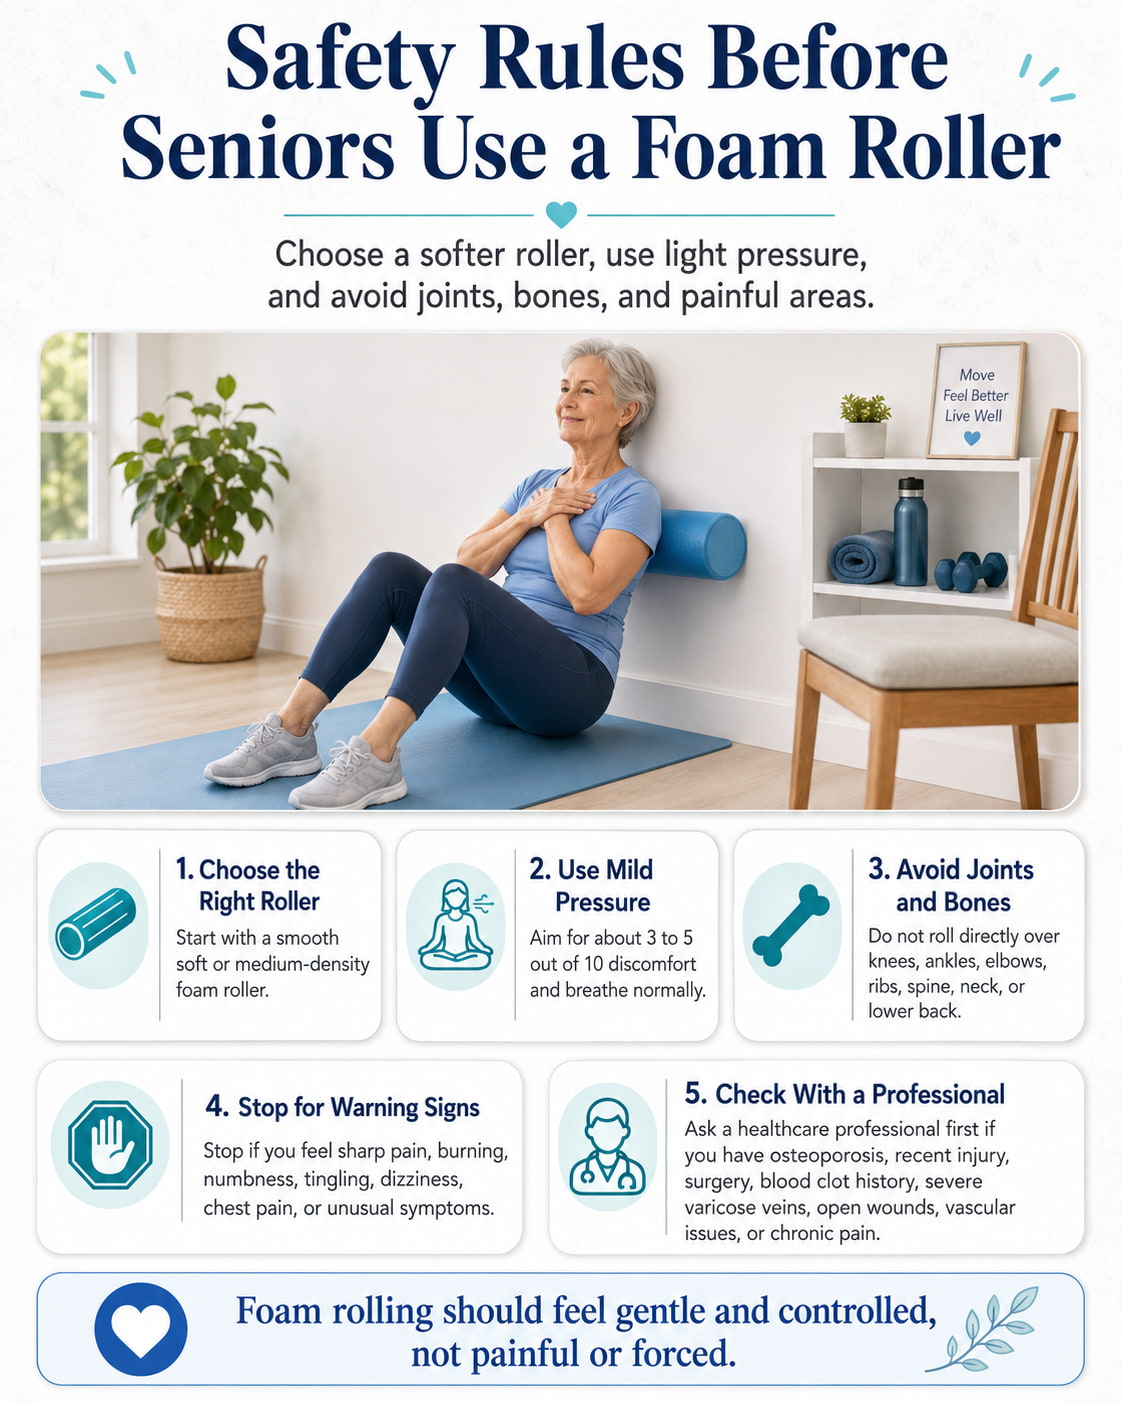
Start with a soft or medium-density foam roller. A very hard, textured roller can feel too intense for beginners and may encourage too much pressure. A smooth roller is usually easier to control.
Use mild to moderate pressure. A good target is about 3 to 5 out of 10 discomfort. You should be able to breathe normally and relax your muscles. Sharp pain, burning, numbness, tingling, dizziness, chest pain, or unusual symptoms are signs to stop.
Avoid rolling directly over joints, bones, the neck, the front of the throat, the ribs, the stomach, and the lower back. Use the roller on muscle areas, not on the knee, ankle, elbow, spine, or bony points.
Check with a healthcare professional before foam rolling if you have osteoporosis, a recent fracture, a recent surgery, blood clot history, deep vein thrombosis, open wounds, severe varicose veins, acute inflammation, unexplained swelling, a torn muscle, a vascular condition, or a chronic pain condition. ACE also advises checking with a doctor first if you have heart or vascular illness or chronic pain conditions.
How Long Should Seniors Foam Roll?
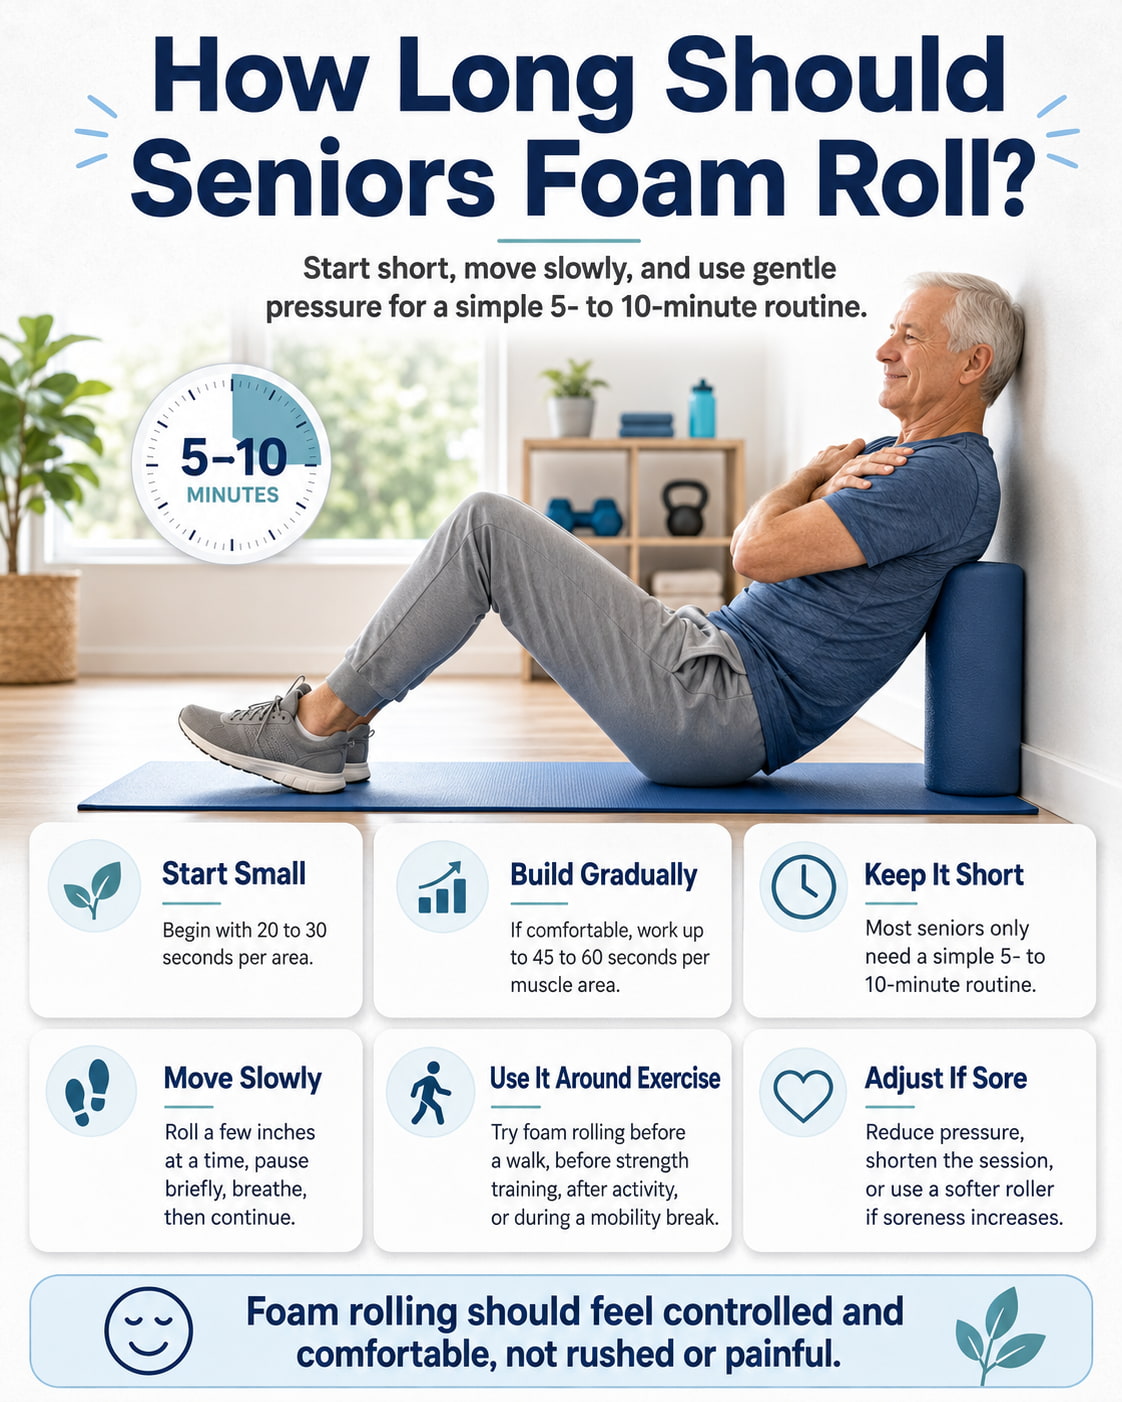
Start with 20 to 30 seconds per area. If that feels comfortable, build toward 45 to 60 seconds per area. Most seniors do not need long sessions. A simple 5- to 10-minute routine is enough for general stiffness.
Move slowly. You can roll a few inches at a time, pause on a mildly tender area, breathe, and then move again. Do not rush back and forth quickly. Slow pressure is easier to control and usually feels better.
Foam rolling can be done before a walk, before a strength workout, after exercise, or during a daily mobility break. If you feel more sore the next day, reduce the pressure, shorten the session, or use a softer roller.
How to Choose a Foam Roller for Seniors
A smooth, medium-length foam roller is a good starting point. A 36-inch roller gives more support for upper-back work, while a shorter roller is easier to store and move around.
For most seniors, a softer or medium-density roller is better than a very firm roller. A half-round foam roller can also be useful for people who need more stability because it does not roll away as easily.
Use a yoga mat, carpeted floor, sturdy chair, wall, or countertop nearby for support. If getting down to the floor is difficult, choose wall-based or seated foam roller exercises first.
8 Foam Roller Exercises for Seniors
Start with gentle, controlled foam roller exercises that feel comfortable and easy to adjust.
These 8 senior-friendly moves focus on large muscle areas to help ease stiffness, support mobility, and improve daily movement.
1. Wall Upper Back Roll
Best for: Seniors who want a floor-free way to ease upper-back stiffness from sitting, reading, driving, or using a computer.
Muscles worked: Upper back, mid traps, rhomboids, rear shoulders, and the muscles around the thoracic spine.
Equipment needed: Foam roller and a clear wall.
Why it stands out: This is one of the most senior-friendly foam roller exercises because it keeps you standing. The wall controls the pressure, and you can step closer or farther away to adjust intensity.
Suggested sets and reps: Do 1 to 2 rounds of 30 to 60 seconds. Move slowly and keep the pressure mild.
Rest: Rest 20 to 30 seconds between rounds or as needed.
How to do it:
- Stand with your back facing a wall.
- Place the foam roller horizontally between your upper back and the wall.
- Keep your feet about hip-width apart and slightly away from the wall.
- Bend and straighten your knees a little to roll the foam roller up and down your upper back.
- Stay away from your neck and lower back.
- Breathe slowly and keep the movement smooth.
Common mistakes: Rolling too high onto the neck, leaning too hard into the roller, shrugging the shoulders, or arching the lower back.
Expert tip: Think of gently massaging the muscles beside the upper spine, not pressing directly into the spine.
Exercise variations: You can turn slightly to one side to focus more on the shoulder blade area.
Easier variation: Use a folded towel against the wall instead of a foam roller.
Harder variation: Step your feet slightly farther from the wall and pause briefly on tight spots.
2. Floor Upper Back Roll
Best for: Seniors who can safely get on and off the floor and want a stronger upper-back release.
Muscles worked: Upper back, thoracic spine area, mid traps, rhomboids, rear shoulders, and postural muscles.
Equipment needed: Foam roller and exercise mat.
Why it stands out: This version gives more pressure than the wall version and may help the upper back feel looser before posture, walking, or strength exercises.
Suggested sets and reps: Do 1 round of 30 to 45 seconds to start. Build to 1 to 2 rounds of 60 seconds if comfortable.
Rest: Rest 30 to 45 seconds before standing up or changing positions.
How to do it:
- Sit on the floor with your knees bent and feet flat.
- Place the foam roller across your upper back, below your shoulder blades.
- Support your head lightly with your hands if needed.
- Keep your hips on the floor or lift them slightly if comfortable.
- Use your legs to roll your upper back slowly over the roller.
- Stop before the roller reaches your neck or lower back.
Common mistakes: Rolling the lower back, pulling the neck forward, moving too fast, or holding the breath.
Expert tip: Keep the movement small. The upper back does not need aggressive pressure to respond.
Exercise variations: Turn slightly toward one shoulder blade to target one side at a time.
Easier variation: Do the wall upper back roll instead.
Harder variation: Lift the hips slightly and move slower through the stiffest area.
3. Seated Calf Roll
Best for: Seniors with lower-leg stiffness from walking, standing, or sitting for long periods.
Muscles worked: Calves, including the gastrocnemius and soleus.
Equipment needed: Foam roller and a sturdy chair or floor mat.
Why it stands out: Tight calves can make walking, stairs, and ankle movement feel less comfortable. This exercise is simple, controlled, and easy to modify.
Suggested sets and reps: Roll each calf for 30 to 60 seconds. Do 1 to 2 rounds per side.
Rest: Rest 15 to 30 seconds between sides.
How to do it:
- Sit on a sturdy chair or on the floor.
- Place the foam roller under one calf.
- Keep the ankle relaxed and the knee slightly bent if needed.
- Slowly move the leg forward and backward so the roller massages the calf.
- Stay between the back of the ankle and below the knee.
- Switch sides and repeat.
Common mistakes: Rolling directly behind the knee, pressing into the Achilles tendon, rushing the movement, or adding too much pressure too soon.
Expert tip: Point and flex your foot gently while pausing on a tight calf area to add controlled movement.
Exercise variations: Turn the leg slightly inward or outward to reach different calf areas.
Easier variation: Use your hands to move the roller instead of moving your whole leg.
Harder variation: Use the floor version and gently lift your hips to add pressure.
4. Seated Hamstring Roll
Best for: Seniors who feel stiffness in the back of the thighs after sitting, walking, or light exercise.
Muscles worked: Hamstrings and nearby soft tissue at the back of the thigh.
Equipment needed: Foam roller, sturdy chair, or exercise mat.
Why it stands out: The hamstrings influence hip and knee movement. Gentle rolling may help the back of the thighs feel less stiff before walking, stretching, or lower-body exercise.
Suggested sets and reps: Roll each side for 30 to 60 seconds. Do 1 round to start.
Rest: Rest 20 to 30 seconds between sides.
How to do it:
- Sit on a chair or floor with one leg extended.
- Place the foam roller under the back of your thigh.
- Keep your hands supported beside you.
- Slowly move your thigh over the roller from mid-thigh toward above the knee.
- Avoid rolling directly behind the knee.
- Switch sides and repeat.
Common mistakes: Rolling too close to the knee joint, locking the knee hard, rounding the back, or forcing pressure into a painful spot.
Expert tip: Keep your thigh relaxed. If you tense the leg, reduce pressure until you can breathe normally.
Exercise variations: Slightly rotate the thigh inward or outward to target different parts of the hamstrings.
Easier variation: Use a softer roller or keep more body weight on the chair.
Harder variation: Use the floor version and lift the hips slightly if your shoulders and wrists tolerate it.
5. Gentle Glute Roll
Best for: Seniors with hip, buttock, or sitting-related stiffness who can control the pressure safely.
Muscles worked: Gluteus maximus, gluteus medius, deep hip rotators, and outer hip muscles.
Equipment needed: Foam roller, mat, and optional sturdy chair nearby.
Why it stands out: The glutes help support walking, standing, stair climbing, and getting up from a chair. Gentle rolling can be useful when the hips feel stiff from long periods of sitting.
Suggested sets and reps: Roll each side for 30 to 45 seconds. Do 1 to 2 rounds as tolerated.
Rest: Rest 30 seconds between sides.
How to do it:
- Sit on the foam roller with your knees bent and feet on the floor.
- Place your hands behind you for support.
- Shift your weight slightly onto one glute.
- Roll slowly over the muscle, not the tailbone.
- Keep the pressure mild and controlled.
- Switch sides and repeat.
Common mistakes: Rolling directly on the tailbone, leaning too aggressively, twisting the knee, or forcing the figure-four position.
Expert tip: Keep the movement small. A few slow inches can be more useful than rolling quickly across the whole hip.
Exercise variations: Use the wall version for less pressure or the floor version for more pressure.
Easier variation: Place the foam roller against a wall and gently lean one hip into it.
Harder variation: Cross the ankle over the opposite knee and pause on a mild tender spot for 2 slow breaths.
6. Inner Thigh Roll
Best for: Seniors who feel stiffness through the inner thighs and can safely use the floor or a supported setup.
Muscles worked: Hip adductors and inner thigh muscles.
Equipment needed: Foam roller and mat.
Why it stands out: The inner thighs help with hip control, balance, and lower-body movement. Gentle rolling may help reduce inner-thigh tightness, but this area should be treated carefully.
Suggested sets and reps: Roll each side for 20 to 40 seconds. Do 1 round per side.
Rest: Rest 30 seconds between sides.
How to do it:
- Lie face down or slightly on your side on a mat.
- Bend one knee out to the side and place the foam roller under the inner thigh.
- Support your upper body with your forearms.
- Slowly shift your body so the roller moves along the inner thigh.
- Stay away from the groin and knee joint.
- Switch sides and repeat.
Common mistakes: Rolling too close to the groin, pressing into the knee, forcing the hip open, or using too much pressure.
Expert tip: This should feel gentle. If the position strains your hip, skip it and use a seated inner-thigh stretch instead.
Exercise variations: Use a shorter roller if a long roller feels hard to position.
Easier variation: Use a massage stick or soft roller while seated instead of getting on the floor.
Harder variation: Slow the movement and pause for one relaxed breath on a mild tight spot.
10-Minute Beginner Foam Roller Routine for Seniors
Use this routine 3 to 5 days per week or after walks, light workouts, or long periods of sitting. Keep the effort at 3 to 5 out of 10. The goal is to feel looser, not sore.
| Exercise | Time | Notes |
|---|---|---|
| Wall Upper Back Roll | 60 seconds | Keep pressure light and avoid the neck |
| Seated Calf Roll | 30 seconds per side | Stay away from the ankle and knee |
| Seated Hamstring Roll | 30 seconds per side | Keep the leg relaxed |
| Gentle Glute Roll | 30 seconds per side | Use wall version if floor work is difficult |
| Standing Quadriceps Roll | 30 seconds per side | Do not roll over the kneecap |
| Wall Lat and Side-Back Roll | 30 seconds per side | Avoid ribs and armpit pressure |
| Easy walking or breathing reset | 1 to 2 minutes | Move slowly and check how your body feels |
Progress by adding 5 to 10 seconds per area before adding pressure. If you feel sore the next day, reduce the time or choose a softer roller.
Common Foam Rolling Mistakes Seniors Should Avoid
Using Too Much Pressure
Foam rolling should not feel like a pain test. Strong pressure can make your muscles tense up instead of relax. Start lighter than you think you need.
Rolling Too Fast
Fast rolling is harder to control and often misses the tight areas. Move slowly, pause briefly, and breathe.
Rolling Directly Over Joints or Bones
Avoid knees, ankles, elbows, hip bones, ribs, spine, and the neck. Foam rolling is for soft tissue areas, not joints.
Rolling the Lower Back Directly
The lower back is not a good place for direct foam roller pressure. If your lower back feels stiff, focus on nearby areas such as the upper back, glutes, hips, and thighs, and consider gentle mobility work instead.
Holding Your Breath
Breathing tells you if the pressure is appropriate. If you cannot breathe normally, the pressure is probably too high.
Ignoring Warning Signs
Stop if you feel sharp pain, numbness, tingling, dizziness, chest pain, unusual swelling, or symptoms that do not feel normal for you.
When Should Seniors Foam Roll?
Foam rolling can be useful before a walk or workout because it may help you feel more prepared to move. Keep it short and gentle before exercise.
After activity, foam rolling can be slower and more relaxed. This is a good time to work on calves, hamstrings, quads, glutes, and upper back.
You can also use foam rolling as a daily stiffness break. A few minutes after sitting for a long time may help you move into your next activity more comfortably.
How to Progress Safely
Progress slowly. The first goal is comfort and control. The second goal is consistency. Pressure should come last.
Start with wall and seated versions. Then, if getting on the floor is safe and comfortable, try floor-based variations. Add time before adding pressure. Add harder positions only when you can breathe normally and control your body.
A good progression looks like this: 20 seconds per area, then 30 seconds, then 45 seconds, then 60 seconds. You do not need to roll one muscle group for several minutes to get value.
Who Should Be Careful With Foam Rolling?
Seniors with osteoporosis, recent fractures, blood clot history, deep vein thrombosis, severe varicose veins, open wounds, recent surgery, acute injury, unexplained swelling, or significant pain should talk with a healthcare professional before using a foam roller.
A 2021 expert consensus paper on foam rolling contraindications and cautions identified open wounds and bone fractures as contraindications, while local tissue inflammation and deep vein thrombosis were among the cautions. This does not mean every senior must avoid foam rolling, but it does mean health history matters.
FAQs About Foam Roller Exercises for Seniors
Are foam roller exercises safe for seniors?
Foam roller exercises can be safe for many seniors when pressure is light, movement is slow, and the roller is used on muscle areas instead of joints or bones. Seniors with medical conditions, recent injuries, vascular issues, osteoporosis concerns, or chronic pain should check with a healthcare professional first.
How often should seniors use a foam roller?
Many seniors can start with 2 to 3 days per week. If the body responds well, a short 5- to 10-minute routine can be done more often. Daily foam rolling is not required, and more is not always better.
What type of foam roller is best for older adults?
A smooth, soft or medium-density foam roller is usually best for beginners and older adults. Avoid very hard, textured rollers at first because they can create too much pressure.
Should seniors foam roll before or after exercise?
Both can work. Before exercise, use short and gentle rolling to prepare the muscles. After exercise, use slower rolling to relax tight areas. Foam rolling should support your workout, not replace warm-ups, walking, strength training, or balance work.
What areas should seniors avoid foam rolling?
Avoid rolling directly over the neck, lower back, spine, ribs, stomach, joints, bones, open wounds, swollen areas, or areas with sharp pain. Do not roll directly over the knee, ankle, elbow, or hip bone.
Can foam rolling help stiffness?
Foam rolling may help some people feel less stiff and move more comfortably. Research suggests foam rolling can support short-term range of motion, but results vary. It should be used as one part of a complete movement routine.
Conclusion
Foam roller exercises for seniors should be gentle, controlled, and easy to modify. Start with wall and seated variations, use light pressure, avoid joints and bones, and keep sessions short. The best routine is the one you can do consistently without pain or next-day soreness.
Use foam rolling to support better movement, then pair it with walking, strength training, stretching, and balance exercises for a more complete senior fitness plan.
This content is for informational purposes only and is not a substitute for professional medical advice.
References
- Cleveland Clinic: Should You Try Foam Rolling?
- CDC: Older Adult Activity Guidelines
- ACE Fitness: Foam Rolling 101
- Cheatham et al. 2015: Effects of Self-Myofascial Release Using a Foam Roll or Roller Massager
- Bartsch et al. 2021: Expert Consensus on Foam Rolling Contraindications and Cautions
- Ryu et al. 2024: Effects of Foam Roller-Based Combined Exercise on Functional Fitness, Balance, and Gait in Older Women