Yoga for seniors can provide a gentle, adaptable way to practice mobility, balance, posture, breathing, and muscular control. The best routine is not necessarily the one with the deepest stretches or hardest poses. It is the one you can perform comfortably, consistently, and with appropriate support.
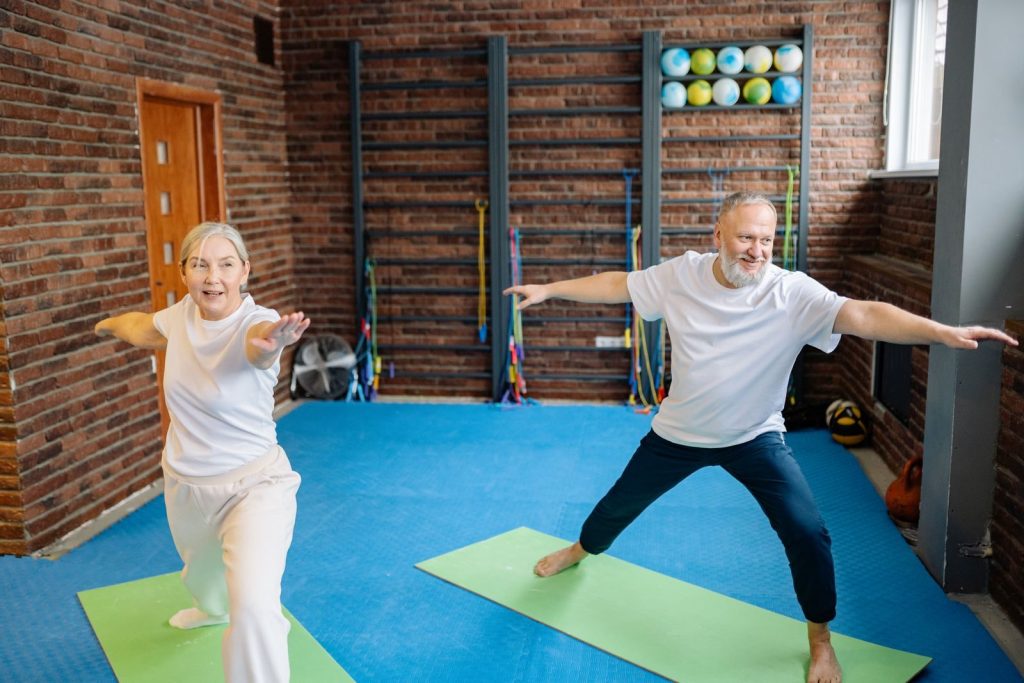
The 10 poses below require no floor work. Most use a sturdy chair or wall, making the routine suitable for older beginners, people returning to exercise, and anyone who prefers additional balance support.
Is Yoga Good for Seniors?
Yoga can be a gentle and adaptable way for older adults to practice mobility, balance, posture, breathing, and light muscular strength. Seated, chair-supported, and wall-supported poses make it easier to adjust each movement to individual comfort and ability.
Research suggests that yoga may improve some measures of mobility and balance in older adults, but it should not be treated as a guaranteed way to prevent falls. Yoga works best as part of a broader activity plan. The CDC physical activity guidelines for older adults also recommend aerobic activity, muscle-strengthening exercise, and regular balance-focused movement.
Potential Benefits of Yoga for Seniors
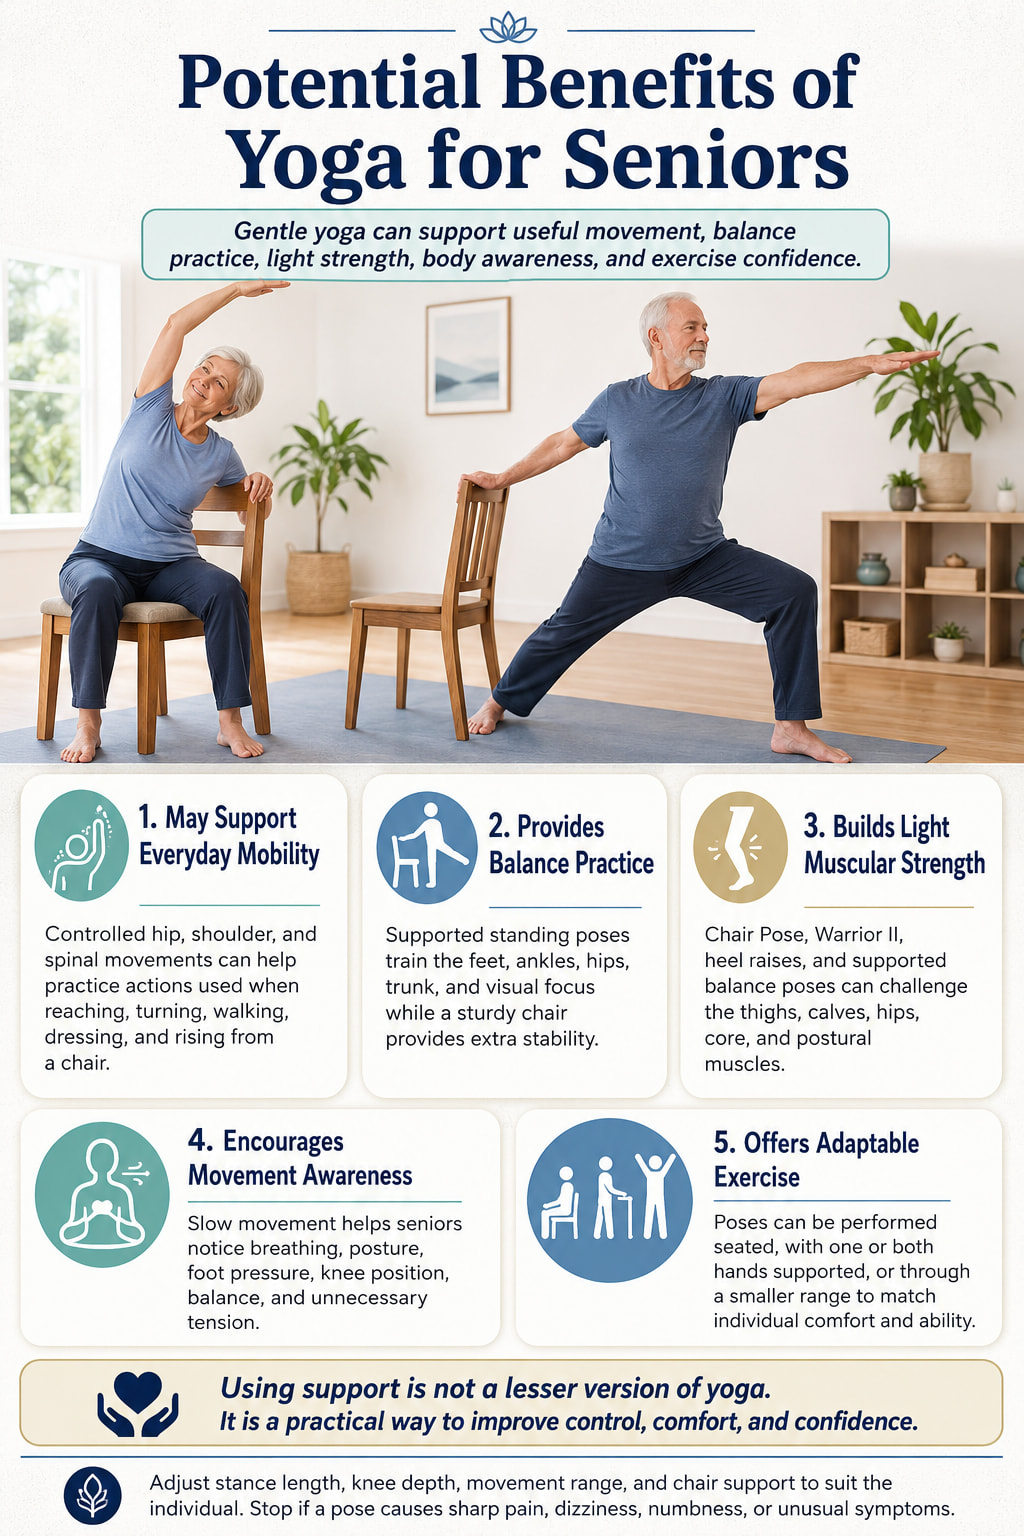
Gentle yoga may help older adults:
- Practice movements used for reaching, turning, walking, and rising from a chair
- Improve flexibility and controlled joint movement
- Practice balance with a chair or wall for support
- Strengthen the legs, hips, calves, core, and postural muscles
- Improve awareness of breathing, posture, and body position
The National Institute on Aging includes yoga among activities that can help older adults practice balance.
Using a chair, reducing the movement range, or performing a pose while seated does not make the exercise less useful. These modifications help match the pose to your current mobility, confidence, and balance.
Safety Tips Before Starting Yoga for Seniors
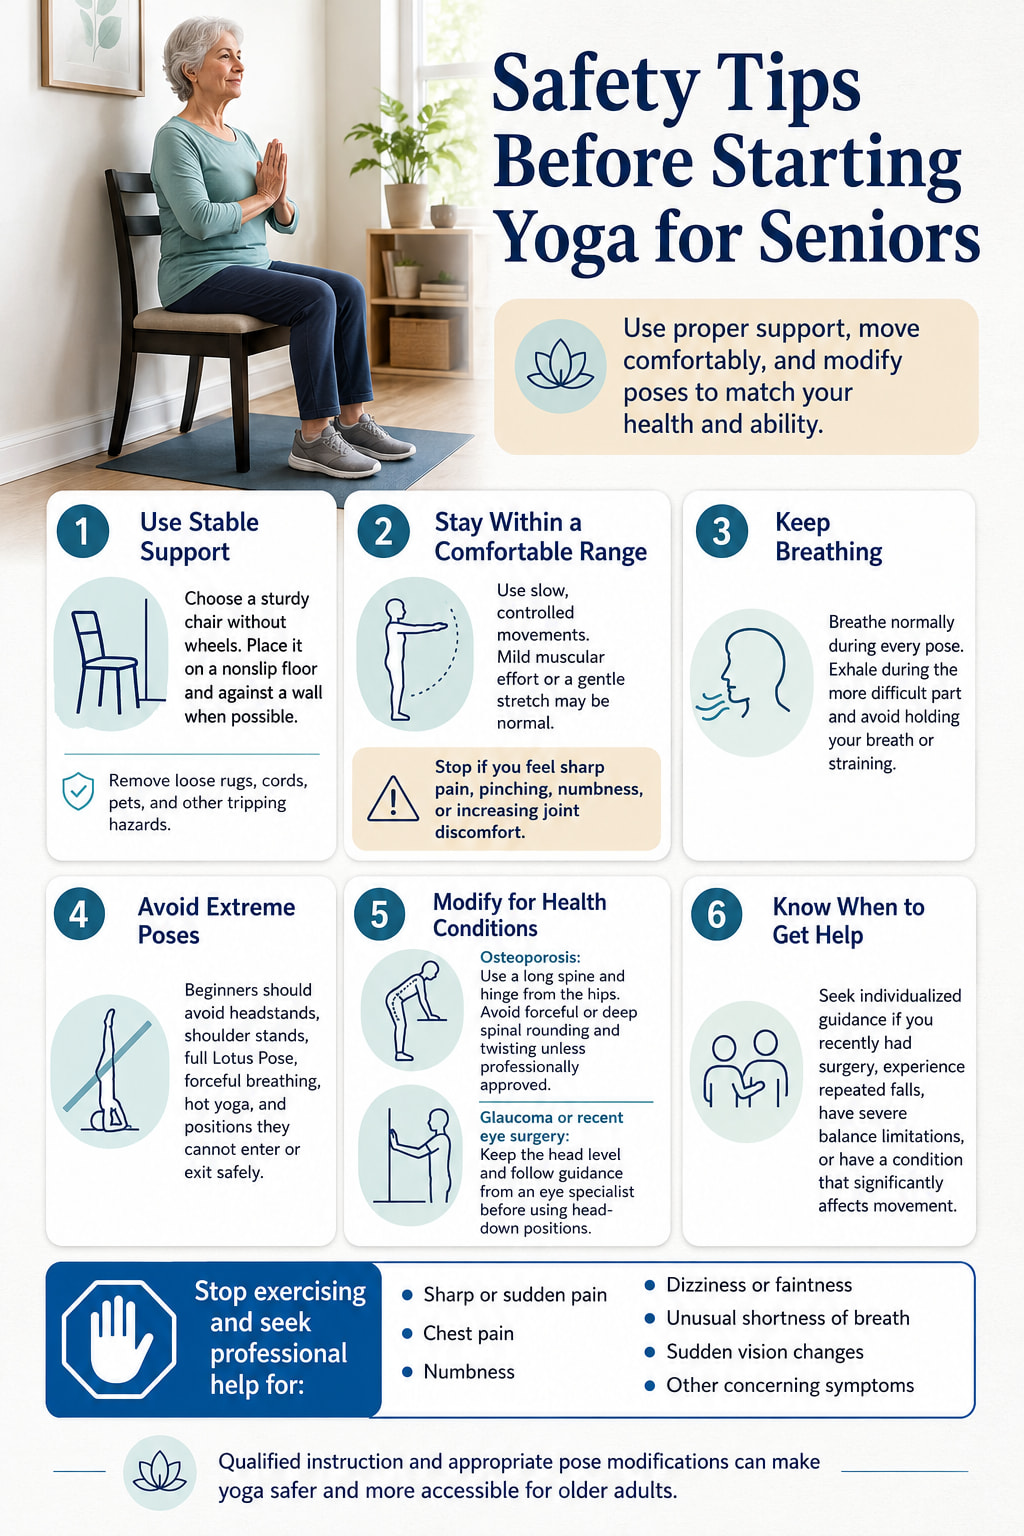
The National Center for Complementary and Integrative Health considers yoga generally safe when practiced appropriately, but injuries can occur.
Use a sturdy chair without wheels on a nonslip floor, preferably placed against a wall. Remove loose rugs, cords, pets, and other tripping hazards before starting.
Move slowly and stay within a comfortable range. Mild muscular effort or a gentle stretch may be normal, but sharp pain, pinching, numbness, or increasing joint discomfort is not.
Keep breathing throughout each pose. Avoid extreme positions, forceful breathing, hot yoga, and movements you cannot enter or exit safely.
People with osteoporosis, glaucoma, recent surgery, repeated falls, or significant balance limitations should seek individualized professional guidance before beginning.
Stop exercising and seek professional help if you experience sharp pain, chest pain, dizziness, faintness, numbness, unusual shortness of breath, or sudden vision changes.
Equipment Needed
You need:
- A sturdy armless chair without wheels
- A clear wall for support
- A nonslip floor
- Comfortable clothing
- Supportive shoes or bare feet with secure traction
- Enough open space to move safely
A yoga block, cushion, or folded towel is optional.
10 Gentle Yoga Poses for Seniors
These 10 gentle yoga poses for seniors use seated, chair-supported, and wall-supported positions to make movement safer and more accessible. Together, they help practice mobility, balance, posture, flexibility, and light muscular strength without requiring floor work.
1. Seated Mountain Pose
Best for: Practicing upright posture, steady breathing, foot placement, and body awareness at the beginning or end of a routine.
Muscles worked: Spinal erectors, deep abdominal muscles, upper-back muscles, hip stabilizers, and muscles of the feet.
Equipment needed: A sturdy chair without wheels.
Suggested sets and reps: Hold for 3 to 5 slow breaths. Repeat once or twice.
Rest: Rest for 15 to 30 seconds between holds if needed.
How to do it:
- Sit near the middle or front of the chair with your feet about hip-width apart.
- Position your knees above your ankles and press both feet gently into the floor.
- Lengthen your spine without forcing your chest upward or arching your lower back.
- Relax your shoulders away from your ears and rest your hands on your thighs.
- Look straight ahead and take 3 to 5 smooth breaths.
Common mistakes: Sliding the feet too far forward, lifting the shoulders, aggressively arching the back, pushing the chin forward, or holding the breath.
Progression or regression: Sit against the backrest for more support. To progress, sit away from the backrest or slowly raise both arms overhead.
2. Seated Cat-Cow
Best for: Gentle spinal movement, trunk awareness, breathing coordination, and warming up the back.
Muscles worked: Abdominal muscles, spinal erectors, upper-back muscles, and muscles surrounding the shoulders and rib cage.
Equipment needed: A sturdy chair.
Suggested sets and reps: Perform 5 to 8 slow repetitions.
Rest: Rest for 20 to 30 seconds after the set.
How to do it:
- Sit upright with your feet flat and your hands resting on your thighs.
- Inhale as you gently tilt the pelvis forward and allow the chest to lift slightly.
- Keep the neck long rather than throwing the head backward.
- Exhale as you gently tilt the pelvis backward and allow the upper back to round slightly.
- Return to a tall neutral position and continue slowly.
Common mistakes: Forcing a large spinal arch, dropping the head backward, collapsing the chest, moving quickly, or creating pain to achieve more range.
Progression or regression: Use small pelvic tilts if spinal movement feels uncomfortable. Increase the range slightly only when the movement remains smooth and pain-free.
3. Seated Side Bend
Best for: Side-body mobility, rib-cage movement, shoulder range of motion, and comfortable overhead reaching.
Muscles worked: Obliques, quadratus lumborum, latissimus dorsi, intercostal muscles, and shoulder muscles.
Equipment needed: A sturdy chair.
Suggested sets and reps: Perform 2 to 4 repetitions per side, holding each position for 2 or 3 breaths.
Rest: Return to the center for one full breath between sides.
How to do it:
- Sit tall with both feet flat and your right hand holding the side of the chair.
- Reach your left arm toward the ceiling or diagonally upward.
- Lengthen through the left side before leaning gently toward the right.
- Keep both sitting bones in contact with the chair.
- Return to the center and repeat on the other side.
Common mistakes: Twisting the chest toward the floor, lifting one side of the pelvis, shrugging the reaching shoulder, or leaning farther than you can control.
Progression or regression: Keep the reaching hand on your hip for an easier version. Progress by holding the overhead reach for up to 20 seconds.
4. Seated Figure-Four Pose
Best for: Hip external-rotation mobility and reducing stiffness around the outer hip.
Muscles worked: Gluteal muscles, deep hip rotators, hip adductors, and postural muscles.
Equipment needed: A sturdy chair. A cushion may improve comfort.
Suggested sets and reps: Hold for 15 to 30 seconds per side. Complete 1 or 2 rounds.
Rest: Rest for 15 to 30 seconds before changing sides.
How to do it:
- Sit tall with both feet flat on the floor.
- Lift your right foot and rest the ankle on the left shin or thigh.
- Keep the right foot gently flexed and allow the right knee to move outward naturally.
- Remain upright or hinge forward slightly from the hips.
- Hold while breathing normally, then switch sides.
Common mistakes: Pushing down forcefully on the knee, rounding the back, twisting the pelvis, holding the breath, or placing the foot higher than the hip comfortably allows.
Progression or regression: Rest the foot lower on the opposite leg for an easier version. Progress by adding a small forward hip hinge while keeping your spine long.
5. Chair-Supported Half Forward Fold
Best for: Hip-hinge practice, shoulder mobility, back-body length, and controlled hamstring mobility.
Muscles worked: Hamstrings, glutes, spinal erectors, latissimus dorsi, shoulders, and abdominal stabilizers.
Equipment needed: A sturdy chair or countertop.
Suggested sets and reps: Hold for 10 to 30 seconds. Repeat 1 or 2 times.
Rest: Stand upright and rest for 30 seconds between holds.
How to do it:
- Stand behind the chair with both hands on the top of the backrest.
- Step backward until your arms are comfortably extended.
- Soften your knees and push your hips backward.
- Keep your back long and your head in line with your spine.
- Stop when you feel a gentle stretch, then return by pressing through your feet and bringing the hips forward.
Common mistakes: Rounding the back, locking the knees, dropping the head, forcing the hips backward, or placing too much body weight on an unstable chair.
Progression or regression: Stand closer to the chair for an easier version. Step slightly farther back or hold longer to progress.
People with osteoporosis, previous spinal fractures, or significant back problems should obtain individualized instruction before using forward-folding movements.
6. Wall Half Downward Dog
Best for: Shoulder mobility, upper-back movement, hip hinging, and gentle calf or hamstring length.
Muscles worked: Latissimus dorsi, shoulders, triceps, spinal erectors, abdominals, hamstrings, and calves.
Equipment needed: A clear wall.
Advanced: Lower the hands slightly only when the position remains comfortable and appropriate.
Rest: Stand upright for 30 to 60 seconds between holds.
How to do it:
- Face the wall and place both palms against it around shoulder height.
- Walk your feet backward while keeping the hands in place.
- Soften your knees and move your hips backward.
- Lengthen the arms and spine without forcing the chest toward the floor.
- Keep the head between or slightly above the arms and return slowly.
Common mistakes: Dropping the head below the heart unnecessarily, locking the knees, forcing the shoulders, allowing the lower back to sag, or stepping too far from the wall.
Progression or regression: Keep the hands higher and stand closer to the wall for an easier version. Step farther back or place the hands slightly lower to progress.
Keep the head level if head-down positions cause dizziness or if you have been advised to avoid them because of glaucoma, blood-pressure concerns, or recent eye surgery.
7. Supported Chair Pose
Best for: Practicing the sit-to-stand pattern and building leg, hip, and trunk strength.
Muscles worked: Quadriceps, glutes, hamstrings, calves, spinal erectors, and abdominal muscles.
Equipment needed: A sturdy chair placed against a wall.
Suggested sets and reps: Perform 1 to 3 sets of 5 to 8 repetitions.
Rest: Rest for 45 to 90 seconds between sets.
How to do it:
- Stand in front of the chair with the seat behind you and your feet about hip-width apart.
- Reach your hips backward while bending your knees.
- Keep your feet planted and your chest comfortably lifted.
- Lower until you touch or sit on the chair.
- Press through your feet to stand without rushing.
Common mistakes: Allowing the knees to collapse inward, dropping heavily onto the seat, lifting the heels, rounding excessively, or placing the feet too far from the chair.
Progression or regression: Use your hands or place a firm cushion on the seat for an easier version. Progress by lightly touching the chair without sitting fully.
8. Chair-Supported Warrior II
Best for: Hip mobility, lateral leg strength, posture, weight shifting, and lower-body endurance.
Muscles worked: Quadriceps, glutes, hip adductors, calves, shoulders, and trunk stabilizers.
Equipment needed: A sturdy chair.
Suggested sets and reps: Hold for 10 to 20 seconds per side or perform 4 to 6 slow bend-and-straighten repetitions.
Rest: Rest for 30 to 60 seconds before changing sides.
How to do it:
- Stand beside the chair and hold it with your right hand.
- Step your feet apart using a comfortable stance.
- Turn the right foot outward and angle the left foot slightly inward.
- Bend the right knee gently while keeping it directed toward the toes.
- Lengthen through the torso, hold, and repeat on the other side.
Common mistakes: Taking an excessively long stance, allowing the front knee to fall inward, leaning heavily toward the chair, twisting the knee, or forcing the hips to face completely sideways.
Progression or regression: Shorten the stance and use both hands for more support. Progress by extending one or both arms while keeping the knee bend shallow.
9. Supported Tree Pose With Kickstand
Best for: Balance, ankle control, hip stability, posture, and single-leg weight shifting.
Muscles worked: Gluteus medius, deep hip stabilizers, quadriceps, calves, muscles of the feet, and trunk stabilizers.
Equipment needed: A sturdy chair or wall.
Suggested sets and reps: Hold for 10 to 20 seconds per side. Complete 1 to 3 rounds.
Rest: Rest for 20 to 40 seconds between sides or rounds.
How to do it:
- Stand behind the chair and hold it with both hands.
- Shift most of your weight onto your left foot.
- Turn your right knee slightly outward and place the right toes on the floor.
- Rest the right heel near the left ankle without pressing against the knee.
- Stand tall, hold, and repeat on the other side.
Common mistakes: Placing the lifted foot against the knee joint, removing support too soon, locking the standing knee, holding the breath, or focusing on how high the foot can lift.
Progression or regression: Keep both feet on the floor and practice weight shifting for an easier version. Progress by using one hand, fingertip support, or briefly lifting the toes.
10. Supported Palm Tree Heel Raise
Best for: Calf strength, ankle control, foot stability, posture, and supported balance.
Muscles worked: Gastrocnemius, soleus, muscles of the feet and ankles, quadriceps, glutes, and trunk stabilizers.
Equipment needed: A sturdy chair or countertop.
Suggested sets and reps: Perform 1 to 3 sets of 6 to 12 repetitions.
Rest: Rest for 30 to 60 seconds between sets.
How to do it:
- Stand behind the chair with both hands supported and your feet about hip-width apart.
- Lengthen your posture and keep your knees straight but not locked.
- Press through the balls of both feet and slowly lift your heels.
- Pause for 1 or 2 seconds without rolling the ankles outward.
- Lower the heels under control and repeat.
Common mistakes: Bouncing, leaning heavily onto the chair, rolling onto the outer toes, rushing the lowering phase, or locking the knees.
Progression or regression: Perform seated heel raises for an easier version. Progress by using lighter hand support or lowering for 3 seconds.
A 15-Minute Yoga Routine for Seniors
Use this sequence two or three times per week. Begin with one round and add a second round only when you recover comfortably.
| Exercise | Starting target | Rest |
|---|---|---|
| Seated Mountain Pose | 3–5 breaths | As needed |
| Seated Cat-Cow | 5–8 repetitions | 20 seconds |
| Seated Side Bend | 2–3 per side | One breath between sides |
| Seated Figure Four | 15–20 seconds per side | 20 seconds |
| Chair-Supported Half Forward Fold | 15–20 seconds | 30 seconds |
| Wall Half Downward Dog | 15–20 seconds | 30 seconds |
| Supported Chair Pose | 5–8 repetitions | 45–60 seconds |
| Chair-Supported Warrior II | 10–20 seconds per side | 30 seconds |
| Supported Kickstand Tree | 10–20 seconds per side | 30 seconds |
| Supported Heel Raise | 6–10 repetitions | 30–60 seconds |
Keep the session around 2 to 4 out of 10 effort when starting. You should finish feeling that you could perform a little more rather than feeling exhausted.
Increase only one training variable at a time. Add one or two repetitions, one extra breath, or a slightly larger comfortable movement range. Do not increase the hold time, movement range, and balance difficulty during the same session.
How Often Should Seniors Do Yoga?
Two or three structured yoga sessions per week is a practical starting point. Shorter mobility sessions may be performed more frequently when they do not increase pain, fatigue, or joint irritation.
The National Institute on Aging suggests approximately three balance-training sessions per week and includes yoga as one possible balance activity.
Allow recovery between demanding leg-strength or balance sessions. Gentle seated breathing and mobility work may require less recovery than Chair Pose, Warrior II, or repeated heel raises.
Yoga should complement a well-rounded routine. Continue to include appropriate aerobic activity and progressive muscle-strengthening exercise rather than relying on stretching alone.
How to Progress Safely
Progress begins with better control, not deeper stretching.
First, learn the starting position and breathe normally. Next, add a small number of repetitions or a few seconds to the hold. Increase the movement range only when you can enter and leave the pose smoothly.
During balance exercises, progress from two-hand support to one-hand support and then to light fingertip support. Fully removing the chair is optional. It is not necessary to make the pose effective.
A harder variation is appropriate when you can complete every repetition without pain, breath-holding, uncontrolled shaking, foot movement, knee collapse, or grabbing suddenly for support.
Reduce the difficulty when form changes or symptoms appear. A smaller range performed well provides more useful practice than a deeper pose performed without control.
Common Yoga Mistakes Older Beginners Should Avoid
Using an Unstable Chair
A folding chair, lightweight chair, or chair with wheels may move when you apply pressure. Use a solid chair and place it against a wall whenever possible.
Forcing Flexibility
A pose does not become more effective simply because you move deeper. Stop at the first comfortable point of tension and allow range of motion to improve gradually.
Removing Support Too Soon
Balance practice should not become a test of whether you can avoid falling. Keep the wall or chair close and use it before you become unstable.
Holding the Breath
Breath-holding often appears when a pose is too difficult. Reduce the range, shorten the hold, or use more support until you can breathe normally.
Moving Too Quickly Between Positions
Transitions can be more challenging than the poses themselves. Pause after rising from the chair, changing direction, or lifting the head.
Turning Every Pose Into a Passive Stretch
Mobility also requires strength and control. Include supported squats, heel raises, and balance work rather than performing only seated stretches.
Ignoring Warning Signs
Sharp pain, numbness, dizziness, chest pain, unusual shortness of breath, or sudden vision changes are not normal training sensations. Stop the session and seek appropriate professional help.
Frequently Asked Questions
Is yoga safe for seniors who have never exercised?
Gentle, properly modified yoga may be appropriate for many older beginners. Start with seated poses, use a stable chair, keep the movement range small, and consider working with a qualified instructor who has experience teaching older adults.
Medical guidance is appropriate when a health condition, recent surgery, repeated falls, or significant pain affects your ability to exercise safely.
Is chair yoga as useful as standing yoga?
Chair yoga can provide meaningful practice for posture, breathing, spinal mobility, shoulder movement, hip mobility, and light muscular work.
Standing poses generally create a greater balance and weight-bearing challenge, but they are not automatically better. The most useful version is the one that matches your current ability and allows consistent practice.
Can seniors do yoga every day?
A short, low-intensity mobility routine may be suitable on most days for some people. More challenging strength and balance poses may require recovery between sessions.
Begin with two or three sessions per week and monitor how your muscles and joints respond.
Can yoga improve balance?
Yoga may improve some measures of balance and mobility, especially when it includes appropriately challenging standing positions. However, improvements in balance tests do not guarantee that yoga will prevent falls.
People with a history of falling should use support and consider an individualized balance and strength program.
Which yoga poses should seniors avoid?
There is no universal list that applies to every older adult. However, beginners should generally avoid extreme inversions, forceful breathing, hot yoga, deep end-range positions, and poses they cannot enter or exit safely.
Health conditions may require additional modifications. Osteoporosis can affect forward bending and twisting recommendations, while glaucoma may affect head-down positions.
Do I need to be able to get on the floor?
No. The entire routine in this guide can be performed seated, standing with a chair, or facing a wall.
Floor work may be added later when getting down and standing back up can be performed safely and confidently.
How long should a senior hold a yoga pose?
A starting hold of 10 to 20 seconds or 2 to 3 comfortable breaths is enough for many beginners. Seated posture and breathing poses may be held slightly longer.
End the hold sooner when breathing changes, posture deteriorates, muscles shake uncontrollably, or discomfort increases.
Conclusion
Yoga for seniors should emphasize comfortable movement, steady breathing, useful strength, and reliable support rather than extreme flexibility.
Begin with the seated poses, keep a chair nearby during all standing exercises, and progress one small step at a time. Practicing these 10 gentle poses two or three times per week may help support mobility, balance, posture, and confidence while fitting naturally alongside walking and strength training.
References
- CDC: Physical Activity Guidelines for Older Adults
- NCCIH: Yoga Effectiveness and Safety
- National Institute on Aging: Three Types of Exercise
- Systematic Review of Yoga, Balance, and Mobility in Older Adults
- 2025 Randomized Trial of Yoga and Falls in Older Adults
- Biomechanical Demands of Standing Yoga Poses in Seniors
- Mayo Clinic: Exercising With Osteoporosis
- American Academy of Ophthalmology: Glaucoma and Head-Down Positions
This content is for informational purposes only and is not a substitute for professional medical advice.