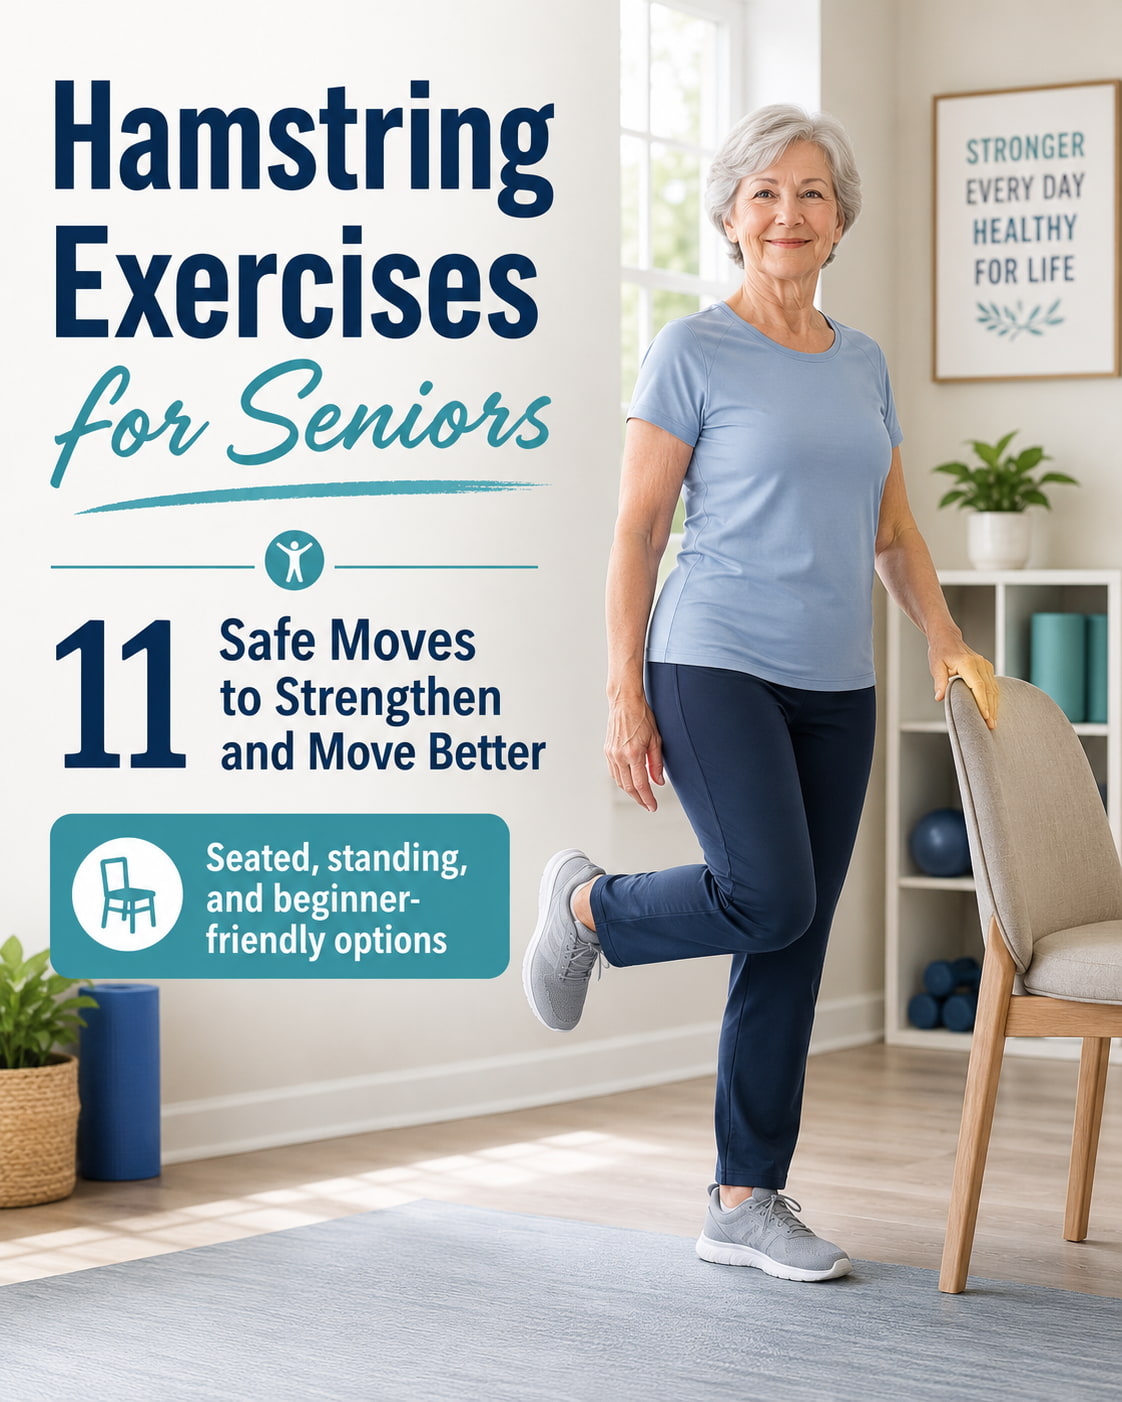
Hamstring exercises for seniors can help build the back-of-thigh strength needed for walking, standing, climbing stairs, and moving with better control. The hamstrings bend the knee, help extend the hip, and support everyday lower-body movement, which is why they deserve more attention than simple stretching alone.
This guide covers safe seated, standing, floor, band, dumbbell, and gym options. You will learn how to train your hamstrings with better form, how to choose the right level, and how to build a simple routine that fits your ability.
Why Hamstring Exercises for Seniors Matter
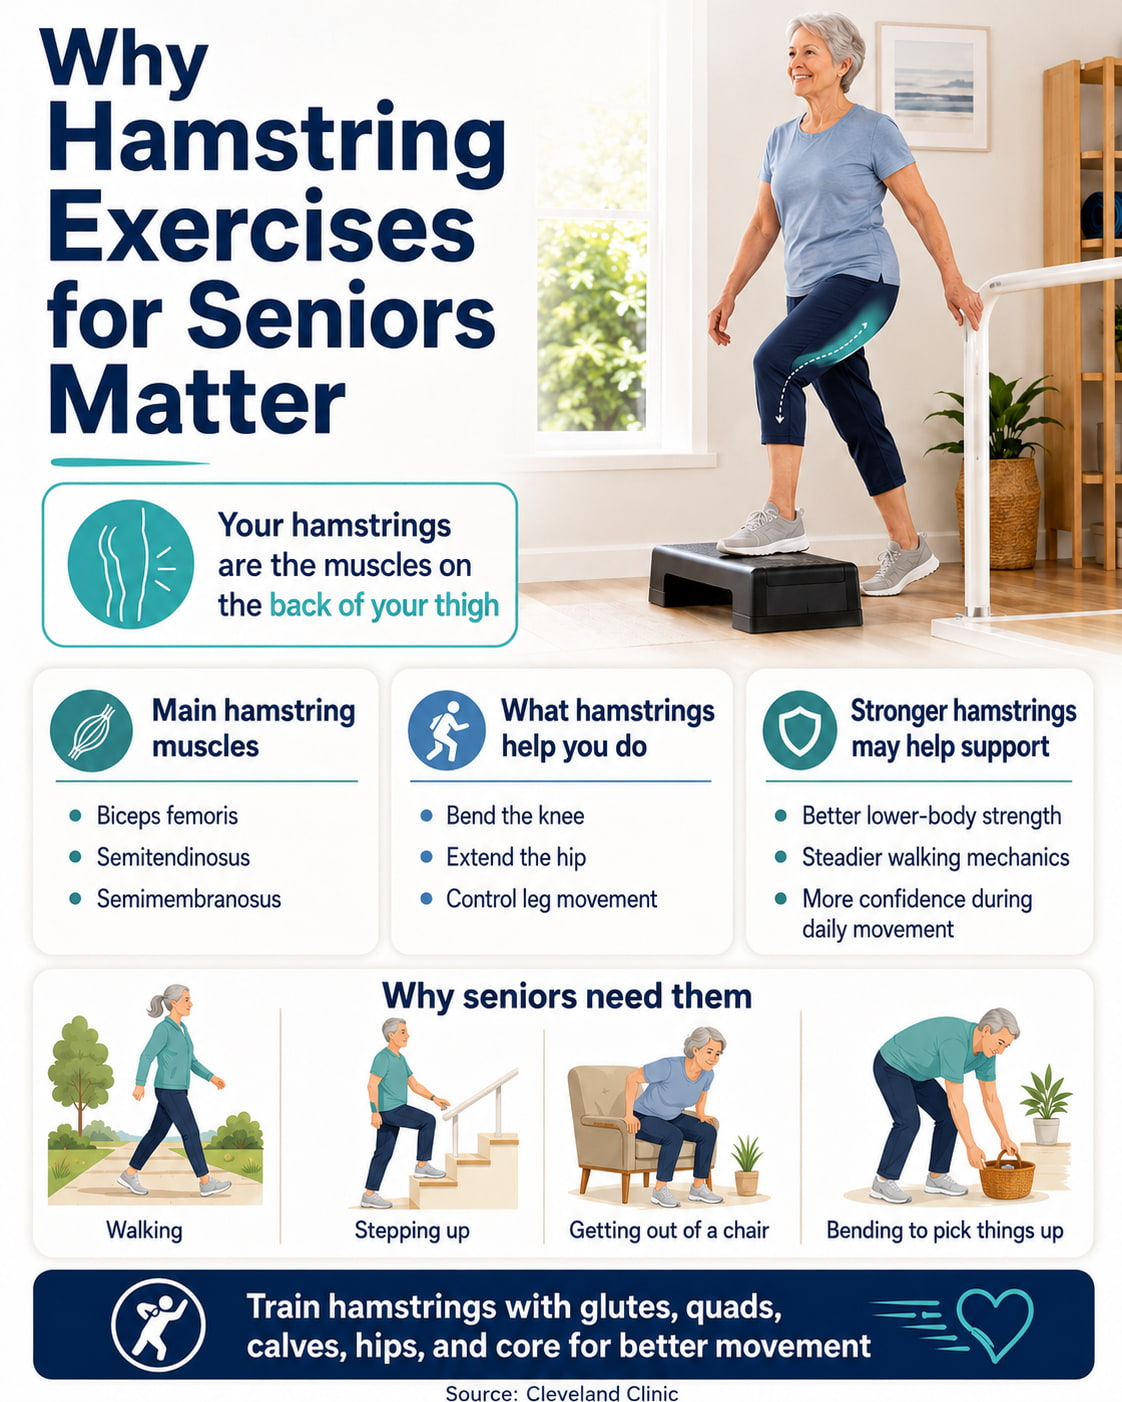
Your hamstrings are the muscles on the back of your thigh. They include the biceps femoris, semitendinosus, and semimembranosus. According to Cleveland Clinic, the hamstrings help bend the knee, extend the hip, and rotate the hip joint.
For seniors, those actions matter during normal daily movement. When you walk, step up, get out of a chair, bend to pick something up, or control your leg as it moves behind you, your hamstrings help your hips and knees work together.
Weak or poorly controlled hamstrings may make movement feel less stable. Stronger hamstrings may help support better lower-body strength, steadier walking mechanics, and more confidence during daily tasks when paired with glute, quad, calf, hip, and core training.
How Seniors Should Train Hamstrings Safely
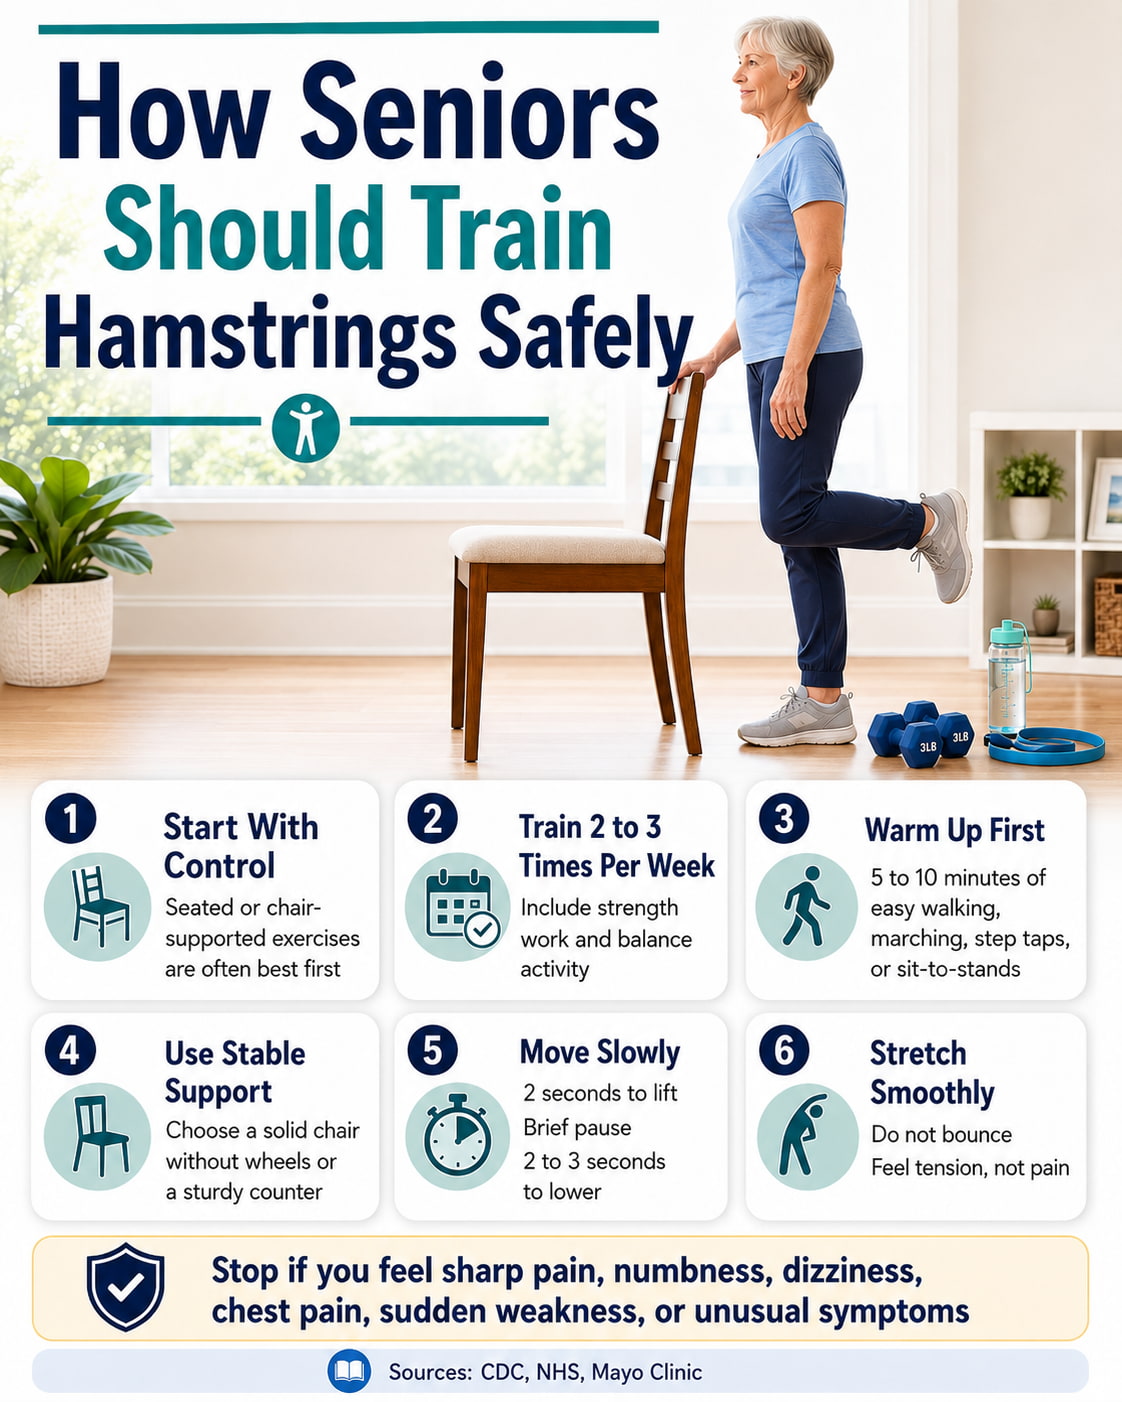
Start with exercises you can do with control. A seated or chair-supported version is often the best first step if balance, confidence, or joint comfort is a concern.
The CDC older adult physical activity guidelines recommend muscle-strengthening activities at least 2 days per week, along with balance activity. For hamstring training, that usually means 2 to 3 short sessions per week is enough for most seniors.
Before training, warm up for 5 to 10 minutes with easy walking, marching in place, gentle step taps, or slow sit-to-stands. Use a stable chair or counter for support when needed. The NHS strength exercise guide recommends using a solid, stable chair without wheels for chair-based exercises.
Use a slow tempo. A good starting pace is 2 seconds to lift or pull, a brief pause, and 2 to 3 seconds to lower. Stop the exercise and seek professional help if you feel sharp pain, numbness, dizziness, chest pain, sudden weakness, or unusual symptoms.
For stretching, do not bounce or force the position. Mayo Clinic recommends smooth stretching and feeling tension rather than pain.
11 Best Hamstring Exercises for Seniors
These hamstring exercises for seniors include seated, standing, floor, band, and gym-friendly options so you can choose the safest level for your body. Start with controlled beginner moves first, then progress gradually as your strength, balance, and confidence improve.
1. Seated Heel Dig Isometric
Best for: Very beginners, chair-based workouts, balance limitations, and seniors who want to learn how to feel the hamstrings working.
Muscles worked: Hamstrings mainly, with light support from the calves, glutes, and core.
Equipment needed: A stable chair without wheels.
Why it stands out: This is one of the safest ways to start because the leg does not need to move much. You press your heel into the floor and gently pull back without actually sliding the foot. That teaches hamstring activation in a controlled seated position.
Suggested sets and reps: Do 2 to 3 sets of 5 to 8 holds per leg. Hold each rep for 3 to 5 seconds.
Beginners: Use light pressure and focus on feeling the back of the thigh tighten.
Intermediate: Hold each rep for 6 to 8 seconds or add one extra set.
Advanced: Press harder into the floor while keeping your posture tall and breathing steady.
Rest: Rest 30 to 45 seconds between sets.
How to do it:
- Sit tall near the front half of a stable chair.
- Place one heel slightly in front of you with the toes pointing up.
- Press the heel down into the floor.
- Gently try to drag the heel back toward the chair without letting it move.
- Hold, breathe, then relax.
- Repeat on the other side.
Common mistakes: Holding your breath, leaning back, pressing so hard that the knee feels uncomfortable, or letting the foot slide quickly.
Expert tip: Think “pull the floor toward me” instead of “kick down.” The goal is controlled hamstring tension, not maximum force.
Exercise variations: Try both heels at the same time, single-leg holds, or longer holds.
Easier variation: Press both heels lightly into the floor for shorter holds.
Harder variation: Use a slightly longer hold or press the heel into a towel for more grip.
2. Seated Heel Drag
Best for: Beginners who want a gentle moving hamstring exercise without standing.
Muscles worked: Hamstrings, calves, and light hip stabilizers.
Equipment needed: A stable chair and a towel, slider, or sock on a smooth floor.
Why it stands out: Seated heel drags train knee flexion, which is one of the main jobs of the hamstrings. The seated position makes it easier to control balance and range of motion.
Suggested sets and reps: Do 2 to 3 sets of 8 to 12 reps per leg.
Beginners: Keep the range short and move slowly.
Intermediate: Pull the heel farther back while keeping the movement smooth.
Advanced: Use a light resistance band or pause at the end of each pull.
Rest: Rest 45 to 60 seconds between sets.
How to do it:
- Sit tall in a stable chair.
- Place one heel on a towel or slider.
- Start with the leg slightly extended in front of you.
- Pull the heel back under the chair by bending the knee.
- Pause when you feel the hamstring work.
- Slowly slide the heel forward again.
- Repeat before switching sides.
Common mistakes: Rushing the slide, leaning forward too much, turning the knee inward, or pulling into knee discomfort.
Expert tip: Keep your knee pointing in the same direction as your toes.
Exercise variations: Use both legs together, alternate legs, or use a band for extra resistance.
Easier variation: Perform the movement without a towel and simply slide the heel lightly on the floor.
Harder variation: Add a light loop band around the ankle or slow the lowering phase.
3. Seated Band Hamstring Curl
Best for: Seniors who want a simple home resistance exercise for the back of the thigh.
Muscles worked: Hamstrings mainly, with calf and hip stabilizer support.
Equipment needed: A light resistance band and a stable anchor point.
Why it stands out: This exercise adds resistance while keeping you seated. It is useful when bodyweight heel drags become too easy but standing exercises still feel challenging.
Suggested sets and reps: Do 2 to 3 sets of 10 to 15 reps per leg.
Beginners: Use a very light band and a short range of motion.
Intermediate: Use a slightly stronger band or pause for 1 second at the bent-knee position.
Advanced: Use a slower 3-second return to make the hamstrings work harder.
Rest: Rest 45 to 75 seconds between sets.
How to do it:
- Sit tall in a stable chair.
- Attach a light band to a secure low anchor in front of you.
- Loop the other end around one ankle.
- Start with the working leg slightly forward.
- Bend the knee and pull the heel back under the chair.
- Pause briefly.
- Slowly return to the starting position.
- Complete all reps, then switch sides.
Common mistakes: Letting the band snap back, twisting the knee, sliding forward in the chair, or using a band that is too heavy.
Expert tip: The return phase matters. Lower slowly instead of letting the band pull your leg forward.
Exercise variations: Use a loop band, long resistance band, cable machine, or seated leg curl machine.
Easier variation: Use a lighter band or perform seated heel drags instead.
Harder variation: Use a stronger band or add a 2-second squeeze at the end of each rep.
4. Standing Chair-Supported Hamstring Curl
Best for: Seniors who can stand safely and want a simple balance-friendly hamstring curl.
Muscles worked: Hamstrings, calves, glutes, and standing-leg stabilizers.
Equipment needed: A stable chair, counter, or sturdy rail.
Why it stands out: This move directly trains the knee-bending action of the hamstrings. The chair support makes it more senior-friendly than unsupported standing curls. The ACE standing hamstring curl guide also emphasizes bringing the heel toward the tailbone and lowering with control.
Suggested sets and reps: Do 2 to 3 sets of 8 to 12 reps per leg.
Beginners: Hold a chair with both hands and use a small range of motion.
Intermediate: Use one hand for support or add a brief pause at the top.
Advanced: Add a light ankle weight or resistance band only if balance stays steady.
Rest: Rest 45 to 75 seconds between sets.
How to do it:
- Stand tall behind a stable chair.
- Hold the chair lightly for balance.
- Shift your weight onto one leg.
- Bend the opposite knee and bring your heel toward your glutes.
- Pause without arching your lower back.
- Lower the foot slowly to the floor.
- Complete the reps, then switch sides.
Common mistakes: Swinging the leg, leaning forward, arching the lower back, or letting the knees drift far apart.
Expert tip: Keep your thighs close together as the heel lifts. This helps the hamstrings do the work instead of turning it into a hip swing.
Exercise variations: Bodyweight standing curl, banded standing curl, cable standing curl, or ankle-weight curl.
Easier variation: Reduce the range of motion and hold the chair with both hands.
Harder variation: Add a light ankle weight or slow the lowering phase to 3 seconds.
5. Glute Bridge
Best for: Seniors who can safely get down to the floor and want to train hip extension.
Muscles worked: Glutes, hamstrings, core, and lower-back stabilizers.
Equipment needed: Exercise mat or padded floor.
Why it stands out: The glute bridge strengthens the posterior chain without standing balance demands. It is especially useful because the hamstrings and glutes work together to extend the hips. The ACE glute bridge guide notes the importance of bracing the abdominals and avoiding excessive low-back arching.
Suggested sets and reps: Do 2 to 3 sets of 8 to 12 reps.
Beginners: Lift only as high as you can without back discomfort.
Intermediate: Pause for 1 to 2 seconds at the top.
Advanced: Add a light mini band around the knees or use a single-leg bridge only if form is excellent.
Rest: Rest 60 to 90 seconds between sets.
How to do it:
- Lie on your back with knees bent and feet flat.
- Keep your feet about hip-width apart.
- Brace your stomach gently.
- Press through your heels and lift your hips.
- Stop when your body forms a straight line from shoulders to knees.
- Pause briefly.
- Lower slowly with control.
Common mistakes: Arching the lower back, pushing too high, letting the knees collapse inward, or feeling the movement mostly in the low back.
Expert tip: Tuck your pelvis slightly before lifting. This helps you use your glutes and hamstrings without overusing your lower back.
Exercise variations: Mini-band bridge, bridge hold, march bridge, or single-leg bridge.
Easier variation: Do a small-range bridge or perform seated heel digs instead.
Harder variation: Use a 3-second lowering phase or add a pause at the top.
6. Heel-Elevated Glute Bridge
Best for: Seniors who already control the basic glute bridge well and want more hamstring challenge.
Muscles worked: Hamstrings, glutes, calves, and core.
Equipment needed: Exercise mat and a low step, sturdy bench, or firm cushion.
Why it stands out: Elevating the heels can shift more work toward the hamstrings. This makes it a useful progression after the basic bridge, but it should still be performed slowly and carefully.
Suggested sets and reps: Do 2 sets of 8 to 10 reps.
Beginners: Start with the regular glute bridge first.
Intermediate: Use a low heel elevation and keep both feet supported.
Advanced: Add a longer pause at the top or slow the lowering phase.
Rest: Rest 60 to 90 seconds between sets.
How to do it:
- Lie on your back with your heels on a low step or firm support.
- Keep your knees bent and feet about hip-width apart.
- Brace your stomach gently.
- Press through your heels and lift your hips.
- Pause when your hips are lifted without arching the back.
- Lower slowly to the floor.
Common mistakes: Using a support that is too high, cramping the hamstrings, arching the lower back, or rushing the reps.
Expert tip: Keep the step low. Higher is not always better, especially for seniors.
Exercise variations: Heel-elevated bridge hold, low-step bridge, or bridge with a mini band.
Easier variation: Return to a regular glute bridge.
Harder variation: Add a 2-second hold at the top of each rep.
7. Supported Hip Hinge
Best for: Learning safe bending mechanics for daily tasks and future deadlift variations.
Muscles worked: Hamstrings, glutes, spinal stabilizers, and core.
Equipment needed: Chair, countertop, wall, or dowel.
Why it stands out: Many seniors need better hip-hinge control before adding weights. This exercise teaches you to push the hips back while keeping the spine neutral, which can carry over to picking up objects, gardening, and loading the dishwasher.
Suggested sets and reps: Do 2 to 3 sets of 8 to 12 reps.
Beginners: Use a chair or countertop for support.
Intermediate: Use a dowel along the back to practice alignment.
Advanced: Progress to a light dumbbell Romanian deadlift.
Rest: Rest 45 to 75 seconds between sets.
How to do it:
- Stand tall with feet about hip-width apart.
- Place your hands on a chair, counter, or your hips.
- Soften your knees slightly.
- Push your hips back as your torso tips forward.
- Keep your back long and chest gently open.
- Stop when you feel a mild stretch in the back of the thighs.
- Drive through your feet and stand tall again.
Common mistakes: Squatting instead of hinging, rounding the back, locking the knees, looking too far up, or shifting weight into the toes.
Expert tip: Imagine closing a car door with your hips. Your knees bend a little, but your hips do most of the movement.
Exercise variations: Wall hip hinge, dowel hip hinge, chair-supported hinge, or banded hinge.
Easier variation: Practice the movement with your hands on a countertop.
Harder variation: Hold a light dumbbell close to your chest.
8. Dumbbell Romanian Deadlift
Best for: Intermediate seniors with good balance, good hip-hinge control, and no pain during hinging.
Muscles worked: Hamstrings, glutes, core, grip, and spinal stabilizers.
Equipment needed: One or two light dumbbells.
Why it stands out: The Romanian deadlift trains the hamstrings through hip extension, not just knee bending. It can be very useful for building stronger hips and posterior-chain control when performed with light loads and excellent form.
Suggested sets and reps: Do 2 to 3 sets of 8 to 10 reps.
Beginners: Learn the supported hip hinge first before adding weight.
Intermediate: Use light dumbbells and stop the lowering phase before your back position changes.
Advanced: Increase weight gradually or use a slower 3-second lowering phase.
Rest: Rest 75 to 120 seconds between sets.
How to do it:
- Stand tall with feet about hip-width apart.
- Hold one or two light dumbbells in front of your thighs.
- Soften your knees slightly.
- Push your hips back and lower the dumbbells close to your legs.
- Keep your spine neutral and shoulders relaxed.
- Stop when you feel a controlled stretch in the hamstrings.
- Press through your feet and stand tall.
Common mistakes: Rounding the back, bending the knees too much, reaching the weights away from the body, going too low, or using heavy weights too soon.
Expert tip: The weights should travel close to your legs. If they drift forward, the lower back usually has to work harder.
Exercise variations: Bodyweight RDL, single-dumbbell RDL, kettlebell RDL, or rack-supported RDL.
Easier variation: Use the supported hip hinge without weight.
Harder variation: Add a light pause near the bottom while keeping tension and control.
9. Machine Seated Leg Curl
Best for: Gym users who want stable, adjustable hamstring resistance without balance demands.
Muscles worked: Hamstrings mainly, with calf support depending on machine setup.
Equipment needed: Seated leg curl machine.
Why it stands out: The seated leg curl is easy to adjust and does not require standing balance. It is a good option for seniors who train at a gym and want a controlled way to strengthen knee flexion.
Suggested sets and reps: Do 2 to 3 sets of 10 to 15 reps.
Beginners: Use a light weight and learn the machine setup first.
Intermediate: Add resistance gradually when all reps feel controlled.
Advanced: Use a slow lowering phase or a brief squeeze at the bent-knee position.
Rest: Rest 60 to 90 seconds between sets.
How to do it:
- Adjust the seat so your knees line up with the machine’s pivot point.
- Place the lower pad comfortably above the back of your ankles.
- Sit tall and hold the handles.
- Curl the pad down by bending your knees.
- Pause briefly when the hamstrings tighten.
- Return slowly to the starting position without letting the weight stack slam.
Common mistakes: Using too much weight, lifting the hips off the seat, rushing the return, or setting the machine incorrectly.
Expert tip: Start lighter than you think you need. A smooth rep is more useful than a heavy rep you cannot control.
Exercise variations: Lying leg curl, standing machine curl, cable curl, or band curl.
Easier variation: Use a very light weight and a smaller range of motion.
Harder variation: Add a 2-second lower or increase the load slightly.
10. Slider Hamstring Curl
Best for: Stronger intermediate or advanced seniors who can safely get down to the floor and control a bridge.
Muscles worked: Hamstrings, glutes, calves, and core.
Equipment needed: Exercise mat and sliders, towels, or socks on a smooth floor.
Why it stands out: This is a more challenging hamstring exercise because the hamstrings bend the knees while the hips stay lifted. It trains strength and control together, but it is not the best starting point for beginners.
Suggested sets and reps: Do 2 sets of 5 to 8 slow reps.
Beginners: Skip this exercise and use glute bridges or seated heel drags first.
Intermediate: Keep the hips lower and use a short range of motion.
Advanced: Keep the hips lifted through the full curl.
Rest: Rest 90 to 120 seconds between sets.
How to do it:
- Lie on your back with knees bent and heels on sliders or towels.
- Brace your stomach gently.
- Lift your hips into a small bridge.
- Slowly slide your heels away from your body.
- Stop before your hips drop or your back arches.
- Pull your heels back toward your body.
- Lower your hips and reset if needed.
Common mistakes: Letting the hips sag, cramping, moving too fast, sliding too far, or forcing the exercise before basic bridges feel strong.
Expert tip: Treat this as an advanced option. Small, controlled reps are better than a long range you cannot control.
Exercise variations: Slider curl, towel curl, stability ball curl, or eccentric-only slider curl.
Easier variation: Keep hips on the floor and perform seated heel drags instead.
Harder variation: Keep hips lifted for every rep and slow the outward slide.
11. Seated Hamstring Stretch
Best for: Cool-downs, gentle flexibility work, stiff hamstrings, and seniors who prefer chair-based stretching.
Muscles worked: This is a stretch for the hamstrings and calves, not a strengthening exercise.
Equipment needed: Stable chair.
Why it stands out: The seated position is simple and balance-friendly. It can help seniors practice gentle hamstring flexibility without needing to sit on the floor.
Suggested sets and reps: Hold 20 to 30 seconds per side. Repeat 1 to 3 times.
Beginners: Keep the knee slightly bent and hinge only a little.
Intermediate: Straighten the knee more if comfortable.
Advanced: Add a slightly longer hold, but do not force the stretch.
Rest: Rest as needed between sides.
How to do it:
- Sit near the front of a stable chair.
- Extend one leg forward with the heel on the floor.
- Keep the toes pointing up.
- Sit tall and hinge forward slightly from the hips.
- Stop when you feel a gentle stretch behind the thigh.
- Hold the position while breathing normally.
- Switch sides.
Common mistakes: Rounding the back aggressively, bouncing, forcing the knee straight, or stretching into pain.
Expert tip: Move from the hips, not by collapsing your chest toward your knee.
Exercise variations: Seated hamstring stretch, standing supported hamstring stretch, or lying strap hamstring stretch.
Easier variation: Bend the knee slightly and use a shorter hold.
Harder variation: Hold for 30 seconds while keeping the back tall and the movement pain-free.
Beginner Hamstring Workout for Seniors
Use this routine 2 days per week. Keep the effort easy to moderate, around 5 to 6 out of 10. Rest 45 to 90 seconds between exercises.
| Exercise | Sets | Reps or time |
|---|---|---|
| Seated Heel Dig Isometric | 2 | 5 to 8 holds per leg |
| Seated Heel Drag | 2 | 8 to 10 reps per leg |
| Standing Chair-Supported Hamstring Curl | 2 | 8 to 10 reps per leg |
| Glute Bridge | 2 | 8 to 12 reps |
| Seated Hamstring Stretch | 1 to 2 | 20 to 30 seconds per side |
Progress by adding 1 to 2 reps per set before adding resistance. When the routine feels easy and your form stays steady, add a light band or move to a slightly harder variation.
Intermediate Hamstring Workout for Seniors
Use this routine 2 to 3 days per week. Keep the effort moderate, around 6 to 7 out of 10. You should finish most sets feeling like you could still do 2 to 4 more good reps.
| Exercise | Sets | Reps |
|---|---|---|
| Seated Band Hamstring Curl | 2 to 3 | 10 to 15 per leg |
| Dumbbell Romanian Deadlift | 2 to 3 | 8 to 10 |
| Glute Bridge or Heel-Elevated Glute Bridge | 2 | 10 to 12 |
| Machine Seated Leg Curl | 2 | 10 to 15 |
| Seated Hamstring Stretch | 1 to 2 | 30 seconds per side |
Do not add every progression at once. Choose one: more reps, slightly more resistance, slower tempo, longer pause, or a harder variation.
How to Choose the Right Hamstring Exercise
Choose a seated exercise if balance is a concern, if you are returning after a long break, or if standing exercises feel uncertain.
Choose a chair-supported standing exercise if you can stand safely but still want extra balance support.
Choose bridges if you can comfortably get down to the floor and back up.
Choose Romanian deadlifts only after you understand the hip hinge and can keep a neutral spine.
Choose slider curls only after regular bridges feel strong and controlled.
Choose machine leg curls if you train at a gym and want stable, adjustable resistance.
Common Hamstring Exercise Mistakes Seniors Should Avoid
The most common mistake is doing too much too soon. Start with fewer exercises and build consistency before adding more volume.
Another mistake is rushing the reps. Hamstrings respond well to controlled movement. Fast swinging usually reduces muscle tension and increases the chance of poor form.
Do not round your back during hip hinges or Romanian deadlifts. If your back position changes, reduce the range of motion or return to a supported hinge.
Do not stretch aggressively. A hamstring stretch should feel like mild to moderate tension, not sharp pain.
Avoid unstable chairs, rolling chairs, slippery floors, and cluttered workout areas. Simple setup choices can make the workout much safer.
How Often Should Seniors Do Hamstring Exercises?
Most seniors can train hamstrings 2 to 3 times per week as part of a full-body or lower-body routine. Leave at least one day between harder hamstring sessions if the muscles feel sore or tired.
A good weekly plan may look like this:
Monday: Hamstring and lower-body strength
Wednesday: Walking, mobility, or balance work
Friday: Hamstring and full-body strength
Weekend: Light walking, stretching, or gentle activity
Consistency matters more than doing a perfect routine. The ACSM resistance training update notes that bodyweight exercises, elastic bands, and home-based routines can support strength and physical function, so seniors do not need a complicated gym plan to make progress.
Safety Tips Before You Start
Use support when you need it. A chair, counter, wall, or rail can make standing exercises more controlled.
Keep the workout area clear. Remove loose rugs, cords, and objects that could cause tripping.
Wear supportive shoes for standing exercises. For floor exercises, use a mat or padded surface.
Move slowly when changing positions, especially when getting up from the floor.
Stop and seek professional guidance if an exercise causes sharp pain, numbness, dizziness, chest pain, sudden weakness, or symptoms that feel unusual for you.
FAQs About Hamstring Exercises for Seniors
What is the best hamstring exercise for seniors?
The best starting exercise for many seniors is the seated heel dig or seated heel drag because both are controlled, low impact, and do not require standing balance. For stronger seniors, glute bridges, chair-supported hamstring curls, and light Romanian deadlifts can be useful.
Are hamstring curls safe for seniors?
Hamstring curls can be safe for many seniors when they are done slowly, with light resistance, and with support if needed. Seated band curls, standing chair-supported curls, and machine seated leg curls are usually easier to control than advanced floor curls.
Can seniors do Romanian deadlifts?
Some seniors can do Romanian deadlifts, but they should learn the supported hip hinge first. Start with bodyweight or very light dumbbells. Keep the weights close, knees slightly bent, and spine neutral. Skip the movement if it causes back pain or feels unstable.
Are hamstring stretches enough?
Stretching may help maintain or improve flexibility, but it does not replace strength training. Seniors usually benefit from a mix of gentle stretching and strengthening exercises such as curls, bridges, and hip hinges.
How many hamstring exercises should seniors do in one workout?
Most seniors only need 2 to 4 hamstring-focused exercises in one session. A good beginner workout might include one seated exercise, one standing curl, one bridge, and one stretch.
What should I do if my knees or lower back hurt?
Stop the exercise and reduce the range of motion, resistance, or difficulty. If discomfort continues, work with a healthcare professional, physical therapist, or qualified fitness professional to find a safer variation.
Conclusion
Hamstring exercises for seniors should be simple, controlled, and matched to your current ability. Start with seated heel digs, heel drags, and chair-supported curls if you are new to training. Progress toward bridges, bands, machines, and light Romanian deadlifts as your strength and confidence improve.
The goal is not to train hard every day. The goal is to build useful strength that helps you move better, stay steady, and feel more capable during everyday life.