
Seated resistance band exercises let you train your back, chest, shoulders, legs, hips, and core without standing or getting onto the floor. The key is choosing movements that cover different muscle groups, securing the band correctly, and using enough resistance to challenge your muscles without losing control.
These eight exercises include clear setup instructions, common mistakes, and beginner adjustments. Use the sample workout below to put them together.
Before You Start
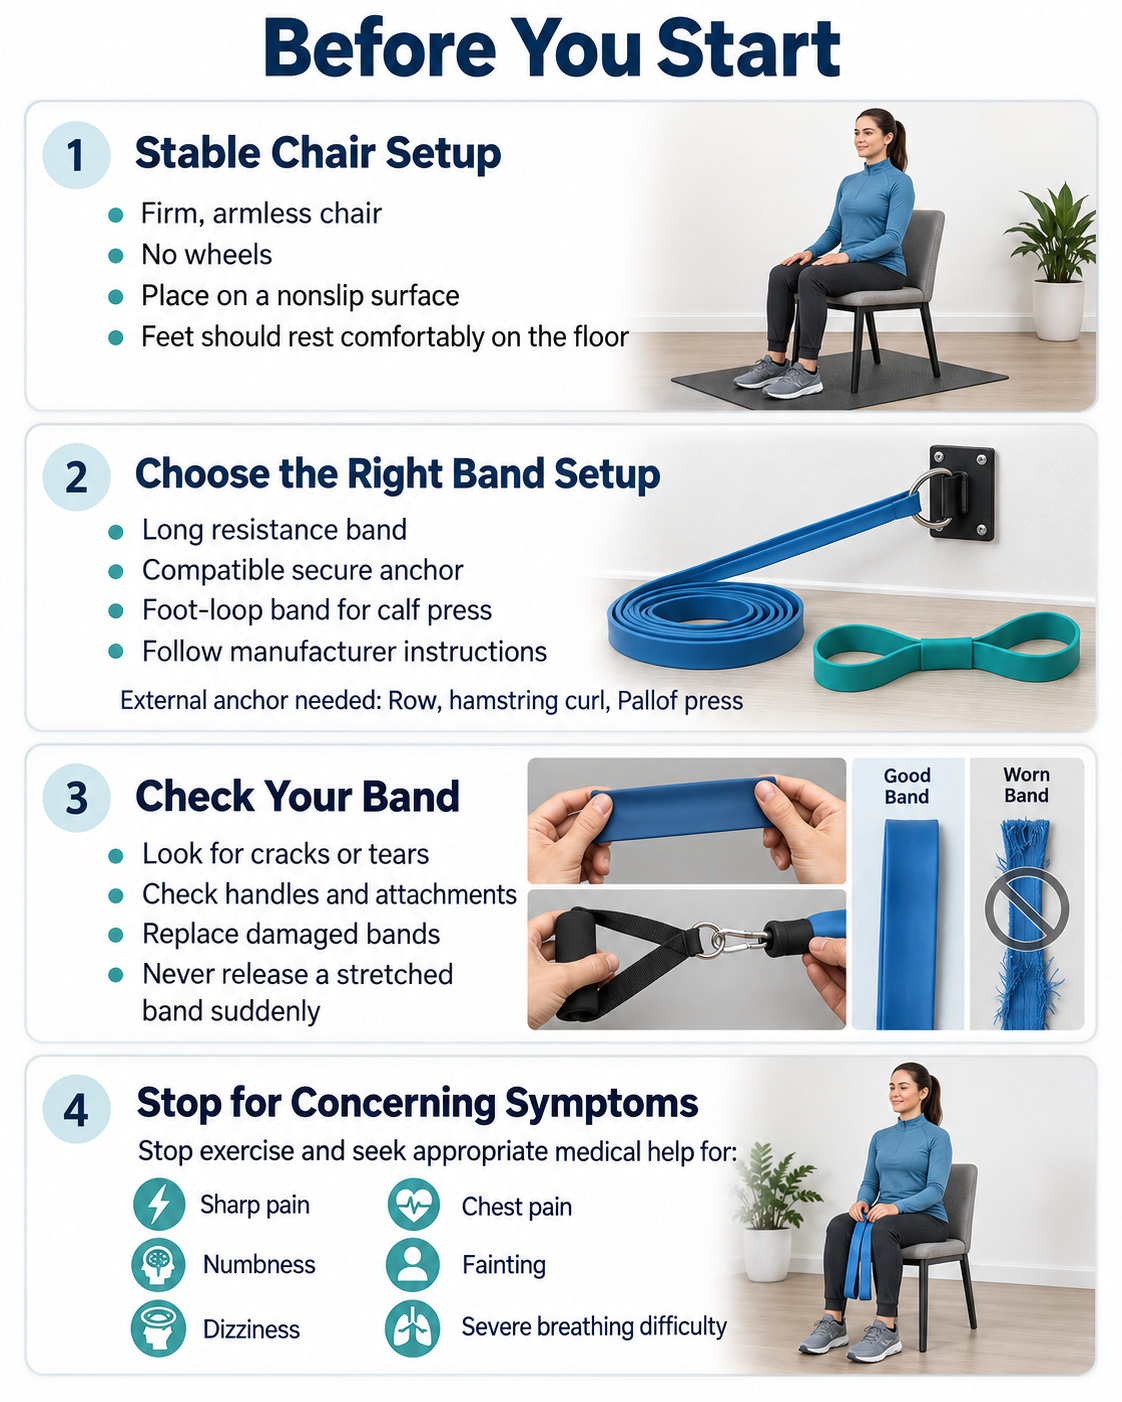
Choose a firm, stable, armless chair without wheels. Your feet should reach the floor comfortably when your knees are bent. The NHS recommends this setup for seated exercise and advises building up gradually.
For this routine, you will need a long resistance band, a compatible anchoring system, and a band with built-in foot loops for the calf press described below. The row, hamstring curl, and Pallof press require an external anchor. Follow the manufacturer’s installation instructions rather than attaching a band to movable furniture.
Inspect the band and its attachments before every workout. The American Council on Exercise advises discarding damaged bands, avoiding overstretching, and never releasing a band while it is under tension.
Stop exercising and seek medical advice for sharp pain, numbness, dizziness, chest pain, or unusual symptoms. Chest pain, fainting, or severe breathing difficulty warrants urgent medical attention. Cambridge University Hospitals advises stopping exercise and seeking appropriate help if concerning symptoms occur during physical activity.
8 Seated Resistance Band Exercises for a Full-Body Workout
The exercises below combine upper-body pushing and pulling with thigh, hip, calf, and core work.
The sets and repetitions are suggested starting ranges—not a requirement to finish every repetition. Begin with one set and use a lighter band whenever your technique starts to change.
1. Seated Resistance Band Row — Front-Anchored
Best for: Building upper-back strength and practicing a controlled pulling movement.
Muscles worked: Upper and middle back, latissimus dorsi, and assisting arm muscles.
Equipment: Long resistance band and a secure anchor in front of the chair.
Sets, reps, and rest: Do 1–2 sets of 8–12 repetitions. Rest for 60–90 seconds.
How to Do It
- Secure the band to a suitable anchor approximately level with your knees when seated.
- Sit facing the anchor with your feet flat. Hold one end in each hand, arms reaching forward and palms facing inward.
- Keep your torso upright as you draw your elbows backward, bringing your hands toward your lower ribs.
- Allow your shoulder blades to move toward each other without lifting your shoulders toward your ears.
- Slowly reach forward again, keeping your back neutral rather than rounding or leaning toward the anchor.
Physitrack describes this front-anchored chair setup with an upright trunk and controlled rowing motion.
Common mistakes: Rocking backward to finish the pull, shrugging, or bending the wrists instead of moving through the shoulders and elbows.
Make it easier: Use a lighter band or reduce the starting tension while keeping the same controlled movement.
2. Seated Resistance Band Chest Press
Best for: Training upper-body pushing strength without lying on a bench.
Muscles worked: Chest, front shoulders, and triceps.
Equipment: Long resistance band.
Sets, reps, and rest: Do 1–2 sets of 8–12 repetitions. Rest for 60–90 seconds.
How to Do It
- Sit upright with both feet planted.
- Position the band across your upper back and bring its ends forward beneath your arms.
- Hold the ends with your elbows bent and out to the sides, keeping your palms facing downward.
- Press your hands forward until your arms are nearly straight and your hands approach each other.
- Slowly bend your elbows to return, keeping your chest comfortably open and your shoulders away from your ears.
Keep your torso steady throughout the movement and avoid allowing the band to ride upward toward your neck.
Common mistakes: Arching the lower back, thrusting the head forward, or letting the band ride upward toward the neck. Avoid forcing your elbows far behind your torso on the return.
Make it easier: Choose a lighter band that allows you to press without leaning. The return should remain controlled rather than snapping backward.
3. Seated Resistance Band Lateral Raise
Best for: Strengthening the shoulders without overhead pressing.
Muscles worked: Primarily the middle portion of the deltoids.
Equipment: Long resistance band.
Sets, reps, and rest: Do 1–2 sets of 8–12 repetitions. Rest for 60–90 seconds.
How to Do It
- Sit tall with your feet together and secure the band’s midpoint beneath one foot.
- Hold an end in each hand, arms beside you and elbows slightly bent.
- Lift your arms sideways toward shoulder height, stopping lower if needed for comfort.
- Lower slowly without changing your torso position.
The British Heart Foundation includes this seated, foot-anchored lateral raise along with other resistance-band movements and recommends controlled exercise technique.
Common mistakes: Shrugging, swinging, or bending the elbows progressively to finish a difficult repetition.
Make it easier: Use less resistance rather than forcing your arms higher.
4. Seated Resistance Band Leg Press
Best for: Training the front of the thigh through controlled knee extension.
Muscles worked: Primarily the quadriceps, with hip muscles helping control the leg.
Equipment: Long resistance band.
Sets, reps, and rest: Do 1–2 sets of 8–12 repetitions per leg. Rest for 60–90 seconds.
How to Do It
- Sit upright and place the band securely around the middle of one shoe—not just across the toes.
- Hold both ends near your waist, keeping the other foot planted.
- Lift the working foot and bring that knee toward you through a comfortable range.
- Press the foot forward against the band, straightening the knee without snapping it into position.
- Bend the knee slowly to return. Complete your repetitions before changing legs.
Capital Area Physical Therapy & Wellness describes the chair-seated leg press as extending the knee against resistance from a band positioned around the foot.
Common mistakes: Leaning backward, rounding the lower back, or allowing the band to slide toward the toes.
Make it easier: Reduce resistance and use a smaller comfortable movement initially. Stop and reset immediately if the band shifts.
5. Seated Resistance Band Hamstring Curl
Best for: Adding direct back-of-thigh work to balance the leg press.
Muscles worked: Hamstrings.
Equipment: Resistance band, compatible ankle attachment, and a secure low anchor.
Sets, reps, and rest: Do 1–2 sets of 8–12 repetitions per leg. Rest for 60–90 seconds.
How to Do It
- Secure the band low in front of the chair and attach it around the working ankle using the manufacturer’s approved method.
- Sit facing the anchor with the working heel ahead of you and the knee partly straight.
- Keep your thigh supported on the seat as you bend the knee, drawing your heel backward toward the chair.
- Stop at a comfortable endpoint without lifting your hip or leaning forward.
- Slowly let the heel travel forward again, resisting the band’s pull. Repeat, then change legs.
Common mistakes: Anchoring the band behind the chair, pulling with the whole body, or letting the band jerk the leg forward. The resistance must oppose the backward heel movement.
Make it easier: Use a lighter band and begin with less knee movement. Keep the heel’s path clear of chair legs and crossbars.
6. Seated Resistance Band Hip Abduction
Best for: Adding direct work for the outer hips.
Muscles worked: Hip abductors and gluteal muscles.
Equipment: Long resistance band.
Sets, reps, and rest: Do 1–2 sets of 10–15 repetitions. Rest for 60–90 seconds.
How to Do It
- Sit toward the front of the chair with both feet supported.
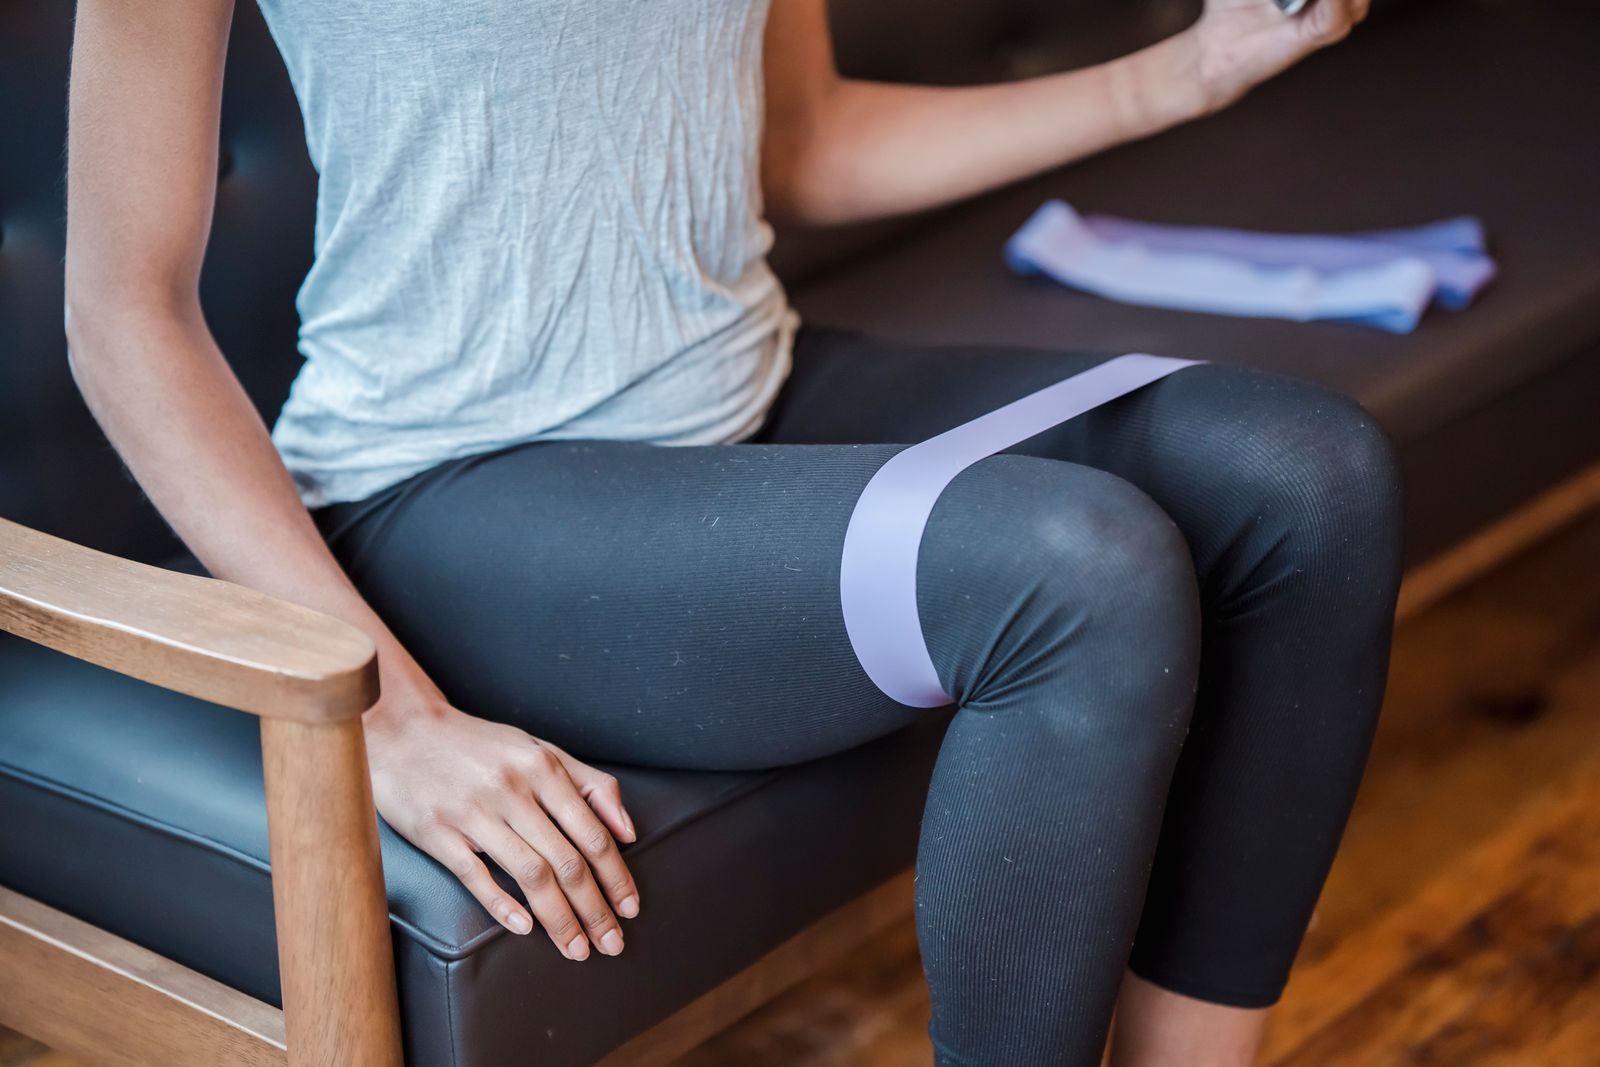
- Wrap the band around your thighs above the knees and hold the ends securely.
- Set your feet slightly wider than your shoulders.
- Press your knees outward without moving your feet or twisting your torso.
- Pause briefly, then return slowly.
Keep the band above the knees rather than directly over the knee joints, and use a range you can control without shifting your body.
Common mistakes: Bouncing, allowing the band to roll onto the knees, or forcing a wider range by shifting your body.
Make it easier: Reduce the band’s tension. Keep the movement small enough that your feet remain steady and the motion comes from your hips.
7. Seated Resistance Band Calf Press
Best for: Strengthening the calves through resisted ankle movement.
Muscles worked: Calf muscles, particularly the gastrocnemius with the knee extended.
Equipment: A THERABAND CLX or equivalent band with manufacturer-designed foot loops.
Sets, reps, and rest: Do 1–2 sets of 10–15 repetitions per side. Rest for 60–90 seconds.
How to Do It
- Sit upright without leaning against the backrest.
- Place each forefoot into a central loop and hold an end loop in each hand.
- Extend your legs in front of you with your heels resting on the floor and toes pointing upward.
- Keep your hands steady while pressing one forefoot away from you, as though pressing a gas pedal.
- Return slowly, complete your repetitions, and change sides.
Performance Health describes this heel-supported THERABAND CLX variation as a resisted calf press using the consecutive loops of the band.
This is an ankle press, not a seated heel raise.
Common mistakes: Pulling backward with the arms, curling only the toes, or allowing the foot loop to slip.
Make it easier: Use a lighter looped band. Do not substitute loose tubing handles for purpose-designed foot loops.
8. Seated Resistance Band Pallof Press
Best for: Training your core to resist twisting.
Muscles worked: Abdominal muscles, including the obliques, and other trunk stabilizers.
Equipment: Resistance band and a secure side anchor.
Sets, reps, and rest: Do 1–2 sets of 6–10 repetitions facing each direction. Rest for 60–90 seconds.
How to Do It
- Secure the band beside the chair at approximately seated chest height.
- Sit with one side toward the anchor, feet planted and hips facing forward.
- Hold the band with both hands at the center of your chest.
- Press your hands straight forward while keeping your shoulders and hips facing ahead. Pause briefly without holding your breath.
- Bring your hands back to your chest. After completing the set, reposition the chair to face the other direction and repeat.
FOX Rehabilitation describes the Pallof press as an anti-rotation exercise in which the trunk remains controlled while the hands move away from the chest against sideways resistance.
Common mistakes: Turning toward the anchor, leaning away from it, arching the back, or holding your breath.
Make it easier: Use less resistance or press your hands a shorter distance. The goal is a steady torso—not the strongest possible band.
A Simple Seated Resistance Band Workout
Start with two nonconsecutive sessions per week, such as Monday and Thursday. The American College of Sports Medicine emphasizes regular resistance training, working the major muscle groups at least twice weekly, and recognizes elastic resistance as a useful training option.
Use this starting structure:
| Part of the workout | What to do |
|---|---|
| Warm-up | Spend 3–5 minutes on comfortable seated marching, ankle movements, and unloaded arm movements. |
| Strength work | Perform one set of each of the eight exercises, using the repetition ranges above. |
| Recovery | Rest for 60–90 seconds between exercises, or longer until your breathing and control recover. |
| Finish | Put the band down and spend a minute or two moving gently while your breathing settles. |
The National Centre for Sport and Exercise Medicine recommends a brief warm-up, gradual repetition increases, controlled movements, and 60–90 seconds of rest in its seated resistance-band workout guidance.
Choose an Effort You Can Control
As a practical starting target, finish each set feeling that you could complete another two or three clean repetitions. Do not continue simply to reach a number once you start rocking, shrugging, or shortening every repetition.
Breathe continuously. Exhale during the harder part of the movement and inhale as you return. You do not need to train to complete muscular failure to benefit from resistance exercise.
Start Smaller When Necessary
For your first session, trying every exercise may be enough. There is no requirement to finish a full circuit while learning unfamiliar equipment.
A shorter practice session could include the row, chest press, leg press, and hamstring curl. Add the remaining movements as you become comfortable with their setups. This is a suggested way to learn the routine, not a separate complete program.
How to Make the Workout Easier or Harder
To reduce difficulty, change the resistance before changing your posture. Choose a lighter band or reduce its starting stretch. With anchored exercises, moving the chair closer to the anchor can reduce tension, provided the band remains appropriately positioned.
For progression, use this simple sequence:
- Improve control. Complete the lower end of the repetition range without rushing or compensating.
- Add repetitions. Gradually work toward the upper end while maintaining the same movement.
- Add a second set or slightly more resistance. Change one variable at a time.
A useful coaching checkpoint is completing the upper repetition target comfortably in two consecutive workouts before increasing the challenge. This is a practical progression rule, not a mandatory research threshold.
Record the band used, your grip position, and the chair’s distance from the anchor. These details help you repeat the same resistance instead of accidentally making each session different.
Frequently Asked Questions
Can Seated Resistance Band Exercises Build Strength?
Yes. Elastic resistance can improve strength when the exercises provide enough challenge and are progressed over time.
This does not mean this particular eight-exercise routine has been tested as a complete program, but resistance bands can provide meaningful muscular resistance when used consistently.
What Resistance Band Should a Beginner Use?
Choose a band that lets you complete the suggested repetitions with a steady posture and controlled return. You may need a lighter band for lateral raises than for rows or leg presses.
Select resistance by how the exercise feels and how well you control it—not by assuming one band is appropriate for every movement.
Can You Do This Workout Every Day?
Daily challenging sessions are unnecessary. Start with two nonconsecutive days and allow recovery between workouts. Gentle movement on other days is different from repeating a demanding strength session.
For most beginners, consistency and recovery are more useful than trying to perform a hard resistance-band workout every day.
Are These Exercises Suitable for Seniors?
Seated exercise can be useful for older adults, but suitability depends on the person—not age alone. Band placement, grip strength, joint comfort, and the ability to remain stable in the chair all matter.
A health professional can help adapt exercises when a condition or mobility limitation makes the standard setup difficult.
Does This Replace Walking or Standing Balance Exercises?
No. This is a seated strength session, not a complete physical activity plan. When appropriate for your abilities, combine it with aerobic activity and other movement.
The Centers for Disease Control and Prevention identifies aerobic, muscle-strengthening, and balance activities as separate components of a well-rounded activity routine for older adults.
Start Light and Build Consistently
Begin with secure equipment, one manageable set, and smooth repetitions. Keep the chair stable, control the band’s return, and stop each set before your technique changes.
Once the routine becomes comfortable, add repetitions or resistance gradually. The goal is repeatable strength training—not simply stretching a heavier band.
This content is for informational purposes only and is not a substitute for medical advice.