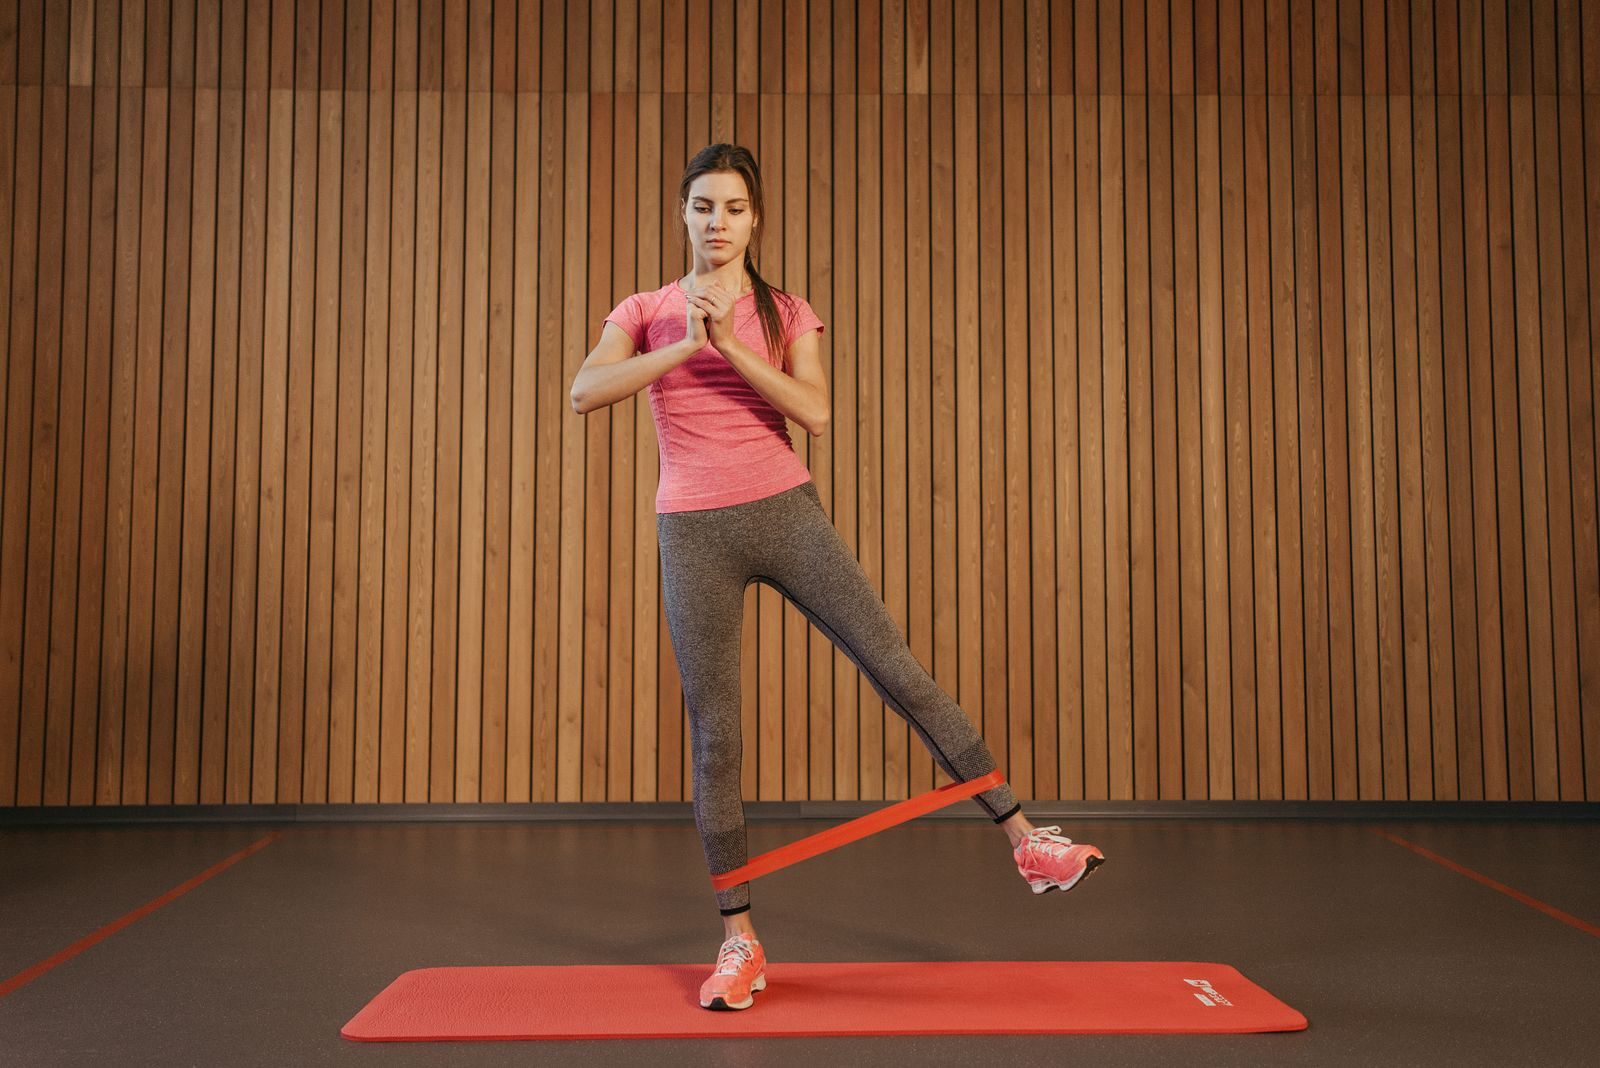
Leg exercises with resistance bands can strengthen your quads, hamstrings, glutes, hips, and calves without requiring a full home gym. The key is using the right band setup, choosing enough resistance to make each set challenging, and gradually progressing as your form improves.
Updated guidance from the American College of Sports Medicine recognizes elastic bands and home-based routines as effective resistance-training options for improving strength, muscle growth, and physical function. A systematic review indexed by PubMed also found no clear strength advantage for conventional weights and machines over elastic resistance across the eight included studies, although results will still depend on the exercises, effort, and program used.
This guide explains which band to use, how to perform 12 effective exercises, how to organize them into a workout, and how to progress safely.
Leg Exercises With Resistance Bands at a Glance
| Exercise | Band type | Main training focus | Starting recommendation |
|---|---|---|---|
| Resistance band squat | Long loop, flat band, or tube band | Quads, glutes, adductors | 2–3 sets of 10–15 |
| Resistance band Romanian deadlift | Long loop or tube band | Hamstrings and glutes | 2–3 sets of 10–15 |
| Resistance band reverse lunge | Long loop or tube band | Quads, glutes, single-leg control | 2–3 sets of 8–12 per leg |
| Seated resistance band leg press | Flat or long band | Quads and glutes | 2–3 sets of 10–16 per leg |
| Banded glute bridge | Mini loop | Glutes and hamstrings | 2–3 sets of 12–20 |
| Lateral band walk | Mini loop | Outer hips and glutes | 2–3 sets of 8–15 steps each way |
| Standing band hip abduction | Mini loop or anchored band | Gluteus medius and minimus | 2–3 sets of 12–20 per leg |
| Standing band hip adduction | Low anchored band | Inner thighs | 2–3 sets of 12–20 per leg |
| Standing band hip extension | Low anchored band | Glutes and hamstrings | 2–3 sets of 12–20 per leg |
| Standing band hamstring curl | Low anchored band | Hamstrings | 2–3 sets of 10–15 per leg |
| Seated band leg extension | Low anchored band | Quadriceps | 2–3 sets of 10–15 per leg |
| Resistance band calf raise | Long loop or tube band | Calves | 2–4 sets of 12–25 |
What Type of Resistance Band Do You Need?
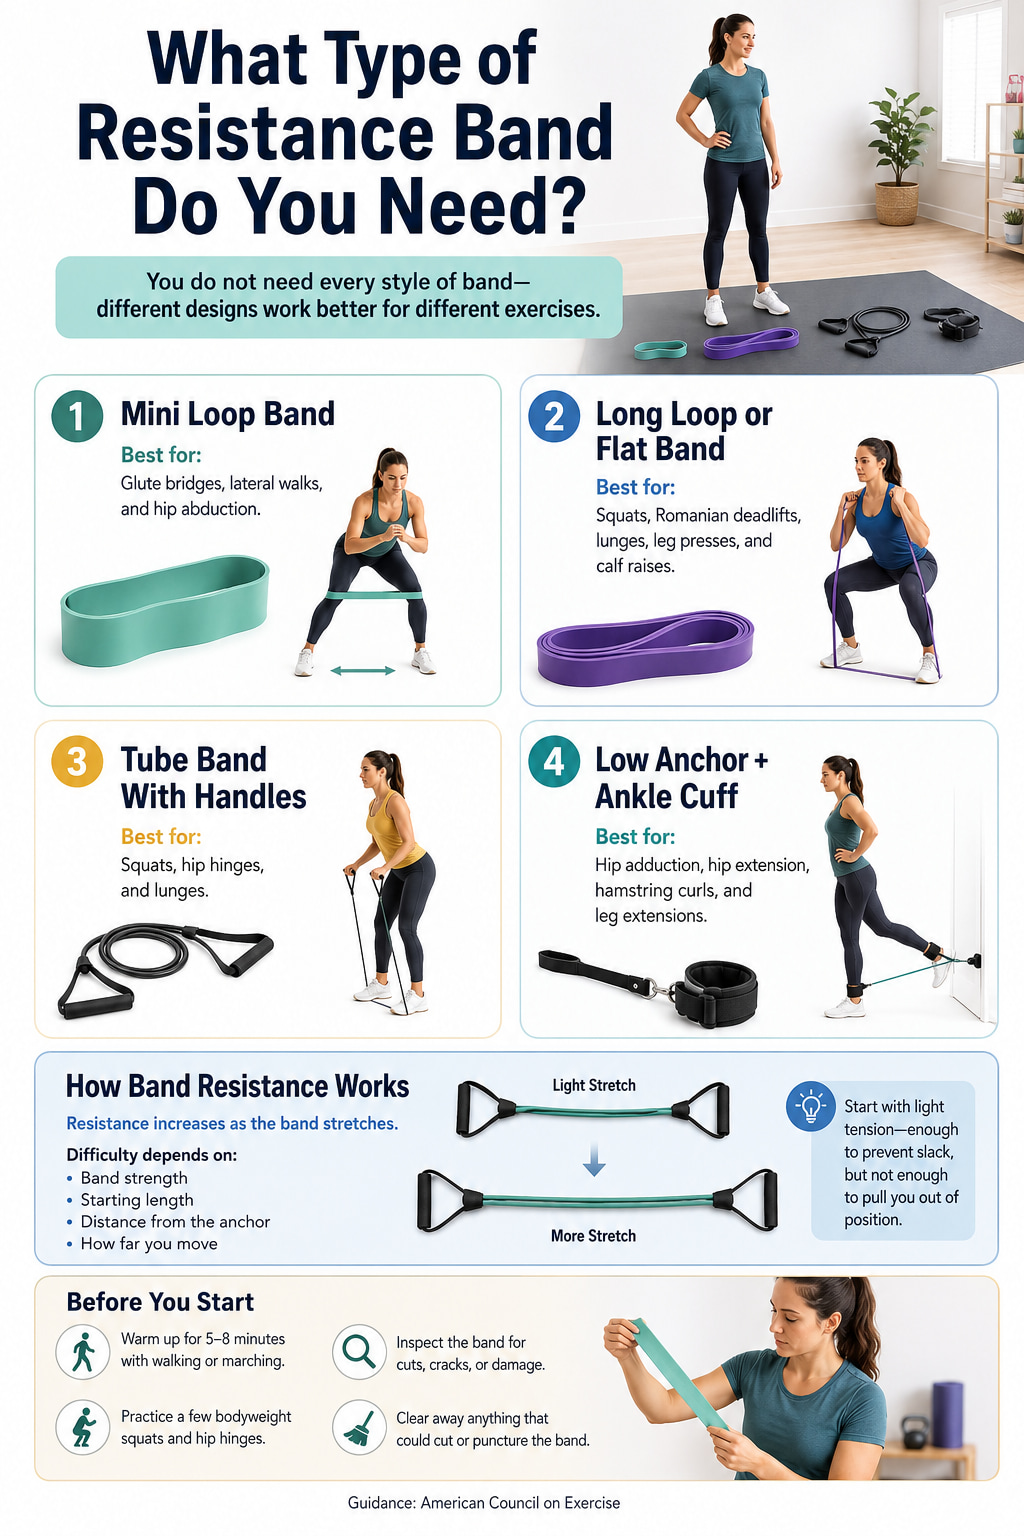
You do not need every style of band, but different designs work better for different exercises.
- A mini loop band is useful for glute bridges, lateral walks, and hip abduction.
- A long loop or flat band works well for squats, Romanian deadlifts, lunges, leg presses, and calf raises.
- A tube band with handles can also be used for squats, hinges, and lunges.
- A low anchor and ankle cuff make hip adduction, hip extension, hamstring curls, and leg extensions easier to set up.
The American Council on Exercise explains that band resistance increases as the material stretches. This means difficulty depends on the band’s strength, its starting length, your distance from the anchor, and how far you move. Begin with enough tension to prevent the band from hanging loose, but not so much that it pulls you out of position.
Before starting, spend five to eight minutes walking, marching in place, and practicing a few bodyweight squats and hip hinges. Inspect the band and clear away objects that could cut or puncture it.
12 Best Leg Exercises With Resistance Bands at Home
These 12 resistance band leg exercises target your quads, hamstrings, glutes, hips, and calves using simple home-friendly equipment.
Choose 5–7 exercises per workout, focus on controlled form, and gradually increase reps or band resistance as you get stronger.
1. Resistance Band Squat
Best for: Building general lower-body strength with a squat pattern.
Muscles worked: Quadriceps, gluteus maximus, adductors, hamstrings, calves, and trunk stabilizers.
Equipment needed: A long loop, flat band, or tube band with handles.
Sets, reps, and rest: Perform 2–4 sets of 8–15 repetitions. Rest for 60–120 seconds.
How to Do It
- Stand on the middle of the band with your feet approximately hip- to shoulder-width apart.
- Hold the ends or handles in front of your shoulders. Keep tube-band handles in your hands rather than placing them over your feet.
- Brace your abdomen and keep your chest comfortably lifted.
- Push your hips back as your knees bend, keeping your entire foot planted.
- Descend as far as you can while maintaining control and a stable foot position.
- Press through your feet to stand, extending your hips and knees together.
- Finish tall without forcefully pushing your hips forward or arching your lower back.
Common mistakes: Avoid placing the band only beneath your toes, allowing your knees to collapse inward, lifting your heels, rounding your back, or dropping quickly into the bottom position.
Progression or regression: Use a bodyweight box squat or banded sit-to-stand as a regression. Progress by using a stronger band, adding a pause at the bottom, or increasing the controlled range of motion.
Coaching cue: Keep your knees following the same general direction as your toes.
2. Resistance Band Romanian Deadlift
Best for: Strengthening the hamstrings and glutes through a hip-hinge movement.
Muscles worked: Hamstrings, gluteus maximus, adductor magnus, spinal erectors, and abdominal stabilizers.
Equipment needed: A long loop, flat band, or tube band.
Sets, reps, and rest: Perform 2–4 sets of 8–15 repetitions. Rest for 60–120 seconds.
How to Do It
- Stand on the middle of the band with your feet about hip-width apart.
- Hold the band ends or handles beside your thighs.
- Soften your knees without turning the movement into a squat.
- Brace your abdomen and push your hips backward.
- Lower your hands toward your shins while keeping the band close to your legs.
- Stop when you feel strong hamstring tension or before your back begins to round.
- Push your feet into the floor and extend your hips to return to standing.
Common mistakes: Do not squat the band downward, round your lower back, lock your knees, lift your head excessively, or allow the band to pull your shoulders forward.
Progression or regression: Practice an unloaded hip hinge with your hands on your hips before adding the band. Progress with a stronger band, a slower lowering phase, or a staggered-stance Romanian deadlift.
Coaching cue: Move your hips backward rather than trying to reach the floor.
3. Resistance Band Reverse Lunge
Best for: Training one leg at a time while improving lower-body control.
Muscles worked: Quadriceps, gluteus maximus, adductors, hamstrings, calves, and hip stabilizers.
Equipment needed: A long flat band or tube band. A chair can provide balance support.
Sets, reps, and rest: Perform 2–3 sets of 8–12 repetitions per leg. Rest for 60–90 seconds.
How to Do It
- Place the middle of the band securely beneath your front foot.
- Hold the ends or handles at your shoulders.
- Step the other foot backward and land on the ball of that foot.
- Lower your rear knee toward the floor while keeping your front foot planted.
- Allow a small, natural forward torso lean without rounding your back.
- Push through the front foot to return to the starting position.
- Complete the repetitions before changing legs.
Common mistakes: Avoid stepping onto an imaginary tightrope, letting the front knee collapse inward, pushing mainly from the rear foot, or using a band that pulls the front foot out of position.
Progression or regression: Begin with a supported static split squat or bodyweight reverse lunge. Progress with a stronger band, greater range of motion, or a brief pause near the bottom.
4. Seated Resistance Band Leg Press
Best for: Training the quads and glutes without requiring a standing squat or lunge.
Muscles worked: Quadriceps, gluteus maximus, hamstrings, and calves.
Equipment needed: A flat or long resistance band and a stable chair.
Sets, reps, and rest: Perform 2–3 sets of 10–16 repetitions per leg. Rest for 45–75 seconds.
How to Do It
- Sit tall near the front of a stable chair.
- Bring one knee toward your chest and place the middle of the band securely across the middle of that foot.
- Hold both ends of the band near your hips, not near your face.
- Keep your foot slightly flexed so the band remains secure.
- Press the foot forward until the leg is almost straight.
- Pause briefly without forcefully locking the knee.
- Slowly bend the knee and return to the starting position.
Common mistakes: Do not place the band across the toes, lean far backward, snap the leg straight, or allow the band to slide toward the heel or toes.
Progression or regression: Hold the band closer to the foot to reduce resistance. Increase the challenge by holding the band farther from the foot, using a stronger band, or slowing the return.
The British Heart Foundation also demonstrates seated leg presses, band squats, and standing hip abduction as practical home-training options.
5. Banded Glute Bridge
Best for: Training hip extension while adding resistance against the knees moving inward.
Muscles worked: Gluteus maximus, hamstrings, gluteus medius, and trunk stabilizers.
Equipment needed: A mini loop band and an exercise mat.
Sets, reps, and rest: Perform 2–4 sets of 10–20 repetitions. Rest for 45–90 seconds.
How to Do It
- Place the mini band just above your knees.
- Lie on your back with your knees bent and feet flat.
- Position your feet approximately hip-width apart.
- Gently press your knees outward to maintain tension on the band.
- Brace your abdomen and drive through your feet to raise your hips.
- Stop when your hips, torso, and thighs form a comfortable line.
- Lower your hips under control without letting your knees collapse inward.
Common mistakes: Avoid overextending your lower back, pushing mainly through your toes, lifting your hips higher than you can control, or spreading your knees excessively.
Progression or regression: Remove the band and perform a bodyweight bridge as a regression. Progress with a stronger mini band, a longer pause at the top, or a controlled single-leg bridge.
The mini band primarily adds outward resistance at the knees. It increases the hip-stabilization demand but does not load hip extension in the same way as placing weight directly across the hips.
6. Lateral Band Walk
Best for: Strengthening the outer hips and practicing control while moving sideways.
Muscles worked: Gluteus medius, gluteus minimus, gluteus maximus, tensor fasciae latae, quadriceps, and trunk stabilizers.
Equipment needed: A mini loop band.
Sets, reps, and rest: Perform 2–3 sets of 8–15 steps in each direction. Rest for 45–75 seconds.
How to Do It
- Place the band above your knees for an easier setup or around your shins for more resistance.
- Stand with your feet wide enough to create light band tension.
- Push your hips back slightly and bend your knees into a shallow athletic stance.
- Step sideways with one foot while keeping your toes mostly forward.
- Bring the trailing foot inward without allowing your feet to come completely together.
- Complete the planned steps, then return in the opposite direction.
Common mistakes: Avoid rocking your torso side to side, dragging the trailing foot, turning both feet outward, taking steps that are too large, or losing tension between repetitions.
Progression or regression: Place the band above the knees and use smaller steps as a regression. Move it toward the ankles, use a stronger band, or maintain a slightly deeper stance to progress.
Lateral band walks are commonly used to train the gluteus medius. ACE recommends maintaining a controlled squat or athletic position while stepping laterally and keeping tension in the loop.
7. Standing Band Hip Abduction
Best for: Isolating the muscles that move the leg away from the body and help control the pelvis.
Muscles worked: Gluteus medius, gluteus minimus, and tensor fasciae latae.
Equipment needed: A mini loop or low anchored band. Use a chair or wall for balance.
Sets, reps, and rest: Perform 2–3 sets of 12–20 repetitions per leg. Rest for 45–75 seconds.
How to Do It
- Place a mini band around your ankles or attach an ankle cuff to a low anchor.
- Stand tall and hold a stable chair or wall lightly.
- Shift your weight onto one leg without locking its knee.
- Move the opposite leg a few inches out to the side.
- Keep your pelvis level and your toes mostly forward.
- Pause briefly, then return slowly without letting the band snap back.
Common mistakes: Avoid leaning your torso, turning the working foot outward, swinging the leg, hiking one side of the pelvis, or using excessive range.
Progression or regression: Move the mini band above the knees or perform the movement without a band as a regression. Progress by using a lower band position, stronger resistance, or a longer pause.
8. Standing Band Hip Adduction
Best for: Directly training the inner-thigh muscles.
Muscles worked: Adductor longus, adductor brevis, adductor magnus, gracilis, and pectineus.
Equipment needed: A band attached to a secure low anchor and an ankle cuff.
Sets, reps, and rest: Perform 2–3 sets of 12–20 repetitions per leg. Rest for 45–75 seconds.
How to Do It
- Attach the band to a manufacturer-approved low anchor.
- Stand sideways with the working leg closest to the anchor.
- Secure the cuff around the working ankle and step away until the band is lightly tensioned.
- Hold a chair or stable support.
- Move the working leg inward and slightly across the front of the supporting leg.
- Keep your hips facing forward and your torso upright.
- Slowly return the leg toward the anchor.
Common mistakes: Do not twist your hips, swing the leg, lean away from the anchor, turn the entire body, or let the band pull your leg back quickly.
Progression or regression: Use a lighter band and a smaller range as a regression. Progress by stepping slightly farther from the anchor, increasing resistance, or pausing as the leg crosses inward.
9. Standing Band Hip Extension
Best for: Isolating the glutes with less knee movement than a squat or lunge.
Muscles worked: Gluteus maximus, hamstrings, and posterior hip stabilizers.
Equipment needed: A low anchor, resistance band, ankle cuff, and chair or wall.
Sets, reps, and rest: Perform 2–3 sets of 12–20 repetitions per leg. Rest for 45–75 seconds.
How to Do It
- Attach the band to a secure low anchor.
- Face the anchor and fasten the cuff around one ankle.
- Step backward until the band has light starting tension.
- Hold a stable support and soften the supporting knee.
- Brace your abdomen and move the working leg behind you.
- Keep the movement at the hip rather than arching your lower back.
- Pause briefly and return under control.
Common mistakes: Avoid leaning far forward, swinging the leg, bending the working knee excessively, rotating the pelvis, or arching your back to create extra range.
Progression or regression: Begin without a band or use very light resistance. Progress with greater tension, a longer pause, or a slightly larger controlled range.
Coaching cue: Move the thigh behind you while keeping your belt line facing forward.
10. Standing Band Hamstring Curl
Best for: Training the hamstrings through knee flexion.
Muscles worked: Biceps femoris, semitendinosus, semimembranosus, and gastrocnemius.
Equipment needed: A low anchor, band, ankle cuff, and stable support.
Sets, reps, and rest: Perform 2–4 sets of 10–15 repetitions per leg. Rest for 45–90 seconds.
How to Do It
- Attach the band to a low anchor and face the anchor.
- Fasten the cuff around one ankle.
- Step backward until the band is lightly tensioned.
- Hold a chair or wall and stand tall.
- Keep your working thigh close to vertical as you bend the knee.
- Bring your heel toward the back of your thigh without forcing the range.
- Slowly straighten the knee and control the band’s return.
Common mistakes: Avoid moving the entire thigh forward, arching your back, pointing the knee outward, rushing the lowering phase, or allowing the band to pull the foot down.
Progression or regression: Use a lighter band or smaller range if you cannot keep the thigh still. Progress with a stronger band, a two-second squeeze, or a slower return.
11. Seated Resistance Band Leg Extension
Best for: Directly training the quadriceps without requiring balance.
Muscles worked: Rectus femoris, vastus lateralis, vastus medialis, and vastus intermedius.
Equipment needed: A stable chair, ankle cuff, resistance band, and secure low anchor behind the chair.
Sets, reps, and rest: Perform 2–3 sets of 10–15 repetitions per leg. Rest for 45–75 seconds.
How to Do It
- Place a stable chair in front of a secure low anchor.
- Attach the band to the anchor and fasten the cuff around one ankle.
- Sit tall with your hips centered on the chair.
- Begin with the working knee bent and the band lightly tensioned.
- Straighten the knee under control.
- Pause before forcefully locking the joint.
- Slowly bend the knee to return to the starting position.
Common mistakes: Avoid kicking the foot upward, leaning far backward, lifting the thigh off the chair, using momentum, or allowing the band to pull the leg back suddenly.
Progression or regression: Use lighter resistance or a shorter range as a regression. Progress with a stronger band, a longer pause near extension, or additional repetitions.
12. Resistance Band Calf Raise
Best for: Strengthening the muscles that raise the heels during walking, running, and climbing.
Muscles worked: Gastrocnemius and soleus, with support from smaller ankle and foot muscles.
Equipment needed: A long loop, flat band, or tube band.
Sets, reps, and rest: Perform 2–4 sets of 12–25 repetitions. Rest for 45–75 seconds.
How to Do It
- Place the middle of the band securely beneath the front half of both feet.
- Hold the ends or handles at shoulder height.
- Stand tall with your feet approximately hip-width apart.
- Keep your knees straight but not forcefully locked.
- Raise both heels as high as you can without rolling your ankles outward.
- Pause briefly at the top.
- Lower your heels slowly until they contact the floor.
Common mistakes: Avoid bouncing, placing the band only beneath the toes, rolling onto the outside edges of the feet, bending and straightening the knees, or letting the heels drop quickly.
Progression or regression: Start with a bodyweight calf raise while holding a wall or chair. Progress with a stronger band, a slower lowering phase, or a single-leg bodyweight calf raise when balance allows.
Sample Resistance Band Leg Workout at Home
You do not need to perform all 12 exercises in one session. Choose a combination that trains the major movement patterns without adding unnecessary repetition.
Beginner Full-Leg Workout
- Resistance band squat: 2–3 sets of 10–15 reps
- Resistance band Romanian deadlift: 2–3 sets of 10–15 reps
- Reverse lunge: 2 sets of 8–10 reps per leg
- Banded glute bridge: 2–3 sets of 12–20 reps
- Lateral band walk: 2 sets of 8–12 steps each way
- Band hamstring curl: 2 sets of 10–15 reps per leg
- Band calf raise: 2–3 sets of 15–20 reps
Rest: Rest for 60–90 seconds between sets. Use up to two minutes after squats, Romanian deadlifts, or lunges when needed.
Frequency: Complete the workout twice per week, preferably with at least one recovery day between sessions.
Effort: Finish most sets feeling that you could perform approximately two or three more controlled repetitions. The final repetitions should be challenging, but your range of motion and posture should remain consistent.
Beginner substitution: Replace reverse lunges with seated band leg presses if balance is currently a limiting factor.
The Centers for Disease Control and Prevention recommends muscle-strengthening activity on at least two days per week as part of an overall activity plan. Those sessions should collectively train all major muscle groups, not only the legs.
How to Make Resistance Band Leg Exercises Harder
Band colors are not standardized between manufacturers, so do not select resistance based only on color. Judge the band by the quality and difficulty of your repetitions.
Use the following progression order:
- Improve your setup and exercise control.
- Add repetitions until you reach the top of the recommended range.
- Increase the resistance slightly.
- Add one set to selected exercises.
- Slow the lowering phase to approximately two or three seconds.
- Add a controlled pause where the exercise is hardest.
- Use a more demanding variation, such as a staggered stance or single-leg movement.
For anchored exercises, stepping farther from the anchor usually increases starting tension. For self-anchored exercises, shortening the working length of a flat band can also increase resistance.
Change only one or two variables at a time. Adding a stronger band, more sets, slower repetitions, and a harder variation simultaneously can make it difficult to judge what your body is ready for.
Benefits of Resistance Band Leg Exercises
They Make Home Strength Training More Accessible
Resistance bands are lightweight, portable, and easier to store than most weights or machines. They can provide meaningful resistance for compound exercises and smaller isolation movements.
They Can Train the Entire Lower Body
A complete band routine can include squatting, hinging, lunging, knee flexion, knee extension, hip abduction, hip adduction, hip extension, and calf work.
This is more balanced than performing only mini-band exercises for the glutes.
Resistance Can Be Adjusted Gradually
You can change difficulty by choosing another band, altering the band’s working length, moving relative to an anchor, adding repetitions, or changing the exercise variation.
Bands Allow Different Directions of Resistance
Free weights are primarily pulled downward by gravity. A properly anchored band can pull from the front, back, or side, which makes movements such as standing hip adduction and hamstring curls practical at home.
Common Resistance Band Leg-Training Mistakes
Using Too Much Resistance
A stronger band is not automatically better. Reduce the tension if it shortens your range, pulls you off balance, causes uncontrolled joint movement, or prevents a slow return.
Starting With a Loose Band
The band should usually have light tension at the beginning of the working range. Excessive slack creates an abrupt change in resistance and reduces control.
Ignoring the Direction of Resistance
A mini band above the knees during a squat mainly creates outward hip resistance. It does not load standing up in the same way as a long band running from the feet to the hands or shoulders.
Choose the setup according to the movement you want to train.
Letting the Band Snap Back
The return phase is part of the exercise. Control the band as it shortens rather than allowing it to pull your limb or body back into place.
Performing Only Outer-Hip Exercises
Lateral walks and hip abductions are useful, but they should not replace squats, hinges, lunges, hamstring curls, or calf work in a complete leg program.
Using an Unsafe Anchor
Do not improvise with lightweight furniture, unstable railings, sharp objects, or doors that can open toward you. Use a dedicated anchor according to its manufacturer’s instructions.
Resistance Band Safety Tips
Inspect your bands, cuffs, handles, and connection points before every workout. Do not use a band with cuts, cracks, punctures, thin sections, or damaged attachments.
The American Council on Exercise also recommends controlling the band throughout each repetition, never releasing it while stretched, keeping tube-band handles off the feet, and following the manufacturer’s maximum-stretch instructions.
Additional precautions include:
- Keep bands away from sharp edges, jewelry, heat, and direct sunlight.
- Test the anchor with light tension before beginning the set.
- Arrange yourself so a slipping band would not travel toward your face.
- Wear supportive footwear for standing exercises.
- Use a chair or wall when balance is uncertain.
- Stop the exercise if you cannot keep the band secure.
- Breathe continuously instead of holding your breath through the entire repetition.
Stop exercising and seek appropriate professional help if you experience sharp pain, numbness, dizziness, chest pain, or unusual symptoms.
Frequently Asked Questions
Can resistance bands build leg muscle?
Yes. Resistance bands can support muscle growth when exercises train the intended muscles through a controlled range, sets are sufficiently challenging, and resistance or training volume gradually increases.
However, very strong or advanced lifters may find bands less convenient for precisely measuring and progressively loading heavy compound movements. Bands can still be useful for accessory work, travel, and additional training volume.
Which resistance band is best for leg exercises?
A long loop or flat band provides the most versatility for squats, hinges, lunges, leg presses, and calf raises. A mini loop is useful for bridges, lateral walks, and hip abduction.
Add a dedicated low anchor and ankle cuff when you want to perform hamstring curls, leg extensions, hip extensions, or hip adduction.
How often should I train my legs with resistance bands?
Two weekly sessions are a practical starting point. More experienced exercisers may use two or three sessions if the number of sets, exercise difficulty, and recovery are managed appropriately.
Avoid training every set to exhaustion. Consistency and gradual progression are more useful than making every workout extremely difficult.
How many exercises should I do in one workout?
Most people need approximately five to seven well-chosen exercises, not all 12.
Include at least one squat or leg-press pattern, one hip hinge, one single-leg or additional quad movement, one hamstring exercise, one hip exercise, and one calf exercise.
Are mini bands enough for a complete leg workout?
Mini bands are useful for glute bridges, lateral walks, and hip exercises, but they have limitations.
A long band or anchored system makes it easier to add meaningful resistance to squats, Romanian deadlifts, leg presses, hamstring curls, leg extensions, and calf raises. Combining a mini loop with a long band creates a more complete setup.
When should I switch to a stronger band?
Use a stronger band when you can repeatedly reach the top of the recommended repetition range with consistent form and still have several repetitions available.
Increase resistance in a small step. Return to the lower end of the repetition range, then rebuild gradually.
Should resistance band leg exercises hurt my knees?
Normal muscular effort is expected, but sharp or worsening joint pain is not a training goal. Check your stance, reduce the resistance or range, and substitute a more comfortable exercise such as a seated leg press when needed.
Persistent pain, swelling, instability, or symptoms related to an existing condition should be evaluated by an appropriate healthcare professional.
Conclusion
Leg exercises with resistance bands can provide a balanced home workout when you train more than just the glutes. Combine squats, hinges, single-leg work, knee-flexion and knee-extension exercises, hip movements, and calf raises to cover the major lower-body muscles.
Start with five to seven exercises twice per week. Keep every repetition controlled, reach the upper end of the repetition range, and then increase the challenge gradually.
This content is for informational purposes only and is not a substitute for medical advice.
References
- American College of Sports Medicine — Resistance Training Prescription for Muscle Function, Hypertrophy, and Physical Performance
- Lopes et al. — Effects of Training With Elastic Resistance Versus Conventional Resistance on Muscular Strength: Systematic Review and Meta-Analysis
- American Council on Exercise — Resistance Band Workout Builder and Safety Guidance
- Centers for Disease Control and Prevention — Physical Activity Guidelines for Adults
- American Council on Exercise — Joint-Friendly Exercises for the Lower Extremity
- British Heart Foundation — Resistance Band Exercises You Can Do at Home