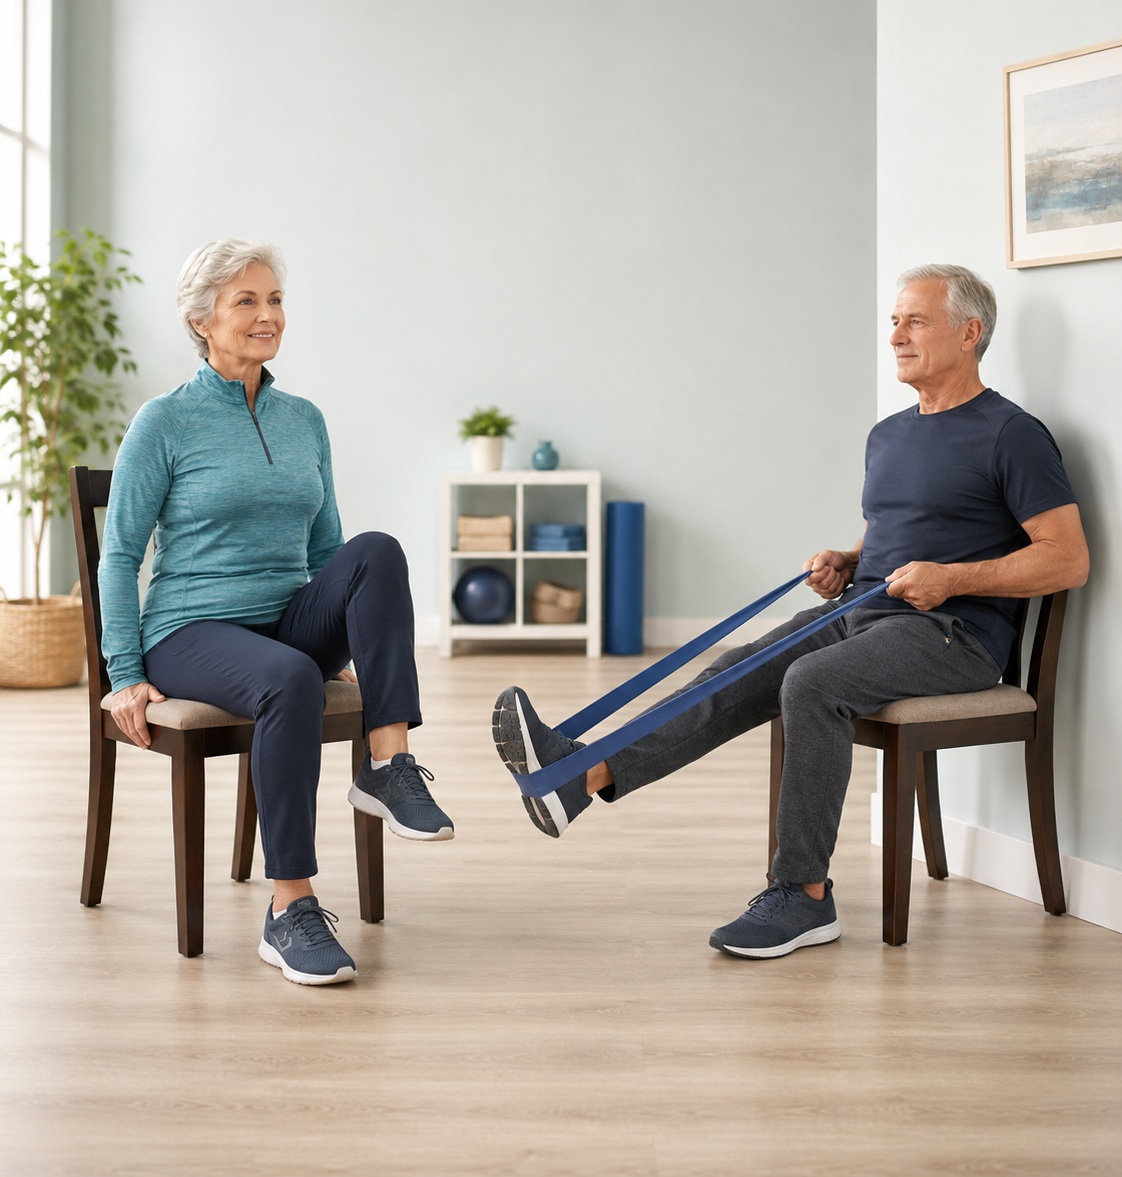
Seated leg exercises for seniors can strengthen the hips, thighs, calves, shins, and glutes while providing the stability of a chair. They are especially useful for older adults who find standing workouts uncomfortable, have limited balance, or need an accessible way to begin resistance training.
The nine exercises below are performed entirely from a seated position. You will learn how to use correct form, choose an appropriate starting volume, avoid common mistakes, and make each movement more challenging as your strength improves.
Seated Leg Exercises for Seniors at a Glance
| Exercise | Main muscles | Best for | Equipment | Starting target |
|---|---|---|---|---|
| Seated march | Hip flexors and quadriceps | Lifting the legs during stepping | Chair | 5–10 reps per side |
| Seated knee extension | Quadriceps | Front-of-thigh strength | Chair | 5–10 reps per side |
| Seated heel raise | Calves | Ankle push-off strength | Chair | 10–15 reps |
| Seated toe raise | Shin muscles | Lifting the front of the foot | Chair | 10–15 reps |
| Seated knee opener | Outer hips and glutes | Side-to-side hip control | Optional mini band | 8–12 reps |
| Seated heel slide | Hamstrings | Knee bending and hamstring control | Optional towel or band | 8–12 reps per side |
| Seated hip adduction squeeze | Inner thighs | Inner-thigh strength | Cushion or soft ball | 6–10 holds |
| Seated glute squeeze | Gluteus maximus | Basic glute activation | Chair | 8–10 holds |
| Seated resistance-band leg press | Quadriceps and glutes | Progressing seated leg strength | Long resistance band | 6–10 reps per side |
These starting targets are intentionally conservative. NHS chair-exercise resources commonly begin with approximately 5–10 controlled repetitions and recommend increasing repetitions, holds, sets, or resistance gradually.
Do Seated Leg Exercises Really Build Strength?
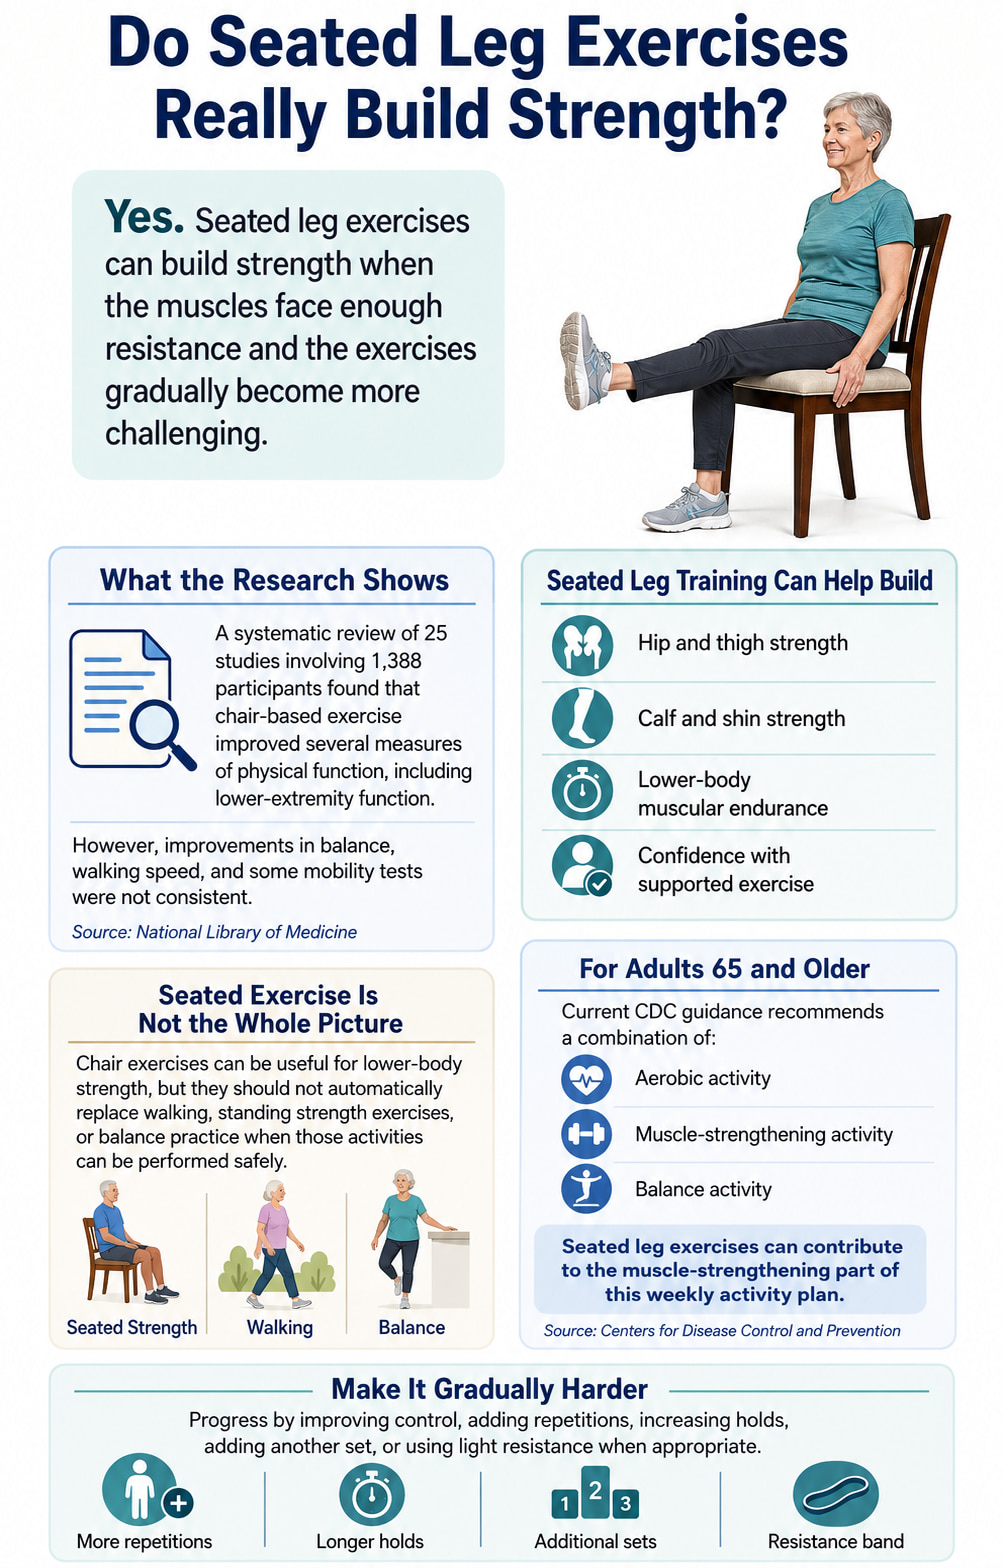
Yes. A seated exercise can build strength when the working muscles face enough resistance and the difficulty gradually increases.
A systematic review indexed by the National Library of Medicine involving 25 studies and 1,388 participants found that chair-based exercise programs improved several measures of physical function, including lower-extremity function. However, improvements in balance, walking speed, and some mobility tests were not consistent. This means chair exercises are a useful training option, but they should not automatically replace walking, standing strength work, or balance practice for people who can perform those activities safely.
Current Centers for Disease Control and Prevention physical activity guidance for adults 65 and older recommends a weekly combination of aerobic, muscle-strengthening, and balance activities. Seated leg exercises can contribute to the strengthening portion of that plan.
How to Set Up for a Safe Seated Leg Workout
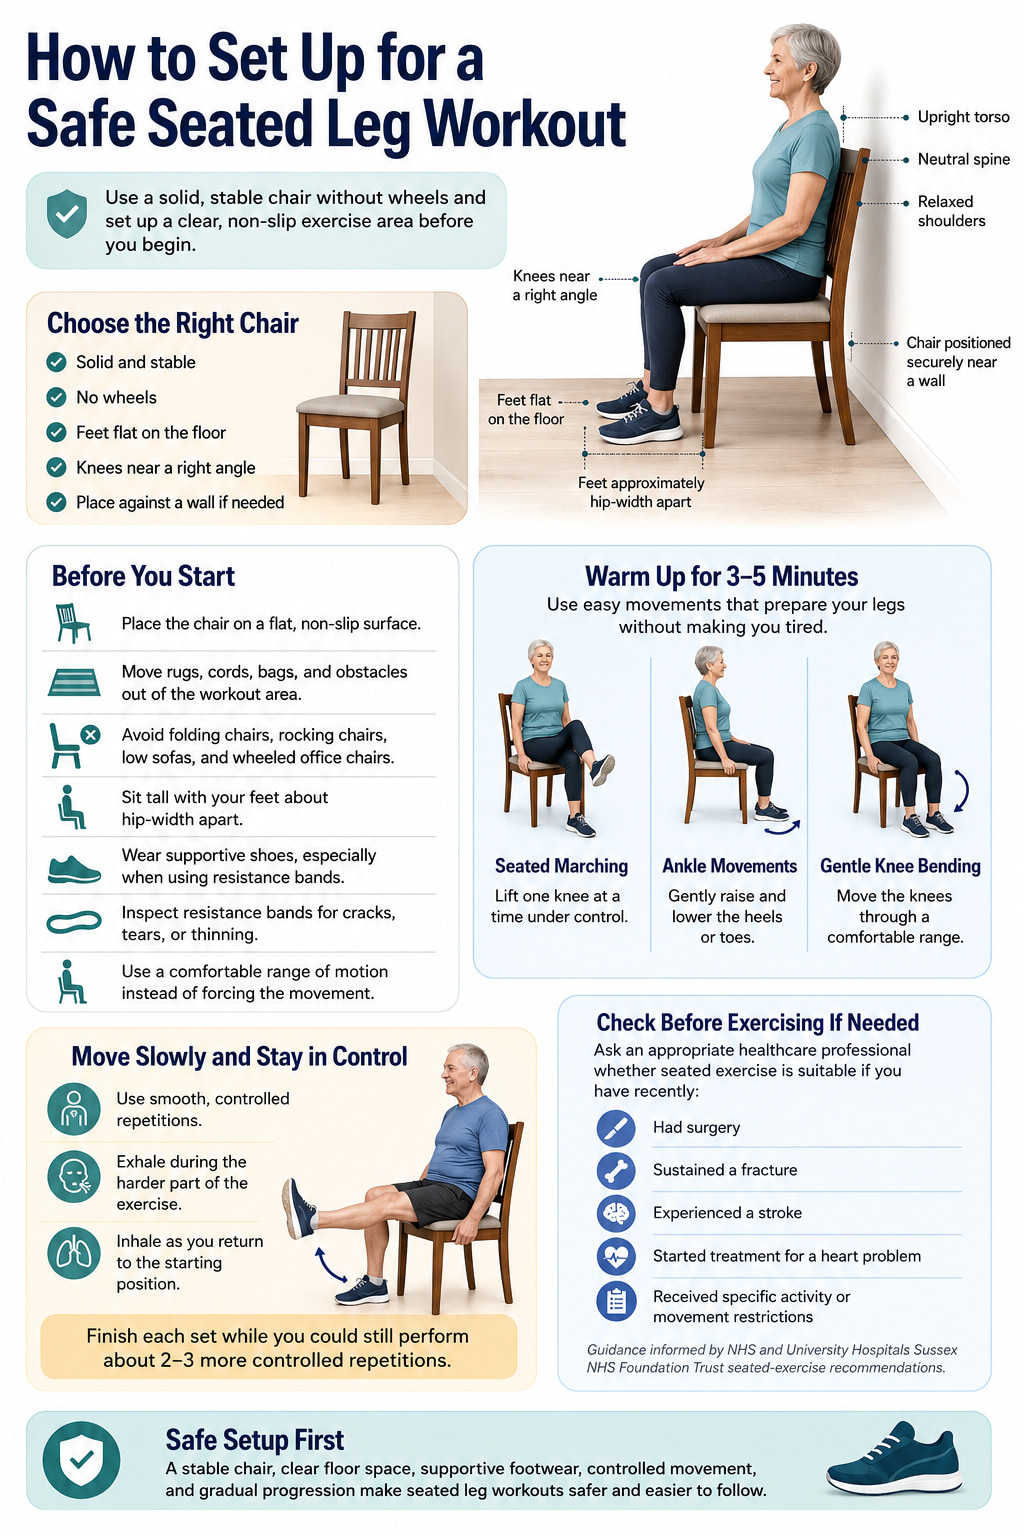
According to the NHS sitting-exercise guidance, the chair should be solid, stable, and free of wheels. It should allow you to place both feet flat on the floor with your knees near a right angle.
Before exercising:
- Place the chair on a flat, non-slip surface.
- Position it against a wall if there is any chance it could move.
- Avoid folding chairs, rocking chairs, low sofas, and office chairs with wheels.
- Sit tall with your feet approximately hip-width apart.
- Wear supportive shoes, especially when using a resistance band.
- Move rugs, cords, bags, and other obstacles away from the chair.
- Inspect resistance bands for cracks, tears, or thinning before use.
- Begin with a comfortable range of motion rather than forcing the movement.
Warm up for three to five minutes with easy seated marching, ankle movements, and gentle knee bending. The warm-up should make you feel ready to move without leaving you tired.
Use slow, controlled repetitions. Exhale during the harder part of an exercise and inhale as you return to the starting position. Finish each set while you could still perform approximately two or three more controlled repetitions.
People who have recently had surgery, sustained a fracture, experienced a stroke, started treatment for a heart problem, or received specific activity restrictions should ask an appropriate healthcare professional whether these exercises are suitable. University Hospitals Sussex NHS Foundation Trust provides similar guidance on using bed and seated exercise appropriately when health or mobility limitations are present.
9 Best Seated Leg Exercises for Seniors
You do not have to perform all nine exercises during your first workout. Begin with five or six movements that you can control comfortably, then add more as your strength and endurance improve.
1. Seated March
Best for: Strengthening the muscles used to lift the leg during stepping and stair climbing.
Muscles worked: Hip flexors and quadriceps, with the abdominal and trunk muscles helping you remain upright.
Equipment needed: A sturdy chair.
Sets, reps, and rest: Start with 1–2 sets of 5–10 repetitions per side. Rest for 30–60 seconds.
How to Do It
- Sit near the front half of the chair with both feet flat.
- Hold the sides of the chair lightly if you need additional stability.
- Sit tall and gently brace your midsection.
- Lift one knee as far as you can without leaning backward.
- Lower the foot quietly and under control.
- Repeat with the other leg.
Common mistakes: Rocking the torso backward, jerking the knee upward, lifting beyond a comfortable range, or dropping the foot quickly. Your upper body should remain mostly still.
Progression or regression: Lift only the heel if raising the whole foot is difficult. To progress, pause for two or three seconds at the top, increase the repetitions, or use a very light ankle weight after you can complete the unweighted version comfortably.
Coaching cue: Lift the knee while keeping your chest still.
The NHS recommends seated hip marching for strengthening the hips and thighs, with each leg lifted only as far as is comfortable and lowered under control.
2. Seated Knee Extension
Best for: Strengthening the front of the thigh and practicing controlled knee straightening.
Muscles worked: Quadriceps.
Equipment needed: A sturdy chair. A light ankle weight or resistance band can be added later.
Sets, reps, and rest: Start with 1–2 sets of 5–10 repetitions per leg. Rest for 30–60 seconds.
How to Do It
- Sit tall with both feet flat and your knees bent.
- Keep one thigh supported by the chair.
- Slowly straighten the opposite knee until the leg is almost straight.
- Pause for one to three seconds.
- Lower the foot slowly instead of letting it drop.
- Complete the repetitions before changing legs.
Common mistakes: Swinging the lower leg, forcefully locking the knee, leaning backward, or lowering too quickly. A shorter controlled range is more useful than a larger uncontrolled one.
Progression or regression: Straighten the knee only partway if the full movement is uncomfortable. Progress by increasing the pause, adding repetitions, or using a light ankle weight or resistance band.
Coaching cue: Straighten smoothly, pause, and lower even more slowly.
Northern Health and Social Care Trust chair-exercise guidance emphasizes extending the leg with control, avoiding a forceful knee lock, and controlling the return to the floor.
3. Seated Heel Raise
Best for: Building calf strength and practicing the ankle push-off used during walking.
Muscles worked: Gastrocnemius and soleus.
Equipment needed: A sturdy chair. A light weight placed securely across the thighs is optional.
Sets, reps, and rest: Perform 1–2 sets of 10–15 repetitions. Rest for 30–45 seconds.
How to Do It
- Sit tall with your knees positioned above your ankles.
- Place both feet flat and point the toes forward.
- Keep the balls of your feet and toes on the floor.
- Raise both heels as high as you can without rolling the feet outward.
- Pause briefly at the top.
- Lower the heels slowly.
Common mistakes: Bouncing, rushing, rolling onto the outside edges of the feet, or moving the knees excessively. Keep pressure distributed across the front of each foot.
Progression or regression: Use a smaller heel lift if necessary. Progress by pausing for three seconds, working one leg at a time, or applying gentle resistance through the thighs with your hands or a light weight.
Coaching cue: Lift the heels straight up rather than letting them roll outward.
Kingston and Richmond NHS Foundation Trust falls-prevention guidance uses seated heel raises to practice controlled ankle movement and suggests a brief hold before lowering slowly.
4. Seated Toe Raise
Best for: Strengthening the muscles that lift the front of the foot.
Muscles worked: Tibialis anterior and other ankle dorsiflexors along the front of the lower leg.
Equipment needed: A sturdy chair.
Sets, reps, and rest: Perform 1–2 sets of 10–15 repetitions. Rest for 30–45 seconds.
How to Do It
- Sit tall with both feet flat.
- Keep both heels firmly on the floor.
- Lift your toes and the front of each foot toward your shins.
- Pause briefly at the top.
- Lower the feet slowly until they are flat again.
Common mistakes: Lifting the heels, rocking the whole body backward, turning the toes inward or outward, or dropping the feet quickly.
Progression or regression: Begin with one foot at a time or use a smaller movement. Progress by holding the raised position for two or three seconds or performing additional controlled repetitions.
Coaching cue: Keep the heels heavy while the toes rise.
Hospital chair-exercise programs commonly pair toe raises with heel raises to train both directions of ankle movement.
5. Seated Knee Opener
Best for: Strengthening the outer hips and improving control of the knees during side-to-side movement.
Muscles worked: Gluteus medius, gluteus minimus, and other hip-abductor and external-rotator muscles.
Equipment needed: A mini resistance band is optional but recommended when strength is the main goal.
Sets, reps, and rest: Perform 1–2 sets of 8–12 repetitions. Rest for 45–60 seconds.
How to Do It
- Sit tall with your feet flat and approximately hip-width apart.
- Place a light mini band just above your knees if using one. Do not place it directly over the kneecaps.
- Keep your feet planted as you press both knees outward.
- Pause briefly without leaning backward.
- Return the knees slowly until they are again aligned over the feet.
Common mistakes: Allowing the feet to roll onto their outer edges, opening the knees with momentum, leaning backward, or letting the band snap the knees inward.
Progression or regression: Perform the movement without a band or use a smaller range as a regression. Progress by using a slightly stronger band or holding the open position for two or three seconds.
Coaching cue: Press the knees apart while keeping both feet grounded.
A similar seated hip-strengthening setup is used by Cambridge University Hospitals NHS Foundation Trust, where the knees press outward against resistance while the feet remain flat.
6. Seated Heel Slide
Best for: Practicing controlled knee bending and beginning to strengthen the hamstrings.
Muscles worked: Hamstrings, with assistance from muscles around the hip and lower leg.
Equipment needed: A towel or exercise slider is optional. A resistance band can be added later.
Sets, reps, and rest: Perform 1–2 sets of 8–12 repetitions per side. Rest for 30–60 seconds.
How to Do It
- Sit tall with both feet flat.
- Place one heel on a folded towel if the floor allows it to slide safely.
- Slide that heel forward until the knee opens to a comfortable angle.
- Press the heel gently into the floor.
- Pull the heel back toward the chair by bending the knee.
- Control both parts of the movement and repeat on the other side.
Common mistakes: Lifting the heel, twisting the knee, moving the whole chair, or using only momentum. The backward pull should feel deliberate.
Progression or regression: Use a shorter sliding distance if needed. To make the hamstrings work harder, press the heel more firmly into the floor, slow the backward pull, or use a light band secured safely in front of you.
Coaching cue: Drag the heel back as though you are trying to pull the floor toward the chair.
NHS chair-exercise guidance uses seated sliding movements with a controlled forward-and-back action and recommends adding band resistance only after the basic version becomes easier.
7. Seated Hip Adduction Squeeze
Best for: Strengthening the inner thighs with a simple seated isometric exercise.
Muscles worked: Hip adductors along the inner thighs.
Equipment needed: A cushion, folded towel, or soft exercise ball.
Sets, reps, and rest: Perform 1–2 sets of 6–10 holds. Hold each repetition for 3–5 seconds and rest for approximately 30 seconds between sets.
How to Do It
- Sit tall with both feet flat.
- Place a cushion or soft ball between your knees.
- Keep the hips, knees, and feet facing forward.
- Gently squeeze your knees toward the object.
- Continue breathing while holding the squeeze.
- Release the pressure slowly before repeating.
Common mistakes: Holding the breath, squeezing as hard as possible immediately, twisting the legs, or continuing through groin or hip pain.
Progression or regression: Begin with a gentle squeeze held for two or three seconds. Progress by increasing the hold to five or eight seconds rather than using a hard or uncomfortable object.
Coaching cue: Build the pressure gradually, then release it just as gradually.
Dynamic Health NHS musculoskeletal guidance uses a soft ball between the knees and a controlled five-second squeeze for seated hip adduction.
8. Seated Glute Squeeze
Best for: Beginners who need a low-movement starting exercise for the glutes.
Muscles worked: Gluteus maximus.
Equipment needed: A sturdy chair.
Sets, reps, and rest: Perform 1–2 sets of 8–10 holds. Hold each squeeze for 3–5 seconds.
How to Do It
- Sit tall with both feet flat.
- Allow your shoulders to remain relaxed.
- Tighten both buttock muscles.
- Hold the contraction while continuing to breathe.
- Relax completely before beginning the next repetition.
Common mistakes: Holding the breath, forcefully pushing the feet into the floor, rocking the pelvis, shrugging, or tightening every muscle in the body.
Progression or regression: Start with shorter holds if you struggle to maintain the contraction. Progress to longer holds or a more demanding glute exercise, such as a resistance-band leg press. A supported sit-to-stand may be a later progression when standing exercise is appropriate.
Coaching cue: Tighten the muscles you are sitting on without changing your posture.
A five-second seated glute squeeze is included in chair-exercise programs from Mersey and West Lancashire Teaching Hospitals NHS Trust.
9. Seated Resistance-Band Leg Press
Best for: Progressing from unresisted chair exercises to a more challenging seated leg movement.
Muscles worked: Quadriceps and gluteus maximus, with assistance from the hamstrings and calves.
Equipment needed: A long resistance band and supportive footwear.
Sets, reps, and rest: Begin with 1–2 sets of 6–10 repetitions per leg. Rest for 60–90 seconds.
How to Do It
- Inspect the band and position the chair securely against a wall.
- Sit back far enough to feel stable and brace your midsection.
- Place the middle of the band under the arch or midfoot of one shoe—not around the toes.
- Hold one end firmly in each hand, keeping the band directed away from your face.
- Begin with the knee bent and the foot slightly off the floor.
- Press the foot forward until the leg is almost straight.
- Keep a slight bend in the knee instead of forcefully locking it.
- Return to the bent-knee position slowly.
Common mistakes: Placing the band around the toes, using a damaged band, losing grip, snapping the leg straight, allowing the band to pull the leg back quickly, or leaning excessively.
Progression or regression: Practice the pressing motion without a band first. Progress to a slightly stronger band only after you can complete 10–12 smooth repetitions while controlling the return.
Coaching cue: Press away under control, then resist the band as the knee bends.
The basic seated band-leg-press setup is also used in rehabilitation guidance from University Hospitals Plymouth NHS Trust, with a band around the foot while the leg presses from a bent to an almost straight position. The resistance and volume here are reduced to make the exercise more appropriate as a general beginner strength progression.
Beginner Seated Leg Workout for Seniors
Perform this routine two nonconsecutive days per week. A third weekly session can be added when you recover comfortably and your form remains consistent.
| Order | Exercise | Starting amount |
|---|---|---|
| 1 | Seated march | 8 reps per side |
| 2 | Seated knee extension | 8 reps per side |
| 3 | Seated heel raise | 12 reps |
| 4 | Seated toe raise | 12 reps |
| 5 | Seated knee opener | 8–10 reps |
| 6 | Seated heel slide | 8 reps per side |
| 7 | Seated hip adduction squeeze | 6 holds of 5 seconds |
| 8 | Seated glute squeeze | 8 holds of 5 seconds |
| 9 | Seated resistance-band leg press | 6–8 reps per side, optional |
Complete one round during your first few workouts. Rest for approximately 30–60 seconds between exercises and longer when necessary.
The final repetitions should require concentration but should not cause you to lose control, hold your breath, or change your posture. You do not need to train to complete muscular failure.
The 2026 American College of Sports Medicine resistance-training position stand emphasizes regular participation, individualization, and progressive resistance rather than unnecessarily complicated programming. It also recognizes elastic bands, bodyweight exercises, and home-based routines as useful resistance-training options.
How to Progress the Exercises Safely
Do not increase every part of the workout at once. Progress one variable at a time in the following order:
- Improve control. Perform every repetition without swinging, bouncing, or losing posture.
- Increase comfortable range. Move slightly farther only when the larger motion remains comfortable.
- Add repetitions. Work from 5–8 repetitions toward approximately 10–12.
- Add a second set. Increase the number of sets after one set no longer provides enough challenge.
- Use a slower return. Take two or three seconds to lower the leg or release the resistance.
- Add light resistance. Use a mini band, long band, or appropriately selected ankle weight.
- Progress beyond seated training when appropriate. Supported sit-to-stands, standing heel raises, walking, and balance exercises can provide challenges that fully seated exercise cannot.
Consider progressing when you can complete the current target during at least two workouts with steady breathing, controlled technique, and no worsening symptoms afterward.
The National Strength and Conditioning Association position statement on resistance training for older adults supports individualized, progressive resistance exercise to improve strength and physical function.
Benefits of Seated Leg Exercises for Seniors
An Accessible Starting Point
Seated exercises remove the balance demands of standing and eliminate the need to get down onto the floor. This can make strengthening more accessible for people with limited mobility or low confidence during unsupported standing.
Strengthening Several Lower-Body Muscle Groups
A balanced chair routine can train the front and back of the thighs, outer and inner hips, glutes, calves, and shin muscles. Using several movement directions is more complete than performing only seated marching or knee extensions.
Simple, Measurable Progression
Repetitions, pauses, range of motion, sets, and resistance can all be adjusted. This allows a routine to begin gently without remaining easy forever.
Support for Everyday Movement
The muscles trained by these exercises contribute to actions such as lifting the foot, straightening and bending the knee, moving the leg sideways, and pushing through the foot. Strengthening them may support physical function, although improvement in a particular task also requires practicing that task when it is safe to do so.
A Practical Way to Exercise Consistently
A chair routine requires little space and minimal equipment. That convenience can make regular strength training easier to maintain, and consistent participation is one of the most important factors in obtaining results.
Common Mistakes to Avoid
Using an Unstable Chair
A rolling or folding chair can move during marching, heel slides, or band exercises. Use a sturdy chair and place it against a wall when necessary.
Moving Too Quickly
Fast repetitions often reduce muscular control. Lift, pause briefly, and return slowly.
Forcing the Range of Motion
The goal is not to lift the knee as high as possible or straighten the leg at any cost. Use the largest comfortable range you can control.
Leaning Back to Lift the Leg
Leaning backward makes seated marching and knee extensions easier by using momentum. Reduce the leg height instead and keep your torso tall.
Holding the Breath
Exhale during the lifting, pressing, or squeezing phase. Continue breathing during isometric holds.
Adding Resistance Too Soon
Bands and ankle weights are helpful only when they do not disrupt technique. Master the unresisted movement before increasing the load.
Treating Seated Exercise as Balance Training
A chair supports the body, so fully seated exercises place little demand on standing balance. People who can safely perform supported balance work should include it separately, consistent with current CDC recommendations for older adults.
When to Stop Exercising
Stop the exercise if you experience:
- Sharp or rapidly increasing pain
- Numbness or new tingling
- Dizziness or faintness
- Chest pain or pressure
- Unusual shortness of breath
- Sudden weakness
- Loss of control or a feeling that the chair may move
- Symptoms that remain noticeably worse after the session
Mild muscular effort is expected, but worsening joint pain or unusual symptoms should not be ignored. Seek appropriate professional help when symptoms are severe, new, or persistent.
Frequently Asked Questions
Do seated leg exercises really strengthen the legs?
They can. The exercise must challenge the muscle, and the challenge must increase over time. A knee extension may begin with the weight of the lower leg, for example, before progressing to a longer pause, additional repetitions, or light resistance.
Very gentle movements such as heel slides and glute squeezes are useful starting points, but they may eventually become too easy to produce further strength gains.
How often should seniors perform seated leg exercises?
Two nonconsecutive strength sessions per week are a practical starting point. A third session may be suitable when the total workload is modest and recovery is good.
The CDC recommends muscle-strengthening activity on at least two days per week for adults aged 65 and older.
How many repetitions should a beginner perform?
Begin with approximately 5–10 controlled repetitions per side or 3–5-second holds for isometric exercises. Progress toward 8–12 repetitions, and then consider adding a second set.
There is no benefit to reaching a target number by using momentum or working through pain. Stop the set when your technique begins to change.
Which seated exercises are best for weak thighs?
The seated knee extension directly trains the quadriceps at the front of the thigh. The resistance-band leg press trains the quadriceps and glutes together and is a useful progression once you can control the simpler exercises.
Can seated leg exercises help with walking?
They may strengthen several muscles used during walking, including the hip flexors, quadriceps, calves, and ankle dorsiflexors. However, walking is also a coordination, endurance, and balance task. Practice walking or supported standing activity separately when it is safe and appropriate.
Do seated exercises improve balance?
Fully seated exercises do not challenge standing balance very much. Some chair-based programs improve certain measures of physical function, but research has not found consistent balance improvements from seated exercise alone. Dedicated balance practice is still important for people who can perform it safely.
Can I use ankle weights or stronger bands?
Add resistance only after you can complete the unweighted exercise through a comfortable range without swinging, breath-holding, or losing posture. Begin with the lightest practical resistance and increase gradually.
People recovering from surgery or injury, or those with clinician-imposed joint or movement restrictions, should follow their individual rehabilitation instructions rather than adding resistance independently.
Conclusion
Seated leg exercises for seniors offer a practical way to strengthen the lower body when standing or floor-based training is not suitable. Begin with a stable chair, controlled repetitions, and a manageable range of motion. As the exercises become easier, gradually add repetitions, pauses, sets, or light resistance.
Choose movements that train the hips, thighs, calves, shins, and glutes rather than relying on one exercise. When it is safe to do so, combine seated strength work with walking, supported standing exercises, and balance practice for a more complete activity routine.
This content is for informational purposes only and is not a substitute for medical advice.
References
- American College of Sports Medicine — Resistance Training Prescription for Muscle Function, Hypertrophy, and Physical Performance in Healthy Adults
https://pubmed.ncbi.nlm.nih.gov/41843416/ - National Strength and Conditioning Association — Resistance Training for Older Adults: Position Statement
https://pubmed.ncbi.nlm.nih.gov/31343601/ - Klempel et al. — The Effect of Chair-Based Exercise on Physical Function in Older Adults: A Systematic Review and Meta-Analysis
https://pubmed.ncbi.nlm.nih.gov/33669357/ - Centers for Disease Control and Prevention — Physical Activity Guidelines for Older Adults
https://www.cdc.gov/physical-activity-basics/guidelines/older-adults.html - NHS — Sitting Exercises
https://www.nhs.uk/live-well/exercise/sitting-exercises/ - Gao et al. — Effect of Chair-Based Exercise on Physical Functioning in Postmenopausal Women: Systematic Review and Meta-Analysis
https://pubmed.ncbi.nlm.nih.gov/41257594/