Office chair exercises at work are simple seated or chair-assisted movements that help desk workers interrupt long periods of sitting, move stiff joints, and activate muscles without needing a gym or special equipment.
The 11 exercises below target the legs, hips, upper back, shoulders, neck, wrists, and forearms. You will also find proper form instructions, common mistakes, modifications, and short routines that fit into a normal workday.
What Are Office Chair Exercises?
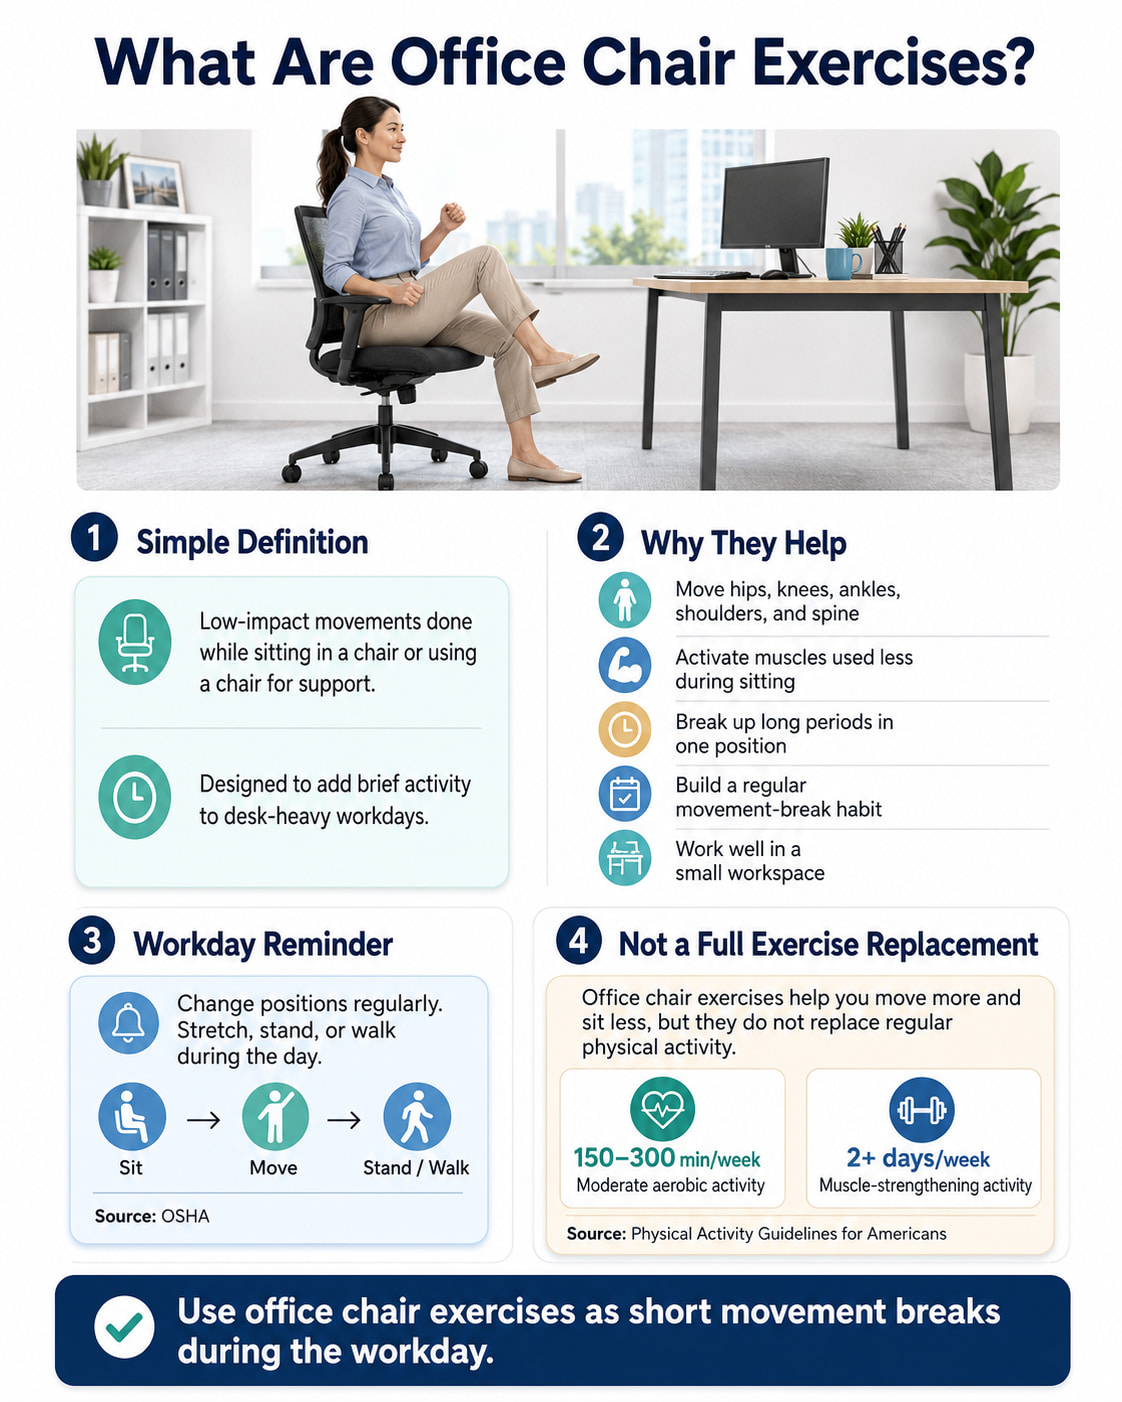
Office chair exercises are low-impact movements performed while sitting in a chair or using a chair for support. They are designed to add brief periods of activity to a workday that involves prolonged computer use or desk work.
They can be useful for:
- Moving your hips, knees, ankles, shoulders, and spine
- Activating muscles that remain relatively inactive while sitting
- Breaking up extended periods in one position
- Building a more consistent movement-break habit
- Completing light exercise in a small workspace
The Occupational Safety and Health Administration recommends changing working positions frequently, stretching the fingers, hands, arms, and torso, and periodically standing or walking. Even a well-adjusted workstation does not make remaining in one position for hours ideal.
However, desk exercises are not a complete replacement for regular physical activity. Current Physical Activity Guidelines for Americans recommend that adults move more and sit less while working toward 150–300 minutes of moderate-intensity aerobic activity each week and muscle-strengthening activity on at least two days.
Before You Start: Chair and Workspace Safety
Choose a solid chair that does not move when you shift your weight. The NHS sitting-exercise guidance recommends a stable chair without wheels, with the feet flat on the floor and the knees bent at approximately right angles.
Follow these setup guidelines:
- Place both feet flat on the floor or on a stable footrest.
- Clear bags, cables, and other objects from around your feet.
- Sit where you have enough room to move your arms and legs.
- Use a fixed meeting or visitor chair for sit-to-stands.
- Do not perform weight-bearing exercises from a rolling or swiveling chair.
- Keep each movement controlled and within a comfortable range.
- Breathe normally instead of holding your breath.
- Respect your employer’s safety rules and available workspace.
Start with one set of each movement. Most office exercises should feel easy to moderately challenging, approximately 3–6 out of 10 for effort.
Stop if you experience sharp pain, numbness, dizziness, chest pain, loss of balance, or other unusual symptoms.
11 Best Office Chair Exercises at Work
These 11 office chair exercises at work help desk workers move more, activate key muscles, and break up long periods of sitting.
They target the legs, hips, upper back, shoulders, neck, and wrists with simple movements that require little space or equipment.
1. Seated Marching
Best for: Moving the hips and legs during a short seated break.
Muscles worked: Hip flexors, quadriceps, and abdominal and spinal stabilizers.
Equipment needed: A stable chair.
Sets, reps, and rest: Perform 1–2 sets of 10–20 alternating lifts or march for 30–60 seconds. Rest for 15–30 seconds.
How to Do It
- Sit toward the front half of the chair with your torso upright.
- Place both feet flat on the floor beneath or slightly in front of your knees.
- Lightly brace your midsection without holding your breath.
- Raise one knee a few inches while keeping your torso steady.
- Lower the foot quietly and repeat with the opposite leg.
- Continue alternating at a controlled pace.
The NHS uses the same basic alternating pattern in its seated hip-marching guidance.
Common mistakes: Leaning backward, rounding the lower back, lifting the knee by swinging the torso, or allowing the feet to drop heavily to the floor.
Progression or regression: Raise the knee through a smaller range and hold the chair for support if needed. To progress, march for up to 60–90 seconds or pause briefly at the top of each lift.
Coaching cue: Keep your belt line still while your legs move.
2. Seated Knee Extension
Best for: Activating the front of the thighs without standing.
Muscles worked: Quadriceps, with the hip and trunk muscles stabilizing your seated position.
Equipment needed: A stable chair.
Sets, reps, and rest: Perform 1–2 sets of 8–12 repetitions per leg. Rest for 20–30 seconds.
How to Do It
- Sit upright with both feet flat on the floor.
- Keep one thigh supported by the chair.
- Straighten the opposite knee until the leg is nearly straight.
- Pause for one second while tightening the front of the thigh.
- Lower the foot slowly.
- Complete the repetitions before switching legs, or alternate sides.
Common mistakes: Snapping the knee straight, lifting the thigh from the chair, leaning backward, or dropping the foot quickly.
Progression or regression: Begin with a partial range if fully straightening the knee is uncomfortable. Progress by holding the top position for two or three seconds or taking three seconds to lower the leg.
Coaching cue: Move from the knee rather than kicking from the hip.
3. Seated Heel and Toe Raises
Best for: Moving the ankles and activating both sides of the lower legs.
Muscles worked: Gastrocnemius and soleus during heel raises; tibialis anterior and other ankle dorsiflexors during toe raises.
Equipment needed: A stable chair.
Sets, reps, and rest: Perform 1–2 sets of 10–15 heel raises followed by 10–15 toe raises. Rest for 15–30 seconds.
How to Do It
- Sit with your feet flat and approximately hip-width apart.
- Keep the balls of your feet on the floor as you raise both heels.
- Pause briefly, then lower the heels with control.
- Keep the heels down and raise the toes toward your shins.
- Lower the toes slowly.
- Continue without rocking your torso.
Common mistakes: Moving too quickly, rolling the feet outward, lifting the entire foot, or using body momentum instead of ankle movement.
Progression or regression: Perform one foot at a time if you want to concentrate on each side. To make the movement easier, reduce the range. To progress, add a two-second pause at the top.
Coaching cue: Press through the front of your feet for heel raises and pull the toes upward for toe raises.
4. Seated Glute Squeeze
Best for: Discreetly activating the glute muscles during desk work.
Muscles worked: Primarily the gluteus maximus, with the other gluteal muscles contributing to hip stability.
Equipment needed: A chair.
Sets, reps, and rest: Perform 5–10 contractions, holding each for 5–10 seconds. Relax fully between repetitions.
How to Do It
- Sit upright with your feet supported.
- Keep your pelvis in a comfortable, neutral position.
- Contract both buttock muscles as though you are gently pressing them together.
- Hold the contraction without lifting from the chair.
- Continue breathing normally.
- Release the contraction completely before repeating.
Common mistakes: Holding the breath, aggressively tucking the pelvis, clenching the abdominal muscles harder than necessary, or maintaining one long contraction without relaxing.
Progression or regression: Start with two- or three-second holds. Gradually increase the hold to 10 seconds, but focus on a clear contraction and complete relaxation rather than squeezing as hard as possible.
Coaching cue: Tighten, breathe, and then fully release.
5. Stable-Chair Sit-to-Stand
Best for: Training practical lower-body strength with a simple chair-assisted movement.
Muscles worked: Quadriceps, gluteus maximus, adductors, hamstrings, calves, and trunk stabilizers.
Equipment needed: A fixed, non-rolling chair that will not slide.
Sets, reps, and rest: Perform 1–3 sets of 5–10 repetitions. Rest for 45–75 seconds.
How to Do It
- Sit near the front of a stable chair.
- Place your feet approximately hip-width apart with the heels firmly supported.
- Lean slightly forward from the hips while keeping your chest comfortably lifted.
- Push through your feet and stand using your legs.
- Finish upright without forcefully leaning backward or locking your knees.
- Reach your hips back and lower yourself to the chair under control.
The NHS strength-exercise guide teaches the sit-to-stand from a stable, non-wheeled chair and recommends standing and sitting slowly rather than dropping onto the seat.
Common mistakes: Using a rolling chair, allowing the knees to collapse inward, pushing only through the toes, dropping onto the seat, or pulling forcefully on a desk.
Progression or regression: Use a higher chair and lightly press your hands against your thighs or armrests if necessary. To progress, take three seconds to lower yourself or add repetitions while maintaining control.
Coaching cue: Bring your chest forward, then push the floor away.
6. Seated Shoulder Rolls
Best for: Gentle shoulder-girdle movement between periods of typing.
Muscles worked: Trapezius, levator scapulae, rhomboids, and other muscles controlling the shoulder blades.
Equipment needed: A chair.
Sets, reps, and rest: Perform 5–10 slow circles backward, followed by 5–10 circles forward.
How to Do It
- Sit upright with your arms relaxed at your sides.
- Raise your shoulders gently toward your ears.
- Roll them backward.
- Lower them away from your ears.
- Bring them forward to complete the circle.
- Reverse direction after finishing the set.
Common mistakes: Moving too fast, forcing the shoulders through an uncomfortable range, tensing the jaw, or moving the head in a large circle with the shoulders.
Progression or regression: Roll one shoulder at a time if moving both together feels awkward. Increase the size of the circles only when the movement remains comfortable.
Coaching cue: Make smooth circles rather than sharp shrugs.
7. Seated Shoulder Blade Squeeze
Best for: Activating the muscles between the shoulder blades.
Muscles worked: Rhomboids, middle trapezius, and lower trapezius, with assistance from the rear shoulder muscles.
Equipment needed: An armless chair or stool.
Sets, reps, and rest: Perform 5–10 repetitions, holding each squeeze for 3–5 seconds. Rest as needed.
How to Do It
- Sit upright with your arms relaxed.
- Keep your chin level and your ribs controlled.
- Gently draw your shoulder blades toward one another.
- Keep the shoulders down rather than shrugging them.
- Hold for three to five seconds.
- Relax completely before repeating.
The Mayo Clinic shoulder blade squeeze uses an upright seated position, a five-second hold, and full relaxation between repetitions.
Common mistakes: Shrugging, thrusting the chest forward, arching the lower back, pushing the head forward, or squeezing with excessive force.
Progression or regression: Start with two-second holds. Progress by increasing the hold to five or eight seconds rather than pulling the shoulder blades together more aggressively.
Coaching cue: Slide your shoulder blades gently back and down.
8. Seated Upper-Body Twist
Best for: Gentle upper-back and trunk rotation.
Muscles worked: Obliques, spinal rotators, and thoracic erector muscles.
Equipment needed: A stable chair.
Sets, reps, and rest: Perform 3–5 repetitions per side, holding each position for 3–5 seconds.
How to Do It
- Sit upright with both feet flat.
- Cross your arms over your chest or place your hands on opposite shoulders.
- Keep your knees and hips facing forward.
- Rotate your rib cage slowly toward one side.
- Stop at a comfortable point without forcing the movement.
- Return to the center and repeat on the other side.
The NHS upper-body twist similarly emphasizes keeping the hips still while rotating only as far as comfortable.
Common mistakes: Pulling hard against the chair, turning the knees with the torso, leaning sideways, holding the breath, or bouncing at the end of the range.
Progression or regression: Use a smaller range if your upper back feels restricted. Progress by adding a brief pause, not by forcing farther into the twist.
Coaching cue: Turn your rib cage while keeping both knees forward.
9. Seated Neck Rotation
Best for: Gentle neck movement after prolonged screen use.
Muscles worked: Cervical rotators, including the sternocleidomastoid and deeper neck muscles.
Equipment needed: A chair.
Sets, reps, and rest: Perform 3–5 controlled rotations per side. Hold each comfortable end position for 2–3 seconds.
How to Do It
- Sit upright with your shoulders relaxed.
- Keep your chin level rather than lifting or dropping it.
- Slowly turn your head toward one side.
- Stop before the movement becomes strained.
- Pause briefly and return to the center.
- Repeat on the opposite side.
Common mistakes: Forcing the head farther with your hand, tilting the head, lifting the chin, moving quickly, or performing large neck circles.
Progression or regression: Reduce the range if turning fully feels uncomfortable. Progress by completing more smooth repetitions. External resistance is unnecessary for a workplace mobility break.
Coaching cue: Imagine your head turning on a level platform.
10. Wrist and Forearm Stretch
Best for: Moving and gently stretching the wrists and forearms after typing or mouse use.
Muscles worked or stretched: Wrist flexors, wrist extensors, finger flexors, and finger extensors.
Equipment needed: None.
Sets, reps, and rest: Hold each stretch for 15–30 seconds per side. Complete 1–2 rounds.
How to Do It
- Extend one arm comfortably in front of you with the palm facing down.
- Keep the elbow straight but not aggressively locked.
- Use the opposite hand to guide the fingers gently downward.
- Hold the stretch across the top of the forearm.
- Turn the palm upward and guide the fingers downward again to stretch the opposite side.
- Finish with five slow wrist circles in each direction.
The Mayo Clinic workplace forearm-stretch guide recommends gentle 15–30-second holds, normal breathing, and avoiding bouncing or painful ranges.
Common mistakes: Pulling the fingers aggressively, locking the elbow, shrugging the shoulder, bouncing, or continuing when the stretch becomes painful.
Progression or regression: Use less hand pressure for a gentler stretch. Progress by holding for up to 30 seconds while maintaining only mild, comfortable tension.
Coaching cue: Look for gentle tension, not pain.
11. Seated Chest Opener
Best for: Moving out of a rounded, forward-reaching desk position.
Muscles worked or stretched: Pectoralis major, pectoralis minor, and anterior deltoids are stretched; upper-back muscles lightly support the position.
Equipment needed: An armless chair is helpful.
Sets, reps, and rest: Perform 3–5 holds of 5–10 seconds. Rest briefly between holds.
How to Do It
- Sit upright and slightly away from the chair back.
- Place your feet flat on the floor.
- Let your arms hang beside you with the palms facing forward.
- Gently move your shoulders back and down.
- Open your arms slightly and lift your chest without arching your lower back.
- Hold while breathing normally, then relax.
This movement follows the general chest-stretch setup in the NHS seated-exercise routine.
Common mistakes: Shrugging the shoulders, forcing the arms too far backward, pushing the ribs forward, or turning the movement into a large lower-back arch.
Progression or regression: Keep the hands closer to your thighs for a gentler stretch. Progress by moving the arms slightly wider while maintaining relaxed shoulders and a neutral lower back.
Coaching cue: Open through the chest without flaring the ribs.
Three-Minute Seated Desk Reset
This low-effort routine can be completed without leaving your chair.
| Exercise | Amount |
|---|---|
| Seated heel and toe raises | 30 seconds |
| Seated marching | 30 seconds |
| Seated shoulder rolls | 30 seconds |
| Shoulder blade squeezes | 5 controlled repetitions |
| Seated upper-body twists | 3 per side |
| Wrist circles and forearm stretches | 30–45 seconds |
Effort level: Approximately 3–4 out of 10.
Rest: Move directly from one exercise to the next unless you need a brief pause.
Frequency: Use it once or several times during the workday, depending on your schedule and comfort.
Five-Minute Office Chair Strength and Mobility Routine
Use a fixed chair for the entire routine, particularly the sit-to-stand.
- Stable-chair sit-to-stand: 8 repetitions
- Seated knee extension: 8 repetitions per leg
- Seated marching: 30 seconds
- Seated glute squeeze: 5 holds of 5 seconds
- Shoulder blade squeeze: 8 repetitions
- Seated chest opener: 3 holds of 5–10 seconds
- Seated neck rotation: 3 repetitions per side
Rest: Take 15–30 seconds when needed.
Effort level: Approximately 4–6 out of 10.
Frequency: Perform the routine two to four times per week, while using shorter mobility breaks on other workdays.
Progression: When every repetition feels controlled, add two repetitions to one exercise or increase one timed movement by 10 seconds. Avoid increasing every exercise at once.
How Often Should Desk Workers Take Movement Breaks?
There is no single break schedule that is ideal for every person or workplace. A practical starting point is to change position or move for a few minutes after approximately 30–60 minutes of uninterrupted sitting.
Possible reminders include:
- A computer or phone notification
- Standing after finishing a task
- Walking during an appropriate phone call
- Moving between meetings
- Completing one exercise each time you refill your water
A 2025 systematic review of 18 randomized trials involving 1,164 office workers found that computer-prompt interventions produced modest reductions in sitting and increases in daily steps. Break schedules varied considerably, and the certainty of the main evidence was rated low to moderate, so reminders should be treated as a practical habit tool rather than a guaranteed health solution.
The goal is not to follow a timer perfectly. It is to reduce long periods in which your body remains in exactly the same position.
How to Progress Office Chair Exercises Safely
Use one progression at a time:
- Add two repetitions.
- Increase a timed exercise by 10–15 seconds.
- Hold a muscular contraction for one or two seconds longer.
- Slow the lowering portion of knee extensions or sit-to-stands.
- Increase your range only when it remains comfortable.
- Complete an additional movement break during the day.
- Add regular walking and structured strength training outside work.
More movement is not automatically better if technique deteriorates. Progress only when you can breathe normally and complete every repetition without rushing or compensating.
Common Office Exercise Mistakes
Using an Unstable Chair
A chair that rolls, spins, tips, or slides can make even a basic exercise unsafe. Use a fixed chair for sit-to-stands and any movement that shifts substantial body weight.
Moving Too Quickly
Fast repetitions often reduce muscular control and encourage swinging. Use a steady pace, particularly when lowering the legs or returning to the chair.
Forcing Stretches
A workplace stretch should create mild tension, not pain. Do not pull aggressively on your neck, wrists, shoulders, or spine.
Holding Your Breath
Continue breathing during isometric exercises such as glute squeezes and shoulder blade squeezes. Exhale naturally during the more difficult part of a sit-to-stand.
Ignoring Workstation Setup
Chair exercises do not compensate for a monitor, keyboard, or chair that consistently places you in an awkward position. Adjust your workstation where possible and continue changing position throughout the day.
Treating Chair Exercises as a Complete Workout
These movements provide useful activity, mobility, and light muscle work. They should complement walking, aerobic exercise, and progressively challenging strength training rather than replace them.
Frequently Asked Questions
How often should I do office chair exercises at work?
A short movement break every 30–60 minutes is a practical starting point, but it is not a strict requirement. Use a schedule that fits your workload and allows you to move without disrupting necessary tasks.
Can I exercise in a rolling office chair?
Low-force seated movements may be possible only when the chair is completely secure and cannot move. A fixed, non-rolling chair is the safer option. Never use a rolling chair for sit-to-stands, chair dips, elevated push-ups, or movements that require you to push heavily against the chair.
Which office chair exercises are the most discreet?
Glute squeezes, heel and toe raises, shoulder blade squeezes, neck rotations, and wrist stretches require little visible movement. They can often be performed without leaving the desk.
Can office chair exercises replace walking or gym workouts?
No. They are best used to interrupt sitting and add light activity. Adults should still work toward regular aerobic exercise and muscle-strengthening activity appropriate for their abilities.
Do office chair exercises improve posture?
They can help you practice upper-back activation, move out of a rounded position, and change how you sit temporarily. However, no single exercise creates a permanently “perfect” posture. Workstation setup, position changes, strength, mobility, and individual anatomy all matter.
Should I exercise if sitting causes neck or back pain?
Do not use desk exercises to diagnose or treat pain. Stop any movement that increases symptoms, and seek guidance from a qualified healthcare professional if pain persists, spreads, follows an injury, or occurs with numbness, weakness, or other unusual symptoms.
How long should an office chair exercise routine take?
A useful routine can take three to five minutes. Consistency matters more than making every break long or difficult.
Conclusion
Office chair exercises at work provide a realistic way to add movement to a desk-based day. Start with a few controlled exercises, use a stable chair, and focus on changing position regularly rather than trying to turn every work break into a hard workout.
For a simple starting point, complete the three-minute seated desk reset once in the morning and once in the afternoon. Gradually add repetitions, longer holds, walking breaks, and structured exercise as your schedule allows.
References
- Office of Disease Prevention and Health Promotion: Physical Activity Guidelines for Americans
- Occupational Safety and Health Administration: Computer Workstation Positions
- NHS: Sitting Exercises
- NHS: Strength Exercises
- Mayo Clinic: Shoulder Blade Squeeze
- Mayo Clinic: Wrist and Forearm Stretches for the Workplace
- PubMed: Computer Prompts and Sedentary Breaks Among Office Workers
This content is for informational purposes only and is not a substitute for medical advice.