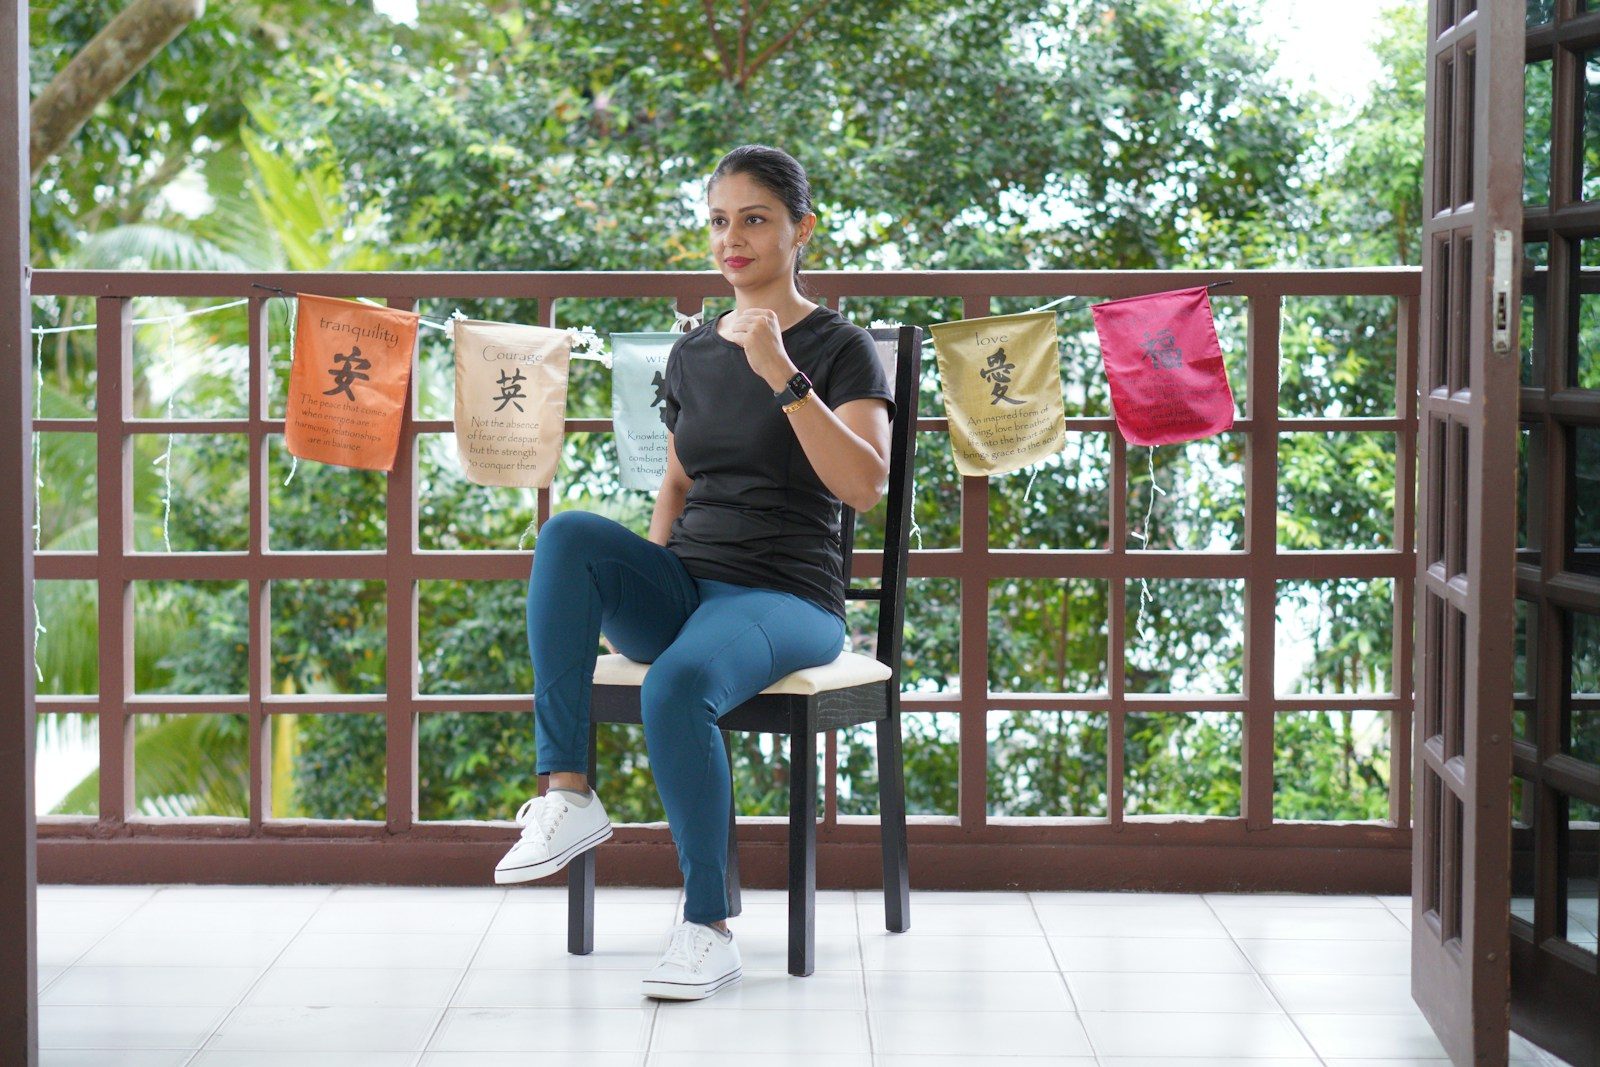
Chair exercises for stomach reduction can strengthen your core and increase daily movement, but they cannot reliably remove fat from your belly alone. Reducing abdominal fat generally requires overall fat loss through consistent physical activity, appropriate nutrition, adequate sleep, and sustainable habits.
That does not make chair exercises ineffective. A well-designed chair workout can train your abdominal muscles, improve trunk control, strengthen your legs, and help you become more active without performing floor exercises.
This guide explains how to perform 10 practical chair exercises, adjust them to your ability, and combine them into a realistic core-strengthening routine.
How Chair Exercises for Stomach Reduction Actually Work
Exercising the muscles beneath your stomach does not give you dependable control over where your body loses fat.
In a small randomized study, six weeks of abdominal exercise improved abdominal endurance but did not significantly reduce abdominal fat. The study on abdominal exercise and abdominal fat supports using core exercises for strength rather than treating them as a targeted fat-loss method.
Chair exercise can still contribute to a fat-loss plan by increasing movement and helping you build enough strength and confidence to perform more activity. The CDC’s weight-management guidance explains that physical activity increases energy expenditure, while weight loss occurs when total energy use exceeds calorie intake over time.
For the best results, use these exercises to:
- Strengthen your abdominal and supporting core muscles
- Add movement to an otherwise inactive day
- Improve your ability to perform longer or more demanding workouts
- Support walking, cycling, swimming, or another suitable aerobic activity
- Maintain muscle while working toward overall fat loss
Benefits of Chair Core Exercises
1. They Make Core Training More Accessible
A chair can provide support for people who find floor exercises uncomfortable, have difficulty getting down to the floor, or are beginning exercise after a long period of inactivity.
Chair-based training is not limited to older adults, but much of the research has focused on this population. A systematic review of 25 studies involving 1,388 adults aged 50 and older found that chair-based exercise programs improved several measures of upper- and lower-body physical function. These findings support chair exercise as an accessible strength and movement option, although they do not prove targeted belly-fat loss.
2. They Train More Than the Visible Abdominal Muscles
Your core includes muscles that move and stabilize the trunk. According to the NCBI Bookshelf overview of the abdominal wall, the abdominal muscles contribute to trunk flexion, rotation, lateral flexion, and stabilization.
The main muscles involved in this routine include:
- Rectus abdominis
- Internal and external obliques
- Transversus abdominis
- Erector spinae and other back stabilizers
- Hip flexors
- Glutes
- Quadriceps
Knee-lifting exercises use the hip flexors to move the legs. The abdominal muscles work mainly to stabilize the pelvis and trunk rather than lifting the knees by themselves.
3. They Can Combine Strength and Movement
Slower exercises such as chair planks and knee lifts emphasize control and muscular endurance. Faster movements such as marching and seated punches can add a light conditioning challenge.
A chair routine will not necessarily reach moderate aerobic intensity for every person. Your breathing rate, pace, exercise selection, fitness level, and ability all influence how demanding it feels.
What You Need Before Starting
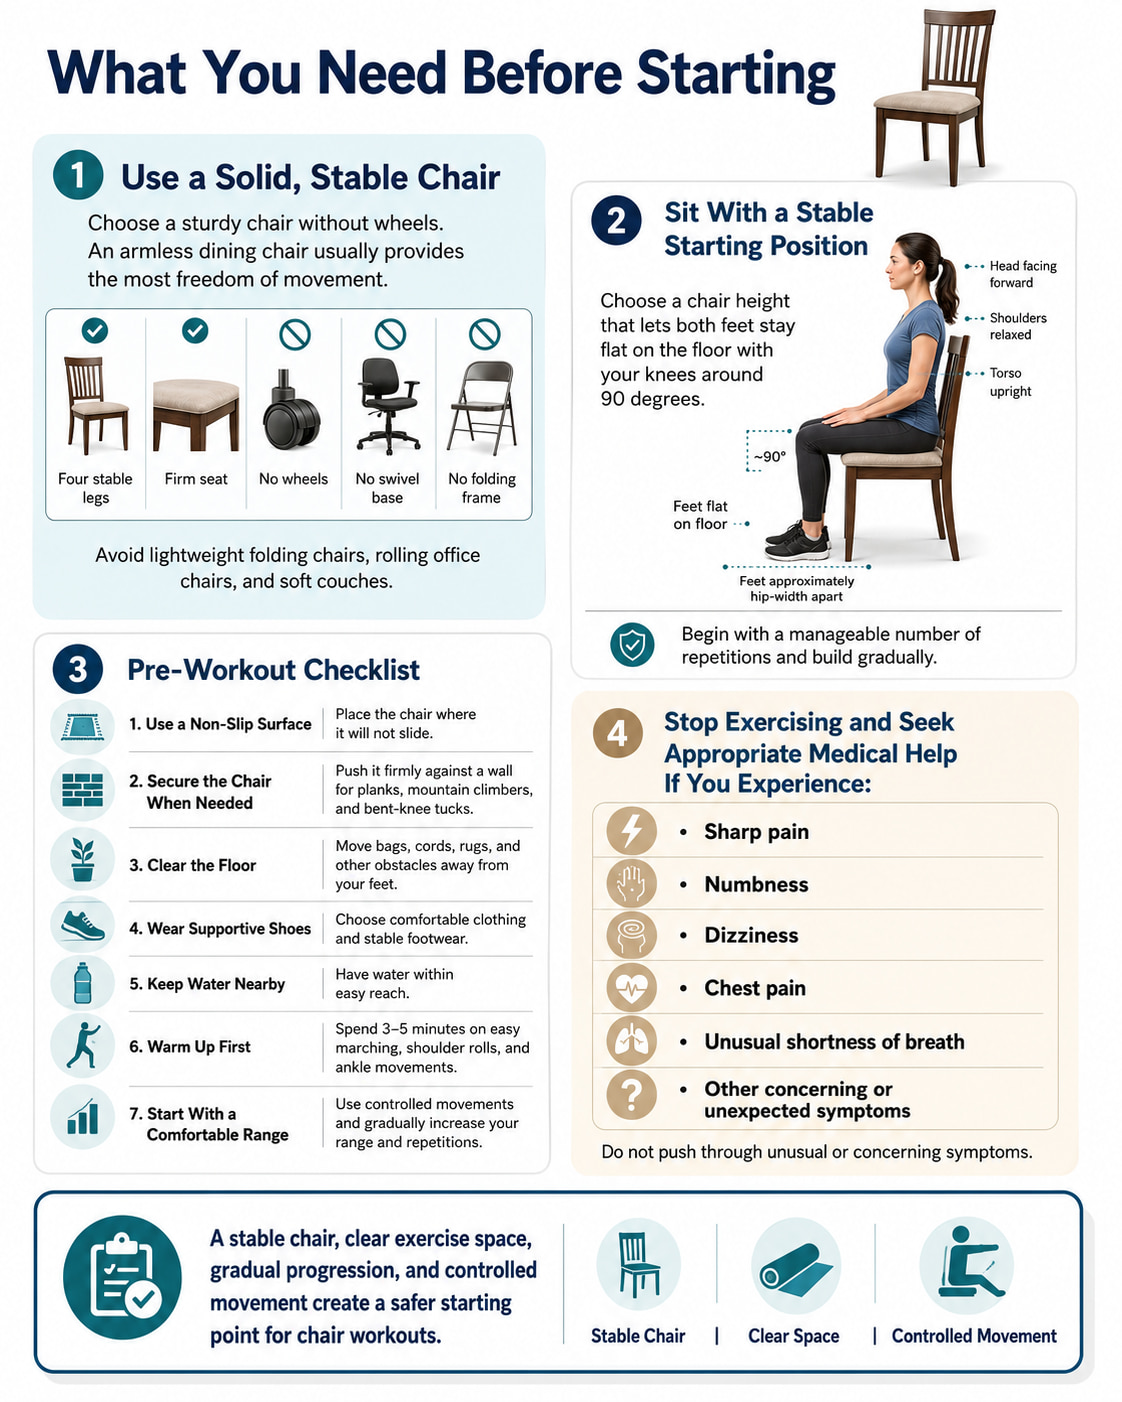
Use a solid, stable chair without wheels. An armless dining chair usually provides the most freedom of movement.
The NHS sitting-exercise guidance recommends choosing a chair that allows you to place both feet flat on the floor with your knees around a right angle. It also advises beginners to build repetitions gradually.
Before beginning:
- Place the chair on a non-slip surface.
- Push it against a wall for planks, mountain climbers, and bent-knee tucks.
- Avoid lightweight folding chairs, rolling office chairs, and soft couches.
- Clear objects away from your feet.
- Wear comfortable clothing and supportive shoes.
- Keep water nearby.
- Warm up with three to five minutes of easy marching, shoulder rolls, and ankle movements.
Begin with a comfortable range of motion. Stop exercising and seek appropriate medical help if you experience sharp pain, numbness, dizziness, chest pain, unusual shortness of breath, or other concerning symptoms.
10 Best Chair Exercises for Belly Fat and Core Strength
These chair exercises strengthen your core, improve stability, and add more movement to your day without requiring floor exercises.
They can support overall fat-loss efforts, but reducing belly fat still depends on consistent activity, nutrition, and overall calorie balance.
1. Seated March With Arm Drive
Best for: Warming up, increasing movement, and learning to stabilize the torso while the legs move.
Muscles worked: Hip flexors, quadriceps, abdominal stabilizers, shoulders, and upper back.
Equipment needed: A sturdy chair.
Sets, reps, and rest: Perform 2–3 sets of 30–45 seconds. Rest for 30 seconds between sets.
How to Do It
- Sit tall near the middle or front of the chair.
- Place both feet flat and keep your knees approximately hip-width apart.
- Gently brace your midsection without holding your breath.
- Lift one knee while swinging the opposite arm forward.
- Lower the foot under control and repeat on the other side.
- Continue at a smooth, sustainable pace.
The movement should resemble controlled marching rather than fast kicking. The NHS also uses seated hip marching as a basic chair exercise, emphasizing an upright posture and controlled foot placement.
Common mistakes: Leaning backward, stomping the feet, rounding the shoulders, or moving so quickly that the trunk rocks from side to side.
Regression: March slowly while keeping both hands on the sides of the chair.
Progression: Increase the work period to 60 seconds or raise the arms overhead on alternating repetitions when shoulder mobility allows.
Coaching cue: Keep your ribs stacked over your hips.
2. Seated Single-Knee Lift
Best for: Practicing abdominal bracing and controlled hip movement.
Muscles worked: Hip flexors, rectus abdominis, obliques, transversus abdominis, and quadriceps.
Equipment needed: A sturdy chair.
Sets, reps, and rest: Perform 2–3 sets of 8–12 repetitions per side. Rest for 30–45 seconds.
How to Do It
- Sit tall with your feet flat and hands resting lightly on the chair.
- Brace your abdomen as though preparing for a gentle push against your torso.
- Lift one knee toward your chest without leaning backward.
- Pause for one second at the top.
- Lower the foot quietly and repeat.
- Complete the repetitions before changing legs, or alternate sides.
Common mistakes: Pulling the knee with the hands, shrugging the shoulders, swinging the leg, or increasing the lower-back arch as the knee rises.
Regression: Lift the foot only a few inches or keep both hands firmly on the chair.
Progression: Remove hand support, hold the top position for two to three seconds, or use a slower lowering phase.
Coaching cue: Lift the knee without letting your chest move away from it.
3. Seated Cross-Body Knee-to-Elbow
Best for: Training rotation, coordination, and side-to-side core control.
Muscles worked: Internal and external obliques, rectus abdominis, hip flexors, and deeper trunk stabilizers.
Equipment needed: A sturdy chair.
Sets, reps, and rest: Perform 2–3 sets of 8–12 repetitions per side. Rest for 30–45 seconds.
How to Do It
- Sit tall near the front of the chair with both feet planted.
- Place your fingertips lightly beside your head or cross your arms over your chest.
- Lift your left knee while rotating your right ribs toward it.
- Bring the elbow and knee toward each other without forcing them to touch.
- Return to the center and place the foot down.
- Repeat on the opposite side.
Move through the middle of your back and rib cage while keeping your hips mostly facing forward.
Common mistakes: Pulling on the head, collapsing the chest, using momentum, or trying to touch the elbow and knee at the expense of posture.
Regression: Touch the opposite hand to the raised thigh without rotating as far.
Progression: Add a brief pause when the elbow and knee move toward each other or alternate continuously without losing control.
4. Seated Torso Rotation
Best for: Building controlled rotational strength through a comfortable range.
Muscles worked: Internal and external obliques, transversus abdominis, rectus abdominis, and back stabilizers.
Equipment needed: A chair; a light ball is optional.
Sets, reps, and rest: Perform 2–3 sets of 8–12 rotations per side. Rest for 30–45 seconds.
How to Do It
- Sit tall with your feet flat and knees pointing forward.
- Hold your hands together in front of your chest.
- Gently brace your abdomen.
- Rotate your rib cage toward one side while keeping your hips centered.
- Pause briefly without forcing the range.
- Return to the middle and rotate to the other side.
Your head and chest can turn together. Keep the movement smooth rather than trying to twist as far as possible.
Common mistakes: Leaning backward, swinging the arms, moving the knees, holding the breath, or forcing the lower back into a large range.
Regression: Use a smaller rotation and keep your hands against your chest.
Progression: Hold a light ball close to your chest or take three seconds to rotate in each direction.
Coaching cue: Turn your ribs while keeping both feet heavy on the floor.
5. Seated Overhead Side Reach
Best for: Training lateral trunk control and improving comfortable side-bending mobility.
Muscles worked: Obliques, quadratus lumborum, latissimus dorsi, shoulders, and abdominal stabilizers.
Equipment needed: A sturdy chair.
Sets, reps, and rest: Perform 2 sets of 6–10 repetitions per side. Rest for 30 seconds.
How to Do It
- Sit tall with both feet planted.
- Let your right hand rest beside your hip or hold the side of the chair.
- Raise your left arm overhead.
- Reach the left hand upward and slightly toward the right.
- Keep both sides of your pelvis supported on the chair.
- Return to the center and repeat before changing sides.
Use a small range at first. The exercise should feel like a controlled side reach, not a deep collapse toward the floor.
Common mistakes: Rotating the chest, lifting one hip from the chair, shrugging the raised shoulder, or forcing the arm overhead despite shoulder discomfort.
Regression: Keep the reaching hand on the shoulder or across the chest.
Progression: Pause for two seconds at the end of each controlled reach or alternate sides without hand support.
6. Seated Punches
Best for: Adding a faster-paced movement while maintaining an upright, braced torso.
Muscles worked: Shoulders, chest, triceps, upper back, obliques, and abdominal stabilizers.
Equipment needed: A sturdy chair.
Sets, reps, and rest: Perform 2–3 sets of 30–45 seconds. Rest for 30 seconds.
How to Do It
- Sit tall with your feet flat and hands held loosely near your shoulders.
- Brace your abdomen and relax your shoulders away from your ears.
- Punch one hand forward without forcefully locking the elbow.
- Bring the hand back before punching with the other arm.
- Continue alternating while keeping your torso controlled.
- Breathe steadily throughout the set.
You can punch straight ahead or slightly diagonally. Avoid using heavy hand weights, especially when punching quickly.
Common mistakes: Snapping the elbows straight, rounding the back, shrugging, twisting aggressively, or allowing the arms to move without control.
Regression: Punch slowly at chest height with a short reach.
Progression: Increase the pace slightly, add controlled diagonal punches, or combine the movement with seated marching.
Coaching cue: Move your arms quickly while keeping your spine quiet.
7. Seated Bent-Knee Tuck
Best for: More challenging seated abdominal and hip-flexor training.
Muscles worked: Hip flexors, rectus abdominis, obliques, transversus abdominis, and quadriceps.
Equipment needed: A heavy, stable chair placed against a wall.
Sets, reps, and rest: Perform 2–3 sets of 6–10 repetitions. Rest for 45–60 seconds.
How to Do It
- Sit near the front of the chair and hold the sides firmly.
- Lean backward slightly while keeping your chest lifted and spine controlled.
- Brace your abdomen.
- Lift both feet and draw your bent knees toward your torso.
- Pause briefly without rounding your lower back excessively.
- Lower your feet to the floor under control.
Only use the two-leg version when the chair is completely stable and you can maintain good trunk position.
Common mistakes: Throwing the knees upward, rounding into a collapsed posture, holding the breath, lowering the legs too far, or performing the exercise on a chair that can move or tip.
Regression: Lift one knee at a time while keeping the other foot on the floor.
Progression: Slow the lowering phase to three seconds or pause with the knees raised for two seconds.
Coaching cue: Bring your knees in without letting your lower back collapse.
8. Chair Incline Plank
Best for: Teaching the core to resist excessive lower-back arching.
Muscles worked: Transversus abdominis, rectus abdominis, obliques, glutes, shoulders, chest, and triceps.
Equipment needed: A sturdy chair secured against a wall.
Sets, reps, and rest: Perform 2–3 holds of 15–30 seconds. Rest for 45–60 seconds.
How to Do It
- Place the chair firmly against a wall so it cannot slide.
- Put your hands on the front of the seat approximately shoulder-width apart.
- Walk your feet backward until your body forms a straight, inclined line.
- Gently squeeze your glutes and brace your abdomen.
- Keep your head aligned with your spine.
- Hold while breathing normally.
Stop immediately if the chair shifts. Use a wall or solid countertop instead when the chair does not feel completely secure.
Common mistakes: Letting the hips sag, pushing the hips too high, shrugging the shoulders, locking the elbows aggressively, or holding the breath.
Regression: Perform the plank with your hands against a wall or countertop.
Progression: Increase the hold gradually or use a slightly lower stable surface. Do not progress by using an unstable chair.
Coaching cue: Keep a straight line from your ears through your hips.
9. Chair-Supported Mountain Climber
Best for: Dynamic core control and full-body conditioning.
Muscles worked: Abdominal stabilizers, hip flexors, shoulders, chest, triceps, quadriceps, and glutes.
Equipment needed: A sturdy chair secured against a wall.
Sets, reps, and rest: Perform 2–3 sets of 20–30 seconds. Rest for 45–60 seconds.
How to Do It
- Begin in the chair incline-plank position.
- Brace your abdomen and keep your hips level.
- Bring one knee forward beneath your torso.
- Return the foot fully to the floor.
- Repeat with the other leg.
- Continue alternating at a pace that allows you to control your trunk.
Start slowly. This should look like a supported plank with alternating knee drives, not running against the chair.
Common mistakes: Bouncing, twisting the hips, taking very short uncontrolled steps, moving faster than your posture allows, or continuing when the chair shifts.
Regression: Perform alternating knee lifts with your hands against a wall or countertop.
Progression: Increase the pace slightly while returning each foot to the floor and keeping the hips stable.
10. Sit-to-Stand With Optional Knee Drive
Best for: Full-body strength, balance, and adding a larger movement to the chair routine.
Muscles worked: Quadriceps, glutes, hamstrings, calves, abdominal stabilizers, and hip flexors during the knee drive.
Equipment needed: A stable chair.
Sets, reps, and rest: Perform 2–3 sets of 6–12 repetitions. Rest for 60 seconds.
How to Do It
- Sit near the front of the chair with your feet approximately hip-width apart.
- Position your feet slightly behind your knees if comfortable.
- Lean forward from your hips while keeping your chest lifted.
- Press through your feet and stand tall.
- Pause, then bend your hips and knees to sit down slowly.
- Add one controlled knee drive after standing only when your balance is steady.
The NHS sit-to-stand instructions similarly emphasize standing through the legs, looking forward, and returning to the chair slowly.
Common mistakes: Dropping heavily onto the seat, allowing the knees to collapse inward, pushing mostly through the toes, or adding the knee drive before developing adequate balance.
Regression: Use your hands for assistance or place a firm cushion on the chair to reduce the movement depth.
Progression: Add the alternating knee drive, slow the lowering phase, or hold a light weight close to your chest.
Coaching cue: Stand tall, then control the return to the chair.
Beginner Chair Workout for Core Strength
This routine uses the more accessible movements first. Complete one round when you are new to exercise and build toward two or three rounds.
Warm-Up
March gently for three minutes while adding comfortable shoulder rolls, arm movements, and ankle circles.
Main Circuit
| Exercise | Starting amount |
|---|---|
| Seated march with arm drive | 30 seconds |
| Seated single-knee lift | 8 per side |
| Seated cross-body knee-to-elbow | 6 per side |
| Seated torso rotation | 8 per side |
| Seated overhead side reach | 6 per side |
| Seated punches | 30 seconds |
| Sit-to-stand | 6–10 repetitions |
| Wall or chair incline plank | 15–20 seconds |
Rest for 20–30 seconds between exercises and 60–90 seconds between rounds.
Programming Guidelines
- Frequency: Two or three nonconsecutive days per week
- Rounds: Start with one and progress to two or three
- Effort: Approximately 5–7 out of 10
- Session length: About 10–20 minutes
- Form goal: Finish each set before your posture or breathing becomes difficult to control
The 2026 American College of Sports Medicine resistance-training update emphasizes consistency, individualization, and training the major muscle groups at least twice per week. It also recognizes bodyweight and home-based exercise as useful resistance-training options.
This core routine does not train every major muscle group equally, so combine it with suitable pulling, pushing, and lower-body exercises when possible.
How to Progress the Chair Workout
Progress only after you can complete your current routine with stable posture and controlled breathing.
Use this order:
- Add two repetitions or five seconds to an exercise.
- Increase from one round to two.
- Reduce hand support where appropriate.
- Add a pause or slower lowering phase.
- Progress to the bent-knee tuck or supported mountain climber.
- Add light resistance only to movements that remain controlled.
Change one variable at a time. Adding more repetitions, faster speed, less support, and additional resistance together makes it difficult to identify which change caused your form to break down.
How Chair Exercise Fits Into a Fat-Loss Plan
Chair exercises can contribute to your weekly movement, but a short core workout is unlikely to provide all the activity needed for substantial changes in body composition.
The CDC physical activity guidelines recommend that adults work toward at least 150 minutes of moderate-intensity aerobic activity per week and perform muscle-strengthening activity on at least two days. People who cannot currently reach those amounts can begin with manageable sessions and increase gradually.
Depending on your ability, you might combine the chair routine with:
- Walking
- Stationary cycling
- Swimming or water exercise
- Seated aerobic exercise
- Wheelchair-based activity
- Full-body resistance training
Nutrition also matters. Avoid extreme diets or trying to compensate for food with excessive exercise. A sustainable eating pattern and regular activity are more practical than rapid-loss promises.
Common Chair-Exercise Mistakes
Expecting the Exercises to Target Belly Fat
Core training can strengthen the muscles beneath the stomach, but visible waist changes usually depend on overall body-fat reduction.
Using an Unstable Chair
Rolling chairs, soft couches, and lightweight folding chairs can shift or tip. This is especially risky during incline planks, mountain climbers, and bent-knee tucks.
Holding Your Breath
Breathe continuously. Exhale during the most demanding part of a repetition and inhale as you return.
Moving Too Fast
Speed can hide poor control. Begin slowly enough to notice whether your trunk is rocking, your back is arching, or your feet are landing heavily.
Leaning Back During Every Knee Lift
Leaning backward turns a controlled knee lift into a momentum-based movement. Reduce the height of the knee if you cannot remain upright.
Doing Only Abdominal Exercises
A complete program should also train the legs, hips, back, chest, shoulders, and arms. Whole-body training helps you build more useful strength and perform more total activity.
Frequently Asked Questions
Can chair exercises reduce belly fat?
Chair exercises can help you move more and strengthen your core, which may support a broader fat-loss program. They should not be expected to remove fat specifically from the belly.
Which chair exercise works the abdominal muscles most?
The chair incline plank is useful for abdominal bracing, while cross-body knee-to-elbow movements and torso rotations emphasize the obliques. Bent-knee tucks can feel demanding, but the hip flexors also contribute substantially.
No single exercise is best for every core function. Combining bracing, rotation, lateral movement, and controlled knee lifting provides more complete training.
How long should a chair workout last?
Beginners can start with 10–15 minutes. A longer workout is not automatically better if fatigue causes poor form. Gradually progress toward 15–25 minutes when appropriate.
How often should I do chair exercises?
Perform the strengthening routine two or three times per week with recovery between demanding sessions. Gentle seated marching and mobility exercises may be performed more frequently when they feel comfortable.
Can I do the entire workout while seated?
Yes. Use the first seven exercises and skip the incline plank, mountain climber, and standing portion of the sit-to-stand. A fully seated routine can still train coordination, trunk control, and muscular endurance.
Should I feel chair core exercises in my lower back?
Your back muscles may work to stabilize your posture, but the exercises should not produce sharp or increasing lower-back pain. Reduce the range, slow down, or stop the movement if you cannot maintain a comfortable position.
What is the safest chair for exercise?
Choose a solid chair without wheels that does not slide or wobble. Your feet should reach the floor comfortably. Secure the chair against a wall before placing significant body weight through it.
Conclusion
Chair exercises can provide an accessible way to strengthen your core, improve movement control, and become more active. They are most useful when you focus on controlled technique instead of chasing high repetitions or promises of rapid belly-fat loss.
Start with five or six exercises, complete one controlled round, and progress gradually. Combine the routine with full-body strength training, suitable aerobic activity, and sustainable eating habits for a more complete approach to body composition and fitness.
References
- CDC: Physical Activity and Your Weight and Health
- CDC: Physical Activity Guidelines
- American College of Sports Medicine: 2026 Resistance Training Guidelines
- PubMed: The Effect of Abdominal Exercise on Abdominal Fat
- PubMed: Chair-Based Exercise and Physical Function
- NCBI Bookshelf: Anatomy of the Abdominal Wall
- NHS: Sitting Exercises and NHS: Strength Exercises
This content is for informational purposes only and is not a substitute for medical advice.
1 thought on “10 Best Chair Exercises for Belly Fat and Stomach Reduction”