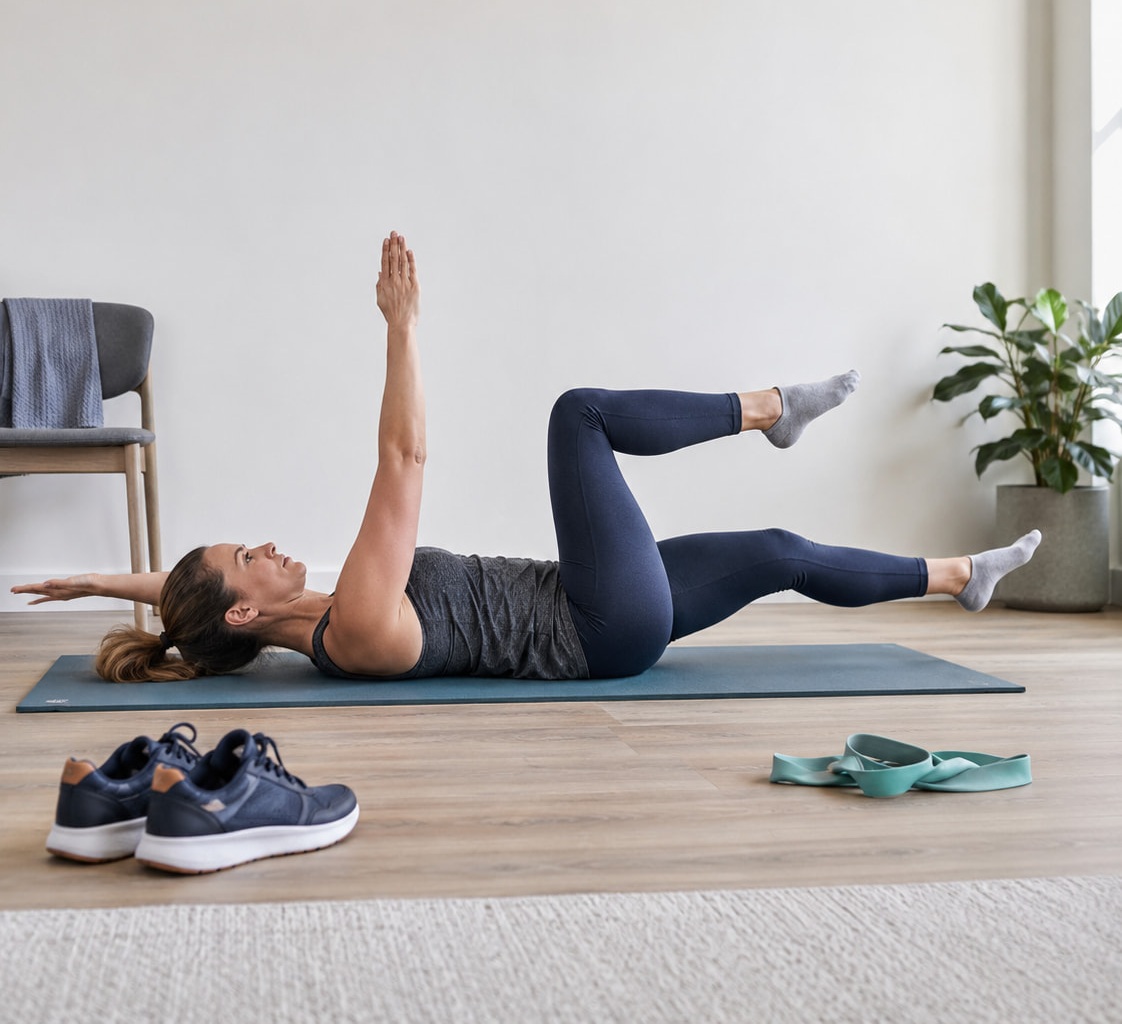
FUPA exercises cannot selectively burn fat from the lower abdomen or upper-pubic area, but they can strengthen your core and help you build a balanced home workout routine.
The term “FUPA” is informal rather than medical. It usually describes fat or fullness around the lower abdomen and upper-pubic area. Having some fullness there is normal, and where your body stores fat is influenced partly by genetics and other individual factors.
This beginner workout combines gentle abdominal exercises with movements for the glutes, legs, chest, shoulders, and cardiovascular system. You need only a mat, a wall, and a sturdy chair or countertop.
Can FUPA Exercises Reduce Lower-Abdominal Fat?
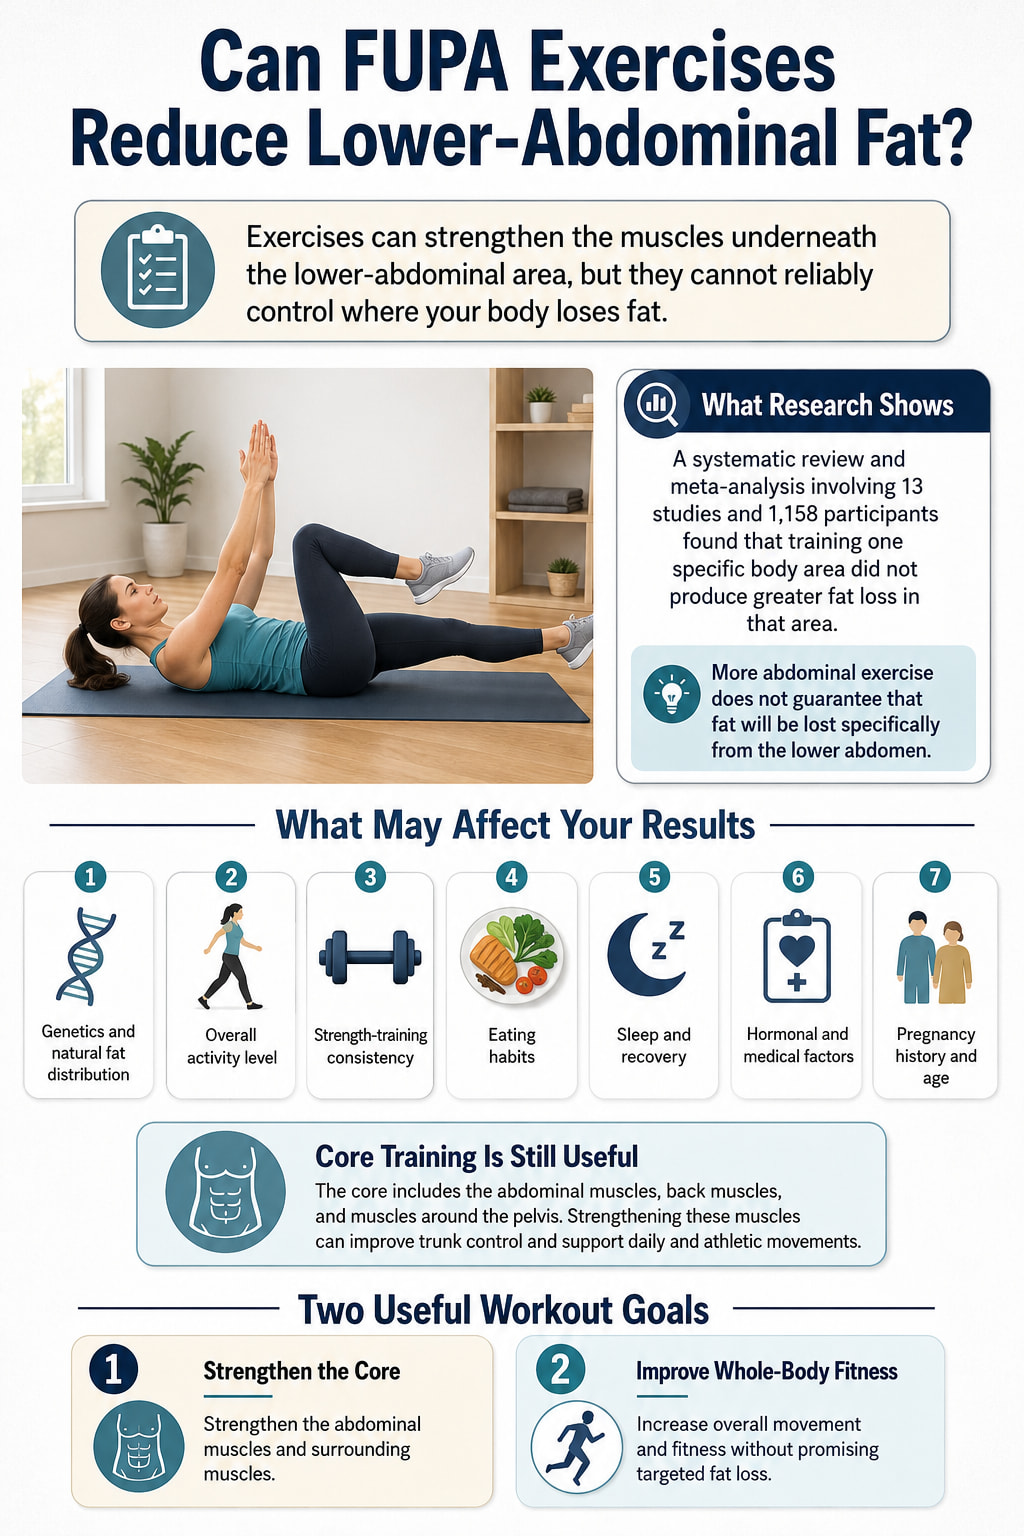
Exercises can strengthen the muscles beneath the lower-abdominal area, but they cannot reliably determine where your body loses fat. Research on spot reduction does not support using abdominal exercises to selectively remove fat from one specific area.
Core training is still valuable. It can strengthen the abdominal, back, hip, and pelvic muscles, improve trunk control, and support everyday movement.
A useful beginner workout should focus on two goals:
- Strengthen the core and surrounding muscles.
- Improve whole-body strength and fitness without promising targeted fat loss.
10 FUPA Exercises for Beginners at a Glance
The following exercises combine core control, full-body strength, and low-impact conditioning. Start with the suggested dose and increase repetitions or duration only when you can maintain good form.
| Exercise | Main training focus | Beginner starting dose |
|---|---|---|
| Supine abdominal brace | Deep core control | 5–8 holds |
| Heel slide | Core stability with leg movement | 5–8 per side |
| Dead bug | Abdominal coordination | 5–8 per side |
| Glute bridge | Glutes, hips, and core | 10–15 reps |
| Bird dog | Core stability and balance | 5–8 per side |
| Incline plank | Full-core endurance | 15–25 seconds |
| Side plank from knees | Obliques and lateral core | 10–20 seconds per side |
| Chair squat | Legs, glutes, and total-body effort | 8–12 reps |
| Wall push-up | Chest, arms, shoulders, and core | 8–12 reps |
| Wall mountain climber | Low-impact conditioning | 20–30 seconds |
10 FUPA Exercises for Beginners
These 10 FUPA exercises for beginners strengthen the core, glutes, legs, and upper body using simple home movements. They support overall fitness and body-composition goals but cannot target fat loss from one specific area.
1. Supine Abdominal Brace
Best for: Learning how to engage the core before attempting harder abdominal exercises.
Muscles worked: Transverse abdominis, obliques, rectus abdominis, and other deep trunk stabilizers.
Equipment needed: Exercise mat or carpeted floor.
Sets, reps, and rest: Perform 1–2 sets of 5–8 holds. Hold each brace for 3–5 seconds and rest for about 20 seconds between sets.
How to do it:
- Lie on your back with your knees bent and feet flat.
- Keep your pelvis and ribs in a comfortable, neutral position.
- Breathe in normally.
- As you breathe out, gently tighten your abdomen as though preparing for a light cough.
- Maintain the tension while taking another small, controlled breath.
- Relax completely before repeating.
Common mistakes: Sucking the stomach in as hard as possible, pressing the lower back forcefully into the floor, squeezing the glutes, or holding the breath.
Progression or regression: If maintaining the brace is difficult, use shorter two-second holds. Progress by holding the brace while slowly lifting one heel.
Coaching cue: Create gentle tension without stopping your breathing.
2. Heel Slide
Best for: Beginners who need a simpler alternative to dead bugs or leg raises.
Muscles worked: Deep abdominal muscles, obliques, hip flexors, and pelvic stabilizers.
Equipment needed: Exercise mat.
Sets, reps, and rest: Perform 1–3 sets of 5–8 repetitions per side. Rest for 30–45 seconds.
How to do it:
- Lie on your back with both knees bent and feet flat.
- Gently brace your abdomen.
- Slowly slide one heel away from your body.
- Stop before your ribs lift or your lower back begins to arch.
- Slide the foot back to the starting position.
- Alternate sides.
Common mistakes: Extending the leg too far, rushing the movement, allowing the pelvis to tilt, or holding the breath.
Progression or regression: Shorten the heel slide to make it easier. Progress by allowing the heel to hover slightly above the floor.
Coaching cue: Move only as far as you can keep your torso still.
3. Dead Bug
Best for: Improving core stability while the arms and legs move.
Muscles worked: Rectus abdominis, transverse abdominis, obliques, hip flexors, and deep spinal stabilizers.
Equipment needed: Exercise mat.
Sets, reps, and rest: Perform 2–3 sets of 5–8 repetitions per side. Rest for 30–60 seconds.
How to do it:
- Lie on your back and raise your arms toward the ceiling.
- Lift your legs so your hips and knees are bent to approximately 90 degrees.
- Gently brace your abdomen while keeping your ribs controlled.
- Slowly lower your right heel and left arm toward the floor.
- Stop before your back arches or your torso shifts.
- Return to the starting position and repeat on the opposite side.
Common mistakes: Moving too quickly, extending the limbs too close to the floor, flaring the ribs, or allowing the lower back to arch.
Progression or regression: Start by moving only one arm or one leg. Progress by straightening the moving leg instead of lowering a bent knee.
The ACE dead bug instructions similarly emphasize maintaining trunk and pelvic control as the opposite arm and leg move.
4. Glute Bridge
Best for: Strengthening the glutes while practicing abdominal and pelvic control.
Muscles worked: Gluteus maximus, hamstrings, deep abdominal muscles, and spinal stabilizers.
Equipment needed: Exercise mat.
Sets, reps, and rest: Perform 2–3 sets of 10–15 repetitions. Rest for 45–60 seconds.
How to do it:
- Lie on your back with your knees bent and feet approximately hip-width apart.
- Place your feet close enough that you can press through them comfortably.
- Brace your abdomen and gently squeeze your glutes.
- Press through your feet and raise your hips.
- Stop when your shoulders, hips, and knees form a controlled line.
- Lower your hips slowly.
Common mistakes: Lifting the hips too high, arching the lower back, pushing mostly through the toes, or allowing the knees to collapse inward.
Progression or regression: Use a smaller lifting range if necessary. Progress by pausing for two seconds at the top or performing additional controlled repetitions.
Both Mayo Clinic’s bridge guidance and the ACE glute bridge guide emphasize lifting without excessive lower-back arching.
5. Bird Dog
Best for: Improving balance and resisting unwanted movement through the spine and pelvis.
Muscles worked: Deep abdominal muscles, multifidus, spinal erectors, glutes, shoulders, and upper-back stabilizers.
Equipment needed: Exercise mat.
Sets, reps, and rest: Perform 2–3 sets of 5–8 repetitions per side. Hold each repetition for 2–3 seconds and rest for 30–45 seconds.
How to do it:
- Begin on your hands and knees.
- Position your hands beneath your shoulders and knees beneath your hips.
- Brace your abdomen without rounding your back.
- Reach one leg behind you while keeping your hips level.
- Add the opposite arm when you can remain stable.
- Pause briefly, return under control, and switch sides.
Common mistakes: Rotating the hips, lifting the leg too high, arching the lower back, looking forward, or rushing between sides.
Progression or regression: Move only one arm or one leg at a time for an easier version. Progress by slowing the movement or adding a longer pause.
Mayo Clinic recommends beginning the bird dog with individual arm or leg movements before combining the opposite arm and leg.
6. Incline Plank
Best for: Learning proper plank form without starting on the floor.
Muscles worked: Rectus abdominis, transverse abdominis, obliques, shoulders, chest, serratus anterior, and glutes.
Equipment needed: Wall, countertop, sturdy table, or secure bench.
Sets, reps, and rest: Perform 2–3 holds of 15–25 seconds. Rest for 30–60 seconds.
How to do it:
- Place your hands on a stable elevated surface.
- Walk your feet backward until your body forms a straight line.
- Keep your hands beneath or slightly wider than your shoulders.
- Gently push the surface away.
- Brace your abdomen and squeeze your glutes lightly.
- Maintain the position while breathing normally.
Common mistakes: Letting the hips sag, raising the hips too high, shrugging the shoulders, locking the elbows aggressively, or holding the breath.
Progression or regression: Use a wall for the easiest variation. Progress gradually to a countertop, sturdy table, bench, and eventually the floor.
Coaching cue: Keep your ribs and hips connected as one solid unit.
7. Side Plank From the Knees
Best for: Strengthening the muscles along the side of the abdomen with less difficulty than a full side plank.
Muscles worked: Obliques, quadratus lumborum, transverse abdominis, gluteus medius, and shoulder stabilizers.
Equipment needed: Exercise mat.
Sets, reps, and rest: Perform 2–3 holds of 10–20 seconds per side. Rest for 30–45 seconds.
How to do it:
- Lie on your side with your knees bent.
- Place your elbow directly below your shoulder.
- Keep your knees, hips, and shoulders aligned.
- Brace your abdomen.
- Press your forearm and lower knee into the floor.
- Raise your hips and hold while breathing steadily.
- Lower under control and repeat on the other side.
Common mistakes: Letting the shoulder collapse, rotating the chest toward the floor, pushing the hips backward, or holding the breath.
Progression or regression: Perform the movement against a wall if the floor version is uncomfortable. Progress by straightening the top leg or eventually both legs.
Mayo Clinic describes the side plank as a stability exercise that works the muscles along the side of the body.
8. Chair Squat
Best for: Building lower-body strength and increasing the amount of muscle involved in the workout.
Muscles worked: Quadriceps, gluteus maximus, hamstrings, calves, and trunk stabilizers.
Equipment needed: Sturdy chair without wheels.
Sets, reps, and rest: Perform 2–3 sets of 8–12 repetitions. Rest for 45–75 seconds.
How to do it:
- Stand in front of a chair with your feet approximately hip- to shoulder-width apart.
- Keep your chest comfortably tall and brace your abdomen.
- Push your hips backward and bend your knees.
- Lower until you lightly touch or sit on the chair.
- Keep your knees pointing in the same direction as your toes.
- Press through your feet to stand.
Common mistakes: Dropping onto the chair, allowing the knees to collapse inward, lifting the heels, rounding the back, or using momentum to stand.
Progression or regression: Use a higher chair or push lightly through your hands for assistance. Progress by hovering above the seat without sitting down.
Coaching cue: Reach your hips toward the chair instead of driving your knees forward.
9. Wall Push-Up
Best for: Adding upper-body strength to a beginner home workout.
Muscles worked: Chest, triceps, front shoulders, serratus anterior, and core stabilizers.
Equipment needed: Wall.
Sets, reps, and rest: Perform 2–3 sets of 8–12 repetitions. Rest for 45–60 seconds.
How to do it:
- Stand facing a wall and place your hands around chest height.
- Walk your feet backward until your body leans toward the wall.
- Keep your body straight from your head to your heels.
- Bend your elbows and bring your chest toward the wall.
- Keep your shoulders away from your ears.
- Push the wall away to return to the starting position.
Common mistakes: Bending only at the hips, flaring the elbows directly outward, moving the head forward, or letting the lower back arch.
Progression or regression: Stand closer to the wall to make the movement easier. Progress to a countertop or other lower stable surface.
10. Wall Mountain Climber
Best for: Adding low-impact conditioning without performing floor mountain climbers or burpees.
Muscles worked: Hip flexors, abdominal muscles, shoulders, chest, glutes, quadriceps, and calves.
Equipment needed: Wall or sturdy countertop.
Sets, reps, and rest: Perform 2–3 rounds of 20–30 seconds. Rest for 30–60 seconds.
How to do it:
- Place your hands against a wall at approximately shoulder height.
- Walk your feet back slightly and brace your torso.
- Drive one knee upward without rounding your back.
- Return the foot to the floor.
- Alternate legs at a smooth, controlled pace.
- Keep your hips and shoulders facing forward.
Common mistakes: Moving faster than you can control, bouncing on the toes, rounding the back, or allowing the hips to rotate with each knee drive.
Progression or regression: March slowly in place for an easier option. Progress by using a countertop or increasing the pace slightly while maintaining control.
Easy FUPA Home Workout for Beginners
You do not need to perform all 10 exercises in one session. A shorter routine is easier to recover from and more likely to be repeated consistently.
Beginner Warm-Up
Complete 3–5 minutes of easy movement:
- March in place for 30–60 seconds
- Perform 5 gentle hip hinges
- Circle the shoulders 5 times in each direction
- Perform 5 controlled chair squats
- Practice 3 abdominal braces
Main Workout
Complete the following circuit:
- Chair squat: 8–12 repetitions
- Wall push-up: 8–12 repetitions
- Glute bridge: 10–15 repetitions
- Heel slide or dead bug: 5–8 repetitions per side
- Wall mountain climber: 20–30 seconds
- Incline plank: 15–25 seconds
Start with one round. Progress to two or three rounds as your strength and work capacity improve.
Rest: Take 20–45 seconds between exercises and 60–90 seconds between rounds.
Frequency: Perform the workout two or three times per week on nonconsecutive days.
Effort level: Aim for approximately 5–7 out of 10 effort. Each set should feel productive, but you should still be able to perform a few more good repetitions.
How to Progress
Use the following progression order:
- Improve your form and breathing.
- Reach the top of the repetition range.
- Add five seconds to timed exercises.
- Add another set or circuit.
- Choose a slightly harder variation.
Change only one variable at a time. There is no need to increase repetitions, sets, difficulty, and speed during the same week.
The American College of Sports Medicine’s 2026 guidance emphasizes consistency, training major muscle groups at least twice weekly, and choosing a program that is practical enough to maintain. It also recognizes bodyweight and home-based training as effective forms of resistance exercise.
Common FUPA Workout Mistakes
Doing Only Ab Exercises
Crunches, planks, and leg movements can strengthen the core, but they do not train the entire body.
Include leg exercises, pushing movements, pulling movements when equipment is available, and regular aerobic activity. Whole-body training gives you a more complete fitness program than performing hundreds of abdominal repetitions.
Choosing Exercises That Are Too Difficult
Full leg raises, long floor planks, burpees, and fast mountain climbers may be too demanding for a new exerciser.
Start with heel slides, incline planks, wall mountain climbers, and chair squats. A regression is not a failure. It is a way to practice the movement with better control.
Arching the Lower Back
The lower back commonly arches when the legs move farther than the abdominal muscles can control.
Reduce your range of motion immediately if your ribs flare, your pelvis shifts, or your back lifts excessively from the floor.
Holding Your Breath
Breath-holding may make an exercise feel stronger temporarily, but it often creates unnecessary tension.
Exhale during the most difficult part of a repetition, inhale during the easier part, and continue breathing during holds.
Chasing Speed Instead of Control
Faster repetitions are not automatically more effective. Slow down when your hips rotate, your back arches, or your shoulders lose position.
For most beginner core exercises, controlled repetitions provide more useful practice than rushing to increase the number completed.
Training the Core Hard Every Day
Your abdominal muscles also need recovery. Two or three focused sessions each week are enough for most beginners.
Walking and other light daily activity can usually be performed more frequently, depending on your fitness and health.
Judging Progress Only by Appearance
You may notice improved stability, more repetitions, longer holds, easier daily movement, or better exercise confidence before seeing any visible body-composition change.
Fat distribution differs among individuals, and no honest program can promise a specific change in the upper-pubic area.
How to Support Overall Progress
Include Regular Aerobic Activity
Walking, cycling, swimming, dancing, and other activities can complement your strength workouts.
Current CDC physical-activity guidance recommends that adults gradually work toward at least 150 minutes of moderate aerobic activity each week, along with muscle-strengthening activity on two or more days. The activity can be divided into shorter sessions, and some activity is better than none.
A beginner could start with a 10-minute walk several times per week and add time gradually.
Train the Whole Body
A balanced program should eventually include:
- A squat or lunge movement
- A hip-dominant movement such as a bridge
- An upper-body push
- An upper-body pull when equipment is available
- Core-stability exercises
- Aerobic activity
You do not need a gym to begin. Bodyweight exercises, resistance bands, and simple home workouts can support strength and physical function.
Use Sustainable Eating Habits
Exercise works best alongside regular, balanced eating habits.
Focus on meals that provide protein, fruits or vegetables, fiber-rich carbohydrate sources, and enough food to support your daily activities. Avoid crash diets, detoxes, or severe restriction. A registered dietitian can provide individualized guidance when needed.
Teen readers should focus on strength, regular movement, adequate nutrition, and healthy development rather than following a weight-loss diet without guidance from a parent or guardian and a qualified health professional.
Track Useful Signs of Progress
Instead of checking the mirror every day, track:
- Exercise repetitions
- Plank duration
- Walking time or distance
- Energy during daily activities
- Movement quality
- Workout consistency
- How comfortably your clothes fit
These markers are usually more useful than expecting rapid changes in one body area.
Safety Considerations
Stop exercising and seek appropriate medical help if you experience:
- Sharp or increasing pain
- Chest pain
- Dizziness or faintness
- Numbness or tingling
- Unusual shortness of breath
- Abdominal or groin swelling
- Pelvic pressure or heaviness
- Urine leakage that worsens with exercise
- Visible abdominal bulging or doming
- Symptoms that continue after the workout
Speak with a healthcare professional before beginning if you have a diagnosed hernia, recent abdominal or pelvic surgery, significant back problems, osteoporosis, or another condition that may affect exercise.
Pregnancy and Postpartum Training
This routine is not a personalized prenatal or postpartum rehabilitation plan.
Exercise recommendations after pregnancy depend on the type of delivery, healing, complications, pelvic-floor symptoms, abdominal-wall control, previous fitness level, and medical guidance. The American College of Obstetricians and Gynecologists recommends that postpartum exercise be adjusted to individual circumstances.
If you recently gave birth or notice abdominal doming, pelvic heaviness, pain, or leakage, consult an obstetric healthcare professional or pelvic-health physical therapist before progressing to harder core exercises.
Frequently Asked Questions
Can FUPA exercises remove fat from one specific area?
No exercise can reliably guarantee fat loss from only the lower abdomen or upper-pubic area. These exercises strengthen the muscles beneath and around the area while supporting a broader fitness routine.
Overall body-composition changes may occur through consistent activity and sustainable habits, but the location and rate of change vary among individuals.
What is the best FUPA exercise for a complete beginner?
The supine abdominal brace and heel slide are good starting choices because they teach core control without requiring a plank or large leg movement.
Once you can perform them without holding your breath or arching your back, progress to dead bugs, bridges, and incline planks.
Are lower-ab exercises different from regular ab exercises?
The rectus abdominis runs along the front of the abdomen and is not divided into completely separate upper and lower muscles.
Some exercises may feel more demanding near the lower abdomen because they involve leg movement and require the pelvis to remain stable. However, they still train the abdominal system as a whole.
How often should beginners perform this workout?
Two nonconsecutive sessions per week are a practical starting point. Add a third session when you can recover comfortably and maintain good form.
You can walk or perform light activity on the days between strength workouts.
Do I need cardio as well as core exercises?
Cardio is not required during the same session, but regular aerobic activity helps create a more complete fitness program.
Walking is one of the easiest options. Start with an amount you can repeat consistently and add time gradually.
How long does it take to see results?
There is no reliable timeline for changing the appearance of one specific body area.
You may notice better exercise control, improved strength, and longer holds before noticing visible changes. Genetics, activity, nutrition, sleep, health, and starting fitness all affect progress.
Why does my lower back hurt during abdominal exercises?
The movement may be too difficult, your legs may be extending too far, or your abdominal muscles may not be maintaining enough control.
Reduce the range of motion and return to abdominal braces or heel slides. Stop if the discomfort is sharp, increasing, or continues outside the workout.
Conclusion
FUPA exercises for beginners are most useful when they are treated as part of a balanced fitness plan rather than a way to burn fat from one exact area.
Begin with controlled abdominal braces, heel slides, bridges, and incline planks. Add chair squats, wall push-ups, and low-impact conditioning to train more of the body. Focus on good form, regular activity, and gradual progression instead of chasing rapid or guaranteed appearance changes.
References
- American College of Sports Medicine: 2026 Resistance Training Guidelines
- Centers for Disease Control and Prevention: Adult Physical Activity Guidelines
- Human Movement: Systematic Review and Meta-Analysis of Exercise-Induced Spot Reduction
- Mayo Clinic: Exercises to Improve Core Strength
- National Institute of Diabetes and Digestive and Kidney Diseases: Factors Affecting Weight and Health
- American Council on Exercise: Exercise Library
- American College of Obstetricians and Gynecologists: Physical Activity During Pregnancy and Postpartum
This content is for informational purposes only and is not a substitute for medical advice.