The dead bug exercise is a floor-based core move that trains your abs to stay braced while your arms and legs move. It is one of the best beginner-friendly exercises for building core stability, improving body control, and learning how to keep your lower back from arching during movement.
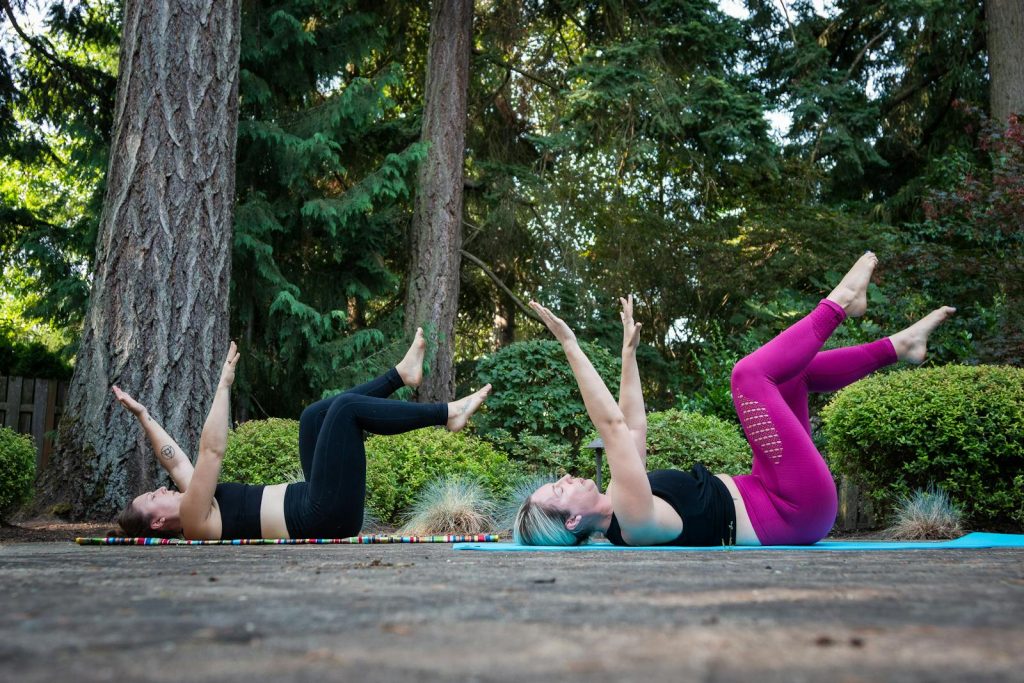
In this guide, you’ll learn how to do the dead bug with proper form, which muscles it works, the biggest mistakes to avoid, beginner modifications, progressions, and how to add it to your workout routine.
What Is the Dead Bug Exercise?
The dead bug exercise is performed lying on your back with your arms reaching upward and your hips and knees bent. From there, you slowly lower the opposite arm and leg while keeping your ribs down, abs tight, and lower back controlled.
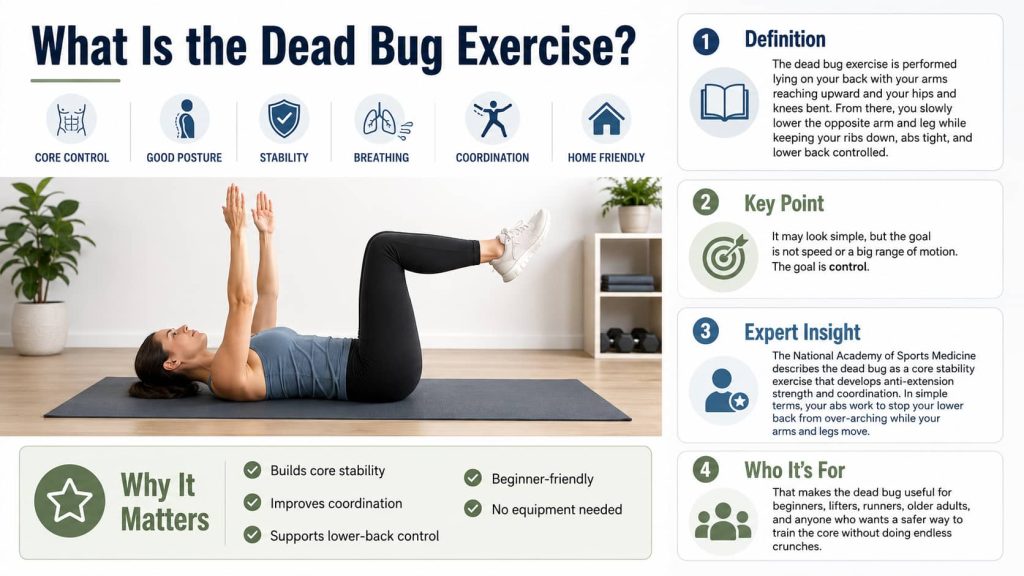
It may look simple, but the goal is not speed or a big range of motion. The goal is control.
The National Academy of Sports Medicine describes the dead bug as a core stability exercise that develops anti-extension strength and coordination. In simple terms, your abs work to stop your lower back from over-arching while your arms and legs move.
That makes the dead bug useful for beginners, lifters, runners, older adults, and anyone who wants a safer way to train the core without doing endless crunches.
Muscles Worked by the Dead Bug Exercise
The dead bug mainly trains your core, but several muscles help you stay stable throughout the movement.
The main muscles worked include:
- Rectus abdominis: The front abdominal muscle that helps control trunk position.
- Transverse abdominis: A deep core muscle that wraps around the midsection and helps create trunk stability.
- Internal and external obliques: Side abdominal muscles that help resist rotation and keep the torso steady.
- Hip flexors: Help hold the hips and legs in the tabletop position.
- Pelvic floor and deep stabilizers: Help support pressure control when you brace and breathe.
- Shoulders and lats: Help control the arm movement, especially in wall press or banded variations.
- Lower back stabilizers: Work isometrically to help maintain a neutral spine position.
According to Harvard Health, the dead bug can engage the major abdominal muscles, including the deep transverse abdominis, while still being easy to modify for different ability levels.
Benefits of the Dead Bug Exercise
Builds Core Stability Without Crunching
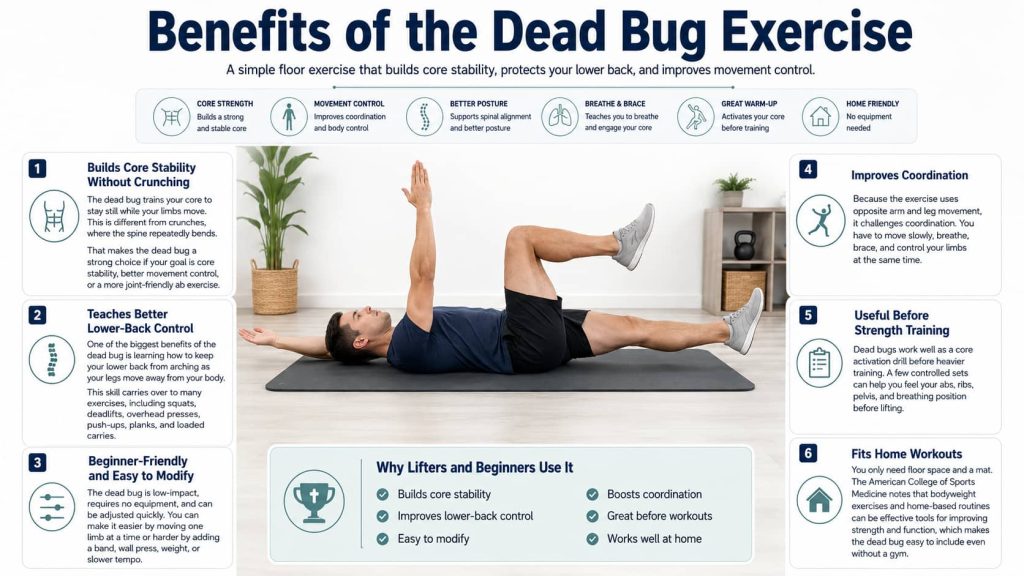
The dead bug trains your core to stay still while your limbs move. This is different from crunches, where the spine repeatedly bends.
That makes the dead bug a strong choice if your goal is core stability, better movement control, or a more joint-friendly ab exercise.
Teaches Better Lower-Back Control
One of the biggest benefits of the dead bug is learning how to keep your lower back from arching as your legs move away from your body.
This skill carries over to many exercises, including squats, deadlifts, overhead presses, push-ups, planks, and loaded carries.
Beginner-Friendly and Easy to Modify
The dead bug is low-impact, requires no equipment, and can be adjusted quickly. You can make it easier by moving one limb at a time or harder by adding a band, wall press, weight, or slower tempo.
Improves Coordination
Because the exercise uses opposite arm and leg movement, it challenges coordination. You have to move slowly, breathe, brace, and control your limbs at the same time.
Useful Before Strength Training
Dead bugs work well as a core activation drill before heavier training. A few controlled sets can help you feel your abs, ribs, pelvis, and breathing position before lifting.
Fits Home Workouts
You only need floor space and a mat. The American College of Sports Medicine notes that bodyweight exercises and home-based routines can be effective tools for improving strength and function, which makes the dead bug easy to include even without a gym.
Dead Bug Exercise: Proper Form Guide
The dead bug stands out because it teaches your core to resist movement instead of creating movement. Your arms and legs move, but your torso stays quiet.
That is what makes it useful for real training. In many exercises and daily movements, the core’s job is not to twist or crunch hard. It is to keep the trunk stable while the hips, legs, shoulders, and arms do their work.
Suggested Sets and Reps
- Beginner: 2 sets of 5–8 reps per side
- Intermediate: 2–3 sets of 8–12 reps per side
- Advanced: 3–4 sets of 10–15 controlled reps per side
Rest 30–60 seconds between sets.
Quality matters more than high reps. Stop the set when your lower back starts to arch, your ribs flare, or your breathing becomes uncontrolled.
How to Do It
- Lie on your back on a mat with your knees bent and feet flat on the floor.
- Bring your legs up so your hips and knees are bent at about 90 degrees.
- Reach both arms toward the ceiling.
- Gently brace your abs as if preparing for a light punch to the stomach.
- Keep your ribs down and your lower back close to the floor.
- Slowly lower your right arm behind you while extending your left leg forward.
- Stop before your lower back arches.
- Exhale as you extend, then return to the starting position with control.
- Repeat on the other side.
- Continue alternating sides slowly.
Common Mistakes
Arching the lower back:
This usually means you are extending your leg too far or losing core tension.
Moving too fast:
Speed turns the exercise into momentum. Slow reps build better control.
Letting the ribs flare:
Keep the front ribs down so your abs can stay engaged.
Reaching too far too soon:
You do not have to touch your heel or hand to the floor. Use the range you can control.
Holding your breath:
Brace, but keep breathing. Exhale as the arm and leg move away.
Lifting the head and neck:
Keep your head relaxed on the floor and look upward.
Pressing the lower back aggressively into the floor:
You want control, not excessive force. Keep the spine steady and comfortable.
How to Use in a Workout
Use the dead bug near the beginning of your workout as a core activation drill or after your main lifts as an accessory core exercise.
Good times to use it include:
- Before lower-body strength training
- Before running or athletic movement
- After a full-body workout
- During a short home core routine
- As part of a beginner-friendly ab circuit
Beginner Dead Bug Modifications
1. Heel Tap Dead Bug
Best for:
Beginners learning core control.
Muscles worked:
Abs, obliques, hip flexors, and deep core stabilizers.
Why it stands out
The heel tap version shortens the range of motion. Instead of extending the leg fully, you lower one heel toward the floor while keeping the knee bent.
Suggested sets and reps
Do 2–3 sets of 6–10 reps per side.
How to do it
- Lie on your back with your knees bent at 90 degrees.
- Reach your arms toward the ceiling or keep them by your sides.
- Brace your abs and keep your lower back controlled.
- Slowly lower one heel toward the floor.
- Tap lightly or stop just above the floor.
- Return to the starting position.
- Repeat on the other side.
Common mistakes:
Dropping the foot too fast, arching the back, or losing rib control.
Coaching cue:
Think “tap the floor softly,” not “drop the leg.”
Exercise variations:
Keep arms down for the easiest version, or reach arms up to increase the challenge.
How to use in a workout:
Use this as your first dead bug variation if the full version feels too difficult.
2. Arms-Only Dead Bug
Best for:
Learning rib control and breathing.
Muscles worked:
Abs, obliques, shoulders, lats, and deep core stabilizers.
Why it stands out
This version removes the leg challenge so you can focus on keeping your ribs down as your arms move overhead.
Suggested sets and reps
Do 2 sets of 8–12 reps.
How to do it
- Lie on your back with knees bent and feet flat.
- Reach both arms toward the ceiling.
- Brace your abs gently.
- Slowly lower one arm overhead.
- Stop before your ribs flare.
- Return to the starting position.
- Repeat with the other arm.
Common mistakes:
Overreaching, flaring the ribs, or shrugging the shoulders.
Coaching cue:
Keep the ribs heavy as your arm moves.
Exercise variations:
Move both arms at the same time if you can keep control.
How to use in a workout:
Use it as a warm-up drill before upper-body or core training.
3. Legs-Only Dead Bug
Best for:
Improving lower-back control before the full opposite arm and leg version.
Muscles worked:
Abs, transverse abdominis, obliques, hip flexors, and deep stabilizers.
Why it stands out
Most people lose position when the leg moves. This version lets you train that part directly without adding arm movement.
Suggested sets and reps
Do 2–3 sets of 6–10 reps per side.
How to do it
- Lie on your back with hips and knees bent at 90 degrees.
- Keep your arms reaching up or resting on the floor.
- Brace your abs.
- Slowly extend one leg forward.
- Stop before your lower back arches.
- Return to tabletop.
- Repeat on the other side.
Common mistakes:
Straightening the leg too low, rushing the return, or lifting the lower back.
Coaching cue:
Only extend as far as your abs can control.
Exercise variations:
Keep the knee bent to make it easier, or straighten the leg more to make it harder.
How to use in a workout:
Use it as a bridge between heel taps and the full dead bug.
Dead Bug Exercise Progressions
1. Wall Press Dead Bug
Best for:
Stronger ab engagement and better upper-body tension.
Muscles worked:
Abs, obliques, transverse abdominis, lats, shoulders, and hip flexors.
Equipment needed:
A wall or sturdy surface.
Why It Stands Out
The wall press dead bug gives your hands something to push against. This can help you create more tension through your abs and lats while keeping the ribs down.
Suggested Sets and Reps
Do 2–3 sets of 6–10 reps per side.
How to Do It
- Lie on your back with your head close to a wall.
- Reach both hands into the wall.
- Bring your legs into tabletop position.
- Press gently into the wall without shrugging your shoulders.
- Brace your abs and keep your ribs down.
- Slowly extend one leg forward.
- Return to the starting position.
- Repeat on the other side.
Common Mistakes
Pressing too hard, shrugging the shoulders, arching the lower back, or rushing the leg movement.
Coaching Cue
Push the wall away gently while keeping your ribs down.
Exercise Variations
Use bent-knee heel taps for an easier version or straight-leg extensions for a harder version.
How to Use in a Workout
Use it before squats, deadlifts, overhead presses, or full-body strength sessions.
2. Stability Ball Dead Bug
Best for:
Coordination, control, and full-body tension.
Muscles worked:
Abs, obliques, hip flexors, shoulders, inner thighs, and deep core stabilizers.
Equipment needed:
Stability ball.
Why It Stands Out
Holding a stability ball between your hands and knees forces you to stay coordinated. If you lose tension, the ball shifts.
Suggested Sets and Reps
Do 2–3 sets of 6–10 reps per side.
How to Do It
- Lie on your back and hold a stability ball between your hands and knees.
- Press gently into the ball.
- Keep your ribs down and abs braced.
- Extend your right arm and left leg away from the ball.
- Keep pressing the ball with the opposite hand and knee.
- Return to the starting position.
- Repeat on the other side.
Common Mistakes
Crushing the ball too hard, holding the breath, or letting the lower back lift.
Coaching Cue
Keep light pressure on the ball the entire time.
Exercise Variations
Use a small Pilates ball or yoga block if a large stability ball feels awkward.
How to Use in a Workout
Use it as a controlled core drill after your main strength exercises.
3. Banded Dead Bug
Best for:
Intermediate core strength and lat engagement.
Muscles worked:
Abs, obliques, transverse abdominis, lats, shoulders, and hip flexors.
Equipment needed:
Resistance band and anchor point.
Why It Stands Out
A band adds tension to the upper body, which makes your core work harder to keep the ribs and pelvis stable.
Suggested Sets and Reps
Do 2–3 sets of 6–12 reps per side.
How to Do It
- Anchor a resistance band behind your head.
- Lie on your back and hold the band with both hands.
- Pull the band so your arms are reaching upward or slightly forward.
- Bring your legs into tabletop position.
- Brace your abs.
- Slowly extend one leg while keeping the band steady.
- Return with control.
- Repeat on the other side.
Common Mistakes
Using too much band tension, losing rib position, or letting the band pull the shoulders out of control.
Coaching Cue
Keep the band still while the leg moves.
Exercise Variations
Use a lighter band to make it easier or add opposite arm movement to make it harder.
How to Use in a Workout
Use it as an accessory core exercise on strength-training days.
4. Weighted Dead Bug
Best for:
Advanced core control.
Muscles worked:
Abs, obliques, transverse abdominis, shoulders, lats, and hip flexors.
Equipment needed:
Light dumbbells or a small weight plate.
Why It Stands Out
Adding weight increases the demand on your core and shoulders. This version should only be used after you can control the standard dead bug with excellent form.
Suggested Sets and Reps
Do 2–3 sets of 5–8 reps per side.
How to Do It
- Lie on your back holding light dumbbells above your chest.
- Bring your legs into tabletop position.
- Brace your abs and keep your ribs down.
- Slowly lower one arm and the opposite leg.
- Stop before your lower back arches.
- Return to the starting position.
- Repeat on the other side.
Common Mistakes
Using weights that are too heavy, losing shoulder control, or turning the movement into a slow pullover.
Coaching Cue
Use the lightest weight that makes control harder without changing your form.
Exercise Variations
Use one dumbbell held with both hands, or use no weight and slow the tempo instead.
How to Use in a Workout
Use it near the end of a workout when you want a more advanced core challenge.
How to Add Dead Bugs to Your Workout
The dead bug exercise fits into many types of workouts because it does not require equipment or heavy fatigue.
Use It as a Warm-Up
Do 1–2 light sets before strength training to wake up your core and improve rib and pelvis control.
Example:
- Dead bug: 2 sets of 6 reps per side
- Glute bridge: 2 sets of 10 reps
- Bodyweight squat: 2 sets of 8 reps
Use It as a Core Exercise
Add it after your main lifts or cardio session.
Example:
- Dead bug: 3 sets of 8–12 reps per side
- Side plank: 2 sets of 20–30 seconds per side
- Bird dog: 2 sets of 8 reps per side
Use It on Recovery Days
Because it is low-impact, the dead bug can fit into a short mobility or core-control session.
Example:
- Cat-cow: 8 slow reps
- Dead bug: 2 sets of 8 reps per side
- Hip flexor stretch: 30 seconds per side
- Child’s pose breathing: 5 slow breaths
Sample Dead Bug Core Routine
Beginner Option
Use this if you are new to core training or struggle to keep your lower back controlled.
- Heel tap dead bug: 2 sets of 8 reps per side
- Arms-only dead bug: 2 sets of 8 reps per side
- Glute bridge: 2 sets of 10 reps
- Side plank from knees: 2 sets of 15–20 seconds per side
Rest 30–45 seconds between exercises.
Intermediate Option
Use this if you can control the basic dead bug without arching your back.
- Standard dead bug: 3 sets of 8–10 reps per side
- Wall press dead bug: 2 sets of 8 reps per side
- Bird dog: 2 sets of 8–10 reps per side
- Forearm plank: 2 sets of 20–40 seconds
Rest 45–60 seconds between exercises.
Advanced Core Control Option
Use this if you already have strong form and want a harder challenge.
- Banded dead bug: 3 sets of 8 reps per side
- Stability ball dead bug: 3 sets of 6–8 reps per side
- Weighted dead bug: 2 sets of 5–6 reps per side
- Side plank with reach-through: 2 sets of 6–8 reps per side
Rest 60 seconds between exercises.
How Often Should You Do the Dead Bug Exercise?
Most people can do dead bugs 2–4 times per week. Since the movement is low-impact and not heavily loaded, it can be used more often than intense ab exercises, as long as your form stays clean.
A good starting point is:
- Beginner: 2 days per week
- Intermediate: 3 days per week
- Advanced: 3–4 days per week
Keep the effort moderate. You should feel your abs working, but you should not feel sharp pain, back strain, hip pinching, or neck tension.
Who Should Use the Dead Bug Exercise?
The dead bug is a good option for:
- Beginners learning core control
- Lifters who need better bracing
- Runners who want trunk stability
- People who dislike crunches
- Older adults who need a modifiable floor-based core exercise
- Home exercisers with no equipment
- Athletes who need better coordination
The American Council on Exercise describes a supine dead bug setup that starts from a stable position on the floor, which makes it easier to learn compared with many advanced core movements.
When to Avoid or Modify Dead Bugs
Modify the dead bug if you cannot keep your lower back controlled, your hip flexors take over, or your neck feels tense.
Stop the exercise if you feel sharp pain, numbness, dizziness, unusual symptoms, or discomfort that worsens as you continue. If you have a current injury, recent surgery, pregnancy-related concerns, or persistent back pain, ask a qualified professional before using advanced dead bug variations.
The dead bug may help support better core control, but it should not be treated as a cure for pain or a replacement for medical care.
FAQs About the Dead Bug Exercise
Is the dead bug exercise good for beginners?
Yes. The dead bug is one of the best beginner core exercises because it is low-impact, easy to modify, and teaches control before intensity. Beginners should start with heel taps, arms-only dead bugs, or legs-only dead bugs before using the full version.
What does the dead bug exercise work?
The dead bug mainly works the abs, including the rectus abdominis, transverse abdominis, and obliques. It also uses the hip flexors, shoulders, lats, and deep stabilizing muscles to help keep the trunk steady.
Should my lower back touch the floor during dead bugs?
Your lower back should stay controlled and close to the floor. It should not arch aggressively as your arm and leg move. If your back lifts, shorten your range of motion or use an easier variation.
How many dead bugs should I do?
Start with 2–3 sets of 6–10 reps per side. As your control improves, you can work up to 10–15 reps per side. Stop each set before your form breaks down.
Are dead bugs better than crunches?
They train the core differently. Crunches focus more on spinal flexion, while dead bugs train core stability and anti-extension control. For many beginners, dead bugs are easier to perform with good form and less neck strain.
Why do I feel dead bugs in my hip flexors?
Your hip flexors help hold your legs in the tabletop position, so some involvement is normal. If you feel them more than your abs, reduce the range of motion, keep your knees bent, or rest your feet on the floor between reps.
Can I do dead bugs every day?
You can do light dead bugs often if they feel good and your form stays controlled. For most people, 2–4 times per week is enough. More is not always better if you start rushing, arching your back, or losing tension.
Conclusion
The dead bug exercise is a simple but powerful way to build core strength, stability, coordination, and lower-back control. The key is to move slowly, brace your abs, keep your ribs down, and use only the range of motion you can control.
Start with 2–3 sets of the basic version or a beginner modification. Once your form feels solid, progress to wall press, stability ball, banded, or weighted dead bugs.
Choose one version today, focus on perfect reps, and build from there.
References
- National Academy of Sports Medicine — Dead Bug Exercise
- American Council on Exercise — Supine Dead Bug
- Harvard Health — The Many Benefits of the Dead Bug
- American College of Sports Medicine — Resistance Training for Health and Fitness
- NCBI Bookshelf — Anatomy, Abdomen and Pelvis: Anterolateral Abdominal Wall
- Mayo Clinic — Core Exercises: Why You Should Strengthen Your Core Muscles
1 thought on “Dead Bug Exercise: Build Core Strength With Perfect Form”