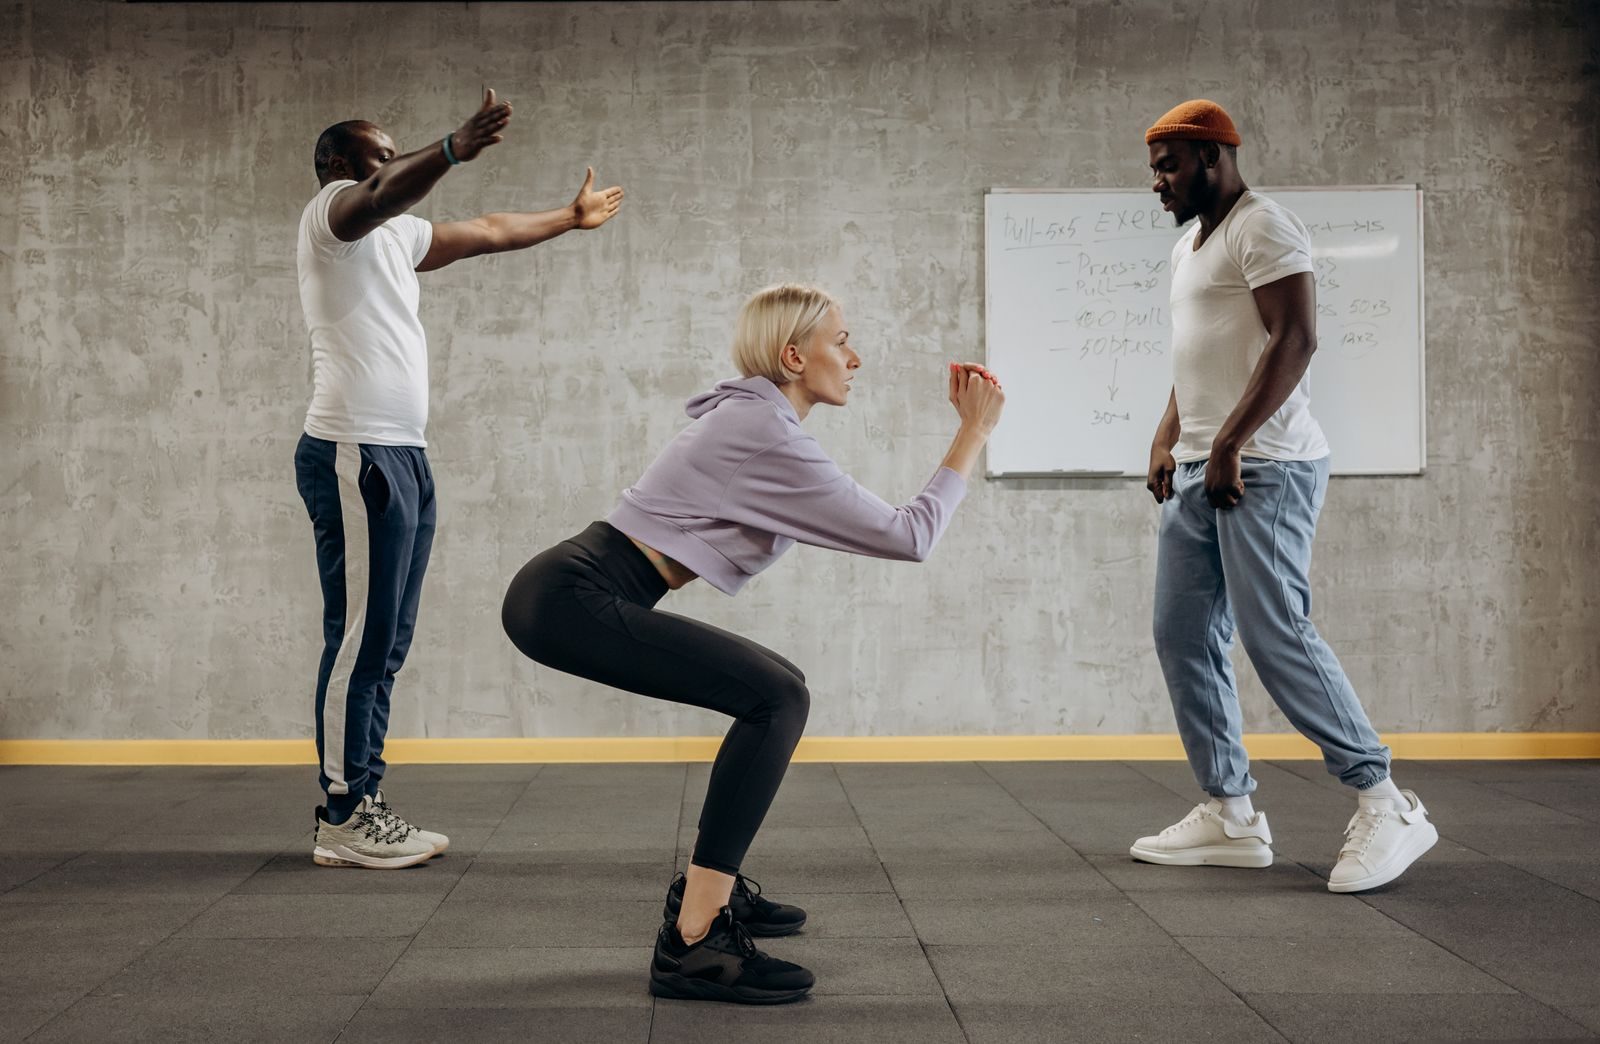
Cool-down exercises combine light movement and gentle stretching to help you transition gradually from training back to rest. A practical cool-down usually begins with two to five minutes of easy activity, followed by stretches for the muscles used most during the workout.
The 10 exercises below create a simple full-body routine suitable after strength training, cardio, running, cycling, or a general fitness session. You do not need to perform every movement after every workout—choose the exercises that match what you trained.
What Is a Cool-Down?
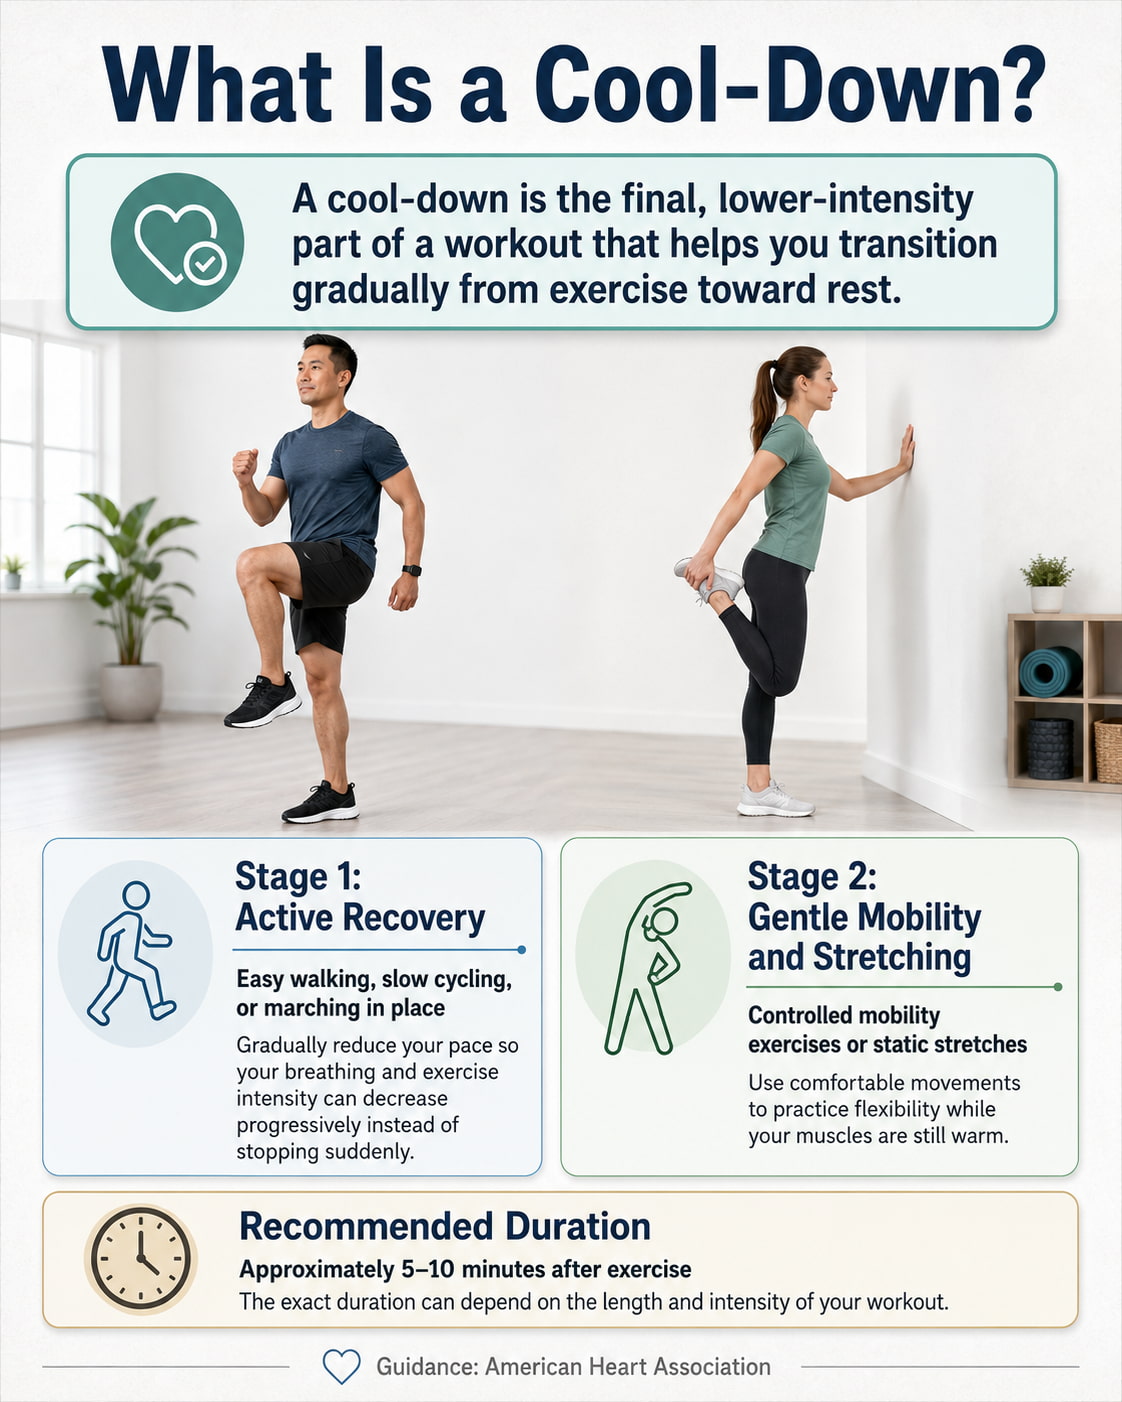
A cool-down is the final, lower-intensity part of a workout. It commonly includes two stages.
The first stage is active recovery, such as easy walking, slow cycling, or marching in place. This allows your breathing and exercise intensity to decrease progressively instead of stopping suddenly.
The second stage uses gentle mobility exercises or static stretches. These movements can be useful for practicing flexibility while your muscles are warm.
The American Heart Association recommends slowing your activity for approximately five to 10 minutes after exercise. The exact duration can depend on how long and intensely you trained.
Benefits of Cool-Down Exercises
A well-structured cool-down may help you:
- Reduce your exercise intensity gradually rather than stopping abruptly.
- Allow your breathing and heart rate to move progressively toward their resting levels.
- Practice flexibility when your muscles are already warm.
- Maintain or gradually improve range of motion when stretching is performed consistently.
- Notice areas that feel unusually tight, uncomfortable, or fatigued after training.
- Finish the workout in a controlled and mentally calming way.
These benefits should be kept in perspective. Cooling down is a useful training habit, but it is not a guaranteed way to prevent injuries or eliminate next-day muscle soreness.
Do Cool-Down Exercises Prevent Muscle Soreness?
Post-workout stretching should not be presented as a reliable cure for delayed-onset muscle soreness.
A 2025 meta-analysis found that post-exercise stretching used by itself did not produce meaningful improvements in soreness, strength, performance, flexibility, or pain threshold compared with no stretching. Stretching can still be worthwhile when your goal is relaxation, movement practice, or improving flexibility over time.
Consistent static stretching can improve range of motion, but flexibility gains come from regular practice—not from forcing one unusually deep stretch after a workout. A large systematic review published in Sports Medicine found that static stretching can improve flexibility both immediately and through continued training.
How Long Should a Cool-Down Last?
Most people can use a 5–10-minute cool-down after a normal workout.
After light or moderate exercise, two minutes of easy movement followed by three or four targeted stretches may be enough. After intense running, interval training, a hard circuit, or a demanding leg workout, spend closer to five minutes gradually reducing your pace before stretching.
Hold most static stretches for approximately 20–30 seconds per side. Stretch slowly, breathe normally, and stop at comfortable tension rather than pain. The AAOS recommends gentle holds lasting around 10–30 seconds without bouncing.
10 Best Cool-Down Exercises After a Workout
The following 10 cool-down exercises combine gentle movement and stretching to help your body transition gradually after training. Choose the movements that match the muscles you used most and perform each one with slow, controlled breathing.
1. Easy Walk or March in Place
Best for: Beginning any cool-down, particularly after running, cycling, interval training, sports, or a high-repetition circuit.
Muscles worked: Calves, quadriceps, hamstrings, hip flexors, glutes, and other lower-body muscles remain lightly active.
Why it stands out: Walking or marching reduces workout intensity without immediately becoming completely still. It is the most important first step after vigorous cardiovascular exercise.
Suggested sets and reps: Continue for two to five minutes at a comfortable pace.
How to do it:
- Stand tall with your shoulders relaxed.
- Walk forward or march gently in place.
- Let your arms swing naturally.
- Take steady breaths without trying to hold a rigid posture.
- Gradually shorten your steps and reduce your pace.
- Continue until you can speak comfortably without gasping.
Common mistakes: Stopping immediately after intense exercise, walking too quickly to let effort decrease, or sitting down while still breathing heavily.
Expert tip: Think “slower every minute.” Your final minute should feel easier than your first.
The gradual reduction in activity aligns with guidance from the American Heart Association.
2. Wall Calf Stretch
Best for: Running, walking, cycling, jumping, stair climbing, calf training, or workouts involving repeated ankle movement.
Muscles worked: Gastrocnemius and soleus muscles of the calf.
Equipment needed: A wall, countertop, or sturdy chair.
Why it stands out: Tight or fatigued calves are common after lower-body cardio. This supported position makes the stretch easy to control.
Suggested sets and reps: One set of 20–30 seconds per side.
How to do it:
- Face a wall and place both hands against it.
- Step one foot behind you.
- Point both feet generally forward.
- Keep the rear heel pressed into the floor.
- Bend the front knee and gently move your hips toward the wall.
- Hold when you feel comfortable tension in the rear calf.
- Repeat on the opposite side.
Common mistakes: Lifting the rear heel, turning the back foot sharply outward, arching the lower back, or pushing until the Achilles tendon feels painful.
Expert tip: Keep the rear heel heavy rather than trying to move your body as far forward as possible.
AAOS guidance also emphasizes keeping the heel flat and avoiding excessive back arching.
3. Supported Standing Quad Stretch
Best for: Squats, lunges, running, cycling, hiking, stair workouts, and quadriceps training.
Muscles worked: Quadriceps, particularly the rectus femoris.
Equipment needed: A wall, rail, countertop, or sturdy chair for balance.
Why it stands out: It targets the front of the thigh without requiring floor work. Support makes it accessible to people who find single-leg balance difficult.
Suggested sets and reps: One set of 20–30 seconds per leg.
How to do it:
- Stand beside a wall or chair.
- Shift your weight onto one leg.
- Bend the opposite knee and bring the heel toward your glutes.
- Hold the ankle or top of the foot.
- Keep your knees close and your torso upright.
- Gently tuck your pelvis until you feel the front of the thigh stretch.
- Repeat on the other leg.
Common mistakes: Pulling the knee sideways, arching the lower back, twisting the torso, or forcing the heel into the glutes.
Expert tip: Bring your belt buckle slightly toward your ribs to limit lower-back arching.
The AAOS recommends using stable support, keeping the knees close, and avoiding back arching or twisting.
4. Half-Kneeling Hip-Flexor Stretch
Best for: Running, cycling, squats, lunges, prolonged sitting, and lower-body workouts.
Muscles worked: Hip flexors, including the iliopsoas region and rectus femoris.
Equipment needed: An exercise mat or folded towel for the knee.
Why it stands out: The half-kneeling position allows you to control the pelvis and stretch the front of the hip without using a very large range.
Suggested sets and reps: One set of 20–30 seconds per side.
How to do it:
- Kneel with one knee on a padded surface.
- Place the opposite foot in front with the knee bent.
- Keep your torso tall and both hips facing forward.
- Gently tighten the glute on the kneeling side.
- Slightly tuck your pelvis.
- Shift forward only until you feel the front of the kneeling-side hip stretch.
- Repeat on the opposite side.
Common mistakes: Lunging too far forward, arching the lower back, letting the front knee collapse inward, or rotating the pelvis.
Expert tip: Create the stretch by tightening the rear glute and positioning the pelvis—not by pushing your hips far forward.
5. Supine Hamstring Stretch
Best for: Deadlifts, running, rowing, lower-body workouts, and activities involving repeated hip hinging.
Muscles worked: Hamstrings at the back of the thigh.
Equipment needed: A mat and an optional towel or stretching strap.
Why it stands out: Lying on your back supports the spine and makes it easier to control the stretch without aggressively reaching toward your toes.
Suggested sets and reps: One set of 20–30 seconds per leg.
How to do it:
- Lie on your back with both knees bent.
- Lift one thigh toward your torso.
- Hold behind the thigh or loop a towel around it.
- Slowly straighten the knee until you feel tension behind the thigh.
- Keep your shoulders, neck, and jaw relaxed.
- Hold without pulling the leg aggressively.
- Repeat on the other side.
Common mistakes: Locking the knee forcefully, pulling on the knee joint, lifting the hips, or straining the neck.
Expert tip: Straighten the knee only as far as you can without changing the position of your pelvis.
The AAOS also recommends a supported supine position and allows a towel when reaching behind the leg is difficult.
6. Reclined Figure-Four Stretch
Best for: Squats, lunges, running, hiking, glute exercises, and full-body workouts.
Muscles worked: Gluteal muscles and deep external hip rotators.
Equipment needed: An exercise mat.
Why it stands out: The floor supports your balance while you adjust the stretch gradually. It is usually easier to control than a standing figure-four position.
Suggested sets and reps: One set of 20–30 seconds per side.
How to do it:
- Lie on your back with both knees bent.
- Cross one ankle over the opposite thigh.
- Keep the crossed foot gently flexed.
- Hold behind the supporting thigh.
- Draw the legs toward your torso until you feel the outer hip stretch.
- Keep your head and shoulders relaxed.
- Repeat on the other side.
Common mistakes: Pressing forcefully on the crossed knee, allowing the foot to become completely relaxed, or lifting the head and straining the neck.
Expert tip: Move the supporting thigh toward you instead of pushing the crossed knee away.
7. Cat-Cow
Best for: Full-body strength training, core workouts, cycling, rowing, prolonged sitting, and workouts that leave the trunk feeling stiff.
Muscles worked: Spinal erectors, abdominal muscles, upper-back muscles, and muscles surrounding the shoulder blades.
Equipment needed: An exercise mat.
Why it stands out: Cat-cow uses slow, controlled movement rather than holding one static position. It can help you explore comfortable spinal flexion and extension after training.
Suggested sets and reps: Five to eight slow repetitions.
How to do it:
- Begin on your hands and knees.
- Place your hands below your shoulders and knees below your hips.
- Exhale as you gently round your upper and lower back.
- Let your head follow the movement without forcing your chin down.
- Inhale as you slowly lift your chest and tilt your pelvis.
- Keep the shoulders away from the ears.
- Alternate smoothly for five to eight repetitions.
Common mistakes: Moving quickly, forcing the neck upward, bending only through the lower back, or holding the breath.
Expert tip: Imagine moving the spine one section at a time rather than trying to create the largest possible curve.
8. Child’s Pose With Side Reach
Best for: Pull-ups, rows, overhead pressing, swimming, upper-body workouts, and full-body training.
Muscles worked: Latissimus dorsi, upper back, shoulders, glutes, and muscles along the side of the torso.
Equipment needed: An exercise mat or bench.
Why it stands out: The side reach adds emphasis to the lats and side of the trunk, which can feel worked after pulling or overhead exercises.
Suggested sets and reps: Hold the center for 20 seconds, then hold 20 seconds with the hands walked to each side.
How to do it:
- Begin on your hands and knees.
- Separate your knees to a comfortable width.
- Move your hips gently toward your heels.
- Reach your hands forward.
- Hold the center position while breathing slowly.
- Walk both hands toward one side to stretch the opposite lat and side of the torso.
- Return to the center and repeat on the other side.
Common mistakes: Forcing the hips to the heels, collapsing the shoulders, holding the breath, or continuing despite knee discomfort.
Expert tip: Reach your fingertips forward while sending your hips back to create length through the sides of your body.
9. Doorway Chest Stretch
Best for: Bench presses, push-ups, chest flyes, shoulder presses, swimming, and workouts involving substantial pressing.
Muscles worked: Pectoralis major, pectoralis minor region, and the front of the shoulder.
Equipment needed: A doorway, wall, or stable vertical support.
Why it stands out: It provides a simple way to target the chest after pressing exercises without placing the shoulder in an uncontrolled position.
Suggested sets and reps: One set of 20–30 seconds per side.
How to do it:
- Stand beside a doorway or wall.
- Place one forearm against the support.
- Keep the shoulder down and away from the ear.
- Step forward or turn your chest gently away.
- Stop when you feel tension across the chest and front of the shoulder.
- Keep your ribs controlled instead of arching your back.
- Repeat on the opposite side.
Common mistakes: Placing the elbow too high, pushing into shoulder pain, shrugging, twisting aggressively, or arching the lower back.
Expert tip: Think about turning your chest away from your arm rather than driving the shoulder forward.
10. Cross-Body Shoulder Stretch
Best for: Rows, pull-ups, shoulder exercises, swimming, racket sports, and upper-body workouts.
Muscles worked: Posterior deltoid, rotator cuff region, and muscles around the upper back and shoulder blade.
Why it stands out: This stretch requires no equipment and can be performed standing or seated.
Suggested sets and reps: One set of 20–30 seconds per arm.
How to do it:
- Stand or sit upright.
- Bring one arm across your chest.
- Use the opposite hand to support the upper arm.
- Draw the arm gently closer without pulling on the elbow.
- Keep the stretching-side shoulder down.
- Hold at comfortable tension.
- Repeat with the other arm.
Common mistakes: Pulling directly on the elbow, twisting the torso, shrugging the shoulder, or using excessive force.
Expert tip: Keep your chest facing forward and allow the movement to come from the shoulder.
AAOS shoulder guidance similarly recommends pulling at the upper arm rather than placing pressure directly on the elbow.
8-Minute Full-Body Cool-Down Routine
Use this routine after a general strength, cardio, or full-body workout.
| Time | Exercise | Duration |
|---|---|---|
| 0:00–2:00 | Easy walk or march | 2 minutes |
| 2:00–2:40 | Wall calf stretch | 20 seconds per side |
| 2:40–3:20 | Standing quad stretch | 20 seconds per side |
| 3:20–4:00 | Half-kneeling hip-flexor stretch | 20 seconds per side |
| 4:00–4:40 | Supine hamstring stretch | 20 seconds per side |
| 4:40–5:20 | Reclined figure-four stretch | 20 seconds per side |
| 5:20–6:00 | Cat-cow | 5 slow repetitions |
| 6:00–6:40 | Child’s pose with side reach | 20 seconds per side |
| 6:40–7:20 | Doorway chest stretch | 20 seconds per side |
| 7:20–8:00 | Cross-body shoulder stretch | 20 seconds per side |
Keep the effort around 2–3 out of 10. You should feel mild or moderate tension, not pain. There is no need to force more range simply because your workout has ended.
How to Customize Your Cool-Down
After Running or Cardio
Begin with three to five minutes of easy walking. Then prioritize the calf stretch, quad stretch, hip-flexor stretch, hamstring stretch, and figure-four stretch.
After Leg Day
Use easy walking or cycling before stretching. Prioritize the calves, quadriceps, hip flexors, hamstrings, and glutes. You may use one 20–30-second hold per side rather than repeating every stretch several times.
After an Upper-Body Workout
Begin with one or two minutes of easy walking or relaxed arm movement. Then use cat-cow, child’s pose with side reach, the doorway chest stretch, and the cross-body shoulder stretch.
After a Full-Body Workout
Complete the full eight-minute routine. Shorten each hold to approximately 15–20 seconds when time is limited.
After a Light Mobility Session
You may not need a separate active cool-down because the session was already low intensity. Finish with relaxed breathing and one or two comfortable stretches.
Common Cool-Down Mistakes
Stopping Too Suddenly
Sitting or lying down immediately after intense cardio does not allow a progressive transition. Walk slowly until your breathing becomes comfortable.
Stretching Into Pain
A stretch should create tension, not sharp, burning, pinching, or electric sensations. Reduce the range or stop the exercise when it hurts.
Bouncing
Bouncing makes the movement harder to control. Enter each stretch gradually and remain still or use slow, deliberate motion.
Holding Your Breath
Breath-holding often causes unnecessary tension. Use calm breaths and relax farther only when the position remains comfortable.
Forcing Every Stretch Equally
One side may have less range than the other. Use a comfortable position on each side rather than forcing them to look identical.
Turning the Cool-Down Into Another Workout
The goal is to lower your effort. Avoid adding demanding mobility drills, deep loaded stretches, or intense conditioning at the end of a difficult session.
Using the Same Routine After Every Workout
Your cool-down should reflect the session. A runner may need more lower-body work, while someone finishing a chest and back workout may benefit more from upper-body stretches.
How Often Should You Do Cool-Down Exercises?
Use a brief cool-down after most moderate or vigorous workouts, particularly when your session ends at a much higher intensity than your normal resting activity.
You do not have to perform all 10 exercises each time. Start with easy movement, then choose three to six stretches for the main muscle groups you trained.
When flexibility is a specific goal, practice selected stretches regularly at least two or three times per week. Progress by increasing consistency, adding a second controlled set, or extending some holds toward 30–45 seconds. Do not progress by forcing pain.
Safety Tips
Cool-down movements should feel controlled and comfortable. Use a wall, counter, or chair when balance is uncertain. Place padding beneath the knees for kneeling exercises and avoid positions that irritate an existing joint problem.
Stop exercising and seek appropriate professional help if you experience sharp pain, numbness, unusual weakness, dizziness that does not settle, chest pain, severe shortness of breath, or other unexpected symptoms.
People recovering from an injury or surgery, those who are pregnant, and those with medical or balance concerns may need individualized exercise modifications. The NHS recommends consulting a physiotherapist or healthcare professional when a condition may affect which stretches are appropriate.
Frequently Asked Questions
Is walking enough for a cool-down?
Walking can be enough when your main goal is gradually reducing your exercise intensity. Add targeted stretches when you also want to work on flexibility or relax the muscles emphasized during the workout.
Do I need to perform all 10 cool-down exercises?
No. After easy movement, choose the stretches that match your workout. Three to six targeted exercises are usually more practical than completing an identical full-body routine every day.
Should I stretch after strength training?
You can stretch after strength training, especially when flexibility is one of your goals. Keep the stretches gentle and prioritize the muscles you trained. Stretching is optional for recovery and should not replace sleep, appropriate nutrition, hydration, or sensible programming.
Can cooling down prevent next-day soreness?
A cool-down may feel relaxing, but current evidence does not show that post-workout stretching alone meaningfully prevents delayed-onset muscle soreness.
How hard should a cool-down stretch feel?
Aim for mild to moderate tension—approximately 2–3 out of 10. Back off when you feel pain, pinching, numbness, or joint discomfort.
Is it bad to skip a cool-down?
Missing an occasional cool-down is unlikely to erase the benefits of your workout. It is most useful after vigorous activity, when gradually lowering your effort feels better than stopping immediately, or when you are deliberately working on flexibility.
Should I use static or dynamic stretches after exercise?
Either can be appropriate. Start with gentle movement when your breathing is still elevated. Afterward, controlled static stretches are convenient for flexibility, while slow mobility exercises such as cat-cow can help you move through a comfortable range.
Conclusion
The best cool-down exercises do not need to be complicated. Begin with easy walking or marching, then choose gentle stretches for the muscles you used most.
Keep each movement controlled, breathe normally, and stop before tension becomes painful. A consistent five- to 10-minute routine is more useful than forcing a long or aggressive stretch once in a while.
This content is for informational purposes only and is not a substitute for professional medical advice.
References
- American Heart Association: Warm Up, Cool Down
- NHS: How to Stretch After Exercising
- American Academy of Orthopaedic Surgeons: Warm Up, Cool Down and Be Flexible
- American Academy of Orthopaedic Surgeons: Knee Conditioning Program
- Mayo Clinic: Stretching—Focus on Flexibility
- Frontiers in Physiology: Effects of Post-Exercise Stretching Versus No Stretching
- Sports Medicine: Optimising the Dose of Static Stretching to Improve Flexibility
- Journal of Sport and Health Science: Practical Recommendations on Stretching Exercise