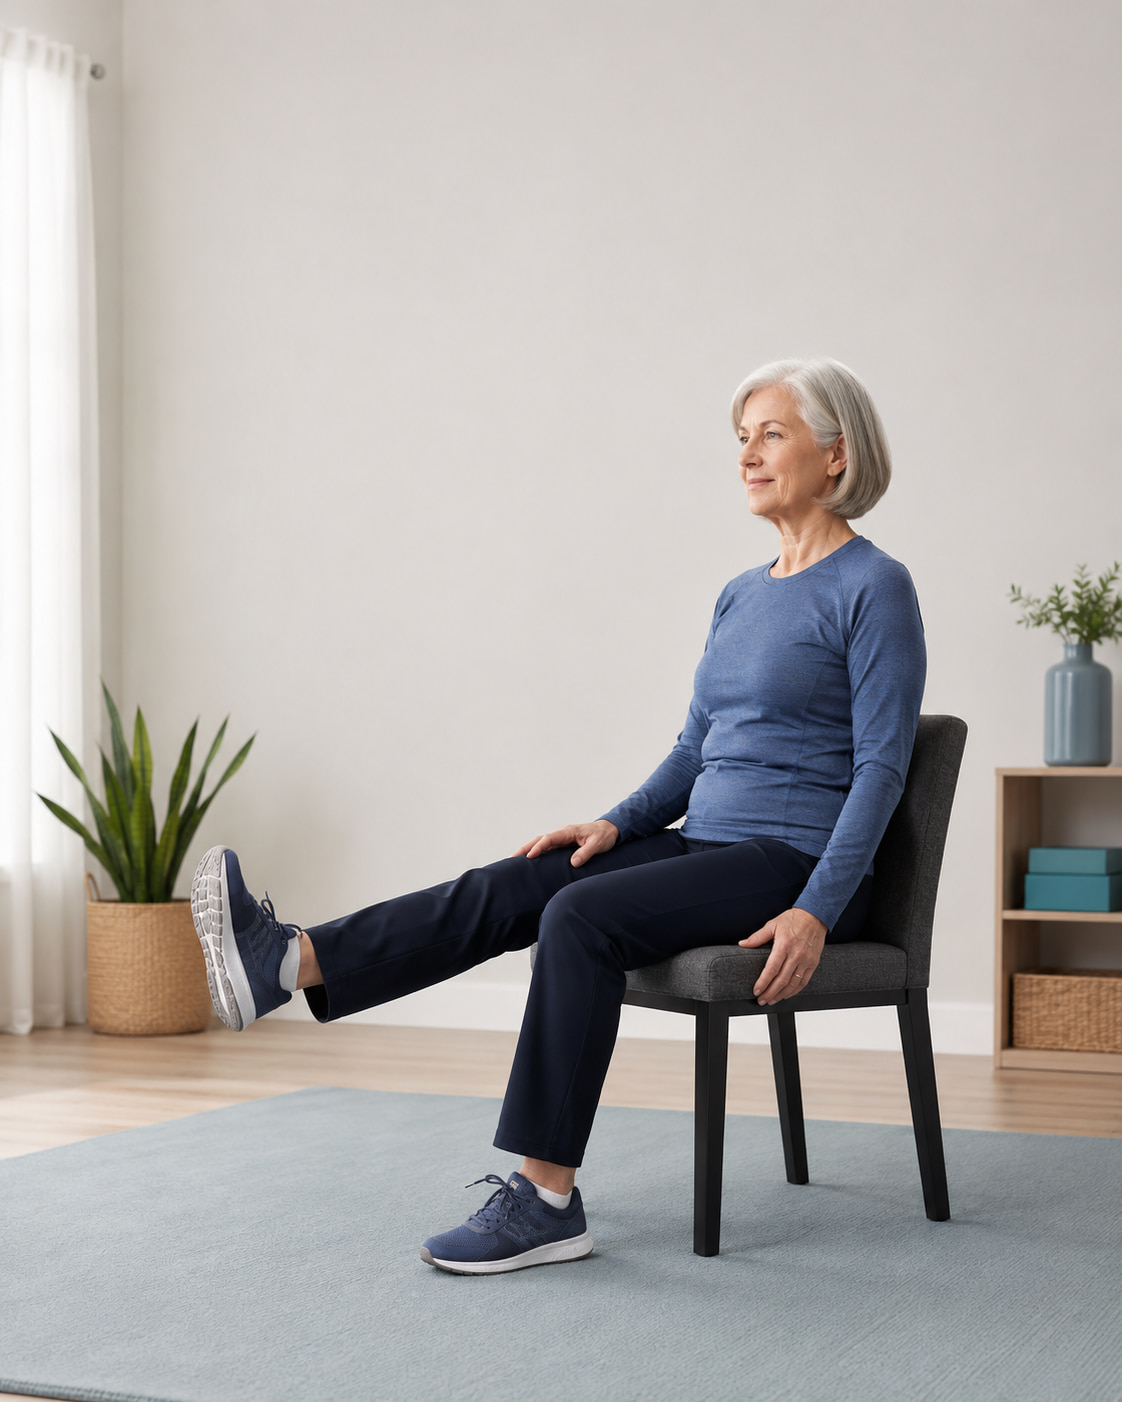
The best leg exercises in a chair include seated marches, knee extensions, heel slides, heel raises, toe raises, knee openers, thigh squeezes, and glute squeezes. Together, these movements train the hips, thighs, calves, shins, and ankles without requiring floor exercises or standing balance.
Chair exercises can be useful for beginners, older adults, people returning to activity, and anyone who currently has difficulty exercising while standing. A systematic review available through the National Library of Medicine found improvements in several measures of physical function among older adults, although results depended on the exercises, training volume, and progression used.
Seated exercise is most effective when you perform each movement with control and gradually make it more challenging. This guide explains how to do eight chair leg exercises correctly, adjust them to your ability, and combine them into a practical routine.
Leg Exercises in a Chair at a Glance
| Exercise | Main purpose | Main muscles worked | Beginner starting point |
|---|---|---|---|
| Seated march | Hip strength and coordination | Hip flexors, quadriceps | 5–10 reps per side |
| Seated knee extension | Thigh strength and knee control | Quadriceps | 5–10 reps per side |
| Seated heel slide | Knee mobility and hamstring activation | Hamstrings, quadriceps | 8–12 reps per side |
| Seated heel raise | Calf strength and ankle control | Calves, especially the soleus | 10–15 reps |
| Seated toe raise | Shin strength and ankle mobility | Tibialis anterior and other ankle dorsiflexors | 10–15 reps |
| Seated knee opener | Outer-hip strength | Gluteus medius, gluteus minimus, other hip abductors | 8–12 reps |
| Seated thigh squeeze | Inner-thigh strength | Hip adductors | 8–10 holds |
| Seated glute squeeze | Glute activation | Gluteal muscles | 8–12 holds |
These are starting recommendations rather than fixed requirements. Begin with fewer repetitions or a smaller range of motion when needed.
What You Need Before Starting
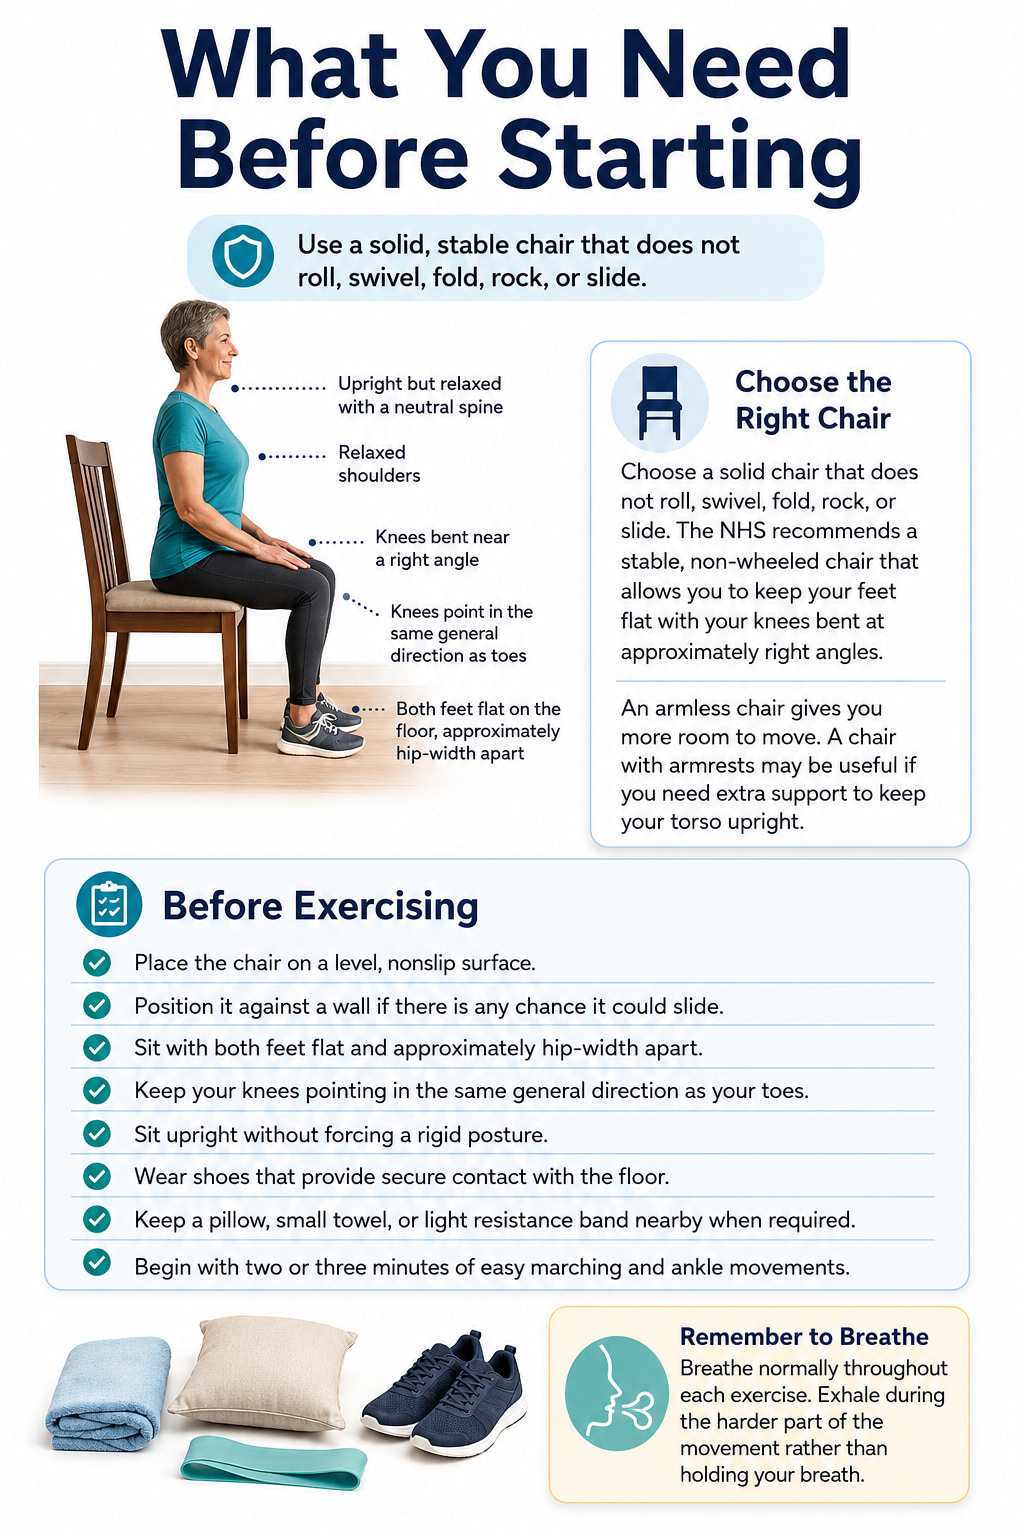
Choose a solid chair that does not roll, swivel, fold, rock, or slide. The NHS recommends a stable, non-wheeled chair that allows you to keep your feet flat with your knees bent at approximately right angles.
An armless chair gives you more room to move. A chair with armrests may be useful when you need help keeping your torso upright.
Before exercising:
- Place the chair on a level, nonslip surface.
- Position it against a wall if there is any chance it could slide.
- Sit with both feet flat and approximately hip-width apart.
- Keep your knees pointing in the same general direction as your toes.
- Sit upright without forcing a rigid posture.
- Wear shoes that provide secure contact with the floor.
- Keep a pillow, small towel, or light resistance band nearby when required.
- Begin with two or three minutes of easy marching and ankle movements.
Breathe normally throughout each exercise. Exhale during the harder part of the movement rather than holding your breath.
8 Best Leg Exercises in a Chair
The following exercises cover the major movements available from a seated position. Some are primarily strength exercises, while others are better for mobility and muscle activation.
1. Seated March
Best for: Strengthening the hip flexors, practicing controlled leg lifting, and improving hip mobility and coordination.
Muscles worked: Hip flexors, quadriceps, and trunk stabilizers.
Equipment needed: A stable chair.
Sets, reps, and rest: Start with 1–2 sets of 5–10 repetitions per leg. Rest for 30–45 seconds between sets.
How to Do It
- Sit upright with your feet flat and approximately hip-width apart.
- Hold the sides or armrests of the chair if you need additional support.
- Lightly brace your abdomen without holding your breath.
- Lift one knee as high as you comfortably can without leaning backward.
- Pause briefly and lower your foot to the floor with control.
- Repeat with the other leg.
Common mistakes: Leaning backward to lift the leg, hiking one side of the pelvis, dropping the foot heavily, or rushing from side to side. A smaller controlled lift is more useful than a high lift created with momentum.
Regression: Lift the foot only slightly or complete fewer repetitions.
Progression: Pause with the knee raised for three to five seconds, increase the repetitions, or add a light ankle weight after you can maintain an upright torso.
The NHS and Memorial Sloan Kettering Cancer Center both include controlled seated marching in their chair-exercise programs and emphasize avoiding backward leaning.
2. Seated Knee Extension
Best for: Strengthening the front of the thigh and improving control as the knee straightens.
Muscles worked: Quadriceps.
Equipment needed: A stable chair. A light ankle weight is optional for progression.
Sets, reps, and rest: Perform 1–2 sets of 5–12 repetitions per leg. Pause for one to three seconds at the top and rest for approximately 30–60 seconds.
How to Do It
- Sit tall with both feet flat on the floor.
- Keep your thigh resting on the chair.
- Slowly straighten one knee until the leg reaches a comfortable position.
- Tighten the front of your thigh and pause.
- Lower the foot under control instead of letting it drop.
- Complete the set and change legs, or alternate sides.
Do not force the knee into a hard locked position. Use the largest comfortable range that you can control.
Common mistakes: Kicking the foot upward, dropping the leg quickly, leaning backward, or lifting the thigh off the seat.
Regression: Straighten the knee only partway or shorten the pause.
Progression: Build toward 10–15 controlled repetitions, increase the pause to five seconds, or add a light ankle weight. Increase resistance only when the unweighted version feels stable.
The North Tees and Hartlepool NHS Foundation Trust recommends progressing knee extensions through repetitions, longer holds, resistance bands, or ankle weights.
3. Seated Heel Slide
Best for: Practicing controlled knee bending and straightening while involving the hamstrings.
Muscles worked: Hamstrings when pulling the heel backward, with the quadriceps assisting as the leg moves forward.
Equipment needed: A small towel on a smooth floor or a furniture slider on carpet. Use one only when the chair is completely secure.
Sets, reps, and rest: Perform 1–2 sets of 8–12 repetitions per leg. Rest for approximately 30 seconds between sides.
How to Do It
- Sit with both feet flat and your knees bent.
- Place the working foot on the towel or slider.
- Slide the heel forward, gradually straightening the knee.
- Keep the heel in contact with the floor.
- Press the heel down lightly and pull it back toward the chair.
- Complete all repetitions before switching sides.
This movement is primarily a mobility and muscle-control exercise when performed on a very slippery surface. Pressing the heel into the floor as you pull it back increases the work performed by the hamstrings.
Common mistakes: Moving the whole torso, allowing the knee to collapse inward, lifting the foot off the surface, or sliding so far that the chair moves.
Regression: Use a shorter sliding distance.
Progression: Increase the range, slow the return, or add carefully controlled resistance with a secured band.
Controlled seated heel slides are included in the North Tees NHS chair program, which recommends starting with a manageable range and adding repetitions or resistance gradually.
4. Seated Heel Raise
Best for: Building calf strength and improving control at the ankle.
Muscles worked: Soleus and gastrocnemius calf muscles. The bent-knee position places greater emphasis on the soleus.
Equipment needed: A stable chair. Optional light resistance can be placed on the thighs.
Sets, reps, and rest: Perform 1–3 sets of 10–15 repetitions. Rest for 30–45 seconds.
How to Do It
- Sit with your feet flat and positioned beneath or slightly in front of your knees.
- Keep the balls of both feet firmly on the floor.
- Lift your heels as high as you can without rolling your ankles outward.
- Pause briefly at the top.
- Lower your heels slowly until they touch the floor.
Common mistakes: Bouncing, moving the feet too far forward, rolling onto the outside edges of the feet, or dropping the heels quickly.
Regression: Use a smaller lift or alternate one foot at a time.
Progression: Add a three-to-five-second pause, perform one leg at a time, or place your hands or a light weight on the lower thighs. Do not place resistance directly on the kneecaps.
5. Seated Toe Raise
Best for: Strengthening the muscles at the front of the lower leg and practicing ankle dorsiflexion—the movement that lifts the toes.
Muscles worked: Tibialis anterior and other ankle dorsiflexors.
Equipment needed: A stable chair.
Sets, reps, and rest: Complete 1–3 sets of 10–15 repetitions. Rest for approximately 30 seconds.
How to Do It
- Sit with both feet flat and approximately hip-width apart.
- Keep your heels pressed into the floor.
- Lift your toes and the front of your feet toward your shins.
- Pause briefly without leaning backward.
- Lower the front of your feet under control.
Common mistakes: Lifting the heels, rocking the torso backward, turning the knees outward, or tapping the feet rapidly without controlling the lowering phase.
Regression: Raise the toes through a smaller range or work one foot at a time.
Progression: Hold the raised position for three to five seconds or perform all repetitions on one side before changing feet.
Heel raises and toe raises appear in both NHS and Memorial Sloan Kettering chair-exercise guidance. The NHS program recommends progressing them by increasing repetitions or adding controlled holds.
6. Seated Knee Opener
Best for: Strengthening the outer hips and practicing control of the knees and pelvis.
Muscles worked: Gluteus medius, gluteus minimus, tensor fasciae latae, and other muscles involved in moving the thighs apart.
Equipment needed: A light loop resistance band is optional. You can also use your hands for resistance.
Sets, reps, and rest: Perform 1–2 sets of 8–12 repetitions, or 5–8 holds lasting three seconds. Rest for 30–45 seconds.
How to Do It
- Sit upright with your feet flat and your knees approximately hip-width apart.
- Place your hands against the outside of your knees or position a light band above them.
- Press your knees outward against the resistance.
- Keep your feet planted and your pelvis still.
- Pause for two or three seconds.
- Return slowly to the starting position.
Common mistakes: Rolling the feet onto their outside edges, leaning backward, pushing with maximum force, or allowing the band to pull the knees inward quickly.
Regression: Use gentle hand pressure or a smaller outward movement.
Progression: Use a slightly stronger band, add repetitions, or extend the pause. You should still be able to move without twisting or holding your breath.
7. Seated Thigh Squeeze
Best for: Strengthening the inner thighs using simple isometric resistance.
Muscles worked: Hip adductors.
Equipment needed: A pillow, folded towel, or soft exercise ball.
Sets, reps, and rest: Perform 1–2 sets of 8–10 holds. Hold each squeeze for three to five seconds and rest for 30 seconds between sets.
How to Do It
- Sit with your feet flat and your knees bent.
- Place a pillow or soft ball between your knees.
- Sit upright and gently brace your abdomen.
- Squeeze your knees toward the object.
- Hold without holding your breath.
- Release the pressure fully before the next repetition.
Common mistakes: Squeezing as hard as possible, allowing the feet to slide together, rounding the back, or failing to relax between repetitions.
Regression: Use a thick pillow and apply only light pressure.
Progression: Increase the hold to eight seconds or use a slightly firmer object. Longer controlled holds are usually more useful than maximal squeezing.
The knee abduction and adduction drill in the Memorial Sloan Kettering chair-exercise guide uses gentle opposing pressure to train both the inner and outer hip muscles.
8. Seated Glute Squeeze
Best for: Learning to contract the glutes and beginning lower-body training when larger movements are difficult.
Muscles worked: Gluteus maximus, with the other gluteal muscles assisting.
Equipment needed: A stable chair.
Sets, reps, and rest: Complete 1–2 sets of 8–12 repetitions. Hold each squeeze for three to five seconds.
How to Do It
- Sit upright with your feet flat and your weight evenly distributed.
- Keep your pelvis still and your lower back in a comfortable position.
- Squeeze both sides of your buttocks together.
- Hold the contraction while continuing to breathe.
- Relax completely before repeating.
Common mistakes: Arching the lower back, pushing forcefully through the feet, gripping the chair, holding the breath, or maintaining constant tension without a full release.
Regression: Use a shorter, lighter contraction.
Progression: Increase the hold or move to a sit-to-stand when you can safely complete weight-bearing exercise.
A seated glute squeeze is a useful entry-level activation drill, but its loading potential is limited. It should eventually be supplemented with a more challenging hip-extension exercise when appropriate. Memorial Sloan Kettering uses three-second buttock contractions in its chair routine.
What Muscles Do Chair Leg Exercises Work?
A balanced chair routine can involve most of the major muscle groups below the waist:
- Hip flexors: Lift the thigh during seated marching.
- Glutes and outer hips: Help control the pelvis and move the knees outward.
- Quadriceps: Straighten the knees during knee extensions.
- Hamstrings: Help bend the knees and pull the heels backward.
- Inner thighs: Pull the legs toward the midline during thigh squeezes.
- Calves: Lift the heels during seated calf raises.
- Front-of-shin muscles: Lift the toes during toe raises.
- Trunk stabilizers: Help maintain an upright seated position.
The amount of muscular work depends on the resistance. A slow knee extension with an ankle weight can provide a meaningful quadriceps challenge. An easy, unresisted heel slide is more useful for mobility and movement practice than for building substantial muscle.
10–15 Minute Chair Leg Workout
This routine uses all eight movements without requiring complicated equipment.
Beginner Routine
- Seated march: 8 repetitions per leg
- Seated knee extension: 8 repetitions per leg
- Seated heel slide: 10 repetitions per leg
- Seated heel raise: 12 repetitions
- Seated toe raise: 12 repetitions
- Seated knee opener: 8 repetitions with a three-second hold
- Seated thigh squeeze: 8 repetitions with a three-second hold
- Seated glute squeeze: 10 repetitions with a three-second hold
Rest for approximately 20–45 seconds between exercises. Complete one round initially. Progress to two rounds when you can finish the first round without rushing, losing posture, or needing a long recovery.
Frequency
Complete the strength-focused routine two or three nonconsecutive days per week. Easy ankle movements and comfortable mobility drills may be performed more frequently.
For strength-focused exercises, choose a difficulty that makes the final few repetitions feel challenging while leaving approximately two or three controlled repetitions available. You do not need to reach complete muscular failure. The American College of Sports Medicine confirms in its updated resistance-training guidance that home routines, resistance bands, and bodyweight exercises can improve strength and physical function.
How to Make Chair Leg Exercises More Effective
Making the exercises harder does not always require adding weight. Use the following progression order:
- Improve your range of motion. Gradually move farther while staying comfortable and controlled.
- Slow the movement. Take two or three seconds to lower the leg or foot.
- Add repetitions. Progress from approximately 5 repetitions toward 10–15.
- Add a pause. Hold the most challenging position for three to five seconds.
- Add a second set. Increase volume only when one set feels manageable.
- Add light resistance. Use a suitable resistance band or ankle weight.
- Progress to standing exercise. Add sit-to-stands or supported standing movements when safe.
Change one variable at a time. For example, do not simultaneously add a heavier band, a second set, and five additional repetitions.
The North Tees NHS program uses the same general approach: reduce range or repetitions when an exercise is difficult, then progress through additional repetitions, sets, holds, resistance, or standing versions.
Mistakes That Limit Your Results
Using an Unstable Chair
A rolling office chair, soft couch, folding stool, or lightweight plastic chair can shift while you exercise. Use a solid chair on a nonslip surface.
Leaning Back to Move the Legs
Leaning backward makes marches and knee extensions appear larger without requiring the target muscles to control the full movement. Reduce the range and keep your torso steady.
Moving Too Quickly
Fast kicking, bouncing, and tapping use momentum. Lift and lower each leg under control so the muscles work through both parts of the repetition.
Never Increasing the Challenge
Repeating the same easy movements indefinitely may maintain mobility, but it provides less stimulus for continued strength development. Add range, repetitions, holds, sets, or light resistance as your control improves.
Adding Resistance Before Learning the Movement
Weights and bands should make good form more challenging—not compensate for poor control. Master the bodyweight version first.
Holding Your Breath
Breathe continuously. Counting the repetitions or hold duration out loud can help prevent accidental breath-holding.
When to Progress Beyond Seated Exercise
Chair exercises reduce balance demands, which is one reason they are accessible. However, fully seated movements provide limited practice for standing balance, weight-bearing, and getting up from a chair.
When you can stand safely, useful next steps may include:
- Sit-to-stands
- Chair-supported standing marches
- Supported calf raises
- Supported side leg raises
- Short walks
- Appropriate standing balance exercises
The Centers for Disease Control and Prevention recommends combining muscle-strengthening exercise with aerobic and balance activities. It also notes that people who cannot meet the full recommendations should be as active as their abilities and circumstances allow.
Chair exercises can remain part of your routine after progressing. They may work well as a warm-up, mobility sequence, or lower-impact option on days when standing training is not appropriate.
Chair Exercise Safety
Exercise within a comfortable range and begin with an amount you can recover from. Muscle effort is expected, but the movements should not cause sharp or increasing pain.
Get individualized guidance before beginning when you have recently had surgery, a fracture, a blood clot, significant bone weakness, or instructions that restrict hip, knee, or ankle movement.
Stop exercising and seek appropriate medical help if you experience:
- Sharp or increasing pain
- New numbness or unusual weakness
- Dizziness or faintness
- Chest pain or pressure
- Unusual shortness of breath
- Any other sudden or concerning symptom
Memorial Sloan Kettering advises modifying or skipping exercises when certain medical conditions are present and stopping for symptoms such as chest pressure, dizziness, or shortness of breath.
Frequently Asked Questions
Can You Build Leg Strength While Sitting in a Chair?
Yes, particularly when the exercise is challenging enough and becomes progressively harder. Knee extensions, heel raises, knee openers, and thigh squeezes can train specific lower-body muscles.
Easy unresisted movements may eventually become too light for continued strength development. At that point, add a longer hold, more repetitions, a second set, or light resistance.
How Often Should I Do Chair Leg Exercises?
Two or three strength-focused sessions per week is a practical starting point. Leave recovery time between harder sessions, especially when using bands or ankle weights.
The CDC recommends muscle-strengthening activity on at least two days per week. It suggests approximately 8–12 repetitions per exercise as a general target, beginning with at least one set and progressing when appropriate.
Are Chair Leg Exercises Suitable for Bad Knees?
Some seated movements reduce weight-bearing demands and can be easier to control than standing exercises, but they are not suitable for every knee problem.
Use a comfortable range, avoid forceful locking, and stop if symptoms increase. Ask a qualified healthcare professional for personalized guidance when you have an injury, unexplained swelling, recent surgery, or persistent pain.
Should I Use Ankle Weights?
Ankle weights can make seated marches and knee extensions more challenging, but they are not necessary for beginners.
First, complete 10–15 controlled repetitions without leaning, kicking, or dropping the leg. Then add a light weight and reduce the repetitions if needed. Resistance should not cause joint pain or change your technique.
Can Seated Leg Exercises Replace Walking?
Not completely. Chair exercises can develop specific muscles and maintain movement, but walking also involves weight-bearing, balance, coordination, and sustained activity.
Use seated exercises as a starting point or supplement. Add walking or other suitable aerobic and standing activities when you can do so safely.
Is It Better to Exercise One Leg at a Time?
One-leg-at-a-time exercises make it easier to notice differences between sides and concentrate on control. They also prevent the stronger leg from doing more of the work.
Both legs can move together during heel raises, toe raises, thigh squeezes, and glute squeezes when that feels stable.
Conclusion
The best leg exercises in a chair train more than the knees. A complete routine should include hip lifting, knee straightening and bending, heel and toe raises, outward and inward thigh work, and glute activation.
Start with a stable chair, a comfortable range, and one controlled set. As the routine becomes easier, add repetitions, holds, a second set, or light resistance. When appropriate, combine the seated exercises with standing strength, balance work, and walking.
This content is for informational purposes only and is not a substitute for medical advice.
References
- National Library of Medicine — The Effect of Chair-Based Exercise on Physical Function in Older Adults
- NHS — Sitting Exercises
- North Tees and Hartlepool NHS Foundation Trust — Chair Exercises
- Memorial Sloan Kettering Cancer Center — Chair Exercises
- American College of Sports Medicine — Resistance Training Guidelines
- CDC — Physical Activity Guidelines for Older Adults