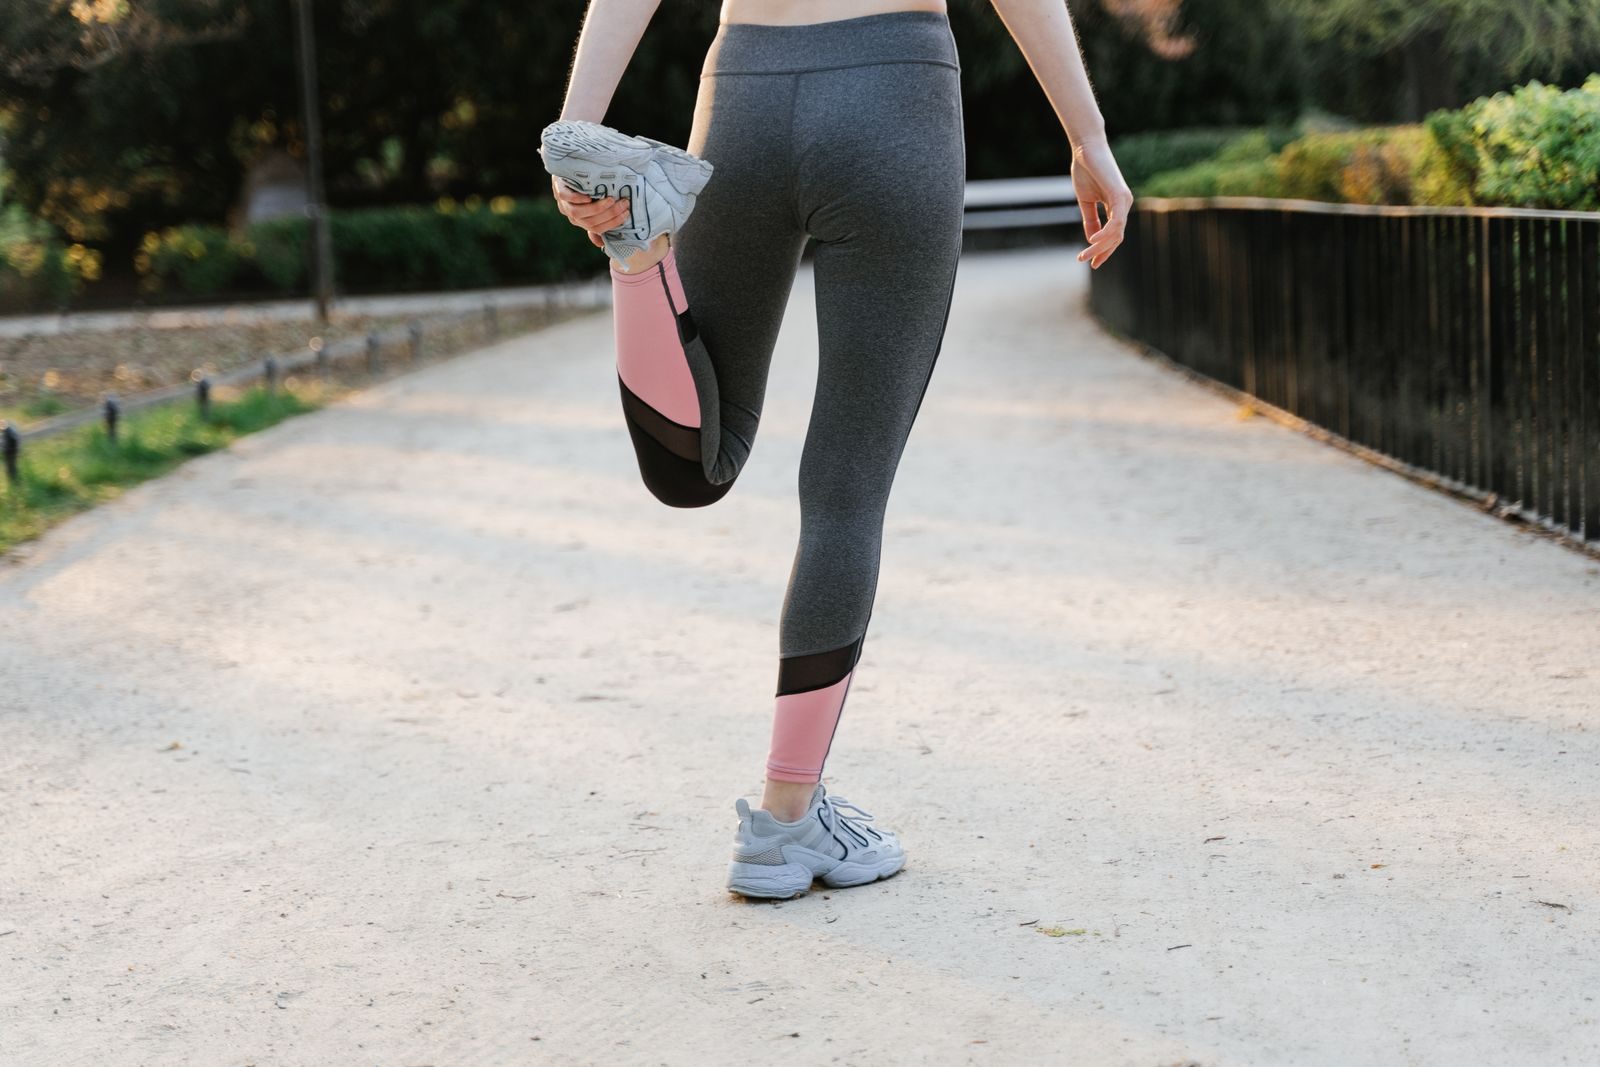
Single leg exercises train one side at a time—or make one leg perform most of the work—to build lower-body strength, balance, coordination, and control. They range from beginner-friendly supported drills to demanding movements such as Bulgarian split squats and single-leg squats.
Some exercises in this guide, including split squats and reverse lunges, keep both feet in contact with the floor. However, the front leg performs most of the work, making them useful stepping-stones toward true one-leg exercises.
Research does not show that unilateral training is automatically better than bilateral exercises such as regular squats. A 2025 systematic review indexed by the National Library of Medicine found similar muscle growth between unilateral and bilateral resistance training, while strength gains were generally specific to the type of exercise practiced. A separate systematic review found that direct single-leg balance training can improve balance control in healthy adults. For a complete program, use single-leg exercises alongside—not necessarily instead of—two-leg strength movements.
Single Leg Exercises at a Glance
| Exercise | Best For | Difficulty | Starting Target |
|---|---|---|---|
| Supported Single-Leg Balance Reach | Balance and ankle control | Beginner | 2–3 sets of 5 reaches |
| Bodyweight Split Squat | Foundational unilateral strength | Beginner | 2–3 sets of 8–12 reps |
| Reverse Lunge | Stepping strength and coordination | Beginner–Intermediate | 2–3 sets of 8–10 reps |
| Step-Up | Glute and quadriceps strength | Beginner–Intermediate | 2–3 sets of 8–12 reps |
| Single-Leg Glute Bridge | Glute strength and pelvic control | Beginner–Intermediate | 2–3 sets of 10–15 reps |
| Single-Leg Calf Raise | Calf and ankle strength | Beginner–Intermediate | 2–3 sets of 10–20 reps |
| Single-Leg Romanian Deadlift | Hamstrings, glutes, and balance | Intermediate | 2–3 sets of 6–12 reps |
| Lateral Step-Down | Knee and hip control | Intermediate | 2–3 sets of 6–12 reps |
| Bulgarian Split Squat | Loaded unilateral leg strength | Intermediate–Advanced | 3 sets of 6–12 reps |
| Single-Leg Squat to Box | True single-leg squat strength | Intermediate–Advanced | 2–3 sets of 5–10 reps |
These are starting targets rather than fixed requirements. Use fewer repetitions, a smaller range of motion, or additional support when needed.
Before Starting Single Leg Exercises
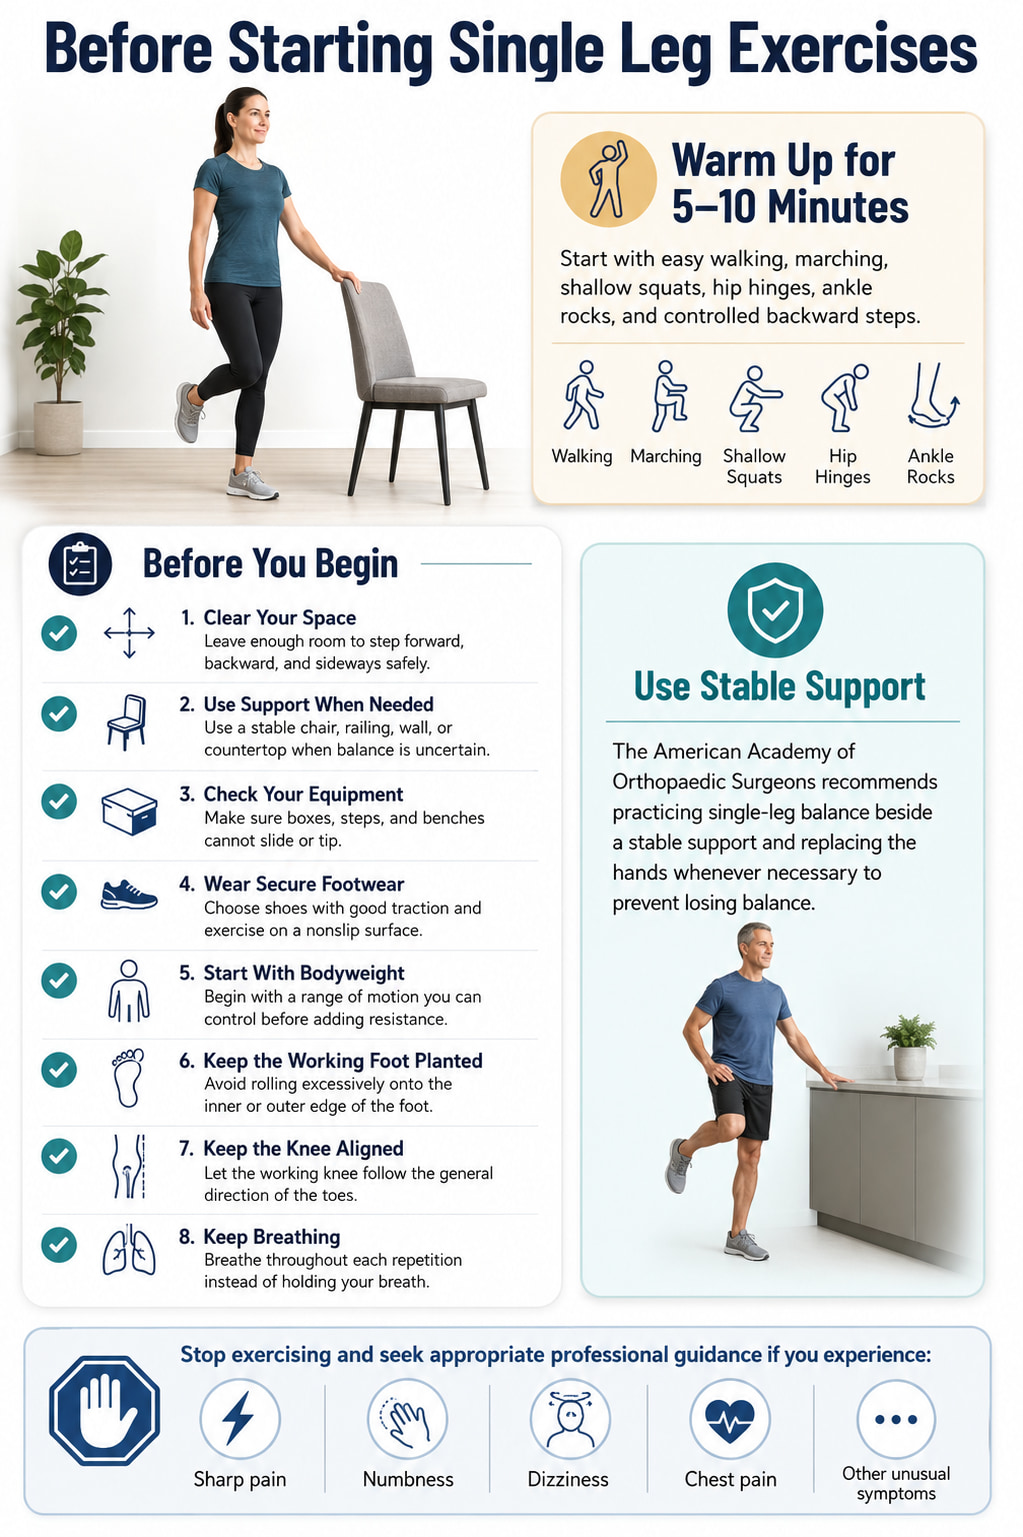
Warm up for approximately 5–10 minutes with easy walking, marching, shallow squats, hip hinges, ankle rocks, and controlled backward steps.
Before beginning:
- Clear enough space to step forward, backward, and sideways safely.
- Use a stable chair, railing, wall, or countertop when balance is uncertain.
- Make sure boxes, steps, and benches cannot slide or tip.
- Wear shoes with secure traction on a nonslip surface.
- Begin with bodyweight and a range of motion you can control.
- Keep the working foot firmly planted instead of rolling onto its inner or outer edge.
- Let the working knee follow the general direction of the toes.
- Breathe throughout each repetition instead of holding your breath.
The American Academy of Orthopaedic Surgeons recommends practicing single-leg balance beside a stable support and replacing the hands whenever necessary to prevent losing balance.
Stop exercising and seek appropriate professional guidance if a movement causes sharp pain, numbness, dizziness, chest pain, or other unusual symptoms.
10 Best Single Leg Exercises for Strength and Balance
The following exercises cover balance, squatting, lunging, stepping, hip hinging, hip extension, and calf strength. Start with the options that match your current ability rather than choosing the most advanced movement first.
1. Supported Single-Leg Balance Reach
Best for: Learning to stabilize the foot, ankle, knee, hip, and torso while standing on one leg.
Muscles worked: Gluteus medius and minimus, calves, foot and ankle stabilizers, quadriceps, and core muscles.
Equipment needed: A wall, chair, countertop, or railing for support.
Sets, reps, and rest: Perform 2–3 sets of 5–8 reaches per side. Rest 30–45 seconds.
How to Do It
- Stand beside a stable support with your feet approximately hip-width apart.
- Shift your weight onto one foot and maintain a slight bend in the working knee.
- Lift the other foot a few inches from the floor.
- Slowly reach one or both hands forward, diagonally, or to the side.
- Keep your pelvis reasonably level and return to the starting position before the next reach.
- Complete the set, then switch legs.
Common mistakes: Reaching farther than you can control, locking the standing knee, gripping the floor excessively with the toes, allowing the arch to collapse, or leaning the entire torso instead of controlling the movement from the ankle and hip.
Progression or regression: Begin with a static 15–30-second single-leg hold while using fingertip support. Progress by reducing hand assistance or reaching in more directions. Avoid making the surface unstable until you can control the exercise comfortably on the floor.
The movement follows the same basic principles demonstrated in the ACE Fitness single-leg stand with reaches and supported balance guidance from AAOS.
2. Bodyweight Split Squat
Best for: Building basic unilateral leg strength without requiring the balance of a true one-leg squat.
Muscles worked: Quadriceps, gluteus maximus, hamstrings, adductors, calves, and core stabilizers.
Equipment needed: No equipment. A chair or wall can provide support.
Sets, reps, and rest: Perform 2–3 sets of 8–12 repetitions per side. Rest 60–90 seconds.
How to Do It
- Stand with one foot forward and the other behind you.
- Keep some space between your feet from side to side rather than standing on a tightrope.
- Raise the rear heel while keeping most of your weight over the front leg.
- Bend both knees and lower the rear knee toward the floor.
- Keep the front foot planted and the front knee aligned with the toes.
- Push through the front foot to return to standing.
Common mistakes: Using a stance that is too narrow, lifting the front heel, allowing the front knee to collapse inward, pushing excessively through the rear foot, or shortening the movement simply to complete more repetitions.
Progression or regression: Hold a support and use a smaller range when learning. Progress by lowering farther, adding a pause, slowing the descent, or holding dumbbells.
The National Strength and Conditioning Association recommends stable support, stationary foot positions, and reduced range of motion as useful ways to make lunge variations more manageable.
3. Reverse Lunge
Best for: Developing stepping control, quadriceps and glute strength, and the ability to return to standing from a staggered position.
Muscles worked: Quadriceps, gluteus maximus, hamstrings, adductors, calves, and abdominal stabilizers.
Equipment needed: No equipment. Dumbbells are optional.
Sets, reps, and rest: Perform 2–3 sets of 8–10 repetitions per side. Rest 60–90 seconds.
How to Do It
- Stand tall with your feet approximately hip-width apart.
- Shift your weight onto one leg and step the other foot backward.
- Land on the ball of the rear foot with enough width to remain balanced.
- Bend both knees and lower the rear knee toward the floor.
- Keep the front foot firmly planted and your torso controlled.
- Press through the front foot and bring the rear leg forward to stand.
Common mistakes: Stepping directly behind the front foot, taking a step that is too short, pushing mainly from the rear leg, slamming the rear knee toward the floor, or rushing the return to standing.
Progression or regression: Use a chair for support or perform a shorter backward step. Progress by holding dumbbells, increasing the controlled range, or pausing briefly near the bottom.
The ACE Fitness reverse lunge instructions similarly emphasize stepping backward, lowering under control, and pressing through the front foot to return.
4. Step-Up
Best for: Building strength for stairs, hiking, running, and other activities that require pushing the body upward with one leg.
Muscles worked: Quadriceps, gluteus maximus, hamstrings, calves, hip stabilizers, and core muscles.
Equipment needed: A stable step, exercise platform, or low box.
Sets, reps, and rest: Perform 2–3 sets of 8–12 repetitions per side. Rest 60–90 seconds.
How to Do It
- Stand directly in front of a stable step.
- Place your entire working foot on top, including the heel.
- Brace your torso and lean slightly forward from the ankles if needed.
- Press the top foot firmly into the platform and stand up.
- Avoid using a strong push from the trailing foot.
- Lower yourself slowly and complete the set before changing sides.
Common mistakes: Choosing a step that is too high, letting the working knee collapse inward, allowing the heel to hang off the platform, springing from the lower foot, or dropping quickly during the descent.
Progression or regression: Begin with a low step and hold a railing. Progress by increasing the step height gradually, slowing the lowering phase, or holding dumbbells. A higher step is only useful when you can keep the full working foot planted and control both directions.
The ACE Fitness exercise library provides detailed setup and movement guidance for the step-up.
5. Single-Leg Glute Bridge
Best for: Strengthening hip extension while learning to control the pelvis without a standing balance challenge.
Muscles worked: Gluteus maximus, hamstrings, adductor magnus, abdominal muscles, and smaller hip stabilizers.
Equipment needed: An exercise mat is optional.
Sets, reps, and rest: Perform 2–3 sets of 10–15 repetitions per side. Rest 45–75 seconds.
How to Do It
- Lie on your back with both knees bent and feet flat.
- Lift one foot and hold that leg with the knee bent.
- Brace your abdomen gently and keep the ribs controlled.
- Press the planted foot into the floor and squeeze the working-side glute.
- Raise your hips until your torso and working thigh form a comfortable line.
- Lower slowly without allowing the pelvis to twist.
Common mistakes: Arching the lower back to lift higher, pushing mainly through the shoulders, allowing one side of the pelvis to drop, placing the working foot too far away, or rushing through the lowering phase.
Progression or regression: Start with a two-leg glute bridge or leave the nonworking toes lightly on the floor. Progress by pausing at the top, extending the free leg, or placing a light dumbbell securely across the hips.
ACE Fitness presents the single-leg glute bridge progression as an intermediate no-equipment exercise targeting the hips, thighs, and trunk.
6. Single-Leg Calf Raise
Best for: Building calf strength and improving control around the foot and ankle.
Muscles worked: Gastrocnemius, soleus, and foot and ankle stabilizers.
Equipment needed: A wall, chair, railing, or calf-raise machine for support.
Sets, reps, and rest: Perform 2–3 sets of 10–20 repetitions per side. Rest 45–75 seconds.
How to Do It
- Stand beside a stable support and shift your weight onto one leg.
- Lift the opposite foot without leaning heavily into the support.
- Keep the working knee straight but not forcefully locked.
- Press through the ball of the working foot and raise the heel.
- Pause briefly at the top.
- Lower the heel slowly through the available range.
Common mistakes: Bouncing through the repetitions, rolling the ankle outward, allowing the arch to collapse inward, using the arms to pull upward, or lowering only partway.
Progression or regression: Begin with two-leg calf raises. Another useful transition is rising with both feet and lowering with one. Progress to a step for a larger comfortable range or hold a dumbbell in the opposite hand.
The American Academy of Orthopaedic Surgeons uses a chair or wall for balance and progresses calf raises from two-leg support to one-leg performance.
7. Single-Leg Romanian Deadlift
Best for: Developing hamstring and glute strength while practicing a one-leg hip hinge.
Muscles worked: Hamstrings, gluteus maximus, adductor magnus, gluteus medius and minimus, spinal erectors, and abdominal stabilizers.
Equipment needed: No equipment is required. A dumbbell or kettlebell can add resistance.
Sets, reps, and rest: Perform 2–3 sets of 6–12 repetitions per side. Rest 75–120 seconds.
How to Do It
- Stand on one leg with the working knee slightly bent.
- Keep pressure through the heel, base of the big toe, and base of the little toe.
- Push your hips backward while the free leg reaches behind you.
- Let your torso lean forward as a result of the hip hinge.
- Keep your hips facing the floor and your spine neutral.
- Stop when your hamstrings limit the movement or your position begins to change.
- Press the working foot into the floor and extend the hip to stand.
Common mistakes: Turning the movement into a squat, opening the free-side hip, reaching toward the floor instead of hinging, rounding the back, locking the working knee, or moving so far that balance replaces muscular control.
Progression or regression: Hold a wall with one hand or use a kickstand stance with the rear toes on the floor. Progress by holding one dumbbell in the hand opposite the working leg or two dumbbells at your sides.
ACE Fitness emphasizes pushing the hips backward, keeping a slight knee bend, extending the free leg behind the body, and returning by contracting the working-side glute.
8. Lateral Step-Down
Best for: Improving controlled lowering, quadriceps strength, and hip stability.
Muscles worked: Quadriceps, gluteus maximus, gluteus medius and minimus, calves, and core stabilizers.
Equipment needed: A low, stable step or platform.
Sets, reps, and rest: Perform 2–3 sets of 6–12 repetitions per side. Rest 60–90 seconds.
How to Do It
- Stand sideways on a low step with one foot fully supported.
- Let the other leg hang beside the platform.
- Hold a railing or stable object if needed.
- Bend the working knee and shift the hips slightly backward.
- Lower the free heel toward the floor without transferring your weight onto it.
- Tap the heel lightly, then press through the working foot to stand.
Common mistakes: Dropping quickly to the floor, pushing off with the free foot, allowing the working knee to collapse inward, letting the pelvis drop excessively, or using a step that is too high.
Progression or regression: Use a lower step or a smaller range and hold a support. Progress by slowing the descent to three or four seconds, using a higher step within your controlled range, or holding light dumbbells.
ACE Fitness describes side step-downs as a more accessible version of a one-legged squat and recommends mastering the bodyweight movement before adding external resistance.
9. Bulgarian Split Squat
Best for: Building substantial quadriceps and glute strength with a larger range of motion and good loading potential.
Muscles worked: Quadriceps, gluteus maximus, hamstrings, adductors, calves, and core stabilizers.
Equipment needed: A stable bench or box. Dumbbells are optional.
Sets, reps, and rest: Perform 3 sets of 6–12 repetitions per side. Rest 90–150 seconds.
How to Do It
- Stand a comfortable stride in front of a stable bench.
- Place the top of your rear foot on the bench.
- Keep the front foot flat and most of your weight over the front leg.
- Bend the front knee and lower the rear knee toward the floor.
- Allow a natural, controlled forward torso angle.
- Descend only as far as you can keep the front foot planted and pelvis controlled.
- Press through the front foot to return to the top.
Common mistakes: Standing too close to the bench, using a bench that is unnecessarily high, pushing hard through the rear foot, letting the front knee collapse inward, twisting the pelvis, or trying to maintain an unnaturally vertical torso.
Progression or regression: Master the regular split squat first. You can also use a lower rear-foot support or hold a railing. Progress by adding dumbbells, pausing near the bottom, or increasing the controlled range.
The ACE Fitness Bulgarian split squat guide recommends a stable bench or box, controlled lowering, and driving through the front foot to return to standing.
10. Single-Leg Squat to Box
Best for: Developing true single-leg squat strength while using a box to standardize depth and provide a clear target.
Muscles worked: Quadriceps, gluteus maximus, gluteus medius and minimus, hamstrings, calves, and core stabilizers.
Equipment needed: A stable box, chair, or bench.
Sets, reps, and rest: Perform 2–3 sets of 5–10 repetitions per side. Rest 90–120 seconds.
How to Do It
- Stand in front of a high box with your weight on one leg.
- Extend the other foot slightly in front of you.
- Reach your arms forward for balance.
- Bend the working knee and hip while sitting back toward the box.
- Keep the whole working foot in contact with the floor.
- Touch the box lightly without collapsing onto it.
- Press through the working foot to stand.
Common mistakes: Falling onto the box, rocking forward to create momentum, lifting the heel, allowing the knee to collapse inward, pushing from the free foot, or choosing a box that is too low.
Progression or regression: Start with a high box, hold a stable support, or let the free heel touch the floor lightly. Progress by lowering the box gradually, reducing assistance, pausing just above the box, or holding a light counterweight.
ACE Fitness recommends maintaining full-foot pressure, a controlled torso, level hips, and gradual progression through greater range or added resistance.
Benefits of Single Leg Exercises
They Develop Strength in One-Leg Tasks
Walking, running, climbing stairs, and changing direction all involve moments when one leg accepts or produces most of the force. Unilateral exercises let you practice producing force in that type of position.
A systematic review indexed by the National Library of Medicine found that strength improvements tend to be specific: unilateral training favors unilateral strength, while bilateral training favors bilateral strength.
They Combine Strength With Balance
A single-leg exercise reduces the base of support, requiring the foot, ankle, hip, and torso to coordinate while the larger leg muscles produce force.
A systematic review published in Perceptual and Motor Skills found that single-leg balance training can improve balance control in healthy adults, although the exact training methods and doses varied across studies.
They Can Be Trained With Minimal Equipment
Several effective options—including split squats, reverse lunges, glute bridges, calf raises, and Romanian deadlifts—can begin with bodyweight. Difficulty can be increased through range of motion, slower lowering, pauses, reduced support, additional repetitions, or external resistance.
The current resistance-training position stand from the American College of Sports Medicine emphasizes that regular progressive resistance training matters more for most healthy adults than relying on a specific equipment type or unnecessarily complex programming.
They Help You Notice Side-to-Side Differences
Single-leg exercises make it easier to notice whether one side has less strength, balance, mobility, or coordination. Do not assume every small difference is a problem. Instead, use a load and range that allow both sides to perform clean repetitions.
A practical approach is to train the less coordinated side first and then match that number of controlled repetitions on the other side.
How to Program Single Leg Exercises
You do not need to perform all 10 exercises in one workout. Choose three to five movements that cover different patterns.
A balanced session can include:
- One squat or lunge exercise
- One hip-hinge or hip-extension exercise
- One step-up or step-down exercise
- One calf exercise
- One short balance drill
For general strength training:
- Perform 2–3 working sets per exercise.
- Use approximately 6–15 repetitions for most strength movements.
- Rest 60–120 seconds between sets.
- Use longer rest periods for demanding loaded exercises.
- Finish most sets with approximately 2–3 controlled repetitions still possible.
- Train the movement patterns approximately twice per week.
- Leave at least one recovery day between challenging lower-body sessions when starting.
The American College of Sports Medicine supports progressive resistance training, multiple working sets, controlled range of motion, and training major muscle groups at least twice weekly. Its updated review also found that consistently reaching complete muscular failure is not required for most resistance-training results.
How to Progress
Change one variable at a time:
- Improve balance and movement control.
- Increase the comfortable range of motion.
- Add repetitions within the recommended range.
- Reduce unnecessary hand support.
- Slow the lowering phase or add a pause.
- Add a small amount of weight.
- Move to a more demanding exercise variation.
Increase the difficulty only when you can complete every repetition without losing foot pressure, knee alignment, pelvic control, or balance.
Beginner Single Leg Workout at Home
Perform this workout two nonconsecutive days per week.
| Exercise | Sets | Reps | Rest |
|---|---|---|---|
| Supported Single-Leg Balance Reach | 2 | 5 reaches per side | 30–45 sec |
| Bodyweight Split Squat | 2 | 8–10 per side | 60–90 sec |
| Low Step-Up | 2 | 8 per side | 60–90 sec |
| Single-Leg Glute Bridge | 2 | 10–12 per side | 60 sec |
| Supported Single-Leg Calf Raise | 2 | 10–15 per side | 45–60 sec |
Use a stable support whenever necessary. End each strength set while you could still complete approximately two or three clean repetitions.
When you reach the top of the repetition range with consistent form, add one or two repetitions, use slightly less hand support, or increase the range before adding weight.
Intermediate Single Leg Strength Workout
Perform this workout once or twice per week as part of a balanced lower-body program.
| Exercise | Sets | Reps | Rest |
|---|---|---|---|
| Supported Balance Reach | 2 | 5 per direction | 30–45 sec |
| Bulgarian Split Squat | 3 | 6–10 per side | 90–150 sec |
| Single-Leg Romanian Deadlift | 3 | 8–10 per side | 90–120 sec |
| Lateral Step-Down | 2–3 | 8–12 per side | 60–90 sec |
| Single-Leg Calf Raise | 3 | 10–15 per side | 60–90 sec |
Perform the balance reach as controlled skill practice rather than trying to fatigue the leg. Add resistance to the strength exercises only when the unweighted or current-load version remains stable throughout every set.
Common Single Leg Training Mistakes
Starting With Exercises That Are Too Advanced
A pistol squat or deep unsupported single-leg squat is not the required starting point. Split squats, supported balance reaches, low step-ups, and kickstand Romanian deadlifts build the same foundational skills with less balance demand.
Using an Unstable Surface Too Soon
Standing on a wobble board or soft pad makes an exercise harder to control, but not necessarily better for building strength. Develop control on a stable floor first.
Letting Balance Limit Every Strength Set
If you repeatedly lose balance before the working muscles become challenged, use light hand support. This allows you to train the intended muscles while gradually improving coordination.
Chasing the Same Depth on Both Sides
One side may initially have less control or range. Use the deepest range each side can perform without twisting, collapsing, or losing foot contact. Gradually improve the more limited side rather than forcing it.
Doing Only Single-Leg Training
Single-leg exercises are useful, but they do not make bilateral squats, deadlifts, and other two-leg movements unnecessary. Combining both approaches can develop broader strength while providing practice in one-leg positions.
Frequently Asked Questions
Are single leg exercises better than regular squats?
Not automatically. Single-leg exercises are more specific to one-leg strength and balance, while regular squats allow you to train bilateral strength and often handle more total resistance.
A systematic review indexed by the National Library of Medicine found similar muscle-growth outcomes between unilateral and bilateral resistance training, while strength improvements tended to favor the type of movement practiced.
Can single leg exercises build muscle?
Yes. Single-leg exercises can build muscle when they challenge the target muscles, are performed with sufficient effort, and become progressively harder.
The same 2025 systematic review found no clear difference in muscle growth between unilateral and bilateral resistance-training programs, although the available evidence remains limited.
What is the best single leg exercise for beginners?
The bodyweight split squat is one of the most practical starting exercises because both feet remain in contact with the floor. Supported single-leg balance reaches, low step-ups, and two-leg-to-one-leg calf-raise progressions are also appropriate starting options.
Should I hold a wall or chair?
Yes. Support is useful when it helps you maintain alignment, use an appropriate range of motion, and train the intended muscles. Begin with as much support as necessary and reduce it gradually.
Should the knee stay behind the toes?
The knee does not need to remain behind the toes in every repetition. Natural forward knee movement can be appropriate when the heel stays planted, the knee follows the foot, and the movement is comfortable.
The Hospital for Special Surgery advises allowing the knees to move naturally over the toes during squatting when comfortable, rather than universally forcing them to remain behind the toes.
Why is one leg less stable than the other?
Differences can come from coordination, exercise familiarity, mobility, previous activity, or strength. Small differences are common.
Use the less stable side to determine your range and number of clean repetitions. A sudden or substantial change in balance or strength—especially with pain, numbness, or other symptoms—should be assessed by an appropriate healthcare professional.
How often should I perform single leg exercises?
Two lower-body strength sessions per week are a practical starting point for many people. Easy supported balance practice can be performed more frequently because it creates less muscular fatigue, but quality matters more than simply accumulating time.
Do I need dumbbells?
No. Bodyweight can be challenging when you use an appropriate range, slow lowering, pauses, and controlled repetitions. Add dumbbells when the bodyweight version no longer provides enough resistance and your technique remains consistent.
Conclusion
Single leg exercises are most effective when the difficulty matches your current ability. Begin with supported balance drills, split squats, low step-ups, and controlled bridges before progressing to loaded Romanian deadlifts, Bulgarian split squats, and single-leg squats.
Choose a few complementary exercises, train both sides, and increase the challenge gradually without sacrificing balance or alignment. Consistent, controlled practice is more valuable than rushing toward the most advanced variation.
This content is for informational purposes only and is not a substitute for medical advice.
References
- American College of Sports Medicine Position Stand: Resistance Training Prescription for Healthy Adults
- Comparison of Unilateral and Bilateral Resistance Training: Systematic Review and Meta-Analysis
- Single Leg Balance Training: A Systematic Review
- National Strength and Conditioning Association: The Undervalued Lunge
- American Academy of Orthopaedic Surgeons: Foot and Ankle Conditioning Program
- ACE Exercise Library: Single-Leg Romanian Deadlift
- ACE Exercise Library: Bulgarian Split Squat
This content is for informational purposes only and is not a substitute for medical advice.