
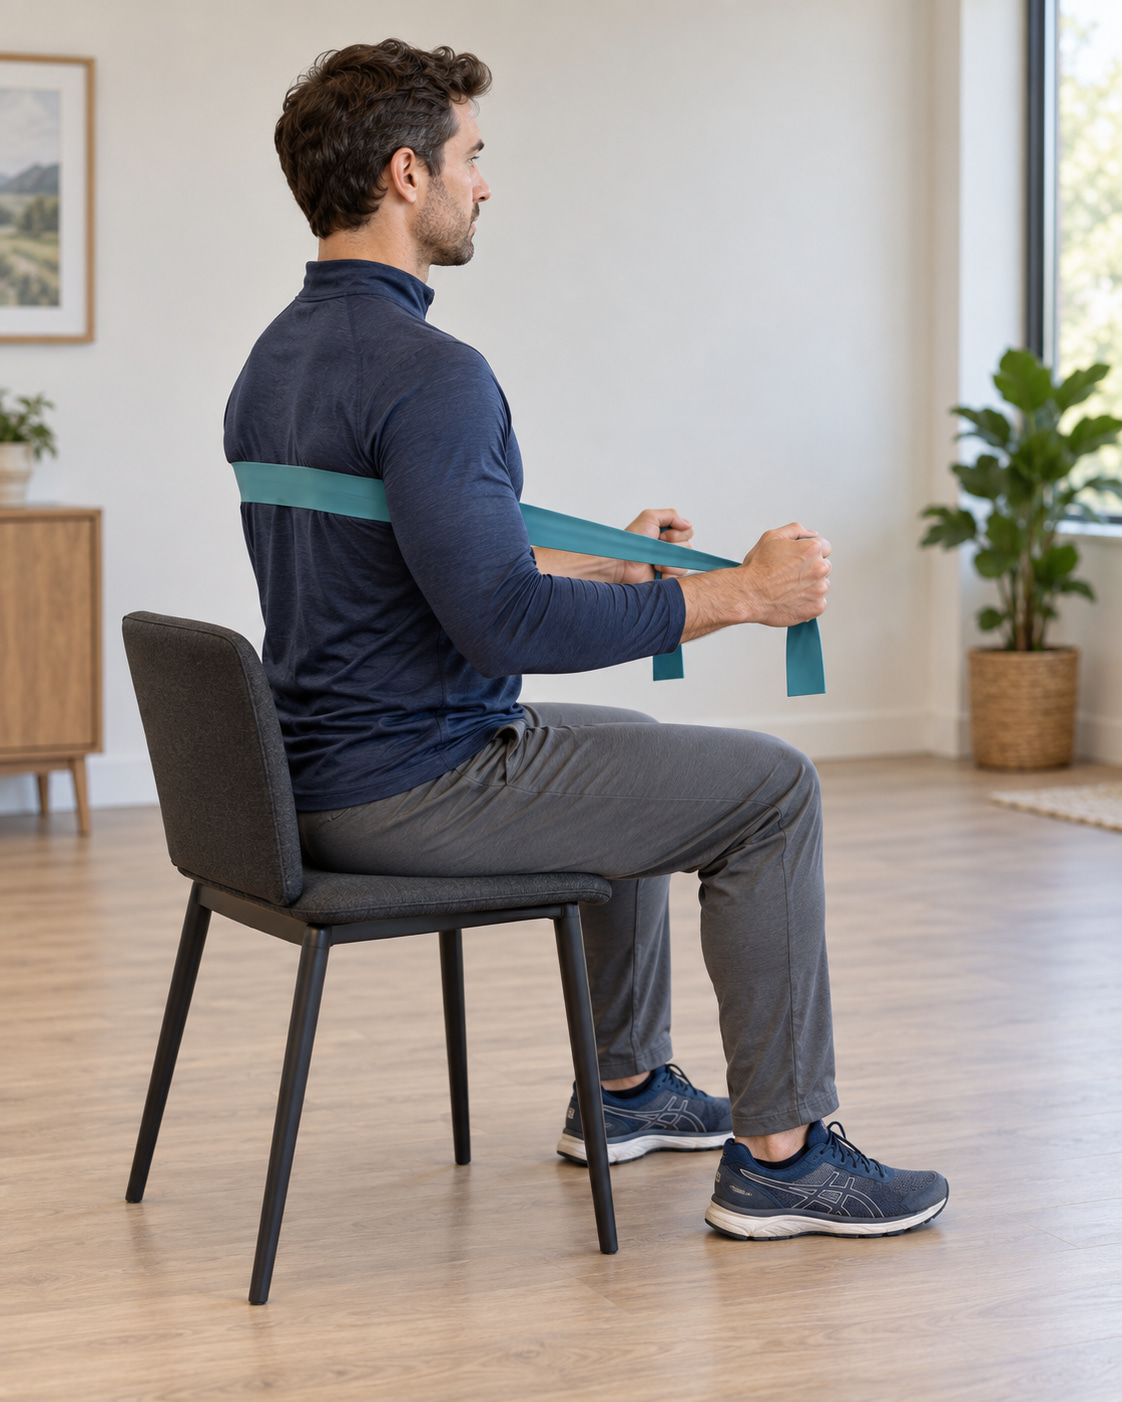
The resistance band chest press works your chest, shoulders, and triceps using equipment that takes up little space. Good technique starts with manageable resistance, a steady body position, and control throughout each repetition.
This guide covers the seated version with a long, flat band wrapped around your upper back. You need a stable chair and a band with two free ends. This setup requires no door anchor or bench.
How to Do the Resistance Band Chest Press
Best for: Training your chest at home while seated.
Equipment: A long, flat, non-looped resistance band and a stable chair without wheels. Choose a chair that allows your feet to rest on the floor and leaves your arms free to move.
Check Your Equipment First
Inspect the band for tears, cracks, punctures, and damaged edges. Replace damaged equipment and follow the manufacturer’s stretching limits. Remove jewelry that could catch the material, and place your chair on a level surface.
The American Council on Exercise recommends starting band exercises smoothly, avoiding sudden jerking, and never releasing a stretched band.
How to Do It
- Sit upright. Place both feet flat on the floor and settle into a comfortable, steady position.
- Position the band. Place its middle across your upper back, with the ends passing under your arms. Hold one end in each hand, leaving similar lengths on both sides.
- Set your arms. Bend your elbows approximately 90 degrees and keep them relaxed beside your torso. Align your wrists with your forearms.
- Press forward. Breathe out as you extend both arms in front of you at chest height. Straighten your elbows comfortably without snapping them into extension. Keep your torso still.
- Return with control. Breathe in as you bend your elbows and bring your hands back to the starting position. Resist the band’s pull instead of letting it snap your arms backward.
Hinge Health describes this seated setup with a non-looped therapy band, elbows initially bent beside the body, and a forward press at chest height.
Quick Form Check
During each repetition:
- Your hands move forward together.
- Your feet remain planted.
- Your shoulders stay relaxed.
- Your torso stays in the same position.
- Your elbows return to their original bent position without traveling far behind your body.
Practical cue: Keep your head over your torso as your hands move away from you. If you need to lean forward to finish the press, reduce the resistance.
What Muscles Does It Work?
The main muscles involved are:
| Muscle | Role in the exercise |
|---|---|
| Pectoralis major | Helps move your upper arms forward and across your body. |
| Anterior deltoids | Assist the pressing movement at your shoulders. |
| Triceps | Straighten your elbows as you press. |
The chest press involves movement at both your shoulders and elbows. Your arms contribute throughout the exercise, so you do not need to feel every repetition exclusively in your chest.
How to Choose the Right Resistance
Test the band through a few complete repetitions before starting a working set. You should be able to finish the press without shrugging, leaning, or cutting the movement short.
Pay attention to the last part of the repetition. Band tension increases as the material stretches, so resistance that feels easy at the beginning can become challenging near full extension.
For the routine below, choose resistance that allows 8–15 controlled repetitions. Finish each working set feeling that you could perform roughly two or three more repetitions with the same technique.
Use these practical checks:
- Too difficult: You cannot reach eight repetitions without changing your posture or shortening the press.
- Manageable: The final repetitions require effort, but your movement stays controlled.
- Ready to progress: You can complete fifteen repetitions comfortably in both working sets.
During your first session, choose a lighter band while you learn the setup. You can adjust the challenge once the movement feels familiar.
Common Resistance Band Chest Press Mistakes
| Mistake | What to do instead |
|---|---|
| Rocking or leaning forward to finish | Reduce resistance and keep your torso steady. |
| Shrugging toward your ears | Reset with relaxed shoulders and use a more manageable band. |
| Flaring your elbows straight out to the sides | Begin with your elbows beside your torso and below shoulder level. |
| Bending your wrists backward | Keep your hands aligned with your forearms and maintain a secure grip. |
| Letting the band pull your arms back quickly | Slow the return enough to stop cleanly in the starting position. |
| Pulling your elbows far behind your body | Return to the original bent-elbow position without forcing extra depth. |
| Pressing unevenly | Check the band’s position and grip lengths, then reduce resistance if one hand still falls behind. |
When a repetition changes noticeably, end the set and reset. Several rushed repetitions make it harder to judge whether the resistance is appropriate.
Sets, Reps, and a Simple Routine
Start with two sessions per week, leaving at least one day between them. The British Heart Foundation recommends allowing a recovery day between resistance band sessions.
Use this chest press block within a broader strength routine that also trains your other major muscle groups.
| Part of the session | Sets and reps | Effort and rest |
|---|---|---|
| Practice set of the seated chest press | 1 set of 6–8 reps | Very light resistance; check your setup and movement. |
| Working sets of the seated chest press | 2 sets of 8–15 reps | Leave approximately 2–3 good reps in reserve; rest 60–120 seconds between sets. |
For example, you could perform this block on Monday and Thursday. Take additional rest between sets if you need it to repeat the same controlled movement.
These exact repetitions and rest periods are a suggested starting plan. The broader principles—multiple sets, sufficient effort, and no requirement to reach muscular failure—align with the American College of Sports Medicine resistance training position stand.
During your first few sessions, prioritize learning the exercise. You can stop well before fatigue while you get comfortable with the band.
If you already train your chest elsewhere in your week, account for that work before adding more sets here.
How to Make Progress Without Losing Form
Keep your setup consistent so you can compare sessions. Record:
- Which band you used.
- Where you held the band.
- How many repetitions you completed in each set.
- Whether the final repetitions stayed controlled.
Grip position matters because changing the working length of the band can change the difficulty.
Build Repetitions First
Keep the same band and gradually work toward two sets of fifteen repetitions.
For example, you might complete eleven and ten repetitions in one session, then twelve and eleven the next. That is useful progress without changing equipment.
There is no requirement to add repetitions every workout.
Increase Resistance Gradually
When both sets reach fifteen controlled repetitions for two consecutive sessions, and you still have a few good repetitions available, consider a slightly stronger band.
Return toward the lower end of the repetition range while keeping your movement and chair position consistent.
Mayo Clinic recommends gradually increasing resistance when an exercise becomes easy. The two-session checkpoint above is a practical tracking rule, not a mandatory threshold.
If the next band is too strong, continue with the lighter one. Avoid shortening the press or adding body movement simply to use more resistance.
Frequently Asked Questions
Can a resistance band chest press build muscle?
It can contribute to chest, shoulder, and triceps development when the resistance is challenging and training progresses over time. Research supports elastic resistance training for strength and muscle growth, although it does not establish this particular seated press as superior to other training methods.
Why do I feel it more in my triceps than my chest?
Your triceps straighten your elbows, so they contribute to every repetition. Where you feel the most effort does not reliably show which muscle is doing the most work.
Check that you complete the movement smoothly, and avoid changing your technique just to chase a burning sensation in your chest.
What if the band rubs against my arms or back?
Release the tension before repositioning it. Lay the material flat across your upper back and check for twists or bunched edges. A smooth shirt may make contact more comfortable.
Stop the set if the band keeps sliding, pinching, or pulling on your skin.
What should I do if pressing hurts my shoulder?
Stop the repetition instead of pushing through pain. Check your setup and try less resistance only if the movement feels comfortable.
Persistent or recurring pain, or difficulty finding a comfortable range, is a reason to seek individual guidance from a qualified clinician or physical therapist.
Put the Technique Into Practice
Start with a light band, a stable chair, and a few careful repetitions. Keep your torso steady, press at chest height, and control the return.
Once you can repeat that pattern comfortably, use the two-set routine and record your progress. Increase the challenge when your technique remains consistent.