
Glute pain exercises should start with light effort, comfortable movement, and gradual progression. Gentle squeezes, seated holds, bridges, supported hip movements, and chair rises are options for mild, manageable symptoms.
The right choice depends on what is causing the pain. The Royal National Orthopaedic Hospital explains that nerve irritation can cause deep buttock pain and that strong buttock contractions may aggravate it. Start with one or two movements you tolerate well, and stop if symptoms become sharper or spread farther down your leg.
Before You Try Glute Pain Exercises
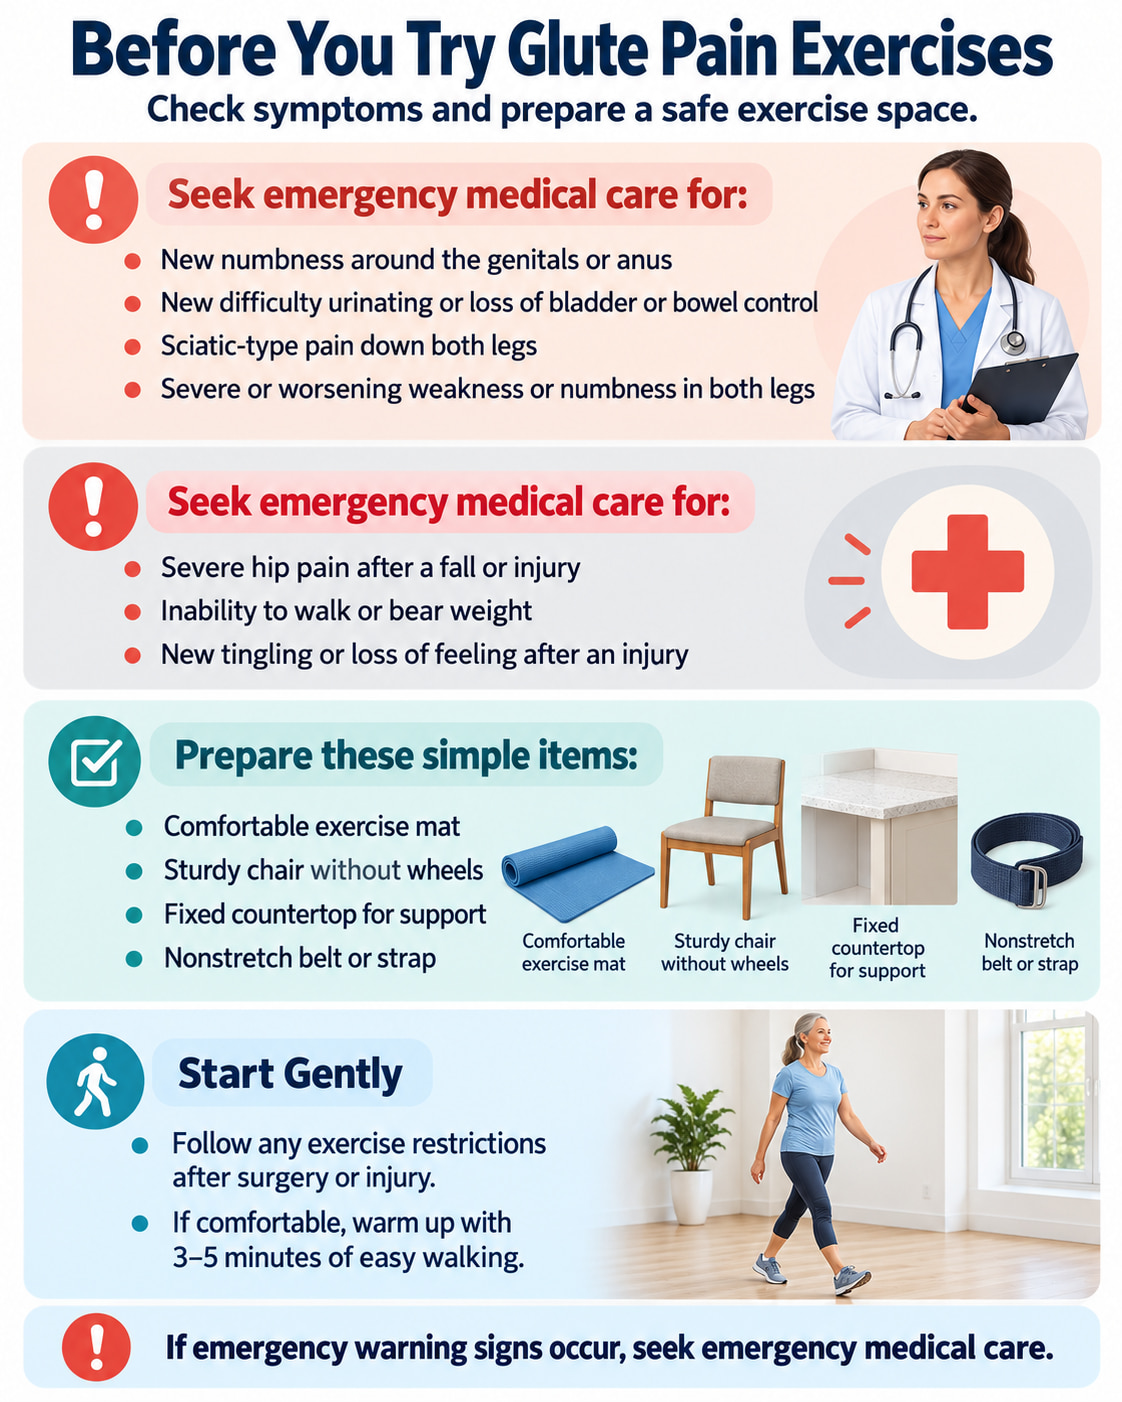
Seek emergency medical care for new numbness around the genitals or anus, new difficulty urinating or loss of bladder or bowel control, sciatic-type pain down both legs, or severe or worsening weakness or numbness in both legs. The NHS identifies these as warning signs of a potentially serious back problem.
Also seek emergency assessment for severe hip pain after a fall or injury, inability to walk or bear weight, or new tingling or loss of feeling after an injury, as advised in the NHS hip-pain guidance.
For the exercises below, use a comfortable mat, a sturdy chair without wheels, a fixed counter if needed, and a nonstretch belt or strap. Follow any existing restrictions after surgery or injury. If comfortable, warm up with three to five minutes of easy walking.
6 Gentle Glute Pain Exercises
The starting amounts below are intentionally small so you can assess your response. Use the videos to understand the movements, then follow these starting amounts rather than automatically copying a video’s full routine.
1. Supine Glute Squeeze
Why it works: This exercise practices tightening the buttock muscles while your body remains supported. The University of Michigan includes glute squeezes performed on your back in its hip and back strengthening guidance.
Muscles worked: Gluteal muscles, particularly the gluteus maximus.
How to do it:
- Lie on your back with your knees bent and feet flat, about hip-width apart.
- Gently squeeze your buttocks together while keeping your hips resting on the surface.
- Hold for three to five seconds without holding your breath or arching your lower back.
- Relax completely before the next repetition.
Starting amount: Five repetitions, with a three- to five-second hold each time.
Trainer Tip: Keep the effort light. If even a gentle squeeze increases deep buttock pain, skip this exercise.
2. Seated Isometric Hip Abduction
Why it works: Pressing outward against a fixed belt works the outer-hip muscles without repeatedly moving the joint. This seated setup appears in Cambridge University Hospitals guidance for diagnosed gluteal tendinopathy.
Muscles worked: Hip abductors, including the gluteus medius and minimus.
How to do it:
- Sit upright in a firm chair with your feet flat and knees about hip-width apart.
- Fasten a nonstretch belt or strap around your lower thighs, just above your knees.
- Gently press your knees outward into the belt without spreading your legs or moving your feet.
- Hold for five to ten seconds while breathing normally, then release slowly.
Starting amount: Three holds of five to ten seconds.
Trainer Tip: Adjust the belt to provide resistance at your natural hip-width position. It should not pull your knees together or dig into your skin.
3. Gentle Glute Bridge
Why it works: A bridge adds a controlled hip lift while both feet stay supported. It works the muscles that straighten your hips and introduces more movement than a static squeeze.
Muscles worked: Gluteus maximus and hamstrings, with the abdominal muscles helping steady your trunk.
How to do it:
- Lie on your back with your knees bent, feet flat and hip-width apart, and arms by your sides.
- Gently tighten your abdomen and buttocks while continuing to breathe.
- Press through both feet and lift your hips only as high as feels comfortable. Keep your pelvis level and your knees aligned with your feet.
- Lower slowly until your hips rest on the surface again.
Starting amount: Three to five slow repetitions.
Trainer Tip: The Royal Orthopaedic Hospital emphasizes avoiding a lower-back arch during a bridge. Start with a small lift. If lifting is uncomfortable, return to a gentle glute squeeze if that feels better.
4. Supported Standing Hip Extension
Why it works: This exercise practices moving your leg behind you while keeping your trunk steady. Holding a chair reduces the balance demand.
Muscles worked: Gluteus maximus and hamstrings.
How to do it:
- Stand upright behind a sturdy chair that cannot slide, holding its backrest for support.
- Shift enough weight onto one leg to free the other foot, keeping the supporting knee relaxed.
- Move the free leg a short distance backward with its knee comfortably straight. Keep your hips facing forward and avoid leaning or arching your back.
- Bring the foot back to the starting position with control, then repeat on the other side.
Starting amount: Three to five repetitions per side.
Trainer Tip: Make the movement smaller if your trunk starts to move. Locala advises keeping the hips level and facing forward during supported standing hip extension.
5. Supported Standing Hip Abduction
Why it works: Moving your leg sideways works the hip abductors, which help control the pelvis during standing and walking. This supported exercise is also described by Wellen in its hip-abduction exercise guidance.
Muscles worked: Gluteus medius and minimus, with other hip muscles assisting.
How to do it:
- Stand with your feet hip-width apart and hold a fixed counter or sturdy chair.
- Shift your weight enough to lift one foot while keeping your pelvis level.
- Move the free leg a small distance sideways. Keep your toes mostly forward and avoid leaning, hiking your hip, or letting the leg drift in front of you.
- Slowly lower the foot, then repeat on the other side.
Starting amount: Three to five repetitions per side.
Trainer Tip: During either standing exercise, the supporting hip carries weight too. If either hip becomes more painful, stop. A comfortable seated exercise may be a better starting option.
6. Sit-to-Stand With a Higher-Seat Option
Why it works: This practices an everyday movement: getting out of a chair. The technique described by South Tees Hospitals uses a forward lean followed by straightening the hips and knees.
Muscles worked: Gluteus maximus and quadriceps, with the trunk muscles helping control your position.
How to do it:
- Sit near the front of a sturdy chair with both feet flat and about hip-width apart. Choose a higher seat if a lower one is uncomfortable, while keeping your feet fully grounded.
- Lean forward from your hips until your shoulders are over your feet.
- Press through both feet and straighten your hips and knees to stand.
- Bend your hips and knees, lean forward slightly, and lower yourself slowly until fully seated.
Starting amount: Three to five repetitions.
Trainer Tip: As an easier option, use secure armrests to help you stand. Avoid rocking for momentum or dropping back into the chair.
How Often Should You Do These Exercises?
Begin with one short set of one or two exercises. For example, try five gentle glute squeezes followed by three small bridges, provided both are comfortable. Rest for about 30–60 seconds between exercises, or longer if needed.
Two nonconsecutive days per week is a cautious starting schedule for this introductory routine. A physical therapist may prescribe a different frequency for a diagnosed condition.
Pay attention to delayed symptoms as well as how an exercise feels at the time. East Sussex Healthcare NHS Trust uses symptoms later that day, overnight, and the following morning to guide exercise loading in gluteal tendinopathy.
| When to check | What to do |
|---|---|
| During the exercise | Keep effort light and movement comfortable. Stop for sharp or spreading pain, tingling, numbness, or weakness. |
| Later that day and the next morning | Symptoms should have settled back to their usual level. If you are worse overall, reduce the amount, effort, or range next time. |
| After several comfortable sessions | Add one or two repetitions to one exercise, or slightly lengthen a hold. Change one variable at a time. |
If even small amounts repeatedly worsen symptoms, stop experimenting and get assessed. Longer walks, stairs, and other daily activities also add to the load on your hips, so adjust your exercise amount on busier days.
Should You Stretch a Painful Glute?
Stretching is not automatically the right response to buttock pain. A feeling of tightness does not establish which tissue is causing the problem.
For diagnosed gluteal tendinopathy, the Royal Orthopaedic Hospital advises avoiding repeated gluteal stretching and pressure over the sensitive outer hip because these can aggravate symptoms.
Avoid forcing deep buttock stretches, especially if they reproduce sharp outer-hip pain or send tingling down your leg. A physical therapist can help determine whether stretching, strengthening, changes to daily activity, or a combination is appropriate.
When to Get Glute Pain Checked
Arrange a medical or physical therapy assessment if pain keeps returning, gets worse, interrupts sleep, or limits normal activities. Hip pain that has not improved after about two weeks of home care also deserves assessment. Do not wait that long if symptoms are worsening or you develop new weakness or loss of feeling.
Seek urgent medical assessment for sudden severe hip pain without an injury, a hot or swollen hip, changes in the skin’s color around the hip, or hip pain accompanied by fever or feeling unwell.
The emergency warning signs listed near the beginning of this article require immediate care.
Frequently Asked Questions
Is walking good for glute pain?
Short, comfortable walks on level ground may help you stay active. If symptoms increase, try a shorter distance, slower pace, or fewer hills. Judge the amount by how you feel afterward and the next morning, as well as during the walk.
What if sitting makes my buttock hurt?
Try changing position regularly and using a firm, slightly higher chair that still lets your feet stay flat. Avoid remaining in a position that steadily increases symptoms. Persistent sitting pain, especially with pain traveling down the leg or numbness, warrants assessment.
Should I exercise both sides if only one side hurts?
For the standing exercises, try each side separately and use only the amount each side tolerates. Remember that the leg you stand on is also working. You do not need to force equal repetitions when one side is uncomfortable.
How long will it take to feel better?
That depends on the cause, how long symptoms have been present, and how your daily activities affect them. Track practical changes, such as getting out of a chair or walking with less discomfort, rather than expecting a fixed recovery date. Seek help if symptoms persist or worsen.
Start with a small amount you can repeat comfortably. Build gradually, and use your response during exercise and afterward to decide whether to continue, adjust, or seek professional guidance.
References
- 1. Wang et al. (2025) — Effect of Conservative Treatment on Greater Trochanteric Pain Syndrome: A Systematic Review and Network Meta-Analysis — Journal of Orthopaedic Surgery and Research.
- 2. Mellor et al. (2018) — Education Plus Exercise Versus Corticosteroid Injection Versus a Wait and See Approach for Gluteal Tendinopathy — The BMJ.
- 3. Cambridge University Hospitals — Gluteal Tendinopathy: Exercise and Management Guidance
- 4. Royal Orthopaedic Hospital — Gluteal Tendinopathy: Strengthening and Activity Modifications
- 5. Royal National Orthopaedic Hospital — A Patient’s Guide to Deep Gluteal Syndrome
- 6. National Health Service (NHS) — Sciatica: Symptoms, Self-Care, and When to Get Medical Help
- 7. National Health Service (NHS) — Hip Pain in Adults: Causes, Self-Care, and Warning Signs
This content is for informational purposes only and is not a substitute for medical advice.