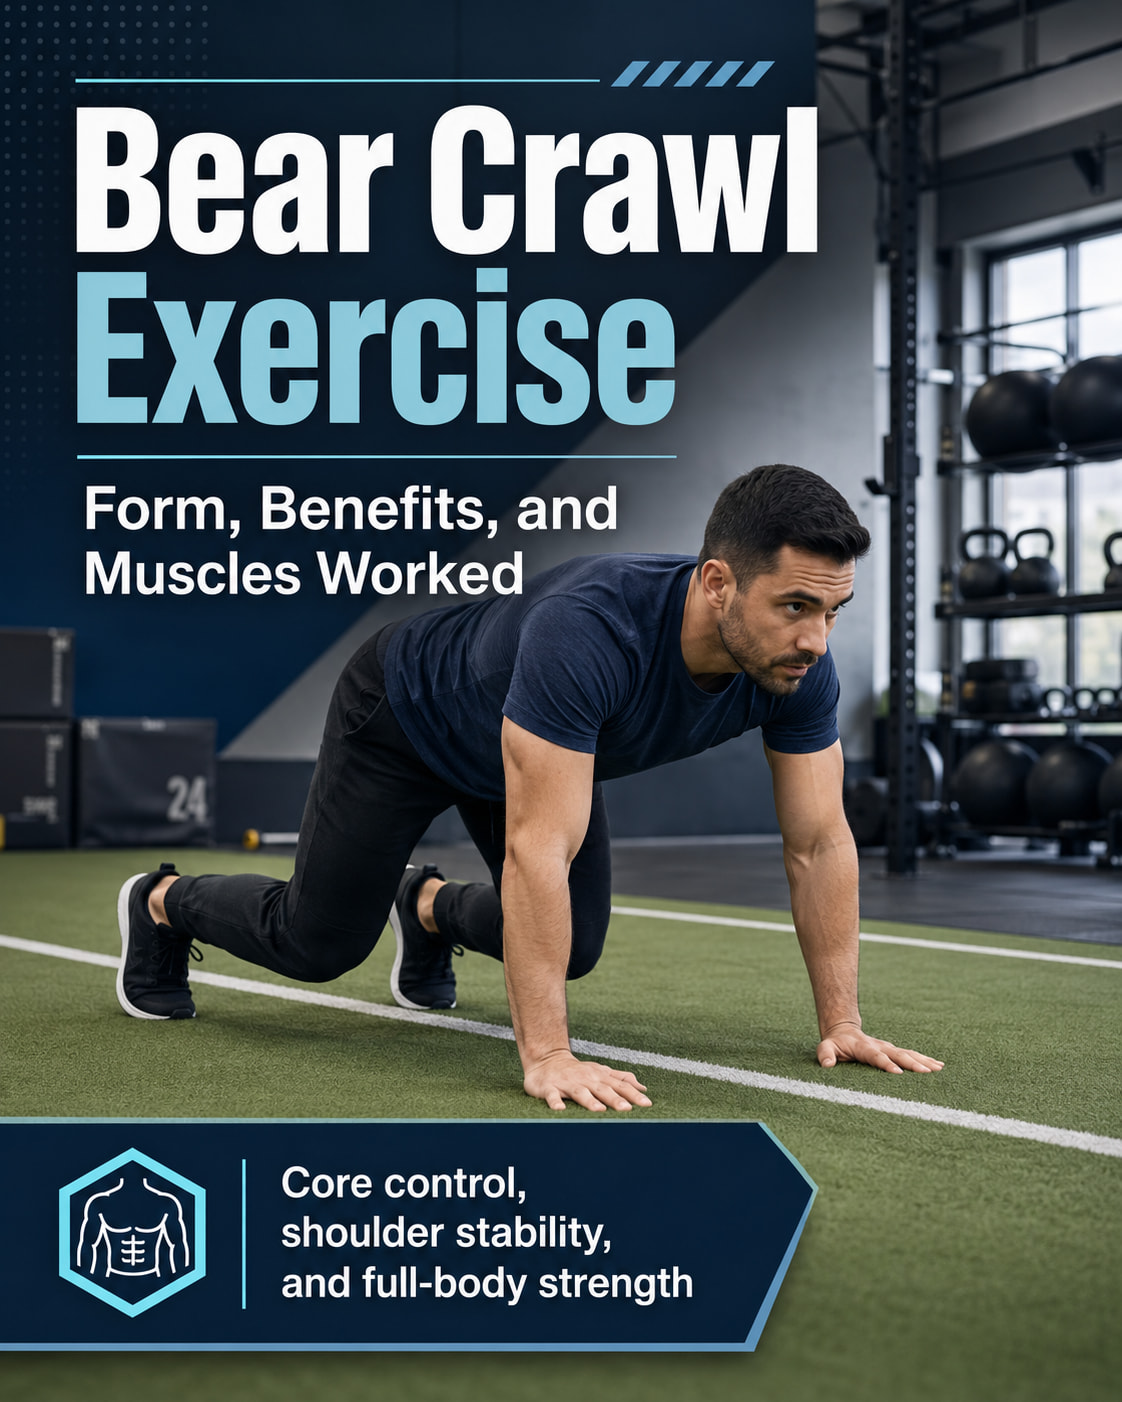
The bear crawl exercise is a no-equipment, full-body bodyweight movement that trains core control, shoulder stability, coordination, and conditioning. It looks simple, but doing it well requires a flat back, low hips, steady breathing, and controlled opposite-arm/opposite-leg movement.
This guide explains how to do the bear crawl exercise with proper form, which muscles it works, the main benefits, common mistakes, beginner modifications, harder progressions, and how to use bear crawls in a real workout.
What Is the Bear Crawl Exercise?
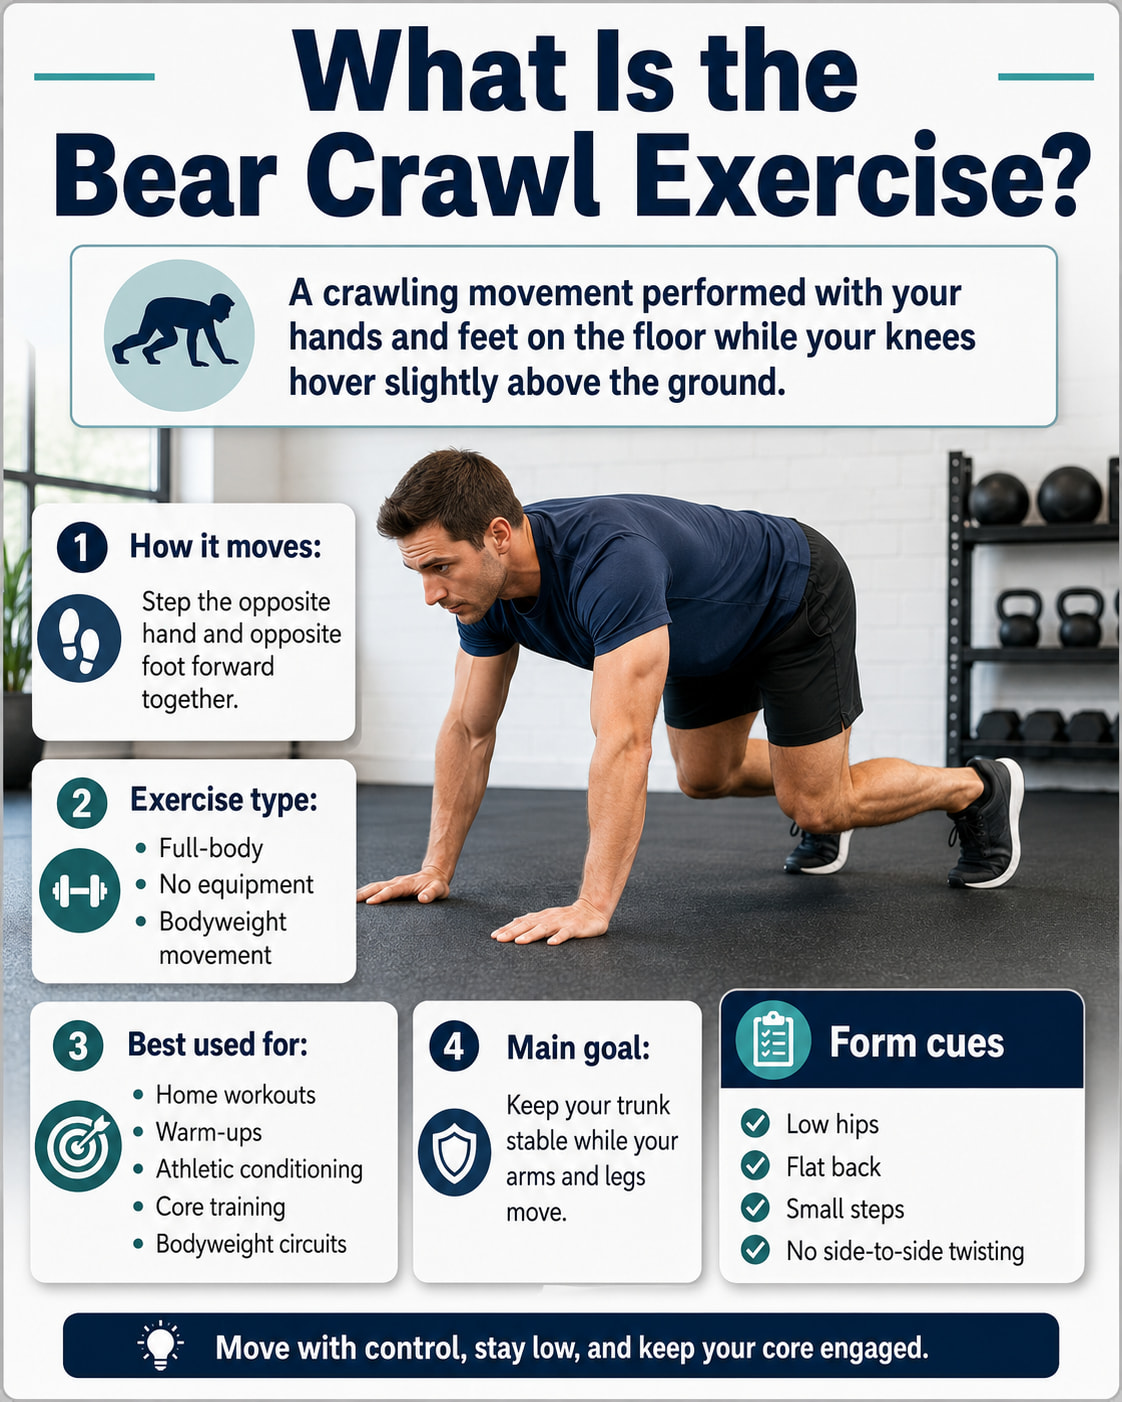
The bear crawl exercise is a crawling movement performed with your hands and feet on the floor while your knees hover slightly above the ground. Instead of moving randomly, you crawl by stepping the opposite hand and opposite foot forward together.
The American Council on Exercise lists the bear crawl as a full-body, no-equipment exercise. That makes it useful for home workouts, warm-ups, athletic conditioning, core training, and bodyweight strength circuits.
A proper bear crawl is not just “moving on all fours.” The goal is to keep your trunk stable while your arms and legs move. Your hips should stay low, your back should stay flat, and your steps should be small enough that your torso does not twist from side to side.
Bear Crawl Exercise Muscles Worked
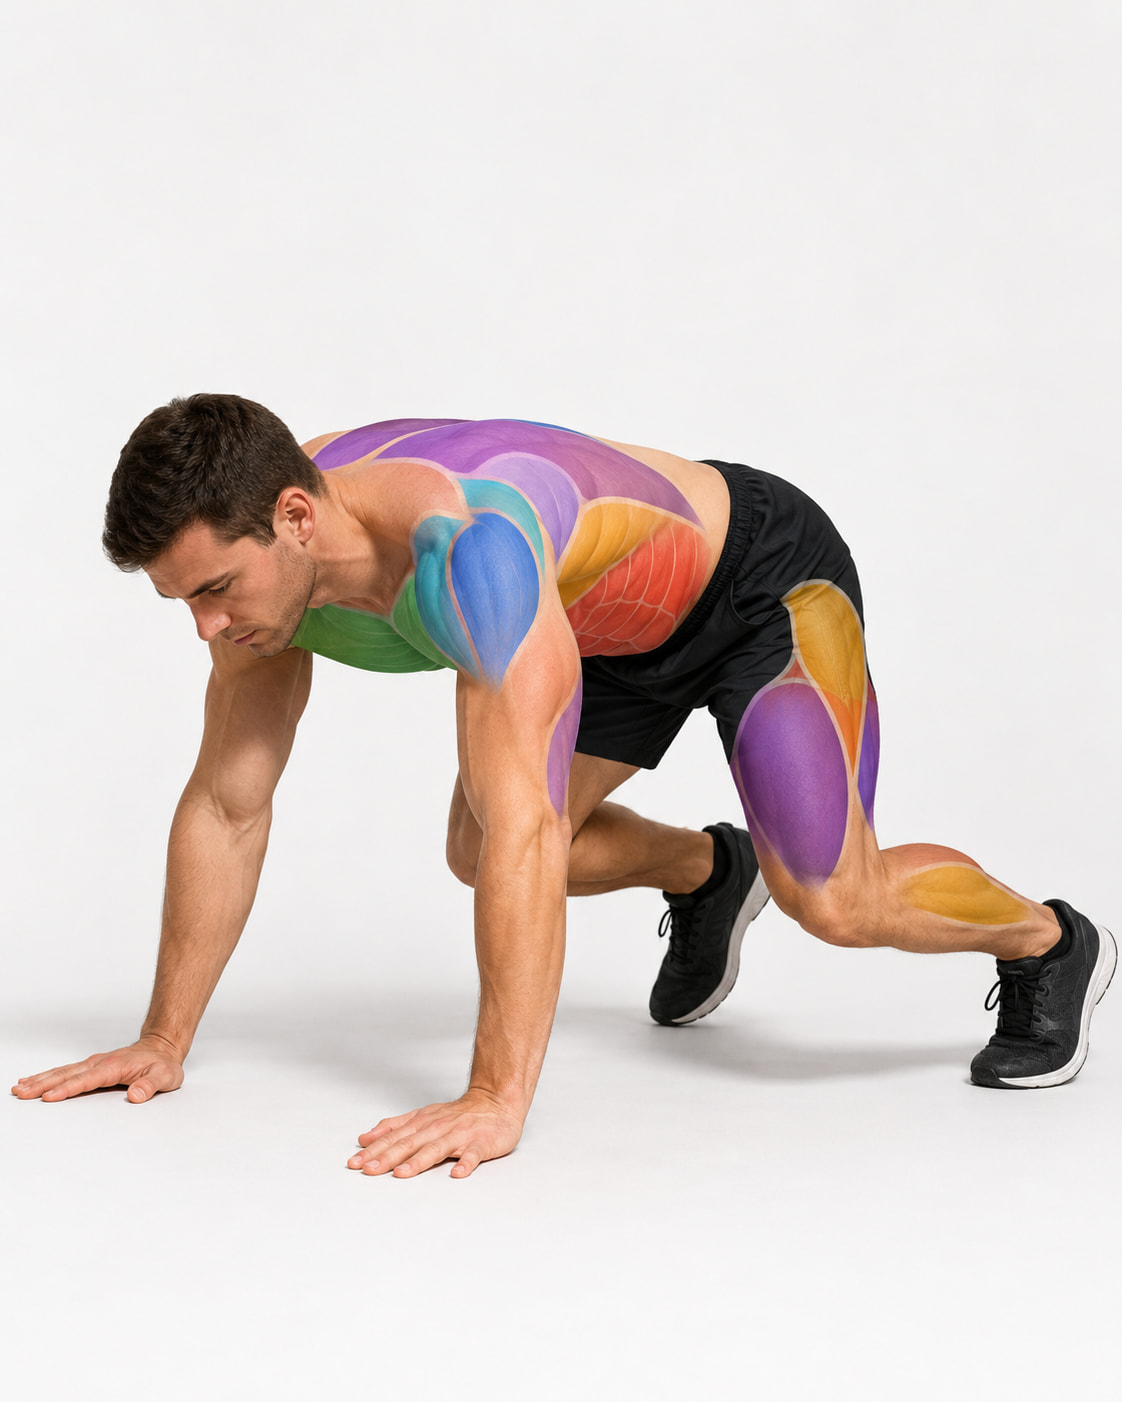
The bear crawl works many muscles at once because your upper body supports weight while your lower body drives movement and your core prevents rotation.
Your core muscles work hard to keep your spine and pelvis stable. This includes the rectus abdominis, transverse abdominis, obliques, and deep spinal stabilizers. The bear crawl is especially useful as an anti-rotation core exercise because your body has to resist twisting every time one hand and the opposite foot move.
Your shoulders and scapular stabilizers help support your upper body. The deltoids, serratus anterior, trapezius, and rotator cuff muscles all contribute to shoulder control. A small EMG study published in the Asian Pacific Journal of Health Sciences found higher serratus anterior and upper trapezius activity during a dynamic bear crawl compared with the push-up plus in the tested group. This does not mean bear crawls are a complete shoulder program, but it supports using them as a shoulder-girdle control exercise.
Your chest, triceps, and upper back assist as you press into the floor and keep the shoulders stable. Your lats and upper back help control your torso position and keep the movement connected.
Your quads, glutes, hip flexors, calves, and feet help keep the knees hovering and move your body across the floor. The lower body does not get a heavy strength stimulus like it would from squats or lunges, but it works continuously to support posture, coordination, and conditioning.
How to Do the Bear Crawl Exercise With Proper Form
Equipment needed: No equipment is required. A flat floor, turf area, mat, or open training space works well.
Suggested sets and reps: Start with 2–3 sets of 10–20 seconds or 5–10 feet forward and backward. Intermediate exercisers can use 3–4 sets of 20–40 seconds or 10–20 yards. Advanced exercisers can use 4–6 sets of 30–60 seconds, longer distances, tempo pauses, or harder crawl patterns.
Beginners: Begin with bear plank holds, short crawls, or stationary opposite hand-and-foot lifts. Focus on keeping the knees low, the back flat, and the steps small.
Intermediate: Use forward, backward, and lateral bear crawls for distance or time. Keep the movement smooth and controlled before adding speed.
Advanced: Use longer crawl sets, slow tempo crawls, pause crawls, band-resisted crawls, bear crawl push-up combinations, or crawl complexes.
Rest: Rest 30–60 seconds between short technique sets and 60–90 seconds between harder conditioning sets. Rest longer if your form breaks down.
How to do it:
- Start on all fours with your hands under your shoulders and your knees under your hips.
- Spread your fingers, press the floor away, and brace your core.
- Tuck your toes under and lift your knees about 1–3 inches off the floor.
- Keep your back flat, hips low, and neck neutral.
- Move your right hand and left foot forward at the same time.
- Then move your left hand and right foot forward at the same time.
- Take small, quiet steps and keep your knees close to the floor.
- Continue crawling forward for the target time or distance.
- Reverse the pattern to crawl backward if your form stays controlled.
Common mistakes: The most common mistakes are raising the hips too high, letting the low back sag, twisting the torso, taking steps that are too large, moving too fast, holding the breath, and letting the knees drift too far from the floor.
Expert tip: Imagine balancing a glass of water on your low back. Move slowly enough that the glass would not spill. This cue helps you keep your hips square and your trunk stable.
Exercise variations: Useful variations include bear plank holds, stationary bear crawls, forward bear crawls, backward bear crawls, lateral bear crawls, tempo bear crawls, bear crawl shoulder taps, bear crawl push-ups, and band-resisted bear crawls.
Easier variation: Use a bear plank hold or a stationary opposite hand-and-foot lift before crawling forward. You can also crawl for only 3–5 feet at a time, then reset.
Harder variation: Add backward crawling, lateral crawling, a slow 3-second step tempo, pauses every few steps, or a light resistance band around the waist if you can maintain clean form.
Benefits of the Bear Crawl Exercise
1. Builds Full-Body Control
The bear crawl trains your body as one connected system. Your hands, shoulders, trunk, hips, and legs all have to work together. This makes it useful for athletes, general fitness, bodyweight training, and anyone who wants a simple movement that challenges coordination.
2. Strengthens Core Stability
Bear crawls are not about crunching or flexing the spine. They train your core to resist movement. When you crawl forward, your trunk has to stay steady while your limbs move. This can help build better bracing, pelvic control, and trunk awareness.
3. Supports Shoulder Stability
Because your hands stay on the floor, the shoulders have to support and control your body weight. When performed slowly, the bear crawl can help train shoulder position, scapular control, and upper-body endurance.
4. Improves Coordination
The opposite hand and opposite foot pattern can feel awkward at first. That is one reason the exercise is valuable. It teaches rhythm, timing, and body awareness. If your hips swing or your steps become uneven, you get immediate feedback that you need to slow down.
5. Works Well Without Equipment
You do not need dumbbells, machines, or a large gym setup. A clear floor space is enough. This makes bear crawls easy to add to home workouts, outdoor sessions, warm-ups, and travel workouts.
6. Adds Conditioning Without Jumping
Bear crawls can raise your heart rate, especially when performed for time or distance. They are lower impact than jumping drills, but they are still demanding. The key is to keep the movement controlled instead of turning it into sloppy speed work.
Common Bear Crawl Mistakes and How to Fix Them
Letting the Hips Rise Too High
When the hips rise too high, the movement turns into a pike crawl instead of a bear crawl. This usually makes the exercise easier on the core and changes the training effect.
Fix it by bending your knees more and keeping them close to the floor. Your hips should stay roughly level with your shoulders, not pointed high toward the ceiling.
Letting the Low Back Sag
A sagging low back often means you are losing your brace or reaching too far with each step. This can make the movement feel uncomfortable and less controlled.
Fix it by shortening your steps, exhaling gently before each movement, and keeping your ribs stacked over your pelvis. If you cannot keep a flat back, return to bear plank holds.
Twisting From Side to Side
Some rotation is natural, but excessive hip swinging means your core is not controlling the movement well. This often happens when you rush or step too far.
Fix it by slowing down and moving with smaller steps. Think “quiet crawl” instead of “fast crawl.”
Taking Steps That Are Too Large
Long steps make it harder to keep the knees low and the torso stable. They also increase the chance that your shoulders and hips will shift out of position.
Fix it by moving each hand and foot only a few inches at a time. Small steps make the bear crawl more controlled and more effective.
Moving Too Fast
Speed is not the goal at first. Fast bear crawls often turn into sloppy conditioning, where the hips bounce, the back arches, and the knees rise too high.
Fix it by using a slower tempo. Once your form is solid, you can add speed in short bursts without losing control.
Poor Wrist Setup
Bear crawls place body weight through the hands and wrists. If your hands are too narrow, fingers are not spread, or shoulders collapse, the wrists may feel overloaded.
Fix it by spreading your fingers, pressing through the whole hand, and keeping your shoulders stacked over your wrists. If your wrists are sensitive, start with shorter sets or use an elevated surface.
Bear Crawl Variations and Progressions
Bear Plank Hold
The bear plank hold is the best starting point. Set up on all fours, lift your knees slightly, and hold the position without moving. Use this to learn the correct knee hover, back position, and core brace.
Start with 2–3 sets of 10–20 seconds.
Stationary Bear Crawl Lift
From the bear plank position, lift one hand and the opposite foot slightly without crawling forward. Pause, return them to the floor, then switch sides. This teaches coordination without the added challenge of traveling.
Use 2–3 sets of 4–6 controlled lifts per side.
Forward Bear Crawl
This is the standard version. Crawl forward with opposite hand and foot movement while keeping your hips low and back flat. Use short distances first, then build up gradually.
Use 2–4 sets of 5–20 yards.
Backward Bear Crawl
Backward bear crawls are usually harder because they demand more coordination and shoulder control. Add them after you can crawl forward without twisting or losing your brace.
Use 2–3 sets of 5–10 yards.
Lateral Bear Crawl
Lateral bear crawls move side to side instead of forward and backward. They challenge shoulder stability, hip control, and coordination in a different direction.
Use 2–3 sets of 5–10 yards each way.
Tempo Bear Crawl
A tempo bear crawl uses slow, deliberate steps. For example, take 2–3 seconds per step and pause briefly before moving again. This makes the exercise harder without adding equipment.
Use 2–3 sets of 10–20 seconds.
Bear Crawl to Push-Up
Crawl forward for a few steps, stop in a strong position, perform one controlled push-up, then continue crawling. This is an advanced variation because it adds more upper-body strength demand and fatigue.
Use this only if your bear crawl and push-up form are both solid.
How to Add Bear Crawls to Your Workout
As a Warm-Up
Bear crawls work well near the end of a warm-up after you have already moved your wrists, shoulders, hips, and ankles. Keep the sets short and controlled.
Try 1–2 sets of 10–15 seconds or 5–10 yards.
As a Core Exercise
Use bear crawls after your main strength lifts or inside a core circuit. Pair them with exercises like dead bugs, side planks, Pallof presses, or carries.
Try 3 sets of 15–30 seconds with 45–60 seconds of rest.
As a Conditioning Drill
Bear crawls can be used for conditioning, but only if your form stays clean. Short intervals usually work better than long, sloppy sets.
Try 4–6 rounds of 15–30 seconds with 45–75 seconds of rest.
As a Finisher
A bear crawl finisher should be challenging but not reckless. Keep the distance short, stop before your shoulders collapse, and avoid turning the movement into a race.
Try 3–5 rounds of 10–15 yards with full control.
Sample Bear Crawl Workout
Use this workout 1–2 times per week as a short core and conditioning session. The CDC physical activity guidelines recommend muscle-strengthening activities at least 2 days per week for adults, and the bear crawl can be one bodyweight tool inside that larger plan.
| Exercise | Sets | Reps or Time | Rest |
|---|---|---|---|
| Bear plank hold | 2 | 15–25 seconds | 30–45 seconds |
| Forward bear crawl | 3 | 10–15 yards | 45–60 seconds |
| Backward bear crawl | 2 | 5–10 yards | 45–60 seconds |
| Side plank | 2 | 20–30 seconds per side | 30–45 seconds |
| Bodyweight squat | 2 | 10–15 reps | 45–60 seconds |
Effort level should feel like a 6–8 out of 10. You should finish each set knowing you could have done a little more with good form. If your hips rise, your back sags, or your shoulders collapse, stop the set and rest.
To progress, add distance first, then time, then harder directions such as backward or lateral crawling. Do not add speed until your control is consistent.
How Often Should You Do Bear Crawls?
Most people can use bear crawls 1–3 times per week, depending on their training plan and recovery. If you are new to the movement, start with 1–2 short sessions per week.
Bear crawls can create fatigue in the shoulders, wrists, core, and hip flexors. More is not always better. Quality matters more than total distance. If your form gets worse every round, the set is too long or the variation is too hard.
The American College of Sports Medicine notes that bodyweight training can be a useful form of resistance training when matched to your goals. For bear crawls, that means using them for core control, movement quality, conditioning, and full-body endurance rather than expecting them to replace heavy strength exercises.
Who Should Use the Bear Crawl Exercise?
Bear crawls can be useful for beginners who need a simple bodyweight core drill, intermediate lifters who want better trunk control, athletes who need coordination and full-body movement, and home exercisers who want a no-equipment conditioning option.
They may not be the best choice for someone who cannot comfortably support weight through the wrists or shoulders. In that case, a bear plank hold, elevated bear crawl, dead bug, plank, or farmer carry may be a better starting point.
Safety Tips for Bear Crawls
Start with short sets and stop before your form breaks down. A clean 10-second bear crawl is more useful than a sloppy 60-second crawl.
Warm up your wrists, shoulders, hips, and ankles before harder crawl sets. Use a comfortable surface that gives your hands enough grip.
Keep your breathing steady. Holding your breath usually makes the movement stiff and harder to control.
Stop the exercise if you feel sharp pain, numbness, dizziness, chest pain, or unusual symptoms. If bear crawls bother your wrists, shoulders, neck, or low back, switch to an easier variation and consider getting guidance from a qualified fitness or healthcare professional.
FAQs About the Bear Crawl Exercise
What muscles does the bear crawl exercise work?
The bear crawl works the core, shoulders, serratus anterior, chest, triceps, upper back, quads, glutes, hip flexors, calves, forearms, and stabilizing muscles. It is best understood as a full-body core and coordination exercise.
Is the bear crawl a core exercise?
Yes. The bear crawl is a strong core exercise because your trunk has to stay stable while your arms and legs move. It trains anti-rotation, bracing, and control more than spinal flexion.
Are bear crawls good for beginners?
Bear crawls can be good for beginners when scaled correctly. Start with bear plank holds or short crawls before using longer distances. The goal is to control the movement, not rush through it.
How long should I do bear crawls?
Beginners can start with 10–20 seconds or 5–10 feet per set. Intermediate exercisers can use 20–40 seconds or 10–20 yards. Advanced exercisers can use longer sets, but only if form stays strong.
Should my knees touch the floor during bear crawls?
Your knees should hover slightly above the floor during the standard bear crawl. If you cannot hold that position, practice the setup first or briefly reset your knees between steps.
Why are bear crawls so hard?
Bear crawls are hard because they challenge multiple qualities at once: core stability, shoulder strength, hip control, coordination, and conditioning. Small form errors also make the movement feel harder quickly.
Can I do bear crawls every day?
You can practice very light bear crawl variations often, but hard bear crawl workouts are usually better 1–3 times per week. Your wrists, shoulders, and core need time to recover, especially if you also lift weights or do push-ups.
Conclusion
The bear crawl exercise is a simple but powerful bodyweight movement for building core control, shoulder stability, coordination, and full-body conditioning. Keep your knees low, your back flat, your steps small, and your movement controlled.
Start with short sets, master the bear plank position, then progress to forward, backward, lateral, and tempo bear crawls. When done well, bear crawls can fit into warm-ups, core circuits, conditioning workouts, and no-equipment training plans.
This content is for informational purposes only and is not a substitute for professional medical advice.
References
- American Council on Exercise: Bear Crawl Exercise Library
- Asian Pacific Journal of Health Sciences: Activity of Different Shoulder Muscles During Dynamic Bear Crawl Exercise
- American College of Sports Medicine: Updated Resistance Training Guidelines
- CDC: Adult Physical Activity Guidelines
- NASM: Agility and Coordination Drills Including Bear Crawls