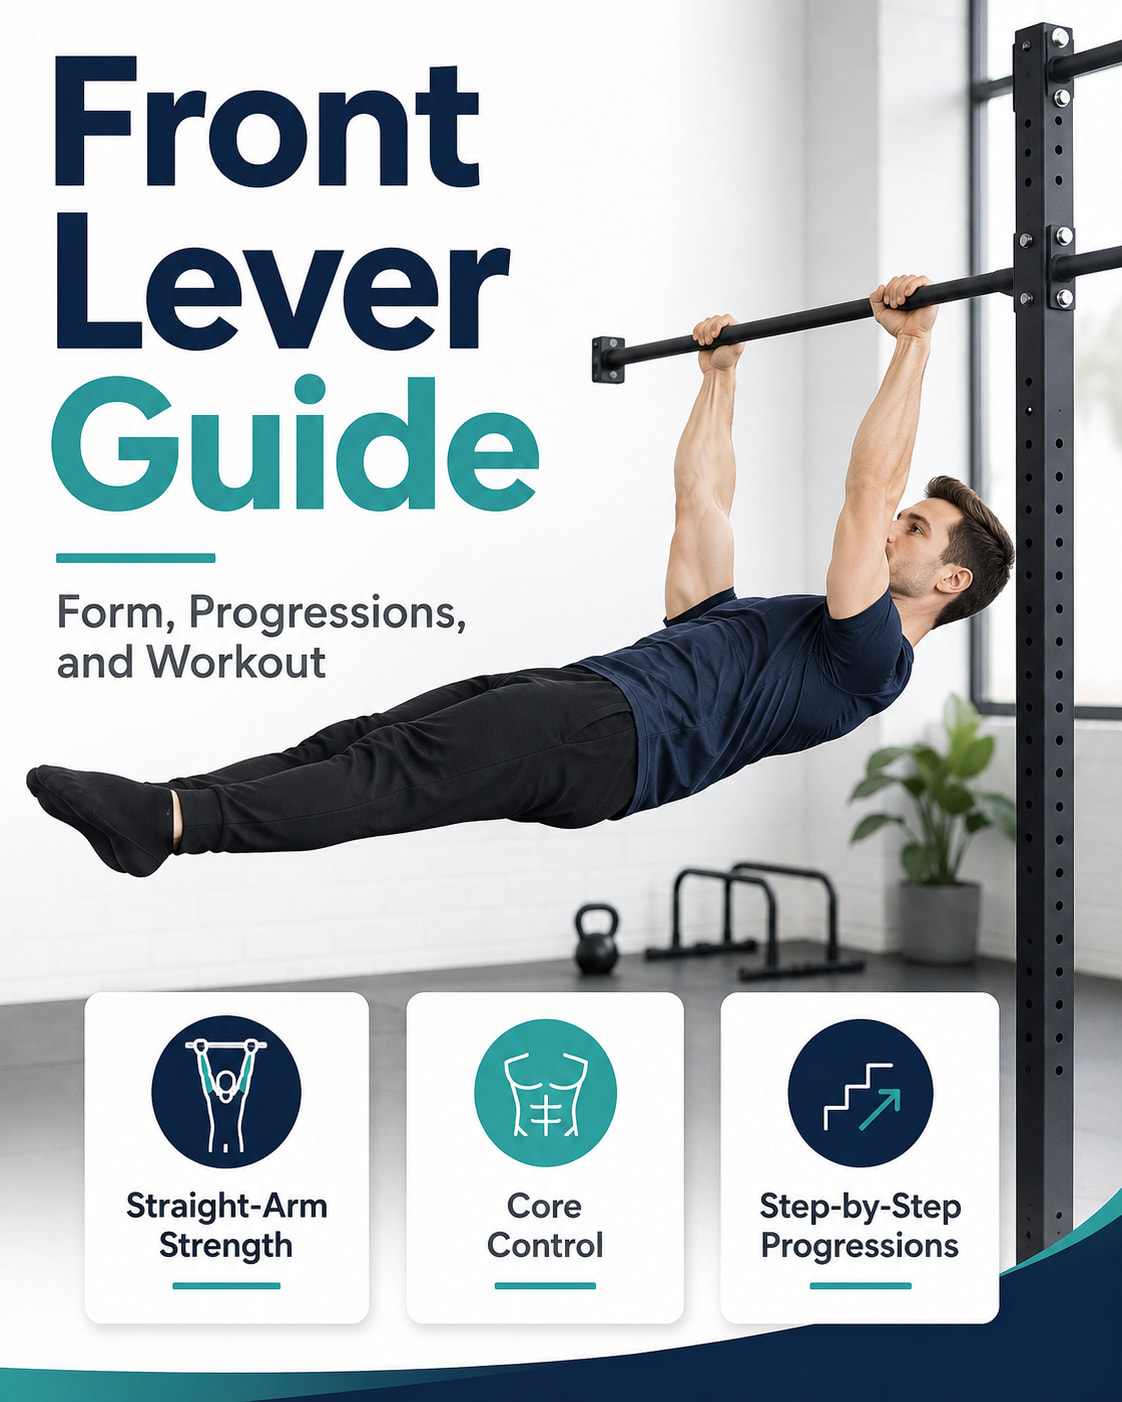
The front lever is an advanced calisthenics strength skill where you hang from a bar or rings and hold your body straight and horizontal with locked arms. This front lever guide will help you understand proper form, muscles worked, smart progressions, common mistakes, and how to build a realistic workout around the skill.
The full front lever is not a beginner move, but the right progressions make it trainable. Instead of forcing the final position, the goal is to build straight-arm pulling strength, core tension, scapular control, and clean body alignment step by step.
What Is the Front Lever?
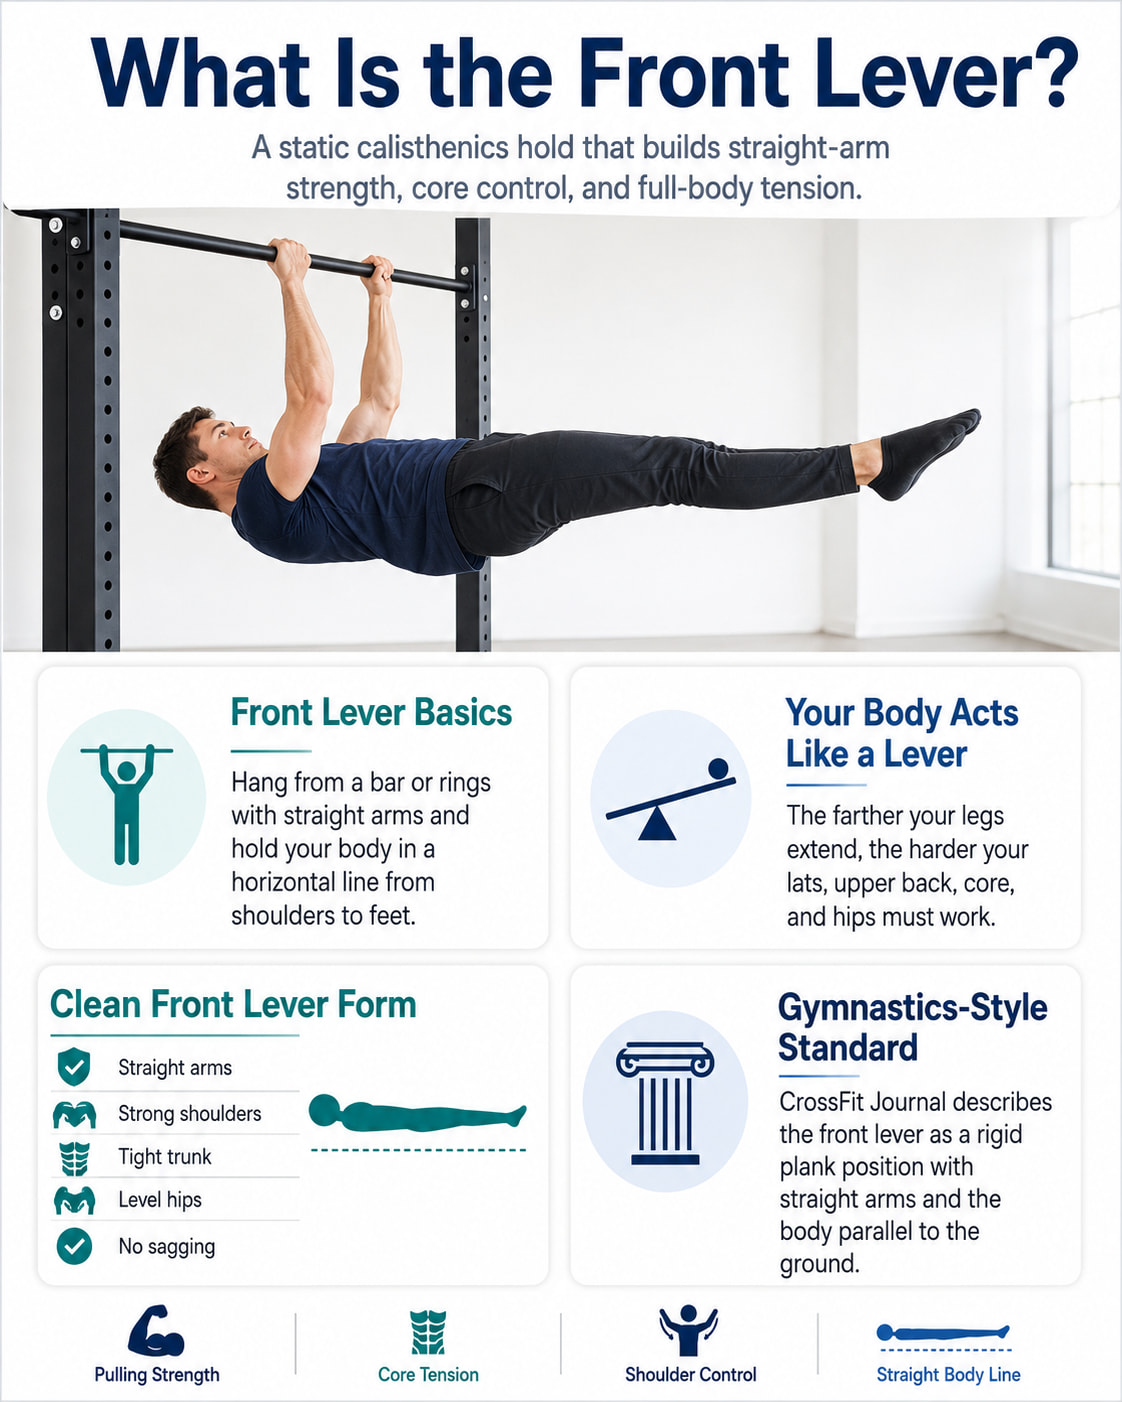
The front lever is a static gymnastics-style hold performed from a pull-up bar, gymnastics rings, or a similar stable hanging setup. Your hands grip the bar or rings, your arms stay straight, and your body forms a strong horizontal line from shoulders to feet.
A front lever looks simple, but it is demanding because your body acts like a long lever. The farther your legs move away from your body, the harder your lats, upper back, core, and hips must work to keep you level.
The CrossFit Journal describes the front lever as a rigid plank position under the rings with straight arms and the body parallel to the ground. That is the standard you are working toward: straight arms, strong shoulders, tight trunk, and no sagging hips.
Front Lever Muscles Worked
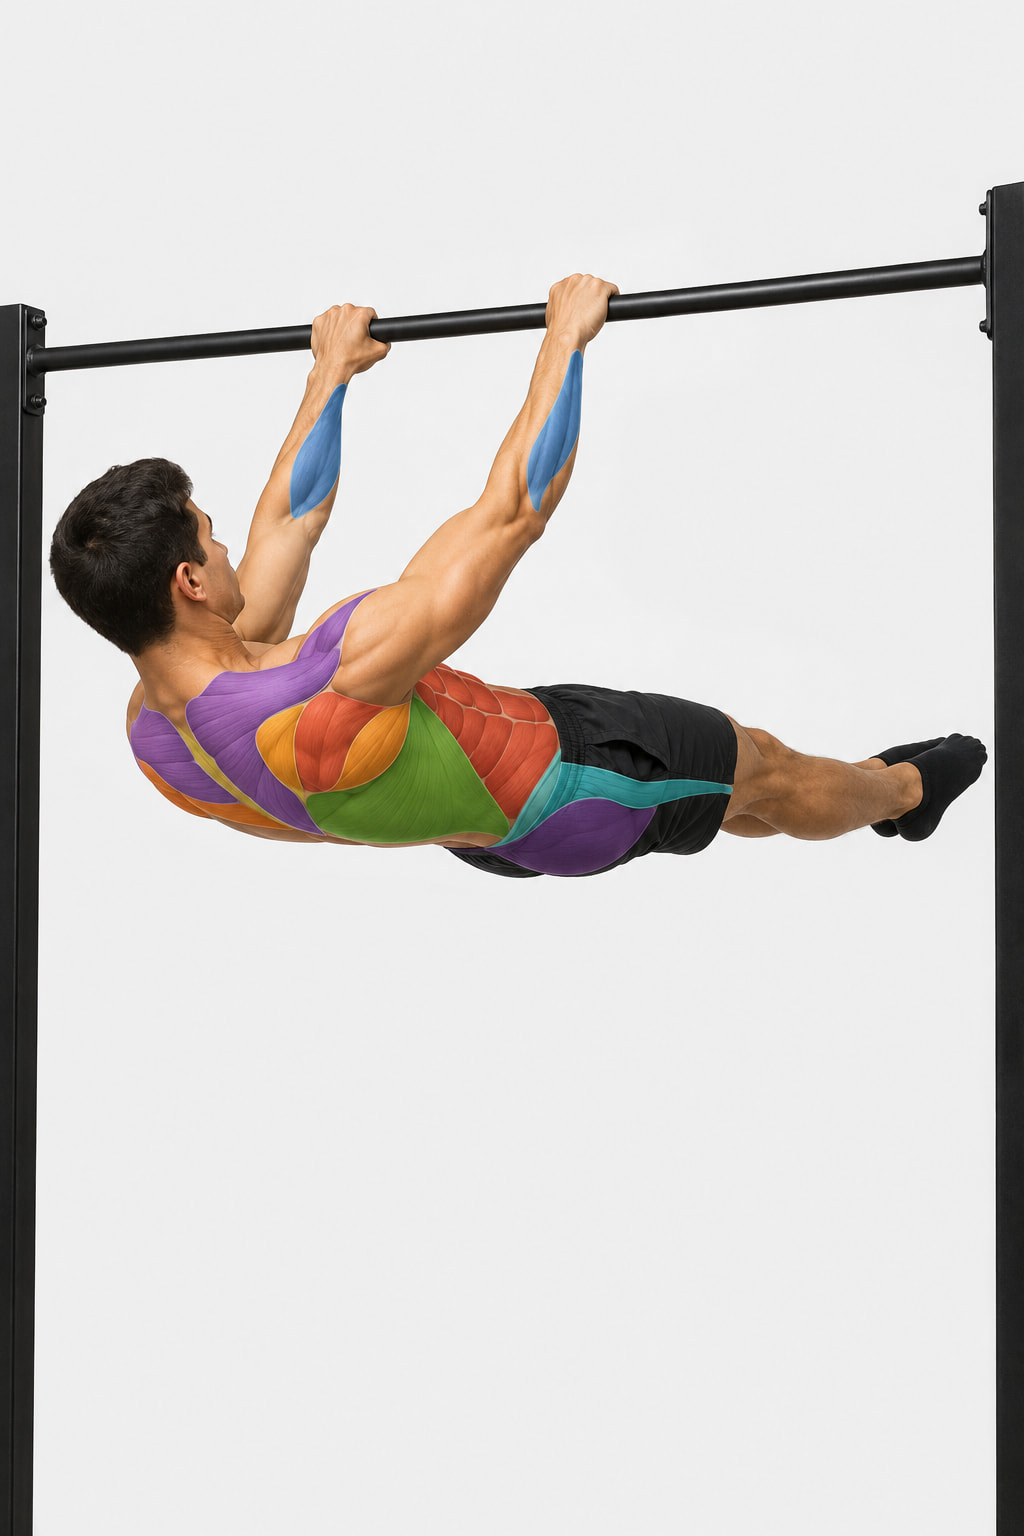
The front lever trains more than your abs. It is a full-body tension exercise with a major emphasis on the back, shoulders, and trunk.
Latissimus Dorsi
The latissimus dorsi is one of the most important muscles in the front lever. Your lats help pull your upper arms down and back while your body hangs underneath the bar. According to NCBI Bookshelf, the latissimus dorsi contributes to shoulder extension, adduction, and internal rotation, which helps explain why it is so important in straight-arm pulling skills.
Teres Major
The teres major assists the lats during shoulder extension and adduction. NCBI Bookshelf explains that the teres major works with the latissimus dorsi to produce powerful shoulder movement and control. In the front lever, this helps you keep the arms strong while the body stays lifted.
Upper Back and Scapular Muscles
Your traps, rhomboids, rear delts, and other scapular stabilizers help control shoulder position. They keep your shoulders from shrugging up toward your ears and help maintain a strong hanging position.
Core Muscles
The rectus abdominis, obliques, and deep core muscles help keep your ribs down and spine stable. Without strong trunk tension, your hips drop and the front lever turns into a bent, sagging position.
Glutes and Hip Flexors
Your glutes help keep your hips extended and your body line tight. Your hip flexors also assist in keeping the legs lifted, especially during tuck, one-leg, and raise variations.
Grip and Forearms
Your grip must stay strong enough to control the bar or rings without slipping. Rings usually require more stabilization than a fixed pull-up bar.
Front Lever Benefits
The front lever is useful because it builds strength in a way that regular crunches or pull-ups do not fully cover.
It develops straight-arm pulling strength, which is important for advanced calisthenics skills. It strengthens the lats, upper back, core, and grip together. It also improves body tension, scapular control, and awareness of your position in space.
For calisthenics athletes, the front lever can carry over to harder pulling skills, lever rows, muscle-up strength, and ring control. For general fitness, the early progressions can be a strong way to train core stiffness and upper-body control, as long as they are matched to your level.
Front Lever Readiness Checklist
You do not need to master every item before starting easy progressions, but these standards help you train more safely and productively.
You should be able to hang from a bar without shoulder discomfort. You should understand how to brace your core and keep your ribs from flaring. You should be comfortable with basic pulling exercises like rows, scapular pull-ups, or assisted pull-ups. You should also be able to hold a hollow body position or dead bug variation with control.
If hanging causes shoulder pain, elbow pain, numbness, or unusual symptoms, work with a qualified coach or healthcare professional before training front lever progressions.
How to Do a Front Lever With Proper Form
Front Lever Hold
Muscles worked: Lats, teres major, upper back, rear delts, abs, obliques, glutes, hip flexors, forearms, and grip.
Equipment needed: Pull-up bar, gymnastics rings, or a secure hanging station.
Why it stands out: The front lever challenges your back and core at the same time. It teaches you to create full-body tension while your shoulders resist a long lever position.
Suggested sets and reps: Use 3 to 5 sets of 5 to 12 seconds per hold. Stop each set before your hips sag, elbows bend, or shoulders lose position.
Beginners: Start with tuck front lever holds, band-assisted holds, or slow tuck lever negatives.
Intermediate: Use advanced tuck, one-leg, or straddle front lever holds.
Advanced: Train full front lever holds, front lever raises, front lever rows, or controlled transitions.
Rest: Rest 90 to 180 seconds between hard sets so your form stays clean.
How to do it:
- Hang from a bar or rings with your hands about shoulder-width apart.
- Pull your shoulders down away from your ears and engage your lats.
- Brace your abs, squeeze your glutes, and point your toes.
- Lift your body until it becomes horizontal or as close to horizontal as your current progression allows.
- Keep your arms straight and your body tight from shoulders to feet.
- Hold the position without swinging, shrugging, or bending your elbows.
- Lower with control before your form breaks.
Common mistakes: The biggest mistakes are bent elbows, sagging hips, loose legs, shrugging shoulders, over-arching the lower back, and using momentum instead of strength.
Expert tip: Think about pulling the bar toward your hips while keeping your ribs down and your glutes tight.
Exercise variations: Tuck front lever, advanced tuck front lever, one-leg front lever, straddle front lever, full front lever, band-assisted front lever, front lever negatives, and front lever raises.
Easier variation: Use a tuck front lever or a band-assisted tuck front lever.
Harder variation: Use a full front lever hold, front lever row, or front lever raise.
Front Lever Progressions From Beginner to Advanced
The best way to learn the front lever is to shorten the lever first, then slowly lengthen your body position. Move to the next progression only when you can hold the current one with straight arms, controlled shoulders, and no hip sag.
1. Tuck Front Lever
Best for: Learning the basic front lever position without the full leverage demand.
Muscles worked: Lats, upper back, abs, obliques, hip flexors, glutes, forearms, and grip.
Equipment needed: Pull-up bar or gymnastics rings.
Why it stands out: The tuck position keeps your knees close to your chest, which shortens the lever and makes the skill more manageable.
Suggested sets and reps: Perform 3 to 5 sets of 5 to 10 seconds.
Beginners: Start with a tight tuck and focus on shoulder position before trying to extend the legs.
Intermediate: Hold the tuck with your back flatter and your knees slightly farther from your chest.
Advanced: Use the tuck as a warm-up before harder front lever progressions.
Rest: Rest 60 to 120 seconds between sets.
How to do it:
- Hang from the bar with straight arms.
- Pull your shoulders down and engage your lats.
- Bring your knees toward your chest.
- Lift your hips until your torso is close to horizontal.
- Keep your arms locked and your core tight.
- Hold the position, then lower under control.
Common mistakes: Rounding too much, letting the hips drop, bending the elbows, and hanging passively from the shoulders.
Expert tip: Make your back feel wide and strong before you lift your hips.
Exercise variations: Tuck holds, tuck negatives, tuck raises, and band-assisted tuck holds.
Easier variation: Practice hanging knee raises and tuck inverted holds.
Harder variation: Move to the advanced tuck front lever.
2. Advanced Tuck Front Lever
Best for: Building the next level of leverage strength after the basic tuck.
Muscles worked: Lats, teres major, upper back, abs, obliques, glutes, hip flexors, and grip.
Equipment needed: Pull-up bar or gymnastics rings.
Why it stands out: The advanced tuck moves your knees farther away from your chest, making the hold harder while still being more accessible than a one-leg or straddle front lever.
Suggested sets and reps: Perform 3 to 5 sets of 5 to 10 seconds.
Beginners: Stay with the regular tuck until you can hold it cleanly.
Intermediate: Use short advanced tuck holds with strong body tension.
Advanced: Pause in the advanced tuck during front lever raises or negatives.
Rest: Rest 90 to 150 seconds between sets.
How to do it:
- Start in a tuck front lever.
- Keep your arms straight and shoulders active.
- Slowly move your knees away from your chest.
- Flatten your back as much as possible without losing control.
- Hold the position with your hips level.
- Return to the tuck before lowering.
Common mistakes: Extending the knees too quickly, losing scapular control, arching the lower back, and holding past technical failure.
Expert tip: Progress by moving the knees slightly farther away over time, not by rushing into the next skill.
Exercise variations: Advanced tuck holds, advanced tuck raises, and advanced tuck negatives.
Easier variation: Return to the regular tuck front lever.
Harder variation: Use a one-leg front lever.
3. One-Leg Front Lever
Best for: Bridging the gap between advanced tuck and longer lever positions.
Muscles worked: Lats, upper back, abs, obliques, glutes, hip flexors, quads, forearms, and grip.
Equipment needed: Pull-up bar or gymnastics rings.
Why it stands out: One leg extends while the other stays tucked, so you can practice a longer body line without the full load of both legs extended.
Suggested sets and reps: Perform 3 to 4 sets of 5 to 8 seconds per side.
Beginners: Do not rush into this progression until your advanced tuck is stable.
Intermediate: Alternate legs each set to keep your strength balanced.
Advanced: Use slow one-leg negatives or pauses during front lever raises.
Rest: Rest 90 to 180 seconds between sets.
How to do it:
- Start in an advanced tuck front lever.
- Extend one leg straight while keeping the other knee bent.
- Keep both hips level and your arms locked.
- Brace your abs and squeeze your glutes.
- Hold the position without twisting.
- Switch legs on the next set or after a controlled reset.
Common mistakes: Letting one hip rotate, relaxing the straight leg, bending the arms, and turning the hold into a swinging movement.
Expert tip: Point both toes and keep your pelvis square to the ceiling.
Exercise variations: One-leg holds, alternating one-leg holds, one-leg negatives, and band-assisted one-leg holds.
Easier variation: Use the advanced tuck front lever.
Harder variation: Use a straddle front lever or half-lay front lever.
4. Straddle Front Lever
Best for: Practicing a near-full front lever with slightly reduced leverage.
Muscles worked: Lats, teres major, upper back, abs, obliques, glutes, hip flexors, adductors, forearms, and grip.
Equipment needed: Pull-up bar or gymnastics rings.
Why it stands out: Spreading the legs shortens the lever compared with a full front lever. This makes the straddle a useful advanced progression before the final skill.
Suggested sets and reps: Perform 3 to 5 sets of 4 to 8 seconds.
Beginners: Build strength with tuck and advanced tuck holds first.
Intermediate: Use one-leg or band-assisted straddle holds before attempting strict straddles.
Advanced: Gradually narrow the straddle over time until your legs move closer together.
Rest: Rest 2 to 3 minutes between sets.
How to do it:
- Start from a strong tuck or inverted position.
- Open your legs into a controlled straddle.
- Lower into the front lever line with straight arms.
- Keep your hips level and your trunk braced.
- Hold the position without letting your legs drop.
- Return to a tuck or lower under control.
Common mistakes: Using a wide straddle to hide poor hip position, losing core tension, bending the elbows, and dropping the legs below the torso.
Expert tip: Make the straddle only as wide as needed to hold clean form.
Exercise variations: Straddle holds, straddle negatives, band-assisted straddle holds, and straddle front lever raises.
Easier variation: Use a one-leg front lever.
Harder variation: Move toward a full front lever with legs together.
5. Full Front Lever
Best for: Advanced calisthenics strength, straight-arm control, and full-body tension.
Muscles worked: Lats, teres major, upper back, rear delts, abs, obliques, glutes, hip flexors, quads, forearms, and grip.
Equipment needed: Pull-up bar or gymnastics rings.
Why it stands out: The full front lever is the complete version of the skill. It requires strong lats, locked arms, tight hips, and excellent control from shoulders to toes.
Suggested sets and reps: Perform 3 to 5 sets of 3 to 8 seconds. Use short, high-quality holds rather than long holds with poor form.
Beginners: Do not train full holds yet. Use tuck and assisted variations.
Intermediate: Use band-assisted full holds or straddle holds.
Advanced: Use full holds, controlled negatives, front lever raises, and front lever rows.
Rest: Rest 2 to 4 minutes between difficult sets.
How to do it:
- Hang from a bar or rings with straight arms.
- Set your shoulders down and engage your lats.
- Brace your core and squeeze your glutes.
- Lift your legs and torso until your body is horizontal.
- Keep your legs together, knees straight, and toes pointed.
- Hold a straight line from shoulders to feet.
- Lower before your hips drop or elbows bend.
Common mistakes: Training the full hold too early, arching the back, sagging at the hips, shrugging, kicking into position, and chasing hold time instead of quality.
Expert tip: A clean 5-second hold is more valuable than a shaky 15-second hold with bent elbows and dropped hips.
Exercise variations: Full front lever hold, band-assisted full lever, front lever negative, front lever raise, and front lever row.
Easier variation: Use a straddle front lever or band-assisted full front lever.
Harder variation: Use front lever rows, slow negatives, or front lever pull-to-inverted transitions.
Best Front Lever Exercises for Strength
Front lever progress is faster when you train the specific hold and the supporting strength around it.
Scapular Pull-Up
Scapular pull-ups teach you to move from a passive hang into an active shoulder position. Keep your elbows straight and pull your shoulders down away from your ears. Use 2 to 4 sets of 6 to 10 controlled reps before your lever work.
Front Lever Negative
A front lever negative builds strength through the lowering phase. Start from an inverted hang, set your shoulders, and lower through your best front lever position as slowly as possible. Use 3 to 5 reps with full control.
Front Lever Raise
Front lever raises train the path from a hang into your lever progression. Use a tuck, advanced tuck, or band-assisted version. Avoid kicking or swinging. Use 3 to 4 sets of 3 to 6 reps.
Front Lever Row
Front lever rows combine the lever position with a rowing action. They are advanced, so use them only when you can hold a strong tuck, advanced tuck, or straddle lever. Use 3 to 4 sets of 3 to 8 reps.
Pull-Up or Weighted Pull-Up
Pull-ups build bent-arm pulling strength that supports front lever training. They do not replace straight-arm lever work, but they are valuable for stronger lats, upper back, and grip. Use strict pull-ups, assisted pull-ups, or weighted pull-ups based on your level.
Hollow Body Hold
The hollow body hold teaches rib control, trunk stiffness, and full-body tension. Use 3 sets of 15 to 30 seconds. Keep your lower back controlled and regress by bending your knees if needed.
Common Front Lever Mistakes
Bending the Elbows
Bent elbows make the movement less strict and change the demand of the skill. Keep your arms locked unless you are intentionally training a row variation.
Letting the Hips Sag
Hip sag usually means the progression is too hard or your core and glutes are not staying tight. Return to an easier variation and build more clean hold time.
Shrugging the Shoulders
If your shoulders rise toward your ears, you lose the strong lat and scapular position needed for the front lever. Practice active hangs and scapular pull-ups.
Using Momentum
Kicking into position may help you reach the shape, but it does not build the same control. Lift, hold, and lower with intention.
Progressing Too Fast
The front lever rewards patience. Do not move from tuck to full lever just because you can briefly hit the shape. Progress when you can control the position repeatedly.
Front Lever Workout Routine
Train the front lever early in your workout while your grip, back, and core are fresh. Two to three sessions per week works well for most people because it gives you enough practice without overloading the shoulders and elbows.
Beginner Front Lever Workout
Use this workout if you are building your first tuck front lever.
Warm up with 5 to 10 minutes of light movement, active hangs, scapular pull-ups, and easy hollow body work. Mayo Clinic’s strength training guidance recommends warming up and using controlled movement rather than rushing through reps.
Workout plan:
Tuck front lever hold: 4 sets of 5 to 10 seconds
Scapular pull-up: 3 sets of 6 to 10 reps
Assisted pull-up or inverted row: 3 sets of 6 to 10 reps
Hollow body hold: 3 sets of 15 to 25 seconds
Dead hang: 2 sets of 20 to 40 seconds
Rest 60 to 120 seconds between most sets. Keep the effort around 7 to 8 out of 10 and stop before form breaks.
Intermediate Front Lever Workout
Use this workout if you can hold a clean tuck and are working toward advanced tuck, one-leg, or straddle positions.
Advanced tuck front lever hold: 4 sets of 5 to 10 seconds
Front lever negative: 3 sets of 2 to 4 reps
Pull-up: 4 sets of 4 to 8 reps
Front lever raise in your current progression: 3 sets of 3 to 5 reps
Hollow body hold or body saw: 3 sets of 20 to 30 seconds
Rest 90 to 180 seconds between hard lever sets. Progress when you can complete all holds with straight arms and level hips.
Advanced Front Lever Workout
Use this workout if you are training straddle or full front lever holds.
Straddle or full front lever hold: 5 sets of 3 to 8 seconds
Front lever raise: 4 sets of 3 to 5 reps
Front lever row: 3 sets of 3 to 6 reps
Weighted pull-up or strict pull-up: 4 sets of 3 to 6 reps
Hollow body hold: 3 sets of 30 to 45 seconds
Rest 2 to 4 minutes between the hardest sets. Keep every rep clean and avoid adding volume when your shoulders, elbows, or grip feel irritated.
How Often Should You Train the Front Lever?
Most lifters do well with front lever training 2 to 3 days per week. Short, high-quality practice usually works better than exhausting daily max holds.
The American College of Sports Medicine emphasizes that consistent resistance training, including bodyweight training, is more important than chasing a perfect or overly complex plan. For front lever work, that means practicing the skill regularly, keeping your progressions appropriate, and recovering well enough to repeat strong sessions.
A simple weekly structure is front lever practice on Monday and Thursday, or Monday, Wednesday, and Friday if your recovery is good. Avoid hard lever work the day after heavy pulling if your shoulders or elbows feel worn down.
How to Progress Safely
Progress only when your current variation looks clean. A good rule is to move up when you can perform 3 to 5 sets of 10 to 15 seconds with straight arms, active shoulders, level hips, and no swinging.
If your form breaks, do not force the next step. Make the exercise easier by tucking the knees more, using a resistance band, reducing hold time, or switching to controlled negatives.
Small progressions work best. Move the knees slightly farther away in the advanced tuck. Extend one leg before both. Use a wider straddle before narrowing your legs. Use bands to practice the full line without losing position.
Safety Tips for Front Lever Training
Warm up before front lever work. Include easy hanging, scapular pull-ups, shoulder circles, light rows, and hollow body practice.
Train with a stable bar or properly installed rings. Do not use weak door frames, unstable furniture, or anything that might move while you hang.
Keep the shoulders active and avoid dropping into a passive hang during hard sets. The American Academy of Orthopaedic Surgeons highlights shoulder conditioning work that supports strength, stability, and controlled movement around the shoulder.
Stop the exercise if you feel sharp shoulder pain, elbow pain, numbness, dizziness, chest pain, or unusual symptoms. Do not train through pain to “earn” the skill. Regress the movement or get help from a qualified professional.
FAQs About the Front Lever
Is the front lever good for abs?
Yes, the front lever trains the abs strongly because your core must keep your ribs, pelvis, and legs connected. However, it is not only an ab exercise. Your lats, upper back, shoulders, glutes, and grip are also major parts of the movement.
Can beginners train the front lever?
Beginners can train early front lever progressions, but most should not start with the full hold. Tuck holds, active hangs, scapular pull-ups, hollow body holds, and assisted pulling exercises are better starting points.
How long does it take to learn the front lever?
It depends on your starting strength, body control, training consistency, body size, recovery, and technique. Some people make progress in a few months, while others need much longer. The key is to progress based on form quality, not a fixed timeline.
Do you need pull-ups for a front lever?
Pull-ups are not the exact same movement, but they help build the lats, upper back, arms, and grip. Front lever training also needs straight-arm strength, so combine pull-ups with lever holds, negatives, raises, and scapular work.
Is the front lever easier on a bar or rings?
A fixed bar is usually easier because it is more stable. Rings move freely, so they demand more shoulder control and stabilization. Start with the setup that allows the cleanest form.
Why do my hips drop during the front lever?
Hip drop usually means the progression is too hard, your lats are losing position, or your core and glutes are not braced enough. Use an easier variation and stop each set before your body line breaks.
Should you train front lever every day?
Daily max-effort holds are usually not necessary. Most people progress better with 2 to 3 focused sessions per week, good warm-ups, and enough recovery between hard pulling sessions.
Conclusion
The front lever is a powerful calisthenics skill, but it should be built with patience. Start with clean tuck holds, master your body line, strengthen your lats and core, and move through progressions only when your form is ready.
A strong front lever is not about rushing into the hardest version. It is about owning each step with straight arms, active shoulders, tight hips, and controlled movement.
References
- CrossFit Journal: Training the Front Lever on Rings
- NCBI Bookshelf: Anatomy, Back, Latissimus Dorsi
- NCBI Bookshelf: Anatomy, Shoulder and Upper Limb, Teres Major Muscle
- American College of Sports Medicine: Updated Resistance Training Guidelines
- American Academy of Orthopaedic Surgeons: Rotator Cuff and Shoulder Conditioning Program