

To do resistance band squats, stand on a resistance tube with both feet, hold the handles beside your shoulders, lower into a controlled squat, and press back to standing. Keep your feet supported, your knees tracking with your toes, and your torso steady throughout the movement, following the resistance band squat setup described by Get Healthy U.
This guide focuses on resistance band squats with handles, including setup, muscles worked, common mistakes, an easier starting option, and a practical training plan.
Before You Start
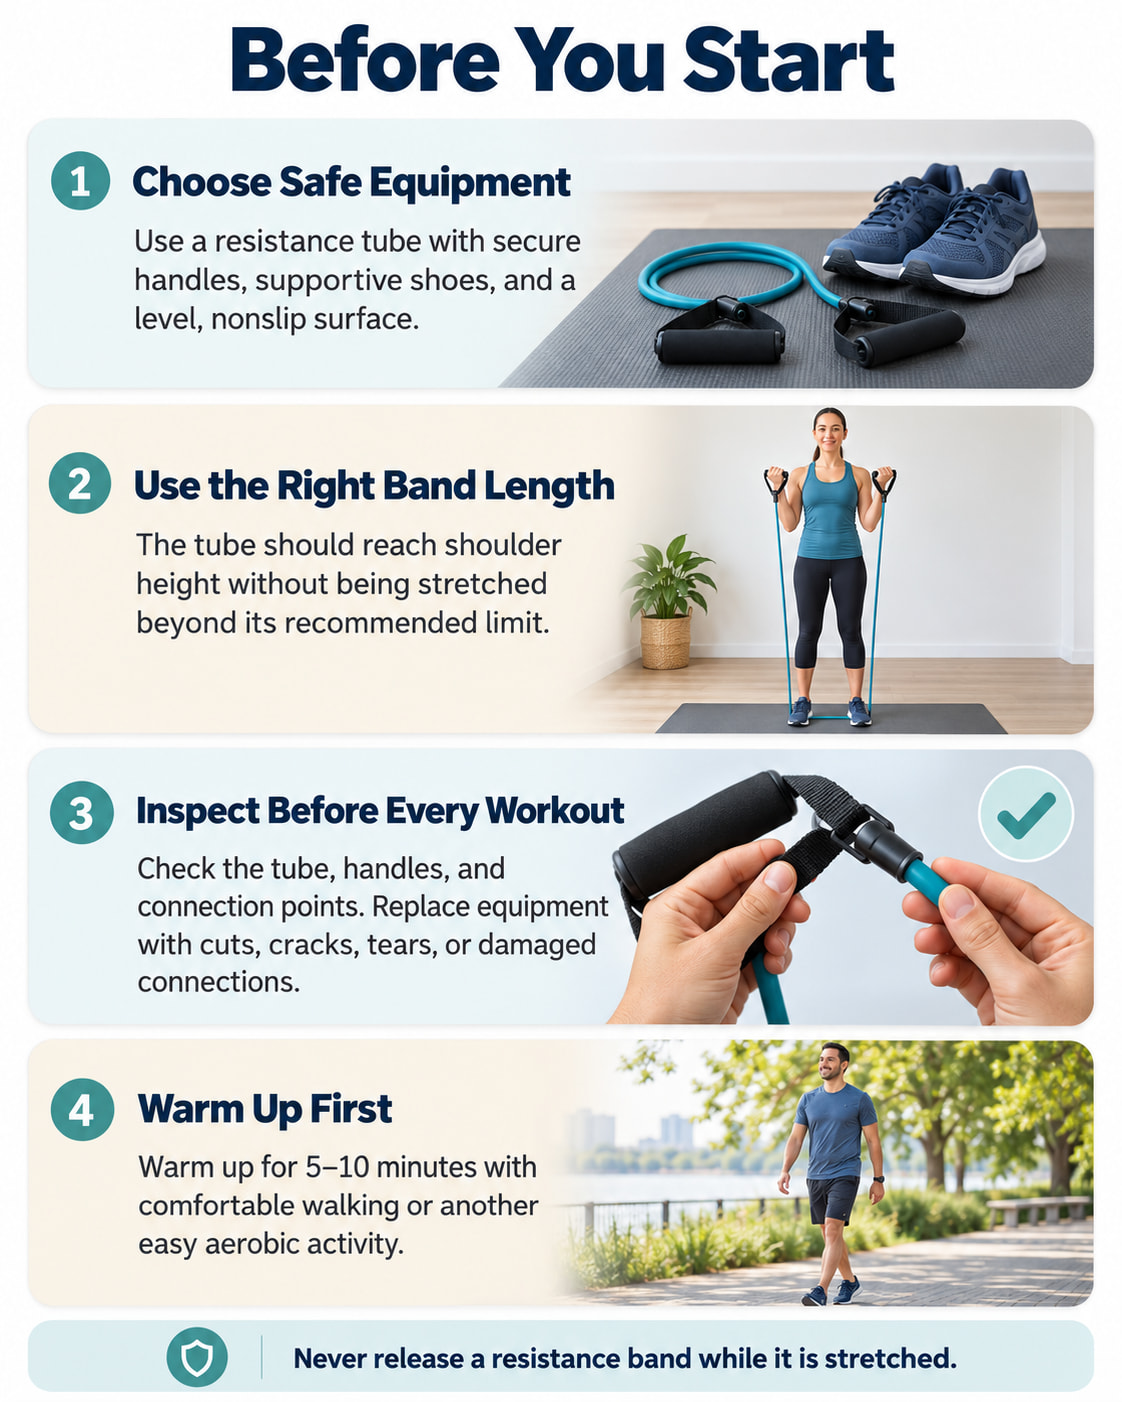
Use a resistance tube with secure handles, supportive shoes, and a level, nonslip surface. The tube must be long enough for the shoulder-height setup without exceeding its manufacturer’s stretching limit.
Inspect the tube, handles, and connection points before each session. The American Council on Exercise recommends discarding damaged bands and never releasing a band while it is stretched.
Warm up with 5–10 minutes of comfortable walking or another easy aerobic activity before starting your working sets, as recommended by Mayo Clinic.
How to Do Resistance Band Squats With Handles
Equipment: A resistance tube with one handle at each end. No external anchor is needed.
How to Do It
- Secure the tube beneath your feet. Stand on its middle with your feet approximately shoulder-width apart and your toes pointing forward. Keep similar lengths of tubing on both sides.
- Bring the handles to your shoulders. Hold one handle beside each shoulder, with your elbows bent and the tubing running behind your upper arms. Maintain a secure grip and keep your wrists comfortable rather than sharply bent.
- Brace and lower. Tighten your abdominal muscles, inhale, and bend your hips and knees together. Move your hips down and slightly back while keeping your feet planted.
- Control the bottom position. Lower only as far as you can maintain balance, a comfortable spine position, and knees aligned with your toes. Keep the handles beside your shoulders rather than allowing them to drop.
- Press back to standing. Exhale and push through your feet, keeping your heels supported. Straighten your hips and knees together. Finish upright without leaning backward or adding an overhead press.
After your last repetition, keep both feet on the tube while lowering the handles slowly. Release the remaining tension before stepping off—never let the handles snap back.
How Deep Should You Squat?
Use a depth you can control, not a depth you have to force. A position with the thighs approaching parallel may be appropriate, but stop higher when going farther causes your heels to lift, your balance to shift, or your torso to lose control.
Your torso can lean forward naturally as your hips move back. You do not need to keep it perfectly vertical. Maintain a comfortable spinal position rather than deliberately rounding or excessively arching your lower back. These principles are consistent with squat guidance from Hospital for Special Surgery.
Common Resistance Band Squat Mistakes
| Mistake | What to do instead |
|---|---|
| The tube shifts beneath your shoes | Stop, release tension, and reset it securely. Do not adjust your feet while continuing the set. |
| One side feels much tighter | Check that the tube is centered and both handles remain at a similar height. |
| Your heels lift | Reduce your depth and maintain contact through both the heels and the balls of your feet. |
| Your knees collapse inward or push excessively outward | Keep them moving in the same direction as your toes. Reduce resistance when alignment becomes difficult. |
| Your hips rise before your chest | Use less resistance and bring your hips and torso upward together. |
| You bounce or rush through repetitions | Lower smoothly and reverse direction under control instead of using momentum. |
Stable foot contact, coordinated hip and knee movement, and a controlled return are central squat-technique principles. End the set when you cannot maintain them.
Muscles Worked and Main Benefits
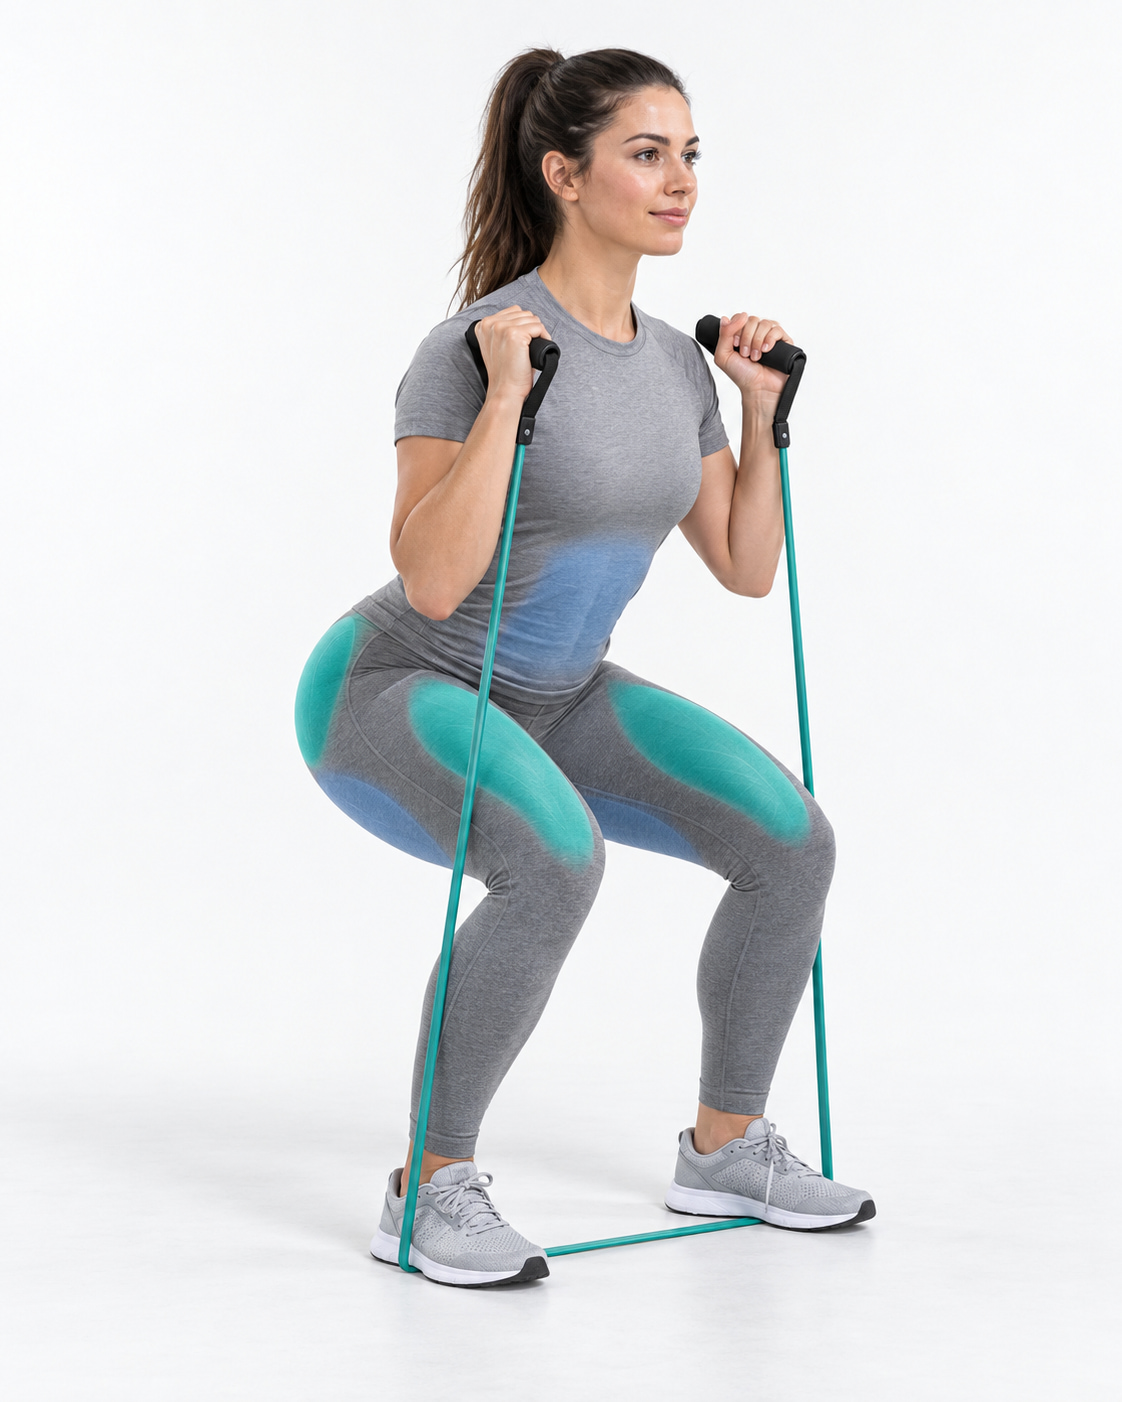
Resistance band squats primarily train your quadriceps and glutes. Your quadriceps straighten your knees as you rise, while your glutes help extend your hips. The hamstrings contribute to the movement, and your abdominal muscles help maintain trunk control.
The practical benefit is adding resistance to a familiar lower-body movement without needing a rack or heavy weights. A tube also takes up little storage space and can fit easily into a home strength routine.
Bands are a legitimate training tool—not merely a warm-up accessory. The American College of Sports Medicine recognizes elastic-band and home-based training as useful options for improving strength, muscle size, and physical function. That supports using band squats within a consistent program; it does not establish that this particular squat variation is superior to every alternative.
An Easier Starting Option: Chair Sit-to-Stand
A chair sit-to-stand removes the band and gives you a defined seated starting position. It can be useful while learning to coordinate standing up and sitting down with control.
Equipment: A firm, stable chair without wheels. Position it so it cannot slide.
How to Do It
- Sit with both feet flat on the floor and your arms relaxed beside your body.
- Lean your torso forward until your shoulders move over your feet.
- Push through both feet and straighten your legs to stand upright.
- Bend your hips and knees, allowing your torso to move forward as you lower yourself gently back onto the seat.
The South Tees Hospitals NHS Foundation Trust describes this forward weight shift and controlled return in its sit-to-stand exercise guidance. This is a full sit-to-stand, not a squat that only taps the chair.
Common mistakes: Rocking repeatedly to build momentum, letting the knees fall inward, or dropping onto the seat. Prioritize a controlled rise and return before adding resistance.
How to Choose the Right Resistance
Choose a tube that lets you complete your intended repetitions without changing your depth, rushing, or losing the shoulder-height handle position.
A practical starting target is to finish each set feeling that two or three more controlled repetitions would still be possible. You do not need to reach complete muscular failure to make progress.
Expect More Band Tension Near Standing
Elastic resistance increases as the tube stretches. With your feet anchoring the tube and your hands beside your shoulders, the tube generally becomes longer as you stand.
Performance Health explains that resistance from elastic tubing depends on how far it is elongated. Consequently, a band’s labeled resistance is not a constant load throughout the squat.
Judge the band through the entire repetition. Being able to lower comfortably does not necessarily mean you can stand up with the same control.
A Simple Twice-Weekly Squat Plan
Use the following as a starting example for a generally healthy adult. Choose one row per session, rather than performing both automatically.
| Starting point | Exercise | Sets and repetitions | Rest |
|---|---|---|---|
| Learning the movement | Chair sit-to-stand | 1–2 sets of 6–10 | 60–90 seconds |
| Ready for added resistance | Resistance tube squat with handles | 2 sets of 8–12 | 90–120 seconds |
Schedule sessions on nonconsecutive days, such as Monday and Thursday. Leave at least one full recovery day between challenging sessions for the same muscles.
Keep the final repetitions challenging but controlled. These sets can form the squat portion of a broader workout; they are not a complete full-body strength program. Training all major muscle groups regularly remains important.
How to Progress
Use this practical progression rule: when you complete every set at the top of your repetition range with consistent form for two sessions, move to the next manageable resistance level. Return to the lower end of the repetition range and build up again.
For example, after completing two controlled sets of 12, try a slightly stronger tube for two sets of eight. Increase only when the new band still allows the same setup and movement quality.
Do not change resistance, sets, and repetitions all at once. Progress gradually while keeping your squat form consistent.
Frequently Asked Questions
Can Resistance Band Squats Build Muscle?
Yes, sufficiently challenging resistance-band training can help build muscle. Your results depend on regular training, appropriate effort, and a workload that continues to challenge you.
However, there is no guarantee that one band or one exercise will remain challenging indefinitely. Increase the training demand gradually rather than repeating easy sets without progression.
Should the Band Go Under Your Feet or Above Your Knees?
Those positions serve different purposes.
The underfoot tube in this guide adds resistance as you rise. A mini-band around the thighs primarily adds an inward pull that you must control; it is not an interchangeable replacement for the underfoot setup.
A thigh band also does not automatically correct knee alignment. A review published in the International Journal of Sports Physical Therapy found no immediate reduction in inward knee movement in the studies reviewed. Longer-term corrective effects remained uncertain.
Can Your Knees Move Past Your Toes?
A strict “knees must never pass the toes” rule is not universal. Research on barbell squats found that restricting forward knee movement shifted more demand toward the hips and lower-back region.
For your squat, prioritize supported feet, controlled movement, and knees tracking with your toes rather than forcing your shins to remain vertical. The National Library of Medicine provides the published research examining restricted versus unrestricted knee movement during squatting.
Follow individualized guidance when a clinician has given you specific restrictions.
What Should You Do if the Band Becomes Loose at the Bottom?
Some reduction in tension is expected because the tube shortens as you lower. If it becomes completely loose or shifts beneath your feet, stop and check its length and setup.
Use tubing suited to your height and this exercise. Do not compensate by stretching it beyond its permitted limit or changing your stance into an uncomfortable position.
When to Stop or Get Individual Advice
Stop exercising and seek professional advice if you experience sharp pain, numbness, dizziness, chest pain, or unusual symptoms. Do not use a stronger band or force more repetitions to work through these warning signs.
For an existing medical condition, recent surgery, or persistent knee or back symptoms, ask a qualified healthcare professional about an appropriate starting point. The National Heart, Lung, and Blood Institute advises discussing symptoms such as chest pain or dizziness during physical activity with a doctor.
The Bottom Line
Start with a manageable band, keep the setup consistent, and make every repetition controlled. Use the chair sit-to-stand when you need a simpler starting point. Build repetitions first, then increase resistance without sacrificing your form.
This content is for informational purposes only and is not a substitute for medical advice.