The wall sit exercise is an isometric lower-body exercise that builds quad endurance, trains bracing, and strengthens your ability to hold a strong squat-like position without equipment. It looks simple, but when done correctly, it can challenge your legs, glutes, calves, and core in a very controlled way.
This guide explains how to do the wall sit exercise with proper form, which muscles it works, the main benefits, common mistakes, beginner-friendly modifications, harder progressions, and how to add it to a real leg workout.
What Is the Wall Sit Exercise?
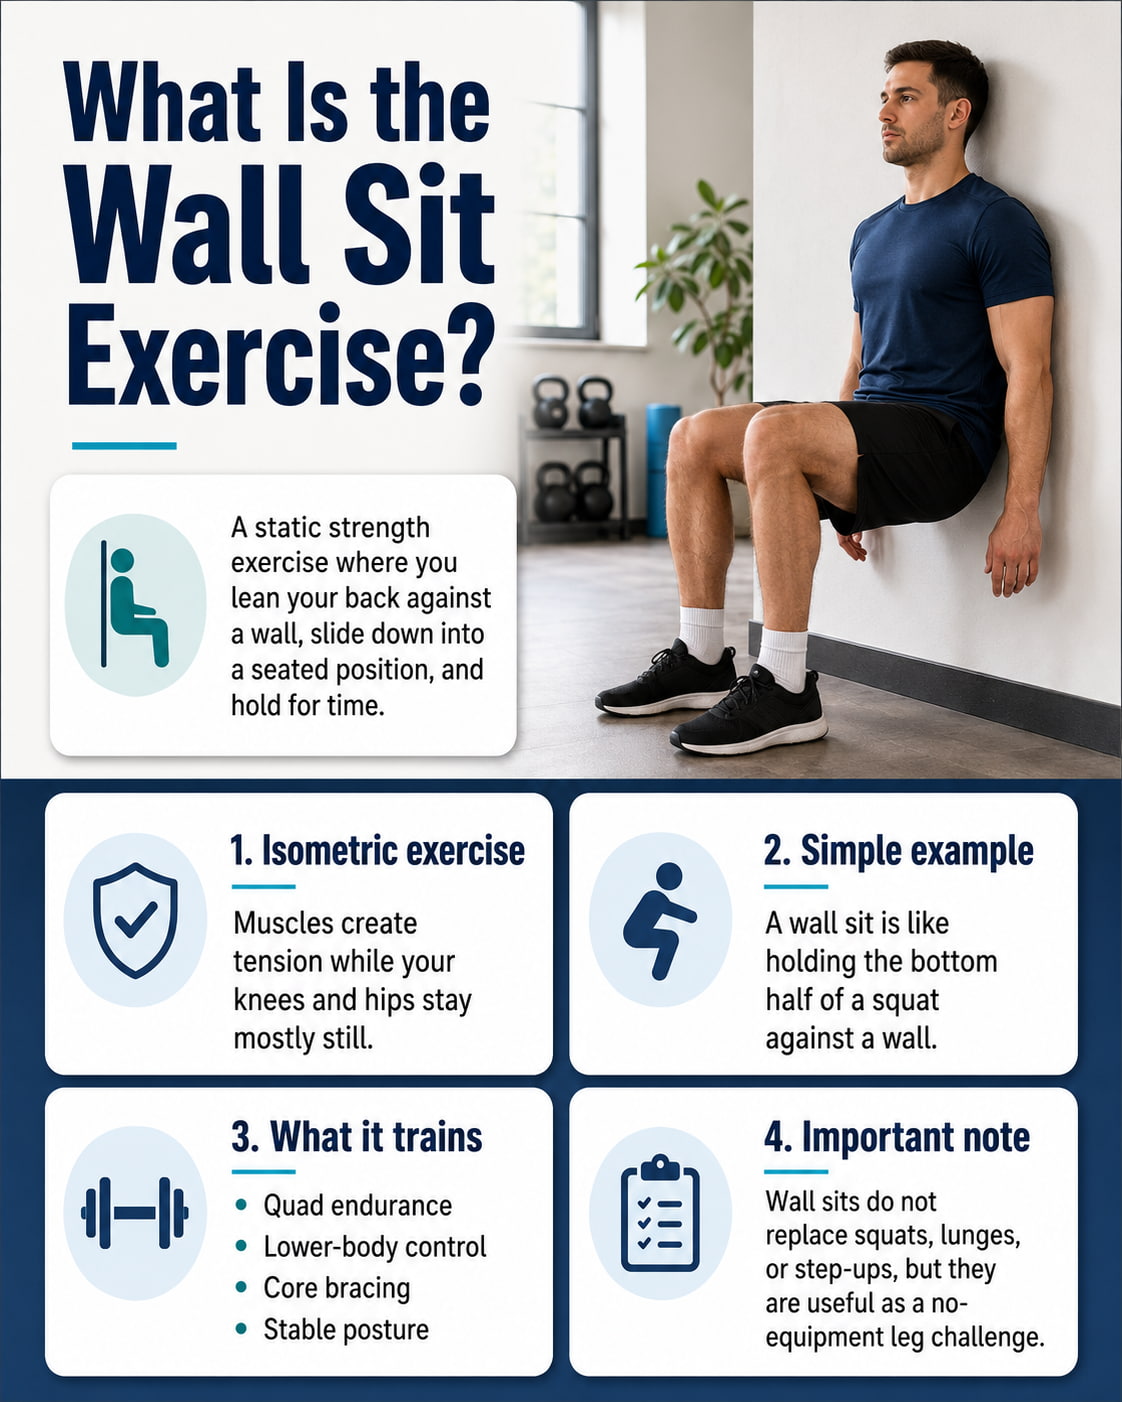
The wall sit exercise is a static strength exercise where you lean your back against a wall, slide down into a seated position, and hold that position for time.
It is called an isometric exercise because your muscles create tension without your knees and hips moving through a full rep. The Mayo Clinic Health System explains that isometric exercise involves contracting a muscle or muscle group without visible joint movement.
In simple terms, a wall sit is like holding the bottom half of a squat against a wall.
Unlike regular squats, lunges, or step-ups, wall sits do not train a full lifting and lowering pattern. That means they should not be your only leg exercise. However, they are useful for building lower-body endurance, teaching position control, and adding a no-equipment challenge to leg workouts.
Wall Sit Exercise Muscles Worked
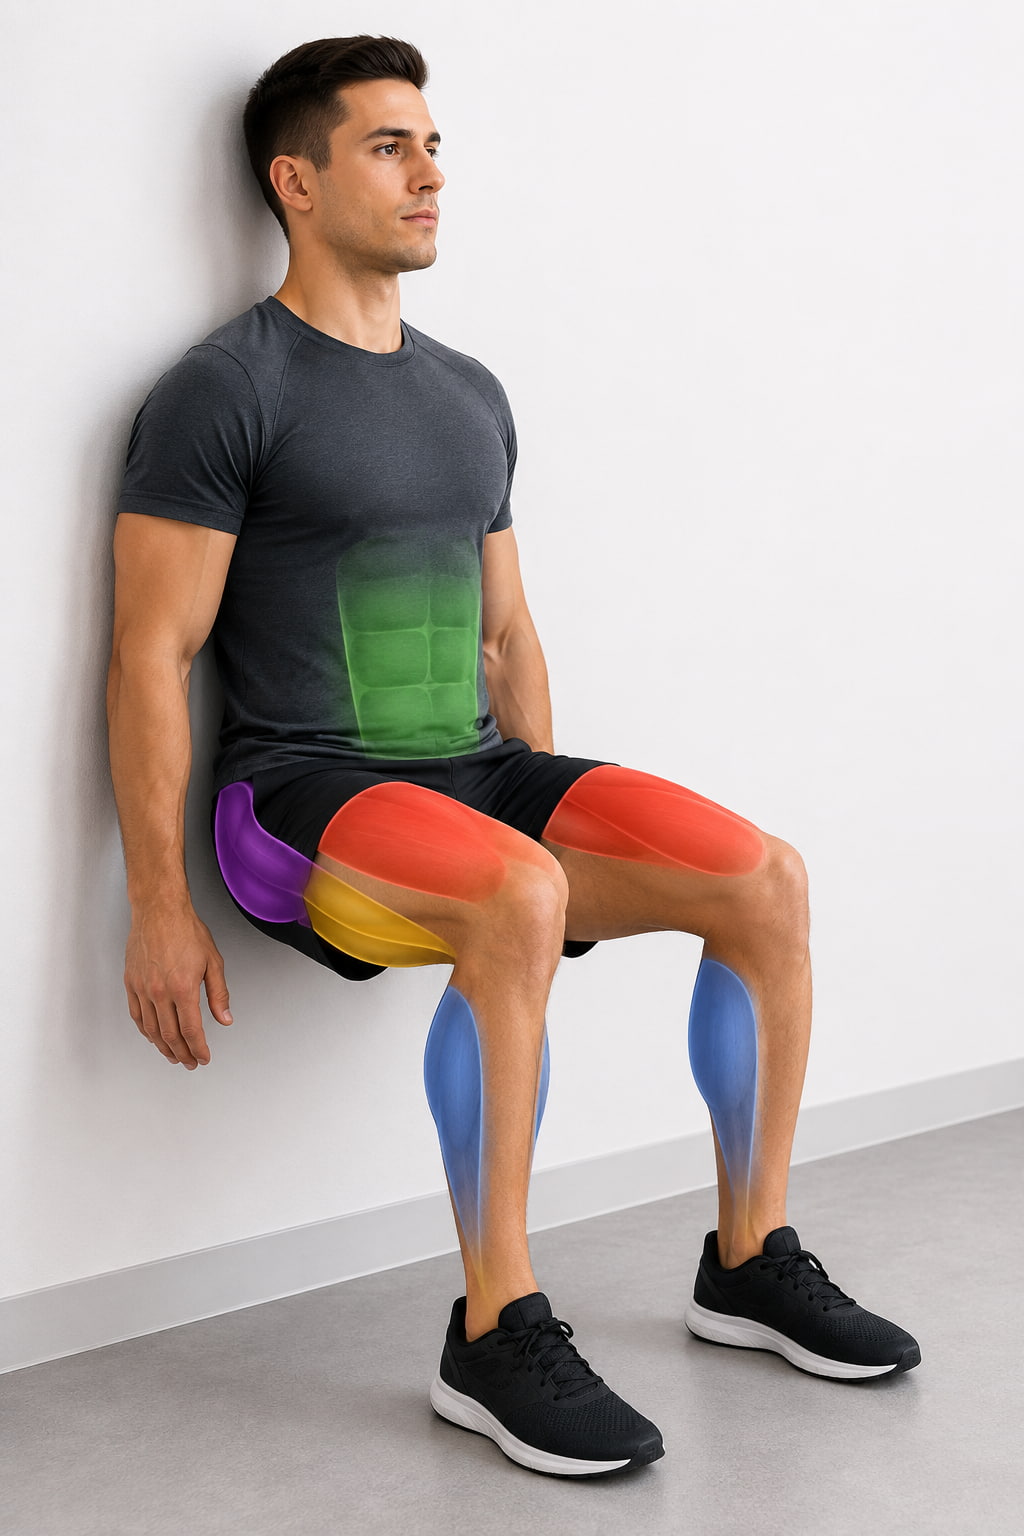
The wall sit exercise mainly targets the quadriceps, which are the muscles on the front of your thighs. Your quads work hard to keep your knees bent and your body from sliding lower.
Your glutes also help stabilize your hips and support the hold. The hamstrings assist around the back of the thighs, especially as you stay controlled in the seated position. The calves help stabilize the lower legs and feet, while your core keeps your torso braced and your back steady against the wall.
The Cleveland Clinic notes that wall sits can quickly challenge the quadriceps, hamstrings, and glutes. NASM also highlights the quads, glutes, calves, and core as key muscles used during the movement.
Wall Sit Exercise
Equipment needed: You only need a sturdy wall. Optional equipment includes a resistance band, dumbbell, weight plate, medicine ball, or stability ball for harder variations.
Suggested sets and reps: Use time instead of reps. Start with 2 to 4 sets of 15 to 45 seconds. More experienced lifters can use 3 to 5 sets of 45 to 90 seconds or add light load once bodyweight holds feel controlled. Keep the effort around RPE 7 to 8 for most sets, meaning challenging but not all-out.
Beginners: Start with a higher wall sit where your hips stay above your knees. Use 2 to 3 sets of 10 to 30 seconds. Rest long enough to repeat clean form. Do not force a deep 90-degree position on the first day.
Intermediate: Use 3 to 4 sets of 30 to 60 seconds. Work toward thighs roughly parallel to the floor if your knees and hips feel comfortable. Add 5 to 10 seconds per set over time before adding weight.
Advanced: Use longer holds, a resistance band above the knees, a dumbbell or plate held at the chest, or a single-leg wall sit variation. Keep the position controlled and avoid turning every set into a maximum-effort test.
Rest: Rest 60 to 90 seconds between sets for general strength endurance. Rest up to 2 minutes if you are using loaded or advanced variations.
How to do it:
- Stand with your back against a sturdy wall and place your feet about hip- to shoulder-width apart.
- Walk your feet forward so they are far enough from the wall to let your knees bend without your heels lifting.
- Brace your abs, keep your chest relaxed, and slide your back down the wall.
- Stop when your thighs are near parallel to the floor, or stay higher if that feels better for your knees.
- Keep your knees tracking in line with your toes and stacked over or slightly behind your ankles.
- Press your whole back into the wall and keep your weight balanced through your feet.
- Breathe steadily and hold the position for your target time.
- To finish, press through your feet and slide back up the wall under control.
Common mistakes: Common wall sit mistakes include placing the feet too close to the wall, letting the knees cave inward, holding the breath, rounding away from the wall, sitting too high to create enough challenge, or dropping too low before you have the strength to control the position.
Expert tip: Think about pushing the floor away instead of just hanging on your knees. Your feet should feel active, your core should stay braced, and your breathing should stay steady throughout the hold.
Exercise variations: Useful variations include the high wall sit, standard wall sit, banded wall sit, weighted wall sit, stability ball wall sit, medicine ball squeeze wall sit, wall sit march, and single-leg wall sit.
Easier variation: Use a higher wall sit with less knee bend and shorter holds. This reduces the demand on your quads while still teaching the position.
Harder variation: Use a weighted wall sit or single-leg wall sit after you can hold a clean bodyweight wall sit for about 60 seconds without knee collapse, breath holding, or posture breakdown.
Benefits of the Wall Sit Exercise
Builds Quad Endurance
The wall sit exercise is one of the simplest ways to challenge your quadriceps without machines or weights. Because you hold the same knee-bent position for time, your quads have to stay active instead of relaxing between reps.
This can be useful for activities that require sustained leg effort, such as hiking, skiing, cycling, stair climbing, and longer lower-body training sessions.
Trains Isometric Strength and Control
Wall sits train your ability to produce force without movement. This is different from a squat, where you lower and stand back up through a full range of motion.
Isometric strength can be useful when you need to hold a stable position, maintain control under fatigue, or improve awareness of knee and hip alignment. NASM describes wall sits as a simple way to improve muscular endurance and joint stabilization in a squat-like position.
Requires No Equipment
One of the biggest benefits of the wall sit exercise is convenience. You do not need a gym, barbell, or machine. A sturdy wall is enough.
This makes wall sits useful for home workouts, travel workouts, beginner leg training, warm-up activation, or short conditioning finishers.
Easy to Scale for Different Levels
Wall sits are beginner-friendly because you can control the depth and hold time. A beginner can stay higher and hold for 10 to 20 seconds. An intermediate lifter can hold a deeper position for 30 to 60 seconds. An advanced lifter can add weight, bands, marching, or single-leg work.
That flexibility makes the exercise useful across different fitness levels.
Supports Lower-Body Stability
A good wall sit teaches you to keep the knees tracking with the toes, the feet planted, and the core braced. These same skills matter in squats, lunges, step-ups, and many sports movements.
Wall sits do not replace dynamic strength training, but they can help reinforce better lower-body position awareness.
Works Well as a Leg-Day Finisher
Wall sits are especially effective at the end of a lower-body workout. After squats, lunges, step-ups, or Romanian deadlifts, a short wall sit finisher can challenge your thighs without needing heavy loading.
This is useful when you want extra quad endurance but do not want to add another complex exercise.
May Support a Balanced Heart-Healthy Routine
Wall sits are a type of isometric exercise, and some research suggests isometric training may help support healthy blood pressure as part of a broader exercise routine. A BMJ Group summary of a large exercise and blood pressure analysis reported promising results for isometric training, including wall squat-style exercises.
This does not mean wall sits replace cardio, strength training, medication, or medical care. The American Heart Association still recommends a balanced routine that includes aerobic activity and strength training. If you have high blood pressure, heart disease, or a recent cardiac event, ask a healthcare professional before using intense isometric holds.
Common Wall Sit Mistakes to Avoid
Placing Your Feet Too Close to the Wall
If your feet are too close, your knees may travel too far forward and your heels may lift. This can make the exercise feel awkward and may place extra stress on the knees.
Walk your feet forward enough so your knees stay lined up over your ankles or slightly behind them when you hold the position.
Letting the Knees Cave Inward
Your knees should track in the same direction as your toes. If they collapse inward, your hips and knees lose alignment.
Think about gently spreading the floor with your feet. If needed, use a resistance band above the knees and press lightly outward to practice better alignment.
Sitting Too Low Too Soon
A deep wall sit is harder than it looks. If you drop to a full 90-degree position before you are ready, your form may break quickly.
Start higher, build time, then work lower over several sessions. A controlled higher wall sit is better than a deep hold with poor form.
Rounding Away From the Wall
Your back should stay supported by the wall. If your upper back peels away, your rib cage flares, or your lower back feels strained, reset your position.
Brace your core gently, keep your ribs stacked over your pelvis, and maintain steady contact with the wall.
Holding Your Breath
Breath holding is one of the most common mistakes during isometric exercises. It can increase pressure and make the exercise feel harder than it needs to be.
Breathe slowly through the hold. Do not strain, clench your jaw, or try to survive the set by holding your breath.
Turning Every Set Into a Max Hold
Wall sits burn quickly, but every set does not need to be a personal record. Max-effort holds can cause form breakdown and make recovery harder.
Most training sets should stop before your knees cave, your back shifts, or your breathing becomes forced.
How Long Should You Hold a Wall Sit?
Beginners can start with 10 to 30 seconds per set. The goal is not to suffer as long as possible. The goal is to hold the position with clean form, steady breathing, and good knee alignment.
Intermediate lifters can work toward 30 to 60 seconds per set. Once you can hold 60 seconds with good form, you can make the exercise harder by going slightly lower, adding another set, using a band, or holding light weight.
Advanced lifters can use 45 to 90 seconds per set or choose harder variations. However, longer is not always better. For strength-focused training, a loaded 45-second wall sit may be more useful than a sloppy 2-minute hold.
A simple progression rule is to add 5 to 10 seconds per set each week until you can hold about 60 seconds. After that, progress with load, bands, or more challenging variations instead of only chasing longer holds.
Wall Sit Exercise Progressions and Regressions
Beginner Regression: High Wall Sit
The high wall sit is the best starting point for most beginners. Instead of lowering until your thighs are parallel to the floor, stay higher with less knee bend.
This reduces the intensity while still training your quads, glutes, and core to hold a stable position.
Beginner Regression: Short Holds
Short holds are useful when your legs fatigue quickly. Start with 10 to 15 seconds, stand up, rest, and repeat.
Over time, build toward 20, 30, and 45 seconds without letting your knees cave or your breathing become strained.
Progression: Longer Standard Wall Sit
The simplest progression is adding time. Once 20 seconds feels solid, try 25 or 30 seconds. When 30 seconds feels controlled, work toward 45 to 60 seconds.
Do not increase hold time if your form is already breaking.
Progression: Banded Wall Sit
Place a light resistance band above your knees and hold the wall sit while gently pressing your knees outward. This adds extra work for the glutes and hip stabilizers.
It is a good option if your knees tend to cave inward during squats or lunges.
Progression: Weighted Wall Sit
Hold a dumbbell, kettlebell, or weight plate at your chest. Keep the load moderate and your back against the wall.
Weighted wall sits are best after you can hold a clean bodyweight wall sit for about 60 seconds.
Progression: Wall Sit March
From the wall sit position, slowly lift one foot a few inches, set it down, and repeat on the other side. Keep the hips level and the knees controlled.
This variation adds a balance and core challenge, so use shorter sets at first.
Progression: Single-Leg Wall Sit
The single-leg wall sit is an advanced variation. One leg supports most of your body weight while the other leg stays lifted.
Use this only after you have strong control with standard and marching wall sits. Keep the hold short and stop before your knee alignment breaks.
How to Add Wall Sits to a Leg Workout
The wall sit exercise works best as an accessory, finisher, or no-equipment lower-body endurance drill. It should not replace squats, lunges, step-ups, hinges, or calf work if your goal is complete leg strength.
Use wall sits after your main lower-body exercises. For example, perform squats or split squats first, then use wall sits near the end of the session. This lets you train dynamic strength before adding static endurance work.
For general fitness, use wall sits 2 to 3 times per week. Leave at least one day between hard lower-body sessions if your legs are still sore or your performance drops.
Sample Wall Sit Exercise Workout
Beginner No-Equipment Leg Workout
Use this workout 2 to 3 times per week. Rest 60 to 90 seconds between sets. Keep the effort around RPE 6 to 8, where the work feels challenging but controlled.
| Exercise | Sets | Reps or Time | Notes |
|---|---|---|---|
| Bodyweight Squat | 2 to 3 | 8 to 12 reps | Move through a comfortable range |
| Glute Bridge | 2 to 3 | 10 to 15 reps | Squeeze the glutes at the top |
| Wall Sit Exercise | 2 to 3 | 15 to 30 seconds | Start higher if needed |
| Standing Calf Raise | 2 to 3 | 12 to 15 reps | Use slow control |
Progress by adding 5 to 10 seconds to each wall sit set, adding one extra set, or lowering slightly deeper once your form feels consistent.
Wall Sit Finisher for Leg Day
Use this after your main leg workout when you want extra quad endurance.
| Round | Exercise | Work | Rest |
|---|---|---|---|
| 1 | Wall Sit Exercise | 30 to 45 seconds | 60 seconds |
| 2 | Wall Sit Exercise | 30 to 45 seconds | 60 seconds |
| 3 | Wall Sit Exercise | 30 to 60 seconds | Done |
Stop the set if your knees cave inward, your back pulls off the wall, you feel sharp pain, or you cannot breathe steadily.
Wall Sit vs Squat: Can Wall Sits Replace Squats?
Wall sits and squats are useful, but they are not the same exercise.
A squat trains your hips, knees, and ankles through movement. You lower, control the bottom position, and stand back up. This trains strength through a larger range of motion.
A wall sit trains a static position. Your muscles work hard, but your joints do not move much. That makes it useful for endurance and position control, but less complete than squats for overall lower-body strength.
The American Council on Exercise notes that wall sits involve a static contraction and do not train the full lengthening and shortening action used in dynamic squatting.
For best results, use wall sits with squats, lunges, step-ups, hinges, and calf exercises rather than using them as your only leg movement.
Safety Tips for the Wall Sit Exercise
Wall sits should feel like muscular effort in your thighs and hips, not sharp joint pain. Mild burning in the quads is normal. Sharp pain, numbness, dizziness, chest pain, or unusual symptoms are not normal.
Keep breathing throughout the hold. Do not strain or hold your breath. This is especially important for people with high blood pressure or heart-related concerns.
If you have knee pain, a recent lower-body injury, uncontrolled high blood pressure, a heart condition, or you are returning to exercise after a medical event, get guidance from a qualified healthcare professional before using hard wall sit holds.
FAQs About the Wall Sit Exercise
What muscles does the wall sit exercise work?
The wall sit exercise mainly works the quadriceps. It also trains the glutes, hamstrings, calves, and core because those muscles help stabilize your hips, knees, feet, and torso during the hold.
How long should I hold a wall sit?
Beginners can start with 10 to 30 seconds. Intermediate lifters can work toward 30 to 60 seconds. Advanced lifters may use 45 to 90 seconds or add load, but only if form stays clean.
Are wall sits good for beginners?
Yes, wall sits can be good for beginners because they are simple and require no equipment. The key is to start with a higher position and shorter holds instead of forcing a deep wall sit right away.
Are wall sits bad for your knees?
Wall sits are not automatically bad for your knees, but poor form or too much intensity can cause problems. Keep your knees tracking with your toes, avoid collapsing inward, and use a shallower hold if a deep position feels uncomfortable.
Can wall sits replace squats?
No. Wall sits are useful, but they do not replace squats. Squats train movement through a larger range of motion, while wall sits train a static hold. Use both if your goal is stronger, more complete legs.
Should I do wall sits every day?
Most people do not need daily wall sits. Two to three times per week is enough for general strength endurance. If your legs are sore, your knees feel irritated, or your form is getting worse, take a rest day.
How do I make wall sits harder?
Make wall sits harder by holding longer, sitting slightly lower, adding a resistance band, holding a dumbbell or plate, using a wall sit march, or trying a single-leg wall sit. Add difficulty gradually instead of jumping straight to advanced variations.
Conclusion
The wall sit exercise is a simple but effective way to build quad endurance, practice lower-body control, and add a no-equipment challenge to your workouts. Start with a position you can hold cleanly, breathe steadily, and progress by adding time before adding load.
Use wall sits as part of a balanced leg program with squats, lunges, step-ups, hip hinges, and calf work. Done correctly, they can be a practical tool for stronger, more stable legs.
This content is for informational purposes only and is not a substitute for professional medical advice.