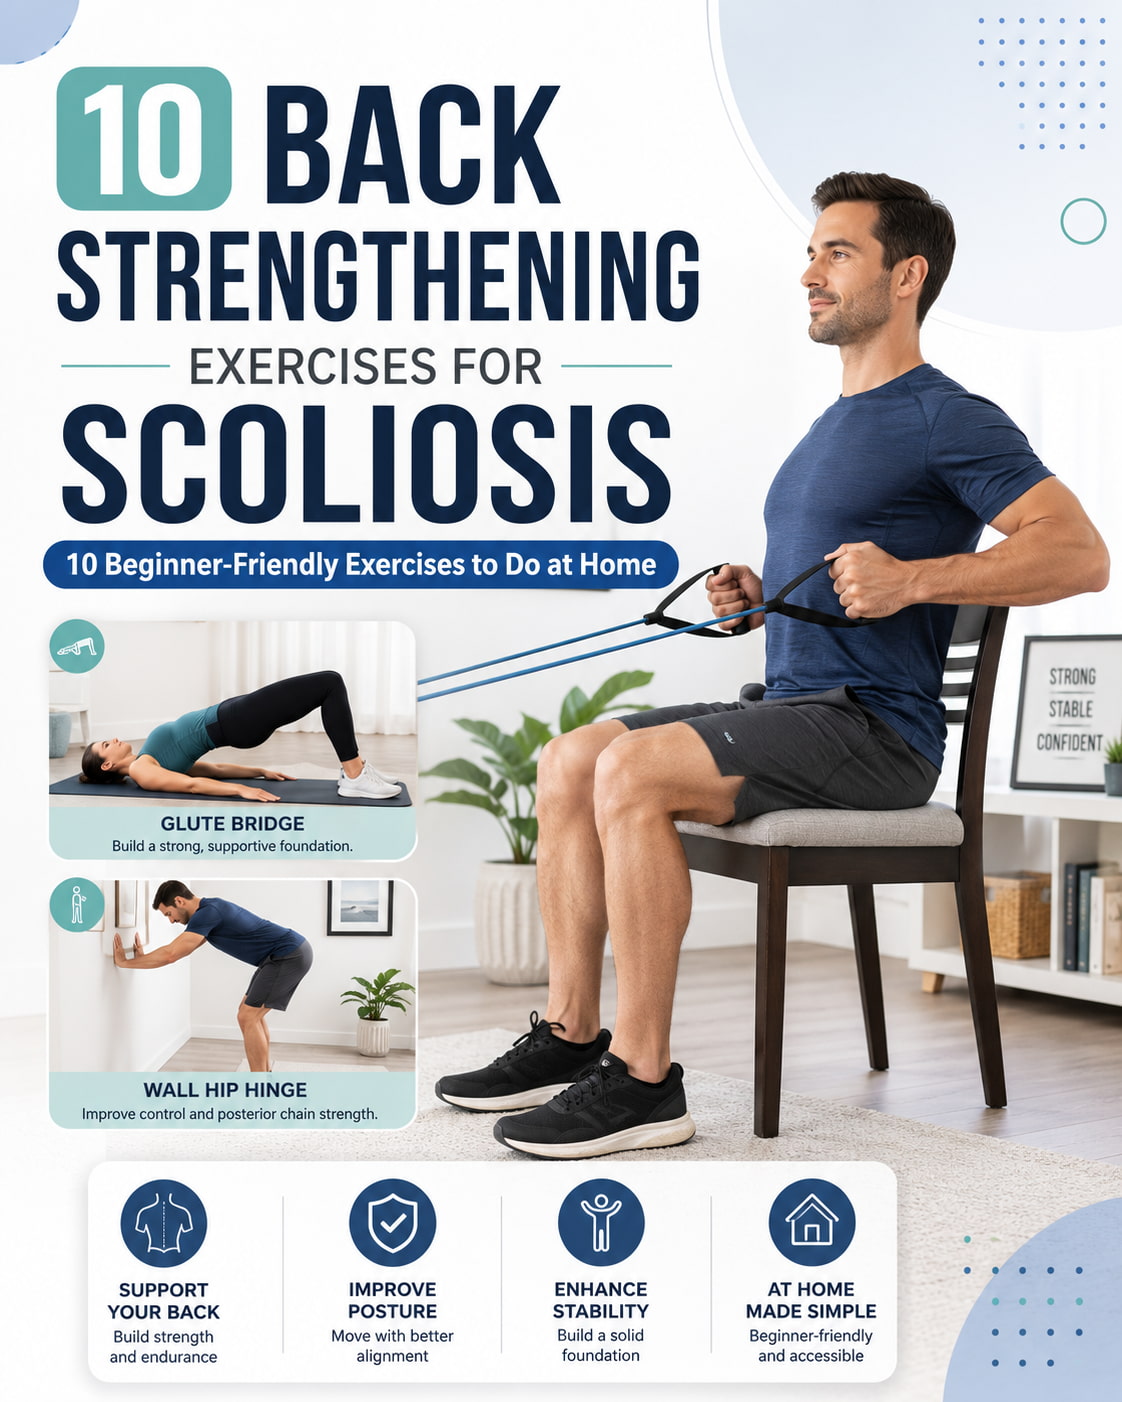
Back strengthening exercises for scoliosis can help build trunk stability, muscular endurance, hip strength, and better control during daily movement. They cannot straighten every spinal curve, cure scoliosis, or replace monitoring, bracing, surgery, or individualized physical therapy.
This guide covers 10 beginner-friendly exercises you can perform at home with a mat, chair, and resistance band. You will learn proper form, common mistakes, easier and harder variations, and how to combine the movements into a practical workout.
Can Back Strengthening Exercises Help Scoliosis?
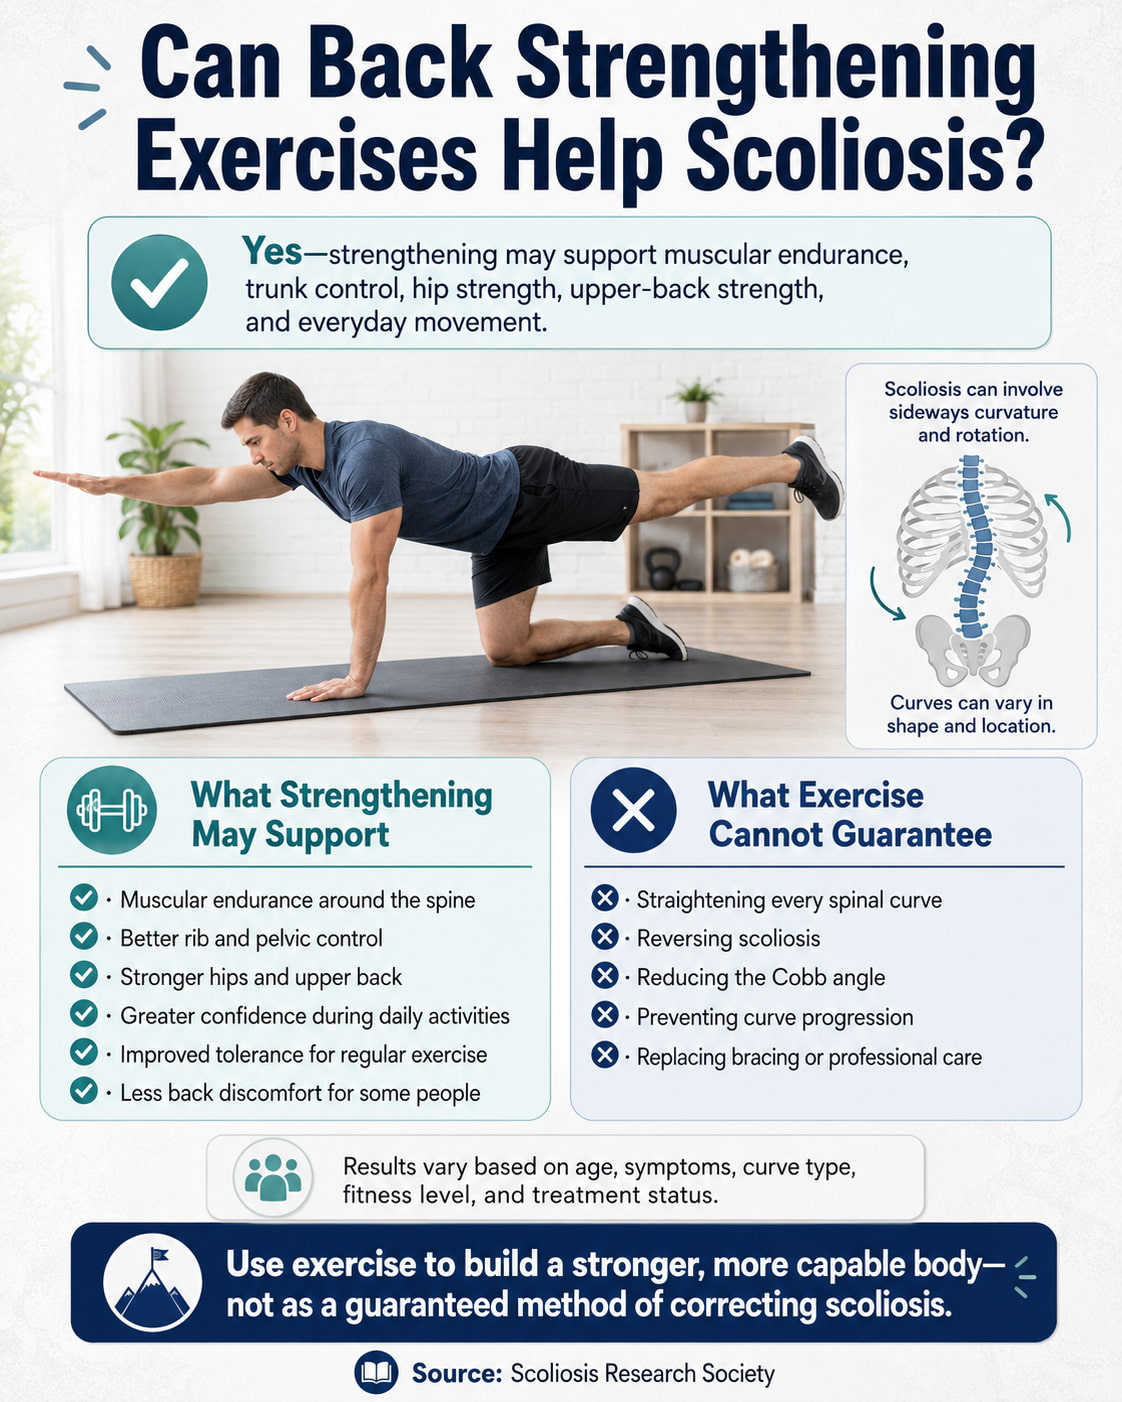
Scoliosis is a three-dimensional condition that can involve both sideways curvature and rotation of the vertebrae and rib cage. Because curve patterns differ, two people with scoliosis may not need the same corrective exercises.
General strengthening may help support:
- Trunk and back muscular endurance
- Control of the ribs and pelvis
- Hip and upper-back strength
- Balance and movement confidence
- Tolerance for exercise and daily activities
- Management of back discomfort in some people
The Scoliosis Research Society states that exercise can play a role alongside conventional treatment, but scoliosis curves generally cannot be reversed without surgery.
Evidence should also be interpreted carefully. A 2024 Cochrane review found that the effects of therapeutic exercise in adolescent idiopathic scoliosis remain uncertain for several important outcomes because the available studies vary in quality and design.
Exercise should therefore be used to build a stronger, more capable body—not as a guaranteed method of reducing a Cobb angle or preventing progression.
General Strengthening vs. Scoliosis-Specific Exercises
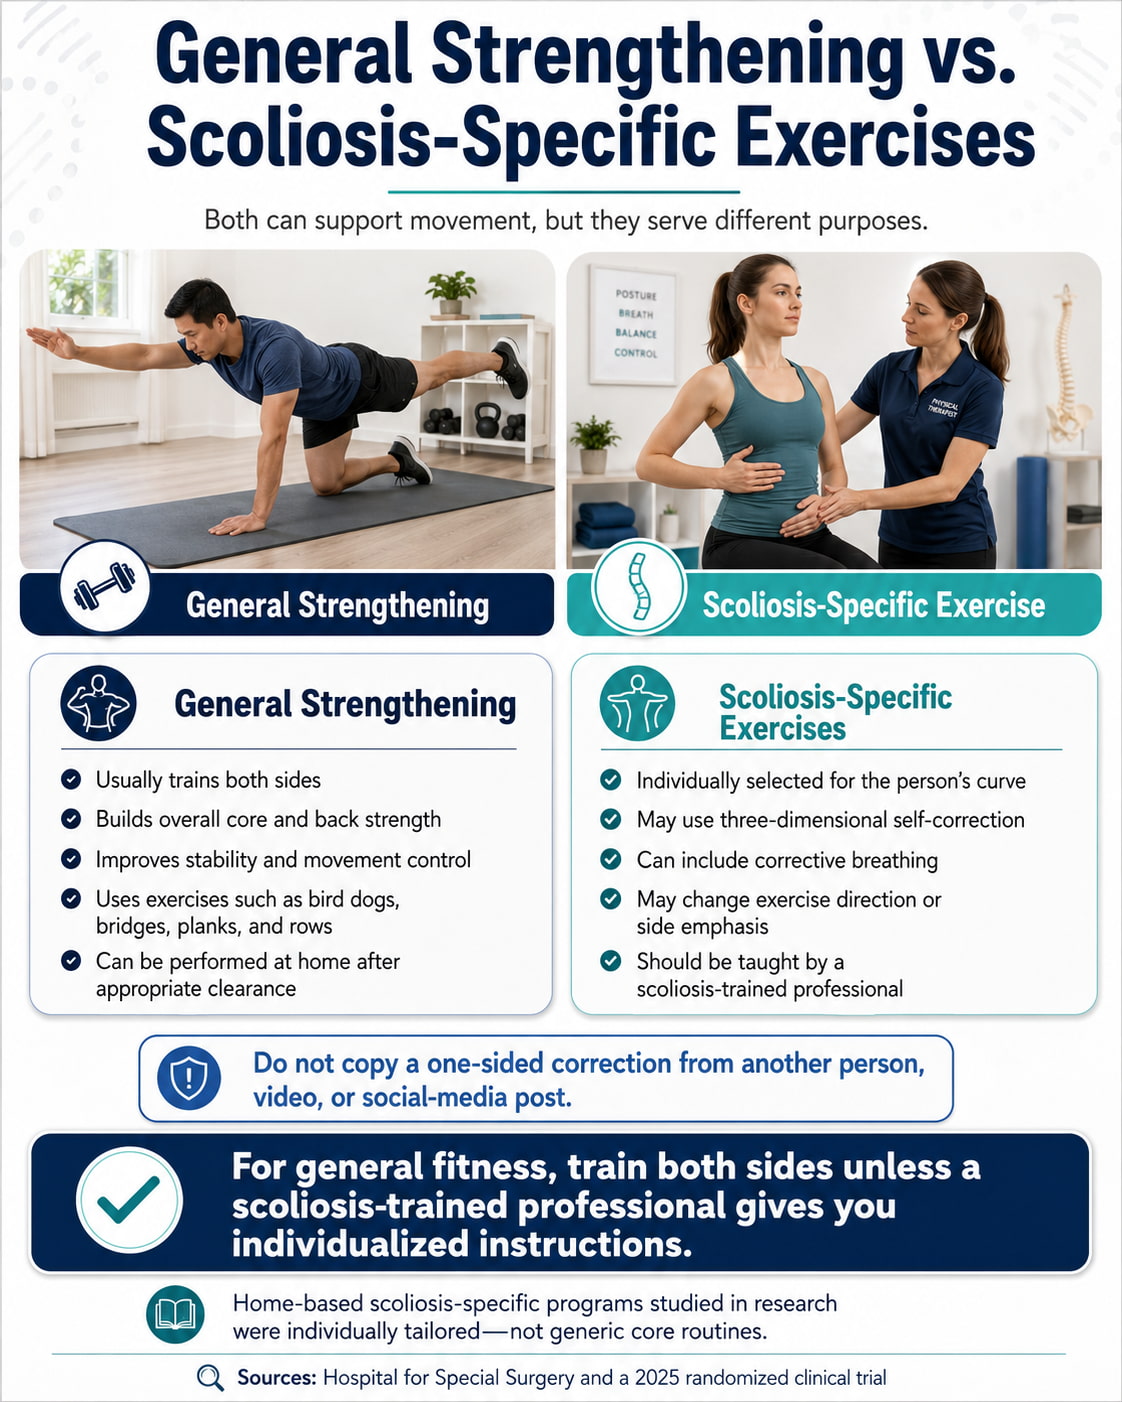
The exercises below are general strengthening exercises. Most train both sides of the body and focus on overall strength, endurance, and movement control.
Physiotherapeutic scoliosis-specific exercises, or PSSE, are different. Approaches such as the Schroth method may use individualized positioning, three-dimensional self-correction, strengthening, and corrective breathing based on the person’s curve pattern.
The Hospital for Special Surgery guide to the Schroth method explains that a trained physical therapist selects exercises according to the individual’s spinal shape and needs.
A 2025 randomized trial found benefits from a digitally supported home PSSE program for children and adolescents, but every participant followed individually tailored scoliosis-specific exercises. The findings do not show that a generic core routine can correct every curve.
Do not copy a one-sided correction from another person or an online video. Train both sides unless a scoliosis-trained professional has assessed your curve and prescribed a different approach.
Back Strengthening Exercises for Scoliosis at a Glance
| Exercise | Main training goal | Starting target |
|---|---|---|
| Abdominal bracing | Basic trunk control | 5–8 holds |
| Tabletop abdominal press | Isometric core strength | 5–8 holds |
| Dead bug | Core control with limb movement | 6–10 per side |
| Bird dog | Back, hip, and trunk stability | 6–10 per side |
| Glute bridge | Glute and posterior-chain strength | 8–12 reps |
| Modified front plank | Whole-core endurance | 10–20 seconds |
| Modified side plank | Lateral trunk strength | 10–20 seconds per side |
| Pallof press | Anti-rotation strength | 8–12 per side |
| Resistance-band row | Upper-back strength | 10–15 reps |
| Wall-supported hip hinge | Hip strength and lifting mechanics | 8–12 reps |
Before Starting the Exercises
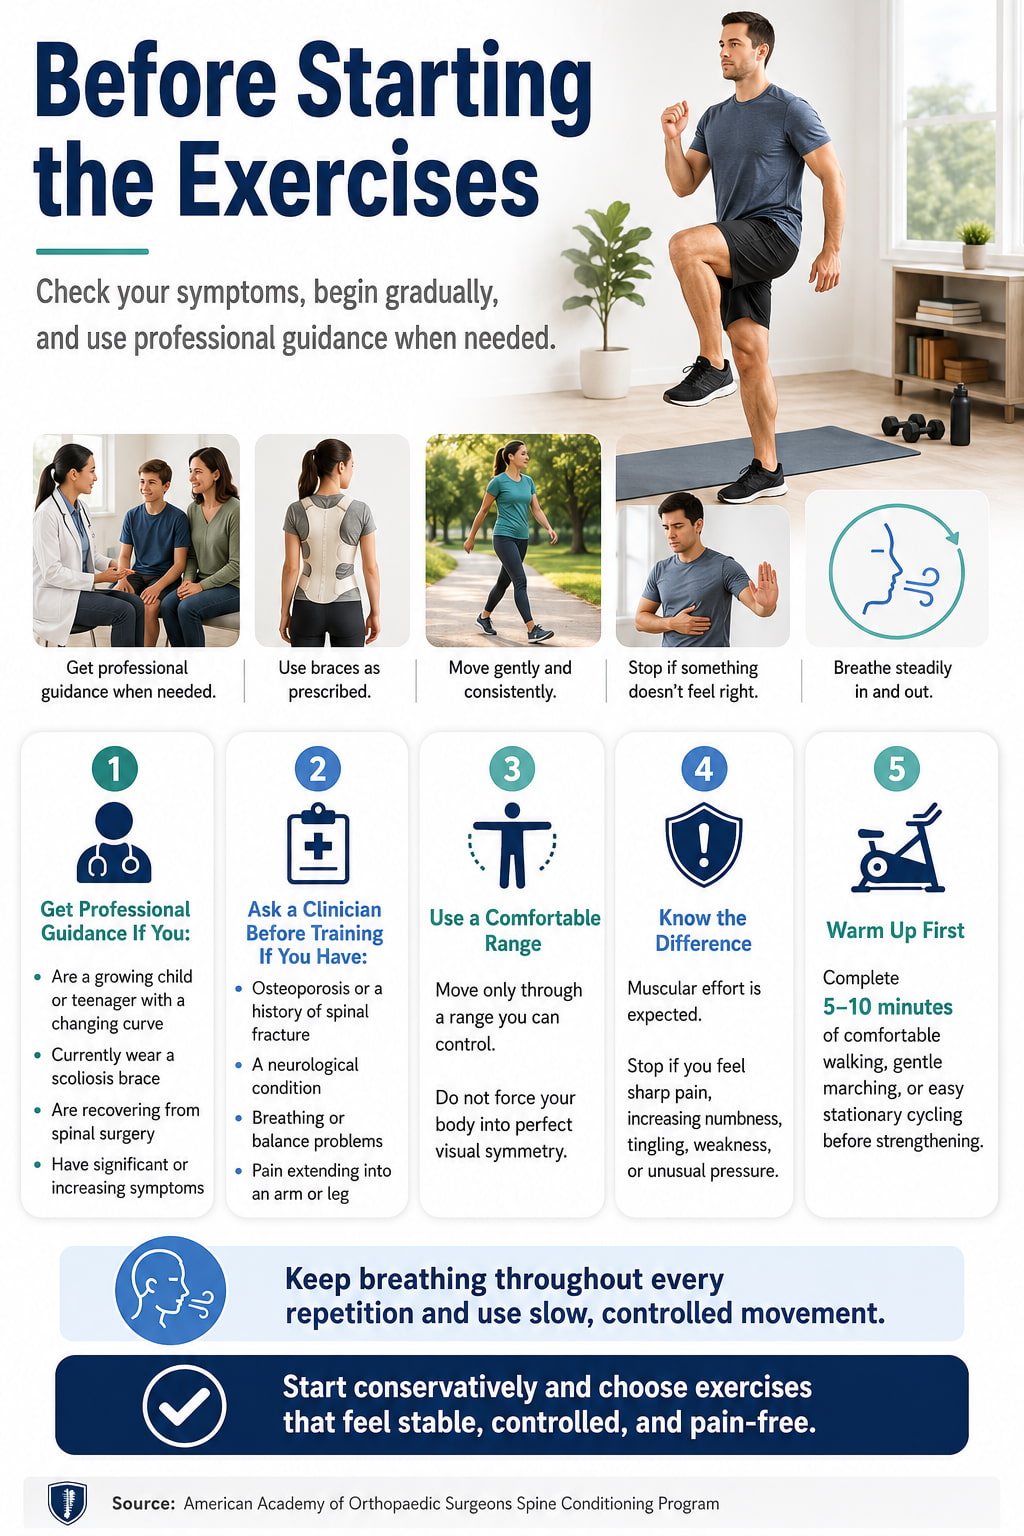
Speak with a doctor or physical therapist before starting if you:
- Are a growing child or teenager with a changing curve
- Wear a scoliosis brace
- Recently had spinal surgery
- Have osteoporosis or a previous spinal fracture
- Have significant or increasing back pain
- Experience numbness, weakness, balance changes, or pain traveling into a limb
- Have been given activity restrictions
Postoperative exercises should come from the surgical team because movement limits and recovery timelines vary.
Warm up with 5–10 minutes of comfortable walking, marching, or easy stationary cycling. The AAOS Spine Conditioning Program recommends low-impact activity before strengthening and advises against exercising through pain.
Use a comfortable range, breathe throughout every repetition, and avoid forcing your body into perfect visual symmetry.
10 Back Strengthening Exercises for Scoliosis at Home
These 10 back strengthening exercises for scoliosis can help improve core stability, upper-back strength, hip control, and everyday movement at home. Perform each exercise slowly, train both sides unless professionally advised otherwise, and stop if you feel sharp pain or unusual symptoms.
1. Abdominal Bracing
Abdominal bracing teaches you to create gentle tension around the trunk without bending, twisting, or holding your breath. It is a useful starting point before progressing to more demanding core exercises.
Best for: Beginners learning how to stabilize the trunk and maintain a controlled rib-and-pelvis position.
Muscles worked: Transverse abdominis, internal and external obliques, rectus abdominis, multifidus, pelvic-floor muscles, and other deep trunk stabilizers.
Equipment needed: An exercise mat or firm, comfortable floor.
Why it stands out: Bracing provides a low-impact way to practice trunk control before adding arm movement, leg movement, resistance, or longer holds.
Suggested sets and reps: Perform 1–3 sets of 5–8 controlled holds.
Rest: Rest for approximately 20–30 seconds between sets.
How to do it:
- Lie on your back with your knees bent and feet flat on the floor.
- Allow your spine to rest in a comfortable position rather than forcing it completely flat.
- Inhale gently through your nose.
- Exhale and tighten the muscles around your midsection as though preparing for a light push against your stomach.
- Keep your ribs controlled without sucking your stomach in aggressively.
- Continue breathing while holding the tension.
- Relax completely before repeating.
Common mistakes: Holding the breath, pushing the stomach outward forcefully, flattening the lower back as hard as possible, squeezing at maximum effort, or tensing the neck and shoulders.
Expert tip: Use approximately 20–30 percent of your maximum effort. The goal is steady control, not the hardest possible contraction.
2. Tabletop Abdominal Press
The tabletop abdominal press creates an isometric core contraction by pressing the hands and thighs against each other while the spine remains still.
Best for: Building core tension without repeated spinal bending or twisting.
Muscles worked: Rectus abdominis, transverse abdominis, obliques, hip flexors, and deep spinal stabilizers.
Equipment needed: An exercise mat.
Why it stands out: The exercise lets you adjust the intensity easily. Pressing more gently makes it accessible, while longer holds provide a greater endurance challenge.
Suggested sets and reps: Perform 1–3 sets of 5–8 holds lasting 5–15 seconds.
Rest: Rest for 20–40 seconds between sets.
How to do it:
- Lie on your back with your knees bent and feet flat.
- Brace your abdomen gently.
- Raise one leg until the hip and knee are each bent to approximately 90 degrees.
- Place the same-side hand against the front of the thigh.
- Press the hand and thigh firmly into each other without allowing either one to move.
- Maintain a comfortable spinal position and continue breathing.
- Lower the leg and repeat on the opposite side.
- Progress to pressing both hands into both thighs when you can maintain control.
Common mistakes: Pulling the knees too close to the chest, arching the back, pushing with maximum force, lifting the head, or holding the breath.
Expert tip: Imagine narrowing the space between your lower ribs and pelvis without curling your shoulders off the floor.
The Hospital for Special Surgery core-exercise guide includes a similar isometric thigh press and emphasizes preventing the back from arching away from the floor.
3. Dead Bug
The dead bug strengthens the core while teaching the trunk to remain controlled as the arms and legs move. It is especially useful for practicing the stability required during walking, carrying, and other daily movements.
Best for: Improving coordination between the limbs and trunk without placing the spine under heavy external load.
Muscles worked: Transverse abdominis, rectus abdominis, obliques, hip flexors, multifidus, and shoulder stabilizers.
Equipment needed: An exercise mat.
Why it stands out: The difficulty can be adjusted through the distance the arms and legs travel. A short range is challenging enough for many beginners.
Suggested sets and reps: Perform 1–3 sets of 6–10 repetitions per side.
Rest: Rest for 30–60 seconds between sets.
How to do it:
- Lie on your back with your hips and knees bent to approximately 90 degrees.
- Extend your arms toward the ceiling.
- Brace your abdomen and keep your ribs from flaring upward.
- Slowly lower one heel toward the floor while maintaining trunk control.
- Return to the starting position and switch legs.
- Progress by lowering the opposite arm and leg at the same time.
- Stop the movement before your back arches or your ribs lift.
- Move slowly and breathe out during each extension.
Common mistakes: Extending the limbs farther than you can control, arching the lower back, moving quickly, holding the breath, or pulling the knees excessively close to the chest.
Expert tip: A smaller range performed without spinal movement is more effective than a large range performed with an uncontrolled arch.
4. Bird Dog
The bird dog trains the back, hips, shoulders, and abdominals to work together while the trunk resists rotation.
Best for: Developing balance, spinal control, and coordination between opposite sides of the body.
Muscles worked: Erector spinae, multifidus, gluteus maximus, gluteus medius, abdominals, rear shoulders, and shoulder-blade stabilizers.
Equipment needed: An exercise mat.
Why it stands out: Bird dogs train both posterior-chain strength and anti-rotation control using only body weight.
Suggested sets and reps: Perform 1–3 sets of 6–10 repetitions per side, holding each repetition for 2–5 seconds.
Rest: Rest for 30–60 seconds between sets.
How to do it:
- Begin on your hands and knees with your hands under your shoulders and knees under your hips.
- Brace your abdomen gently.
- Keep your neck in line with the rest of your spine.
- Slide one leg backward until the toes remain lightly on the floor.
- Lift the leg only as high as you can without arching or rotating.
- Reach the opposite arm forward.
- Hold briefly while keeping the pelvis level.
- Return slowly and repeat on the opposite side.
Common mistakes: Lifting the leg too high, opening the hip, twisting the torso, shrugging the shoulder, looking forward, or moving too quickly.
Expert tip: Think about reaching the hand and heel away from each other instead of lifting them toward the ceiling.
5. Glute Bridge
The glute bridge strengthens the hips and posterior chain while teaching the glutes to contribute to hip extension. Stronger hips can support squatting, walking, stair climbing, and lifting tasks.
Best for: People who need a low-equipment way to strengthen the glutes and back of the hips.
Muscles worked: Gluteus maximus, hamstrings, abdominals, spinal extensors, and hip stabilizers.
Equipment needed: An exercise mat; an optional resistance band.
Why it stands out: The floor provides support while the hips and trunk learn to work together.
Suggested sets and reps: Perform 1–3 sets of 8–12 repetitions.
Rest: Rest for 30–60 seconds between sets.
How to do it:
- Lie on your back with your knees bent and feet flat, approximately hip-width apart.
- Position your feet close enough that you can press through the entire foot.
- Brace your abdomen gently.
- Press through your feet and squeeze your glutes.
- Raise your hips without forcing the lower back into a large arch.
- Pause when your body forms a comfortable line from the shoulders to the knees.
- Lower slowly until the pelvis returns to the floor.
- Reset your brace before the next repetition.
Common mistakes: Overarching at the top, pushing mainly through the toes, placing the feet too far away, allowing the knees to collapse inward, or lifting higher than the available hip motion allows.
Expert tip: Finish the movement by squeezing the glutes rather than pushing the ribs upward.
6. Modified Front Plank
A modified front plank develops whole-trunk endurance while the body remains in a stable, supported position.
Best for: Improving the ability to maintain trunk tension during standing, walking, carrying, and resistance exercises.
Muscles worked: Rectus abdominis, transverse abdominis, obliques, spinal stabilizers, glutes, quadriceps, chest, and shoulder muscles.
Equipment needed: An exercise mat, bench, countertop, or wall.
Why it stands out: The plank can be adjusted from a standing wall position to a full floor plank, making it suitable for a wide range of strength levels.
Suggested sets and reps: Perform 2–4 holds of 10–30 seconds.
Rest: Rest for 30–60 seconds between holds.
How to do it:
- Place your forearms on a wall, countertop, bench, or floor.
- Position your elbows beneath your shoulders.
- Step back or lower your knees until your body forms a straight, comfortable line.
- Brace your abdomen and squeeze your glutes lightly.
- Keep your ribs controlled and neck relaxed.
- Breathe slowly without allowing the hips to sag or rise.
- End the hold as soon as your alignment begins to change.
Common mistakes: Holding too long, sagging through the lower back, lifting the hips excessively, pushing the head forward, shrugging the shoulders, or holding the breath.
Expert tip: Choose an angle that lets you finish every hold with the same posture you had at the beginning.
7. Modified Side Plank
The modified side plank strengthens the muscles along the side of the trunk and hips. These muscles help control side bending and pelvic movement.
Best for: Improving lateral trunk endurance and side-to-side stability.
Muscles worked: Internal and external obliques, quadratus lumborum, transverse abdominis, gluteus medius, gluteus minimus, and shoulder stabilizers.
Equipment needed: An exercise mat or padded surface.
Why it stands out: Side planks train muscles that are not emphasized as strongly during front planks and bridges.
Suggested sets and reps: Perform 1–3 holds of 10–25 seconds on each side.
Rest: Rest for 30–60 seconds between sides.
How to do it:
- Lie on one side with your knees bent and legs stacked.
- Place your elbow directly beneath your shoulder.
- Brace your abdomen and gently press the forearm into the floor.
- Lift your hips until the shoulders, hips, and knees form a comfortable line.
- Keep your chest facing forward rather than rotating toward the floor.
- Breathe normally and maintain the position.
- Lower with control and repeat on the opposite side.
Common mistakes: Placing the elbow too far from the shoulder, rolling the chest forward, allowing the hips to sag, pushing through a painful shoulder, or holding one side much longer without professional direction.
Expert tip: In a general strengthening routine, train both sides. Do not assume that everyone with scoliosis should perform a side plank only on the convex or concave side.
8. Pallof Press
The Pallof press is an anti-rotation exercise. The band pulls the body toward the anchor point while the trunk muscles work to prevent unwanted turning.
Best for: Building rotational control during standing and everyday tasks.
Muscles worked: Obliques, transverse abdominis, rectus abdominis, spinal stabilizers, glutes, shoulders, and upper-back muscles.
Equipment needed: A light resistance band and a secure anchor at chest height.
Why it stands out: It strengthens the core without requiring repeated spinal rotation.
Suggested sets and reps: Perform 1–3 sets of 8–12 repetitions in each direction.
Rest: Rest for 30–60 seconds between sets.
How to do it:
- Secure a resistance band to a stable anchor at approximately chest height.
- Stand sideways to the anchor and hold the band against the center of your chest.
- Position your feet approximately hip-width apart with your knees softly bent.
- Brace your abdomen and keep your shoulders and hips facing forward.
- Press your hands directly away from your chest.
- Pause without allowing the band to rotate or pull your body sideways.
- Return your hands slowly to your chest.
- Complete the repetitions, turn around, and train the opposite direction.
Common mistakes: Using too much resistance, rotating toward the anchor, leaning away from the band, locking the knees, shrugging, or pressing too quickly.
Expert tip: The band should challenge your control without changing your posture. Move closer to the anchor if you cannot stay centered.
Exercise variations: Standing Pallof press, split-stance press, half-kneeling press, Pallof hold, or Pallof press with a small step.
Easier variation: Reduce band tension and keep the hands closer to the chest.
Harder variation: Hold the arms fully extended for 5–10 seconds or perform the press from a half-kneeling position.
The American Council on Exercise anti-rotation press guide emphasizes maintaining a tall back while pressing the resistance forward without allowing the torso to rotate.
9. Seated Resistance-Band Row
A seated band row strengthens the muscles that control the shoulder blades and upper back. These muscles support pulling, carrying, and upright upper-body control.
Best for: Building upper-back strength at home without heavy weights.
Muscles worked: Rhomboids, middle trapezius, lower trapezius, latissimus dorsi, rear deltoids, biceps, and forearm muscles.
Equipment needed: A resistance band and a secure low anchor.
Why it stands out: The seated position reduces balance demands, allowing the reader to focus on shoulder-blade control and symmetrical pulling.
Suggested sets and reps: Perform 1–3 sets of 10–15 repetitions.
Rest: Rest for 45–75 seconds between sets.
How to do it:
- Secure the band to a stable anchor at approximately waist or lower-chest height.
- Sit tall on a firm chair with both feet supported.
- Hold one end of the band in each hand.
- Begin with the arms extended and shoulders relaxed.
- Brace your abdomen lightly.
- Pull your elbows backward while drawing the shoulder blades gently toward each other.
- Stop before the shoulders roll forward or the torso leans back.
- Return the arms slowly to the starting position.
Common mistakes: Leaning backward, pulling the shoulders toward the ears, flaring the ribs, jerking the band, twisting toward one arm, or forcing the shoulder blades together aggressively.
Expert tip: Think about moving the elbows behind you while keeping the front of the chest relaxed and the ribs stacked over the pelvis.
Exercise variations: Standing band row, seated row, one-arm row, high row, or row with an isometric hold.
Easier variation: Sit closer to the anchor or use a lighter band.
Harder variation: Perform alternating one-arm rows while preventing the torso from rotating.
The ACE seated-row exercise library identifies the resistance-band row as a beginner movement for the arms and back.
10. Wall-Supported Hip Hinge
The hip hinge teaches you to bend through the hips while maintaining a controlled trunk. It is an important movement pattern for picking up objects and progressing toward exercises such as Romanian deadlifts.
Best for: Learning safer lifting mechanics and strengthening the glutes and hamstrings.
Muscles worked: Gluteus maximus, hamstrings, adductors, erector spinae, multifidus, and abdominal stabilizers.
Equipment needed: A wall and an optional broomstick.
Why it stands out: The wall provides a clear target for the hips, making it easier to distinguish a hip hinge from rounding or squatting.
Suggested sets and reps: Perform 1–3 sets of 8–12 repetitions.
Rest: Rest for 45–75 seconds between sets.
How to do it:
- Stand with your back toward a wall and your heels approximately 6–10 inches away.
- Place your feet about hip-width apart.
- Soften your knees and brace your abdomen.
- Push your hips backward toward the wall.
- Keep your trunk long and your weight balanced through the feet.
- Touch the wall lightly with your hips.
- Press through your feet and squeeze your glutes to stand.
- Move farther from the wall only when you can maintain control.
Common mistakes: Bending mainly through the knees, rounding the back, lifting the chin, shifting onto the toes, forcing the chest upright, or moving farther than your hip mobility allows.
Expert tip: Imagine closing a car door with your hips while keeping the object in your hands close to your body.
Exercise variations: Dowel hip hinge, wall hinge, band-resisted hinge, light kettlebell hinge, or Romanian deadlift.
Easier variation: Stand closer to the wall and reduce the range.
Harder variation: Hold a light dumbbell or backpack close to the body while maintaining the same controlled movement.
The ACE hip-hinge guidance recommends pushing the hips backward while maintaining a neutral spine, then returning to standing by using the glutes.
Beginner Back Strengthening Workout for Scoliosis
You do not need to perform all ten exercises during every workout. Start with five or six movements that you can complete comfortably and with consistent control.
| Exercise | Sets and reps | Rest |
|---|---|---|
| Abdominal bracing | 2 sets of 5 holds | 20–30 seconds |
| Dead bug heel tap | 2 sets of 6 per side | 30–45 seconds |
| Bird dog | 2 sets of 6 per side | 45 seconds |
| Glute bridge | 2 sets of 8–10 | 45 seconds |
| Modified side plank | 2 holds of 10–15 seconds per side | 45 seconds |
| Seated band row | 2 sets of 10–12 | 45–60 seconds |
Perform the routine two or three times per week with at least one recovery day between sessions. Use an effort level of approximately 4–6 out of 10. You should finish each set feeling that you could have completed another two or three good repetitions.
Daily gentle movement may be appropriate, but demanding strength sessions do not need to be performed every day. Recovery allows the muscles to adapt.
How to Progress Safely
Progress an exercise after you can complete every repetition with steady breathing, controlled alignment, and no worsening symptoms during or after the session.
Change only one training variable at a time. For example, add one or two repetitions, extend a hold by five seconds, use a slightly stronger band, or progress to a more difficult variation.
Do not increase the resistance, range, repetitions, and frequency simultaneously. Small changes make it easier to determine how your body responds.
A useful progression order is:
Master the starting position, improve movement control, increase repetitions, extend the hold or slow the tempo, and only then add more resistance.
Return to the easier version when fatigue causes twisting, arching, breath-holding, shaking, or loss of balance.
Common Mistakes to Avoid
Trying to Force Perfect Symmetry
Scoliosis may produce visible differences in shoulder height, rib position, waist shape, or hip position. Do not aggressively pull or twist yourself into a perfectly symmetrical posture. Aim for a comfortable, controlled position.
Copying Someone Else’s One-Sided Routine
The correct direction for a scoliosis-specific correction depends on the individual curve. A movement prescribed for another person may not match your spine.
Training Only the Lower Back
Back support comes from more than the spinal extensors. A complete routine should also strengthen the abdominals, glutes, lateral hips, obliques, and upper back.
Using Excessive Resistance
A stronger band or heavier weight is not automatically better. The load is too high when it causes leaning, twisting, jerking, breath-holding, or a reduced range of control.
Holding Planks Too Long
Stop the hold when the hips begin to sag, rotate, or rise. Several high-quality 10- to 20-second holds are often more useful than one long, poorly controlled hold.
Ignoring Symptoms
Normal muscular effort is different from sharp pain, nerve symptoms, dizziness, chest pain, or unusual shortness of breath. Stop and obtain professional guidance when concerning symptoms occur.
What Does Research Say About Exercise for Scoliosis?
Research on scoliosis exercise continues to develop, but the quality and results of studies vary.
A 2024 Cochrane review concluded that therapeutic exercise may offer some benefits for adolescents with idiopathic scoliosis, but the evidence was not robust enough to support confident conclusions for several important outcomes.
A 2025 systematic review of core-stabilization exercise found possible benefits for mild-to-moderate adolescent idiopathic scoliosis. However, core training appeared less effective than three-dimensional scoliosis-specific exercise, and the authors highlighted small studies, inconsistent protocols, and limited follow-up.
These findings do not mean general strength training has no value. They mean that improving strength or comfort should not be confused with proving that a generic workout corrects the spinal curve.
When to Work With a Scoliosis Physical Therapist
Consider working with a scoliosis-trained physical therapist when you need help understanding your curve, selecting appropriate exercise directions, managing symptoms, exercising safely in a brace, or progressing beyond basic symmetrical strengthening.
The therapist may assess breathing mechanics, balance, spinal mobility, muscular endurance, posture, and movement during daily tasks. The Royal National Orthopaedic Hospital scoliosis physiotherapy service includes core strengthening, balance work, fitness advice, postural training, and curve-specific exercises within individualized care.
Children and teenagers should continue their scheduled clinical monitoring even when exercise feels helpful. Exercise should not be used as a reason to stop wearing a prescribed brace or miss follow-up imaging and appointments.
Frequently Asked Questions
Can back-strengthening exercises straighten scoliosis?
General back-strengthening exercises are not proven to straighten or cure scoliosis. They may strengthen the muscles supporting the spine, improve fitness, and help some people manage discomfort. Structural correction and curve management require individualized medical guidance.
Which side should I strengthen if I have scoliosis?
A general home-strength routine should normally train both sides. The direction of curve-specific exercise depends on the person’s unique spinal curve and should be determined by a clinician trained in scoliosis rehabilitation.
Do not assume that you should strengthen only the convex or concave side based on appearance alone.
Is a side plank good for scoliosis?
A modified side plank can strengthen the obliques, quadratus lumborum, hips, and shoulder stabilizers. For general conditioning, perform it on both sides. A professional may prescribe a different setup or side emphasis after evaluating your curve.
How often should I perform these exercises?
Two or three strength sessions per week is a practical starting point. Leave at least one recovery day between demanding sessions. A therapist-prescribed scoliosis-specific program may use a different frequency.
Can people with scoliosis lift weights?
Many people with scoliosis can participate in resistance training when the exercises are appropriate for their condition, experience, and symptoms. Start with manageable loads, learn controlled technique, and avoid sudden increases in training volume.
People with significant pain, progressive curves, osteoporosis, neurological symptoms, or a history of surgery should obtain individualized clearance.
Can I learn Schroth exercises from online videos?
Online resources may explain the general principles, but Schroth exercises are curve-specific. The breathing direction, body position, support placement, and corrective movement should ideally be taught by a trained scoliosis physical therapist before being practiced independently at home.
Should I exercise when scoliosis causes back pain?
Gentle movement may be comfortable for some people, but exercise should not be used to push through sharp, increasing, or unexplained pain. Reduce the range or difficulty when discomfort appears and seek professional evaluation when pain persists, interferes with daily activities, travels into a limb, or occurs with weakness or numbness.
Conclusion
The best back strengthening exercises for scoliosis train more than the lower back. Abdominal bracing, dead bugs, bird dogs, bridges, planks, Pallof presses, rows, and hip hinges work together to strengthen the trunk, hips, and upper back.
Start with easy variations, use controlled ranges, train both sides, and progress only when your breathing and alignment remain steady. General strengthening may support function and confidence, but individualized scoliosis-specific treatment should come from an appropriately trained professional.