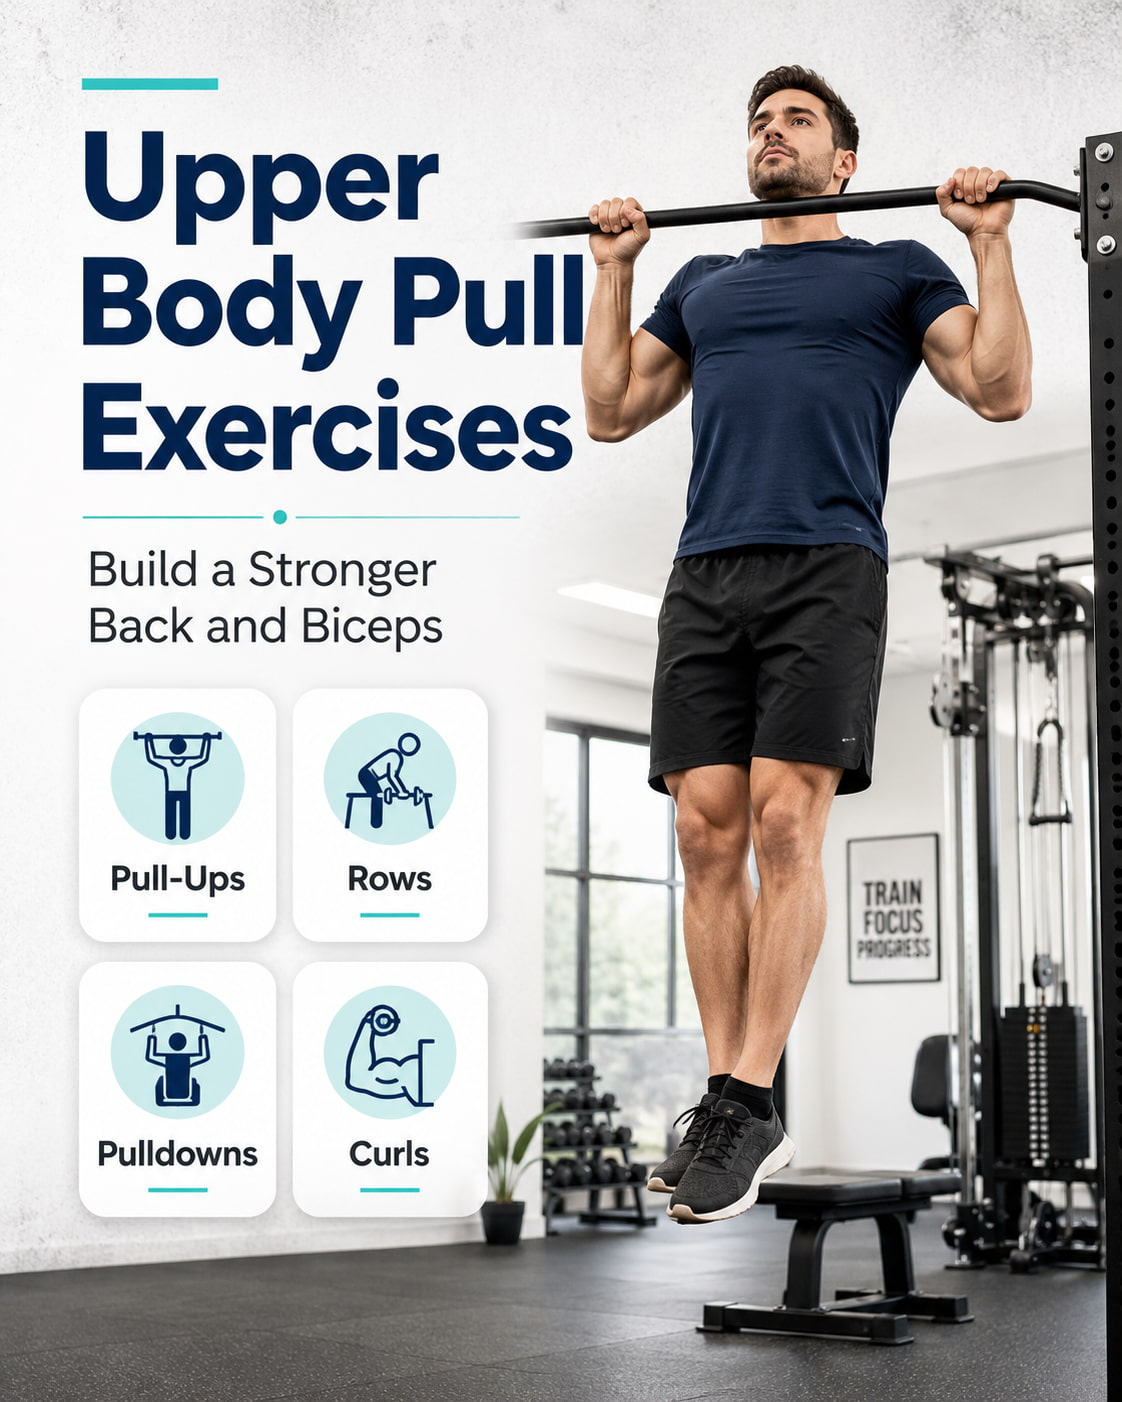
Upper body pull exercises train your back, biceps, rear shoulders, and grip by pulling resistance toward your body or pulling your body toward a bar. The best routine includes both vertical pulls, such as pull-ups and lat pulldowns, and horizontal rows, such as cable rows, dumbbell rows, and barbell rows.
In this guide, you will learn the best upper body pull exercises for building a stronger back and biceps, how to do each movement with better form, common mistakes to avoid, and how to combine them into a practical workout.
What Are Upper Body Pull Exercises
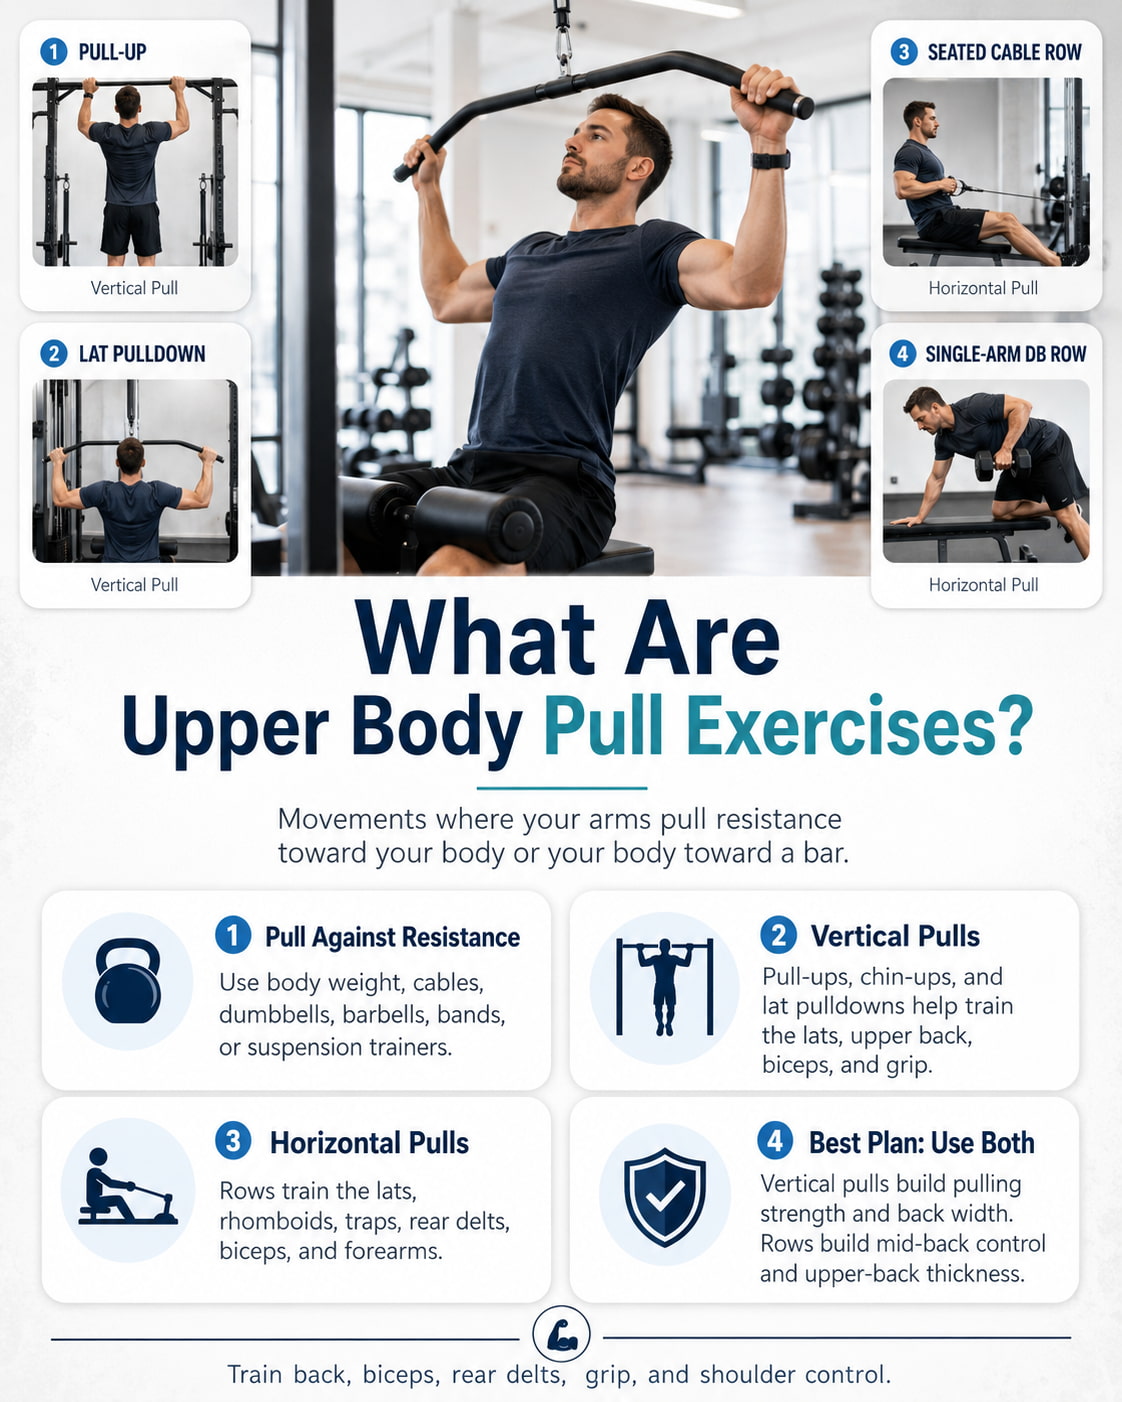
Upper body pull exercises are movements where your arms pull against resistance. The resistance can be your body weight, a cable machine, a dumbbell, a barbell, a band, or a suspension trainer.
The two main categories are vertical pulls and horizontal pulls. Vertical pulls include pull-ups, chin-ups, and lat pulldowns. These usually emphasize the latissimus dorsi, upper back, biceps, and grip. Horizontal pulls include rows. These train the lats, rhomboids, traps, rear delts, biceps, and forearms.
A good upper-body pulling plan should include both patterns. Pull-ups and pulldowns help build pulling strength and back width, while rows help build mid-back control, posture support, and upper-back thickness. The American Council on Exercise exercise library also classifies pull-ups, seated rows, bent-over rows, and single-arm rows as back and arm exercises, which supports using them together in a back-and-biceps routine.
Benefits of Upper Body Pull Exercises
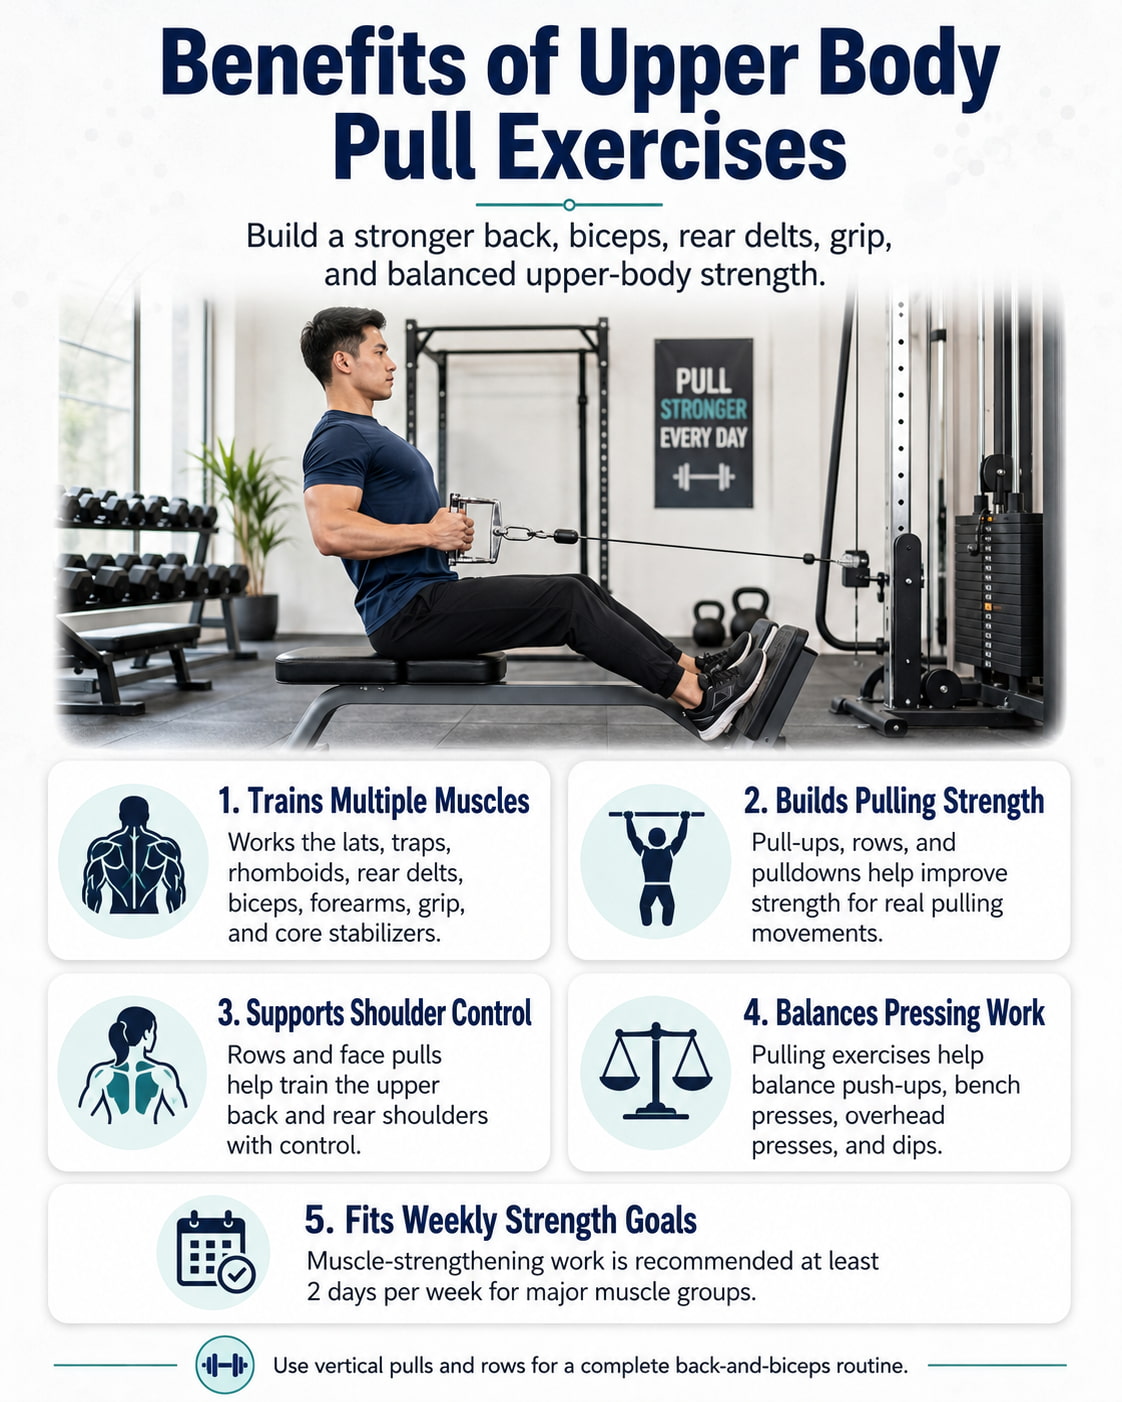
Upper body pull exercises are useful because they train several important muscle groups at once. A pull-up or row does not only work the biceps. It also trains the lats, traps, rhomboids, rear delts, forearms, grip, and core stabilizers.
These exercises can help build a stronger back, improve pulling strength, support better shoulder control, and make your upper-body workouts more balanced. Pulling work is especially important if your training includes a lot of pressing, such as push-ups, bench presses, overhead presses, or dips.
For general fitness, the Centers for Disease Control and Prevention recommends muscle-strengthening activity at least 2 days per week that works the major muscle groups, including the back, chest, shoulders, arms, abdomen, hips, and legs.
Muscles Worked by Upper Body Pull Exercises
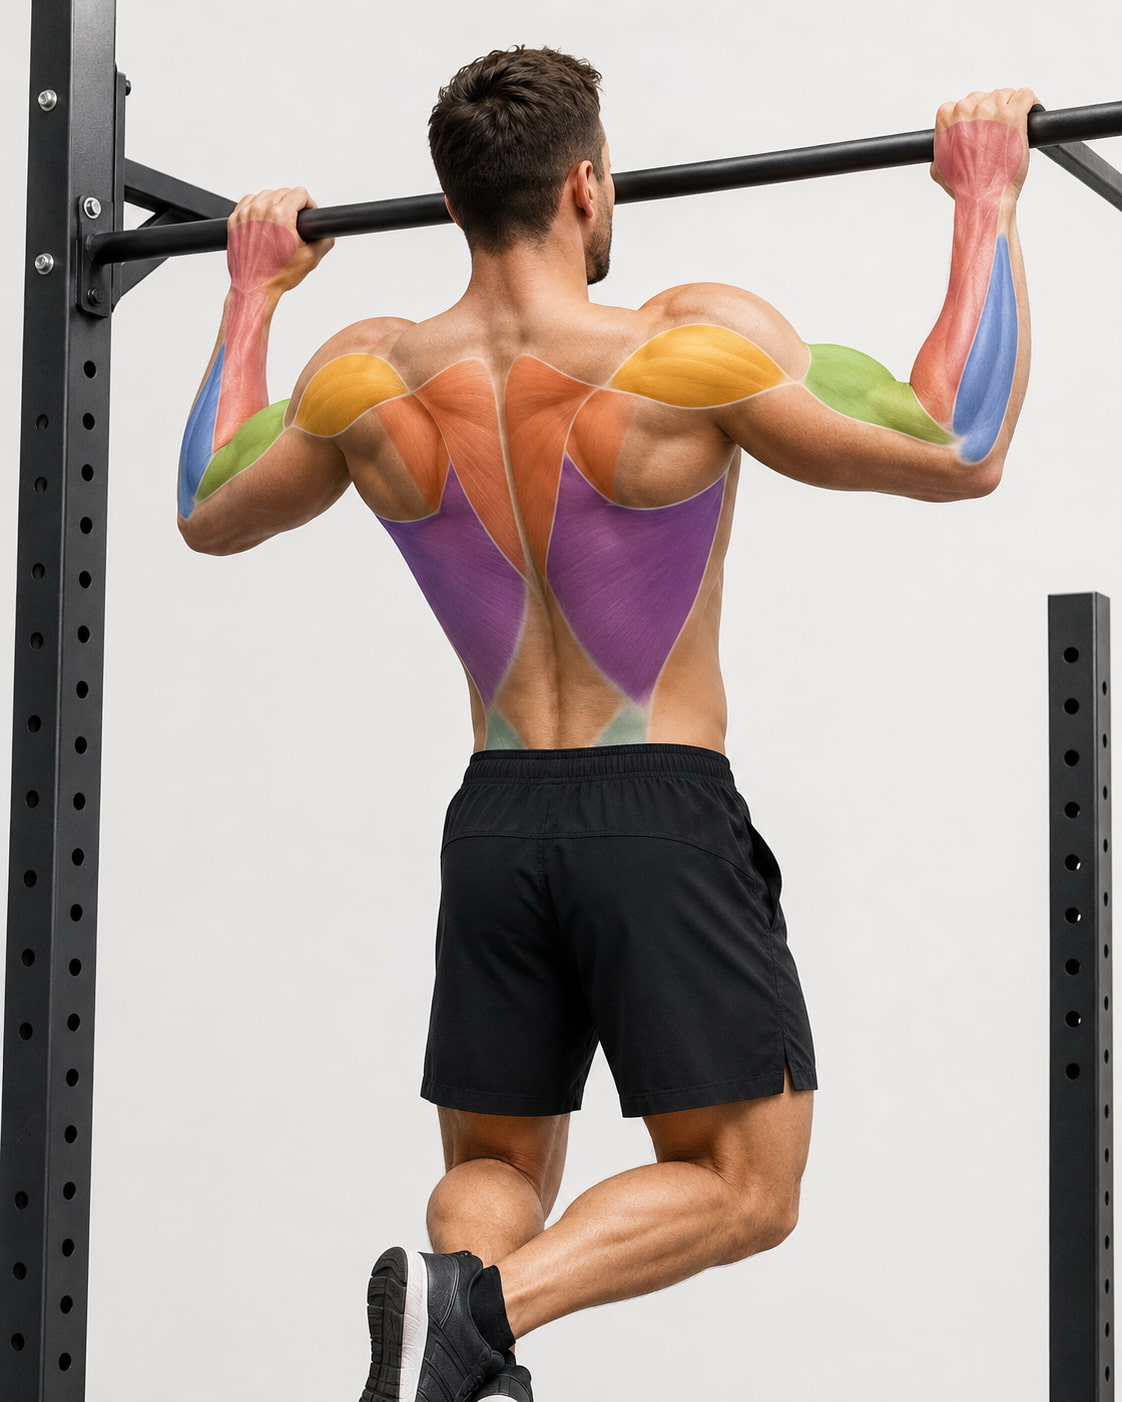
Upper body pull exercises mainly work the latissimus dorsi, rhomboids, trapezius, rear deltoids, biceps brachii, brachialis, brachioradialis, forearms, and grip muscles.
The lats help pull the upper arms down and back. The rhomboids and middle traps help pull the shoulder blades together. The lower traps help control shoulder-blade position. The rear delts help move the arms back during rows and face pulls. The biceps, brachialis, and brachioradialis bend the elbows and assist most pulling exercises.
Your core also works during many upper body pull exercises. Rows and pull-ups require your trunk to stay controlled so your back muscles can do the work instead of relying on swinging, twisting, or momentum.
Upper Body Pull Exercises Safety Tips
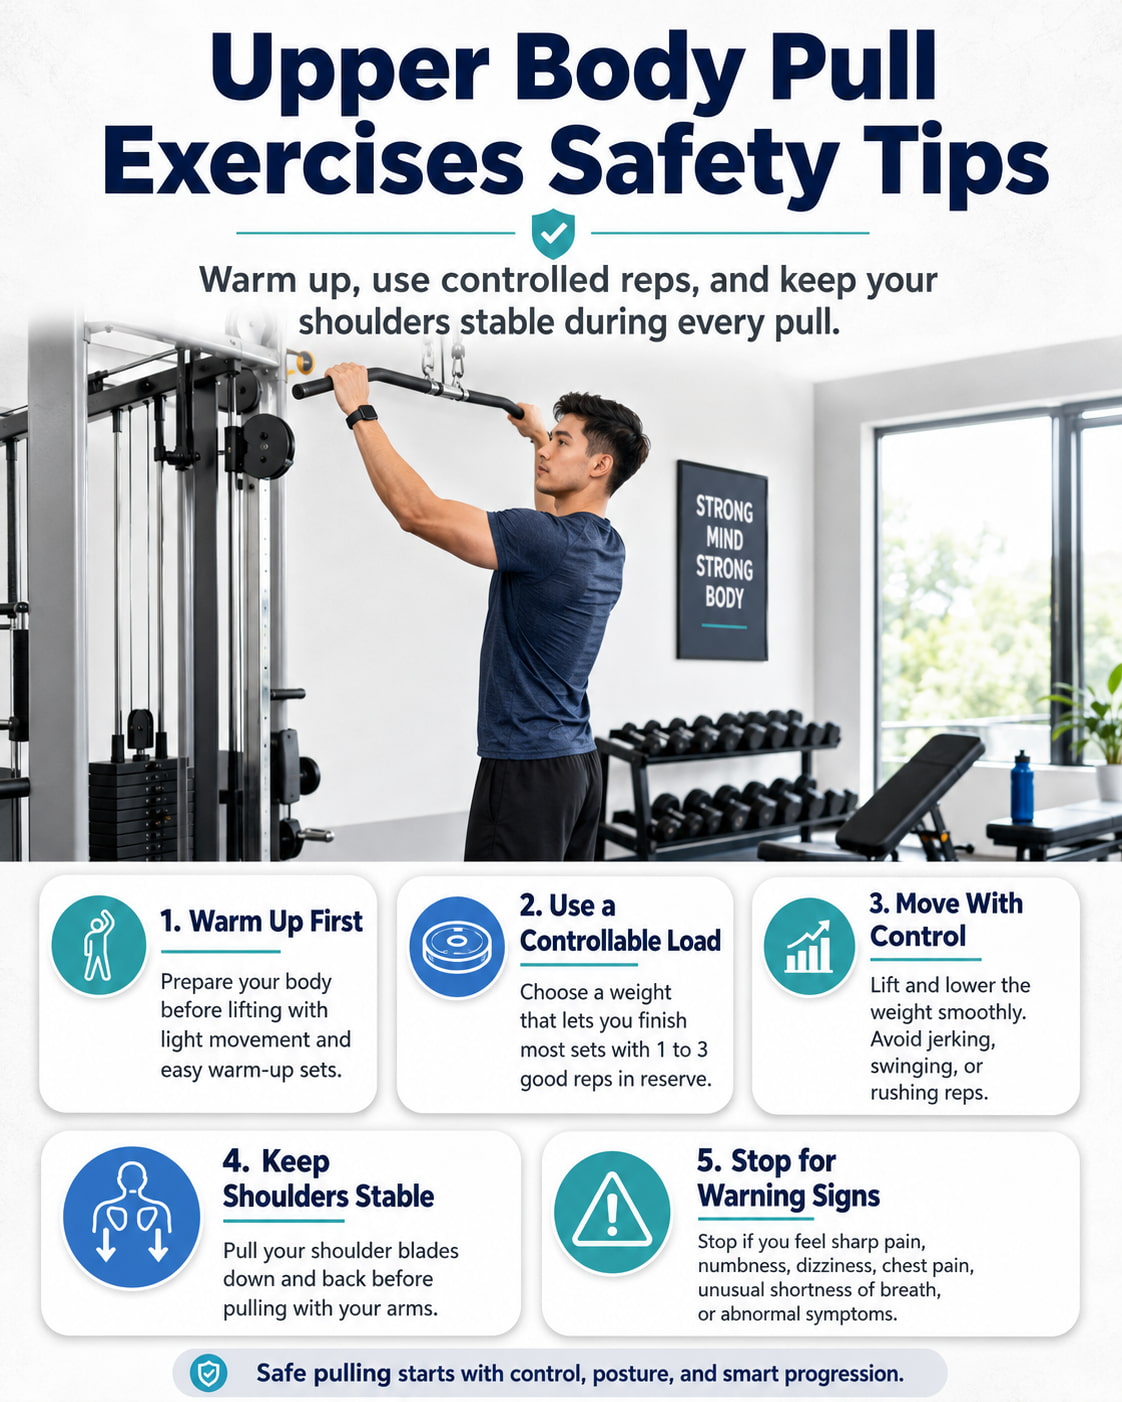
Warm up before training. The Mayo Clinic recommends warming up before lifting, moving weights in a controlled way, breathing properly, and stopping if an exercise causes pain.
Start with a load you can control. Most working sets should finish with about 1 to 3 reps left in reserve. That means the set feels challenging, but you could still complete a few clean reps if needed.
Keep your shoulders controlled. Do not let every rep turn into a shrug. Think about pulling your shoulder blades down and back before pulling with your arms, especially on pull-ups, pulldowns, and rows.
Stop and seek professional help if an exercise causes sharp pain, numbness, dizziness, chest pain, unusual shortness of breath, or symptoms that do not feel normal.
10 Best Upper Body Pull Exercises for Back and Biceps
These upper body pull exercises train your back, biceps, rear delts, forearms, grip, and shoulder-control muscles through vertical pulls and rows.
Choose the versions you can perform with clean form, then progress by adding reps, weight, range of motion, or better control over time.
1. Pull-Up
Best for: Building bodyweight pulling strength, back width, grip strength, and full upper-body control.
Muscles worked: Latissimus dorsi, biceps, brachialis, rhomboids, traps, rear delts, forearms, and core.
Equipment needed: Pull-up bar or assisted pull-up machine.
Why it stands out: The pull-up is one of the most effective upper body pull exercises because you move your full body weight through a vertical pulling pattern. It builds real pulling strength and gives you a clear progression goal.
Suggested sets and reps: Start with 2 to 4 sets of 3 to 8 clean reps. If you cannot do full pull-ups yet, use assisted reps, slow negatives, or band-assisted pull-ups.
Rest: Rest 90 to 150 seconds between sets. Heavier weighted pull-ups may need 2 to 3 minutes.
How to do it:
- Grip the bar slightly wider than shoulder-width with palms facing away.
- Brace your core and keep your ribs down.
- Pull your shoulder blades down before bending your elbows.
- Pull your chest toward the bar without swinging your legs.
- Pause when your chin reaches bar height or your upper chest approaches the bar.
- Lower under control until your arms are straight.
Common mistakes: Swinging the body, cutting the range of motion short, shrugging the shoulders, craning the neck over the bar, and dropping too fast on the way down.
Expert tip: Think “elbows down to the floor” instead of “chin over the bar.” This helps you use your lats instead of only pulling with your arms.
2. Chin-Up
Best for: Training the back and biceps together with more arm assistance than a standard pull-up.
Muscles worked: Lats, biceps, brachialis, brachioradialis, rhomboids, traps, rear delts, forearms, and core.
Equipment needed: Pull-up bar or assisted pull-up machine.
Why it stands out: The chin-up uses an underhand grip, which usually lets the biceps contribute more than in a standard overhand pull-up. NASM notes that both pull-ups and chin-ups can build upper-body and back strength, while grip choice changes the muscle emphasis.
Suggested sets and reps: Use 2 to 4 sets of 4 to 10 reps. Beginners can use assistance, while stronger lifters can add load.
Rest: Rest 90 to 150 seconds between sets.
How to do it:
- Grip the bar with palms facing you, about shoulder-width apart.
- Brace your core and keep your legs quiet.
- Pull your shoulder blades down before bending your elbows.
- Pull your chest toward the bar.
- Keep your elbows moving down and slightly back.
- Lower slowly until your arms are straight.
Common mistakes: Kicking the legs, turning the rep into a half curl, losing shoulder control at the bottom, and rushing the lowering phase.
Expert tip: Keep your chest lifted and think about pulling your elbows toward your ribs.
3. Lat Pulldown
Best for: Building the lats and upper back when pull-ups are too difficult or when you want a more controlled vertical pull.
Muscles worked: Lats, teres major, rhomboids, traps, rear delts, biceps, brachialis, forearms, and core.
Equipment needed: Lat pulldown machine.
Why it stands out: The lat pulldown is one of the best beginner-friendly upper body pull exercises because you can adjust the weight precisely. ACE’s lat pulldown guidance emphasizes bracing the spine, pulling the bar toward the upper or mid-chest, and avoiding extra backward lean during the pull.
Suggested sets and reps: Use 3 to 4 sets of 8 to 12 reps for strength and muscle. Use 10 to 15 reps when learning form.
Rest: Rest 60 to 120 seconds between sets.
How to do it:
- Sit with your thighs secured under the pads.
- Grip the bar slightly wider than shoulder-width.
- Brace your core and lean back slightly.
- Pull your shoulder blades down first.
- Pull the bar toward the upper chest.
- Return the bar overhead with control.
Common mistakes: Pulling behind the neck, leaning too far back, turning it into a row, shrugging the shoulders, and letting the weight stack slam.
Expert tip: Keep your elbows under the bar and drive them down toward your sides.
4. Seated Cable Row
Best for: Building mid-back strength, scapular control, and a strong horizontal pull pattern.
Muscles worked: Rhomboids, middle traps, lats, rear delts, biceps, brachialis, forearms, and spinal stabilizers.
Equipment needed: Seated cable row machine or cable station with row handle.
Why it stands out: The seated cable row gives constant tension and a stable setup, making it easier to feel the back muscles working. ACE’s seated row instructions emphasize an upright torso, neutral wrists, shoulder-blade control, and avoiding leaning back during the pull.
Suggested sets and reps: Use 3 to 4 sets of 8 to 12 reps. For muscle control, use 10 to 15 reps with a short squeeze at the end of each pull.
Rest: Rest 60 to 120 seconds between sets.
How to do it:
- Sit tall with your feet planted on the platform.
- Hold the handle with straight arms and a neutral spine.
- Brace your core and keep your chest up.
- Pull the handle toward your lower ribs.
- Squeeze your shoulder blades gently together.
- Return the handle forward without rounding your upper back.
Common mistakes: Leaning back to move more weight, shrugging, rounding the shoulders at the start, bending the wrists, and pulling too high toward the neck.
Expert tip: Let the arms reach forward at the start, but do not collapse your chest.
Exercise variations: Wide-grip cable row, neutral-grip cable row, single-arm cable row, and chest-supported machine row.
Easier variation: Machine row with a chest pad.
Harder variation: Paused seated cable row.
5. Barbell Bent-Over Row
Best for: Building heavy back strength, upper-back thickness, and stronger pulling mechanics.
Muscles worked: Lats, rhomboids, traps, rear delts, biceps, forearms, spinal erectors, glutes, hamstrings, and core.
Equipment needed: Barbell and weight plates.
Why it stands out: The barbell bent-over row lets you load the back heavily. It also trains your ability to hold a strong hip-hinge position while pulling. ACE describes the bent-over row with a hip hinge, straight back, slight knee bend, and the bar pulled toward the belly button.
Suggested sets and reps: Use 3 to 4 sets of 6 to 10 reps. Keep the weight heavy enough to challenge you but light enough to hold your torso position.
Rest: Rest 90 to 180 seconds between sets.
How to do it:
- Stand with feet about hip-width apart.
- Grip the bar slightly wider than shoulder-width.
- Hinge at the hips and keep a slight bend in the knees.
- Keep your back flat and torso braced.
- Pull the bar toward your lower ribs or upper abdomen.
- Lower the bar under control until your arms are straight.
Common mistakes: Standing up during each rep, rounding the lower back, bouncing the bar, pulling with the neck, and using a load that is too heavy to control.
Expert tip: Keep your torso angle nearly the same from the first rep to the last rep.
6. Single-Arm Dumbbell Row
Best for: Training each side of the back separately and improving side-to-side control.
Muscles worked: Lats, rhomboids, traps, rear delts, biceps, forearms, and core stabilizers.
Equipment needed: Dumbbell and bench.
Why it stands out: The single-arm dumbbell row allows a strong range of motion and helps you focus on one side at a time. ACE’s single-arm row guidance emphasizes a flat back, braced core, shoulder-blade control, and avoiding torso rotation.
Suggested sets and reps: Use 3 to 4 sets of 8 to 12 reps per side.
Rest: Rest 60 to 120 seconds between sets or alternate sides with short rest between arms.
How to do it:
- Place one hand and one knee on a bench.
- Hold a dumbbell in the opposite hand.
- Keep your back flat and head aligned with your spine.
- Let the dumbbell hang under your shoulder.
- Pull your elbow back toward your hip.
- Lower the dumbbell slowly without rotating your torso.
Common mistakes: Twisting the torso, shrugging the shoulder, pulling the dumbbell straight up instead of back, and using momentum.
Expert tip: Think about pulling your elbow toward your back pocket.
7. Chest-Supported Dumbbell Row
Best for: Training the upper back and lats with less lower-back fatigue than unsupported rows.
Muscles worked: Lats, rhomboids, middle traps, rear delts, biceps, brachialis, forearms, and core.
Equipment needed: Incline bench and dumbbells.
Why it stands out: The chest-supported row is useful when you want to train your back hard without turning the movement into a lower-back endurance test. The bench gives your torso support, making it easier to focus on rowing mechanics.
Suggested sets and reps: Use 3 to 4 sets of 8 to 15 reps.
Rest: Rest 60 to 120 seconds between sets.
How to do it:
- Set an incline bench to about 30 to 45 degrees.
- Lie chest-down on the bench with a dumbbell in each hand.
- Let your arms hang straight down.
- Brace lightly and keep your neck neutral.
- Row the dumbbells toward your ribs.
- Lower slowly until your arms are straight.
Common mistakes: Lifting the chest off the bench, shrugging the shoulders, curling the dumbbells instead of rowing, and rushing the lowering phase.
Expert tip: Keep your chest heavy on the bench so your back does the work.
8. Inverted Row
Best for: Bodyweight horizontal pulling, beginner pull-up preparation, and home or gym back training.
Muscles worked: Lats, rhomboids, traps, rear delts, biceps, forearms, glutes, and core.
Equipment needed: Smith machine bar, squat rack bar, sturdy suspension trainer, or stable row setup.
Why it stands out: The inverted row is a scalable bodyweight row. You can make it easier by standing more upright or harder by moving your feet farther forward. It is a great bridge between cable rows and pull-ups.
Suggested sets and reps: Use 2 to 4 sets of 6 to 15 reps.
Rest: Rest 60 to 120 seconds between sets.
How to do it:
- Set a bar around waist height.
- Lie under the bar and grip it slightly wider than shoulder-width.
- Keep your body straight and heels on the floor.
- Brace your core and squeeze your glutes.
- Pull your chest toward the bar.
- Lower under control until your arms are straight.
Common mistakes: Letting the hips sag, pulling with the neck, using a short range of motion, and losing control at the bottom.
Expert tip: Treat every rep like a moving plank.
9. Face Pull
Best for: Rear delts, upper back, shoulder control, and balancing heavy pressing work.
Muscles worked: Rear delts, middle traps, lower traps, rhomboids, rotator cuff muscles, and upper back.
Equipment needed: Cable machine with rope attachment or resistance band.
Why it stands out: The face pull is not a heavy strength lift, but it is one of the best accessory upper body pull exercises for the rear shoulders and upper back. It teaches controlled shoulder-blade movement and can help round out a back-and-biceps workout.
Suggested sets and reps: Use 2 to 4 sets of 12 to 20 reps with light to moderate resistance.
Rest: Rest 45 to 90 seconds between sets.
How to do it:
- Set a cable or band around upper-chest to face height.
- Hold the rope with both hands and step back.
- Start with arms extended and ribs down.
- Pull the rope toward your face.
- Let your hands separate as your elbows move back.
- Return slowly to the start position.
Common mistakes: Using too much weight, arching the lower back, pulling too low, shrugging, and flaring the ribs.
Expert tip: Pull toward your eyebrows or nose, not your chest.
10. Hammer Curl
Best for: Building the biceps, brachialis, brachioradialis, forearms, and stronger elbow flexion.
Muscles worked: Brachialis, brachioradialis, biceps brachii, forearms, and grip muscles.
Equipment needed: Dumbbells or cable rope attachment.
Why it stands out: Hammer curls use a neutral grip, which trains the arms in a position that carries over well to rows, pull-ups, chin-ups, and loaded carries. They are a simple way to finish a back-and-biceps pull workout.
Suggested sets and reps: Use 2 to 4 sets of 8 to 15 reps.
Rest: Rest 45 to 90 seconds between sets.
How to do it:
- Stand tall with a dumbbell in each hand.
- Keep your palms facing each other.
- Brace your core and keep your shoulders relaxed.
- Curl the dumbbells up without swinging.
- Squeeze briefly near the top.
- Lower the dumbbells slowly to full arm extension.
Common mistakes: Swinging the torso, shrugging the shoulders, letting the elbows drift too far forward, and cutting the lowering phase short.
Expert tip: Keep your wrists straight and imagine your forearms as solid handles.
How to Build an Upper Body Pull Workout
A complete upper body pull workout should include one vertical pull, one or two rows, one rear-delt or upper-back accessory, and one biceps-focused exercise.
For strength, place your hardest movement first, such as pull-ups, chin-ups, or barbell rows. For muscle growth, use enough weekly volume and controlled reps. The American College of Sports Medicine notes that resistance training should be individualized and that higher weekly volume is often used for hypertrophy, while heavier loads are more specific to strength.
For most lifters, train upper-body pulling 1 to 2 times per week. If you already train full body, include 2 or 3 pulling exercises per session. If you use a push-pull-legs split, one dedicated pull day can include 4 to 6 exercises.
Sample Upper Body Pull Workout
| Exercise | Sets | Reps | Rest |
|---|---|---|---|
| Pull-Up or Lat Pulldown | 3 | 6 to 10 | 90 to 150 seconds |
| Seated Cable Row | 3 | 8 to 12 | 60 to 120 seconds |
| Single-Arm Dumbbell Row | 3 | 8 to 12 per side | 60 to 120 seconds |
| Face Pull | 2 to 3 | 12 to 20 | 45 to 90 seconds |
| Hammer Curl | 2 to 3 | 10 to 15 | 45 to 90 seconds |
Use a weight that leaves about 1 to 3 reps in reserve on most sets. When you can complete the top end of the rep range with clean form for every set, increase the weight slightly or add one extra rep per set.
Common Upper Body Pull Exercise Mistakes
The most common mistake is using momentum instead of muscle control. Swinging through pull-ups, leaning back on cable rows, and jerking dumbbells during rows may let you move more weight, but it usually reduces the quality of the exercise.
Another common mistake is ignoring the shoulder blades. Good pulling form usually starts with a controlled shoulder position. On rows, avoid letting your shoulders roll forward at the end of each rep. On pull-ups and pulldowns, avoid shrugging toward your ears.
Many lifters also do too much biceps work and not enough back work. Curls are useful, but they should support your pulling routine, not replace rows and vertical pulls.
How Often Should You Do Upper Body Pull Exercises
Most people can train upper body pull exercises 1 to 2 times per week. Beginners can start with one focused pull session or include a few pulling movements in full-body workouts. Intermediate lifters can train pulling twice weekly with different exercise choices or different rep ranges.
Allow enough recovery between hard sessions. If your elbows, shoulders, or grip feel irritated, reduce the volume, use easier variations, and avoid adding load too quickly.
FAQs
Are pull-ups or rows better for upper body pull training
Both are important. Pull-ups train vertical pulling strength and emphasize the lats, biceps, and grip. Rows train horizontal pulling strength and target the mid-back, upper back, rear delts, and biceps. A balanced routine should include both.
Can beginners do upper body pull exercises
Yes. Beginners can start with lat pulldowns, seated cable rows, chest-supported rows, assisted chin-ups, band pulldowns, and higher-bar inverted rows. The goal is to learn control before adding heavy loads.
How many upper body pull exercises should I do in one workout
Most workouts need 4 to 6 exercises. A simple structure is one vertical pull, two row variations, one rear-delt or upper-back accessory, and one biceps exercise.
Do upper body pull exercises build biceps
Yes. Pull-ups, chin-ups, rows, and pulldowns all involve elbow flexion, so the biceps assist during the movement. For direct biceps growth, add curls or hammer curls after your main back exercises.
Should I train pull exercises before push exercises
It depends on your program. In a full-body or upper-body workout, you can alternate push and pull exercises. In a pull-day workout, start with your hardest pulling exercise while you are fresh.
What is the best upper body pull exercise at home
The inverted row is one of the best home-friendly pulling options if you have a safe setup. Resistance band pulldowns, band rows, and dumbbell rows are also useful choices.
Conclusion
Upper body pull exercises are essential for building a stronger back, better biceps, and more balanced upper-body strength. Start with one vertical pull, add one or two rows, include rear-delt work, and finish with a biceps accessory.
Use clean form, controlled reps, and steady progression. The best pull workout is not the longest one. It is the one you can perform consistently, recover from, and improve over time.
References
- American Council on Exercise: Pull-Ups
- American Council on Exercise: Seated Lat Pulldown
- American Council on Exercise: Seated Row
- American Council on Exercise: Bent-Over Row
- American Council on Exercise: Single-Arm Row
- NASM Exercise Library: Face Pull
- American College of Sports Medicine: Resistance Training Guidelines Update
1 thought on “10 Best Upper-Body Pull Exercises for Back and Biceps”