Yoga for seniors over 70 can be a gentle, accessible way to practice mobility, posture, balance, breathing, and muscular control. The safest place to begin is often with seated and chair-supported poses that do not require getting down onto the floor.
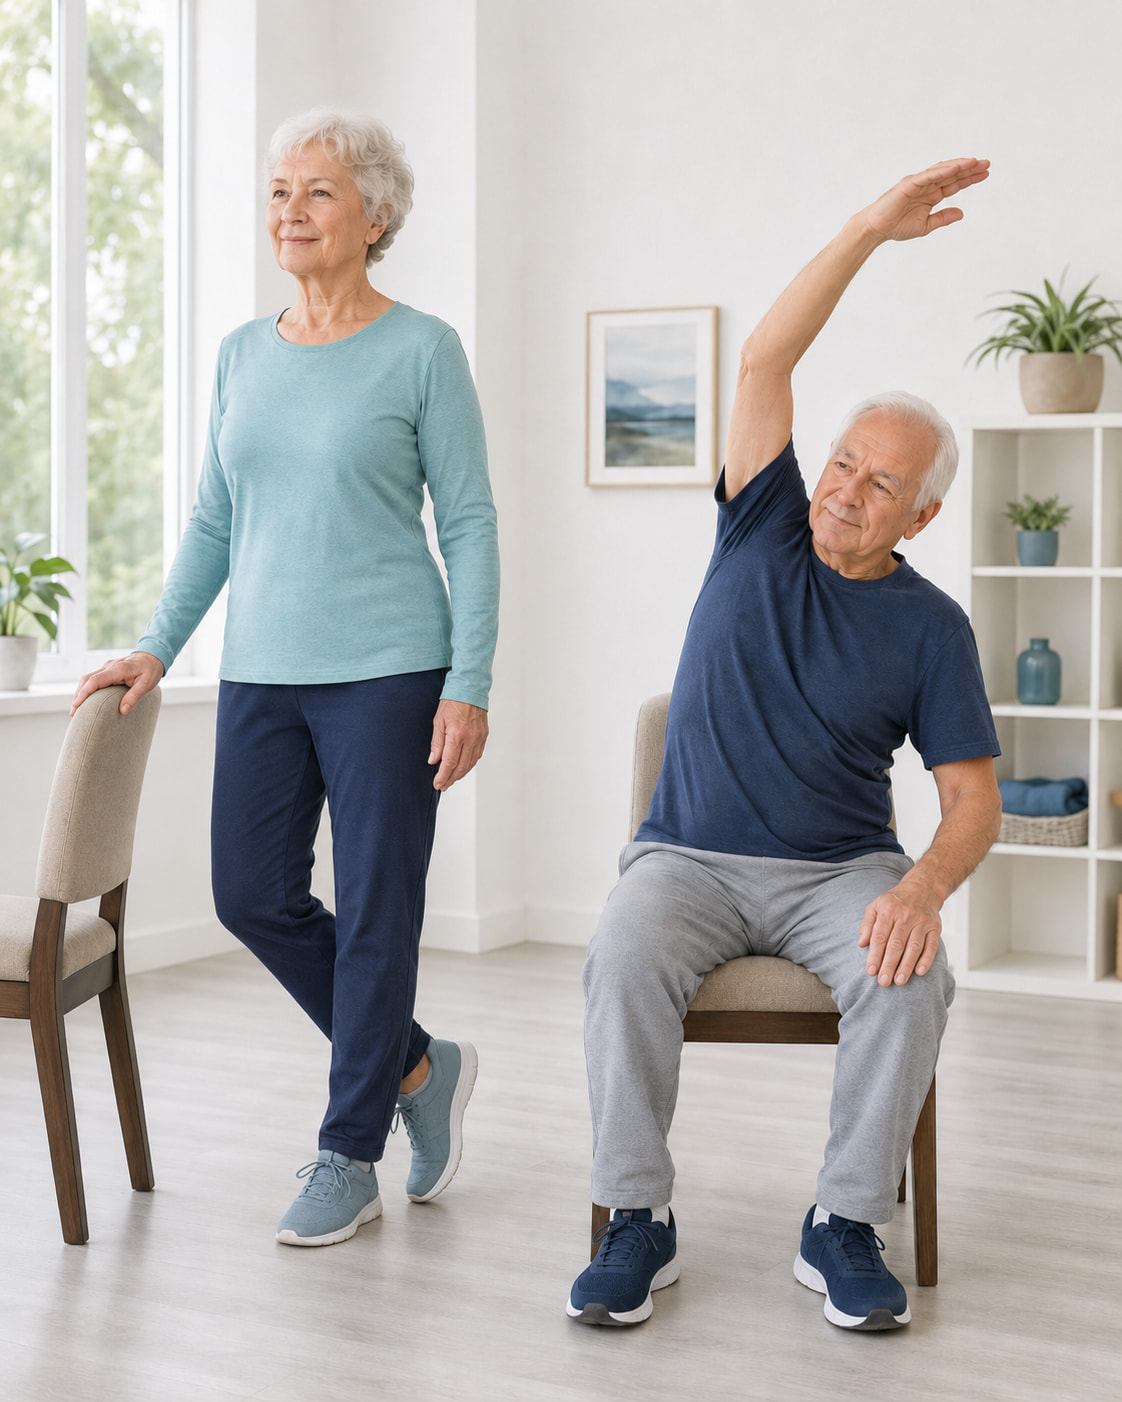
This guide explains 10 easy yoga poses, how to modify each one, which muscles they use, common mistakes to avoid, and how to combine them into a short beginner routine.
Is Yoga Safe for Seniors Over 70?
Yoga can be appropriate after age 70 when the poses match your balance, strength, mobility, health history, and exercise experience.
The National Center for Complementary and Integrative Health notes that yoga is generally considered safe when practiced correctly, although older adults and people with health conditions may need to modify or avoid certain poses.
Chair-supported yoga can reduce difficult floor transfers and provide stability during standing poses. Use a secure chair, keep the exercise area clear, and move only through a comfortable range.
Speak with a healthcare professional or physical therapist before starting if you have:
- Recent surgery, a fracture, or a joint replacement
- Severe osteoporosis or previous spinal fractures
- Frequent dizziness or unexplained balance problems
- Uncontrolled blood pressure or a heart condition
- Glaucoma or restrictions on head-down positions
- New weakness, numbness, or spreading pain
- Instructions limiting bending, twisting, or weight-bearing
Stop exercising if you experience sharp pain, numbness, dizziness, chest pain, unusual shortness of breath, or loss of balance.
Potential Benefits of Yoga After 70
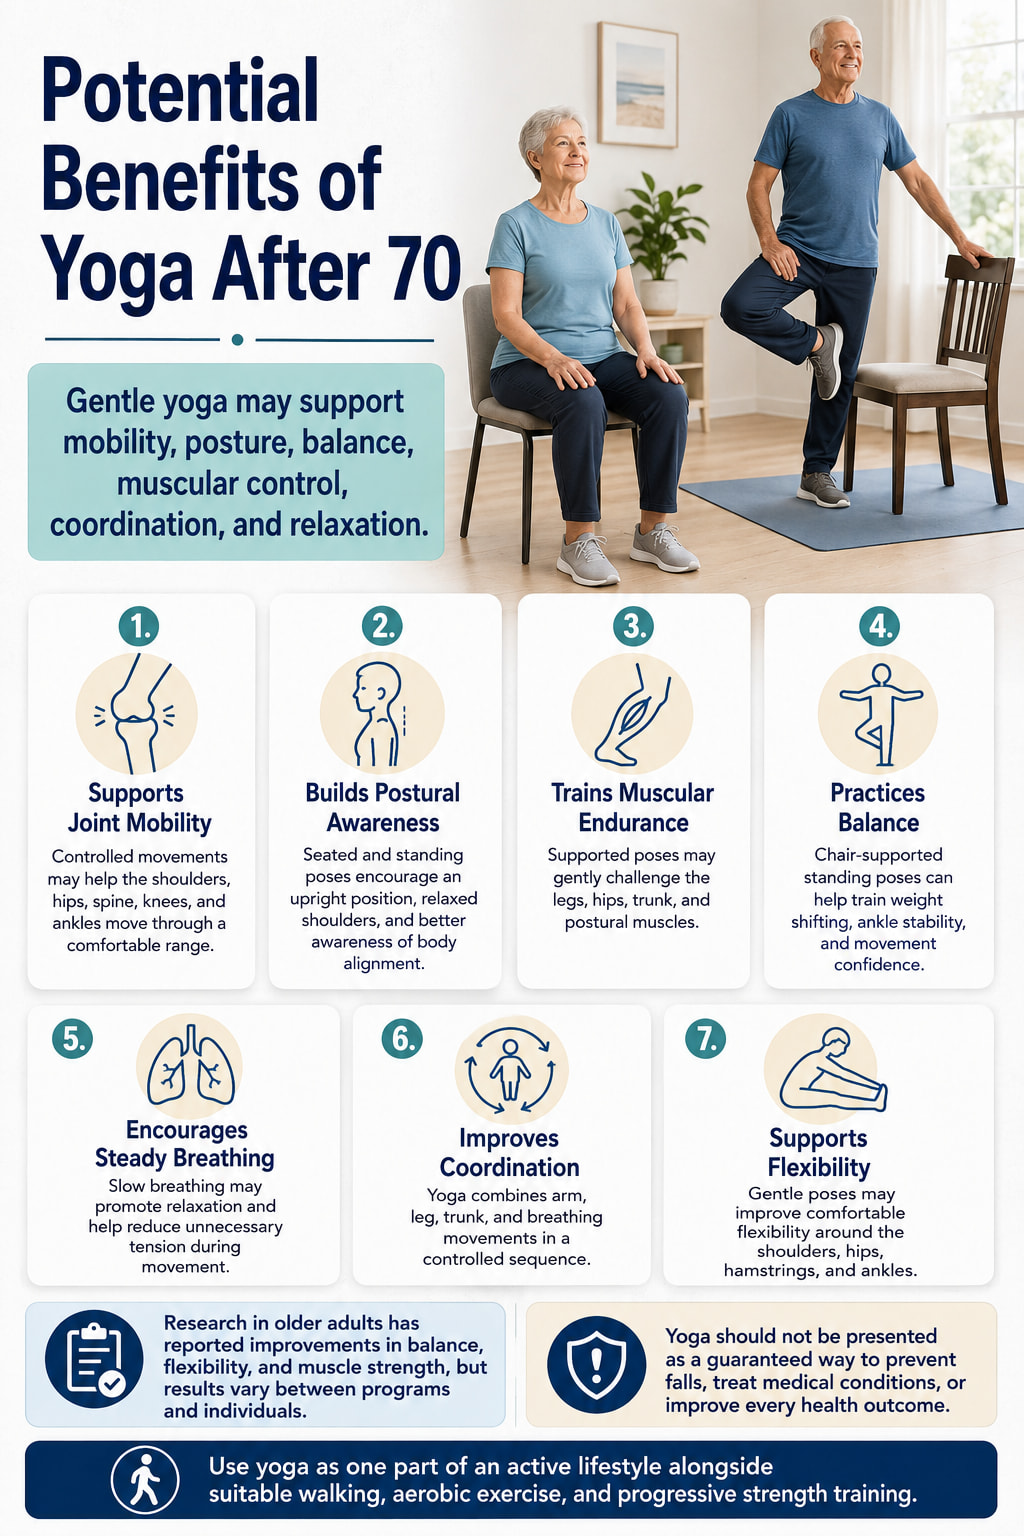
Depending on the poses selected, gentle yoga may help support:
- Joint mobility and comfortable range of motion
- Postural awareness
- Lower-body and trunk endurance
- Balance and movement confidence
- Controlled breathing and relaxation
- Coordination
- Shoulder, hip, and ankle flexibility
A 2023 systematic review and meta-analysis of yoga for older adults reported improvements in balance, flexibility, and muscle strength, although results varied between programs and participants.
Yoga is best viewed as one part of an active lifestyle rather than a replacement for walking, aerobic activity, or progressive strength training. The CDC physical activity guidelines for older adults recommend combining aerobic, muscle-strengthening, and balance activities.
What You Need Before Starting
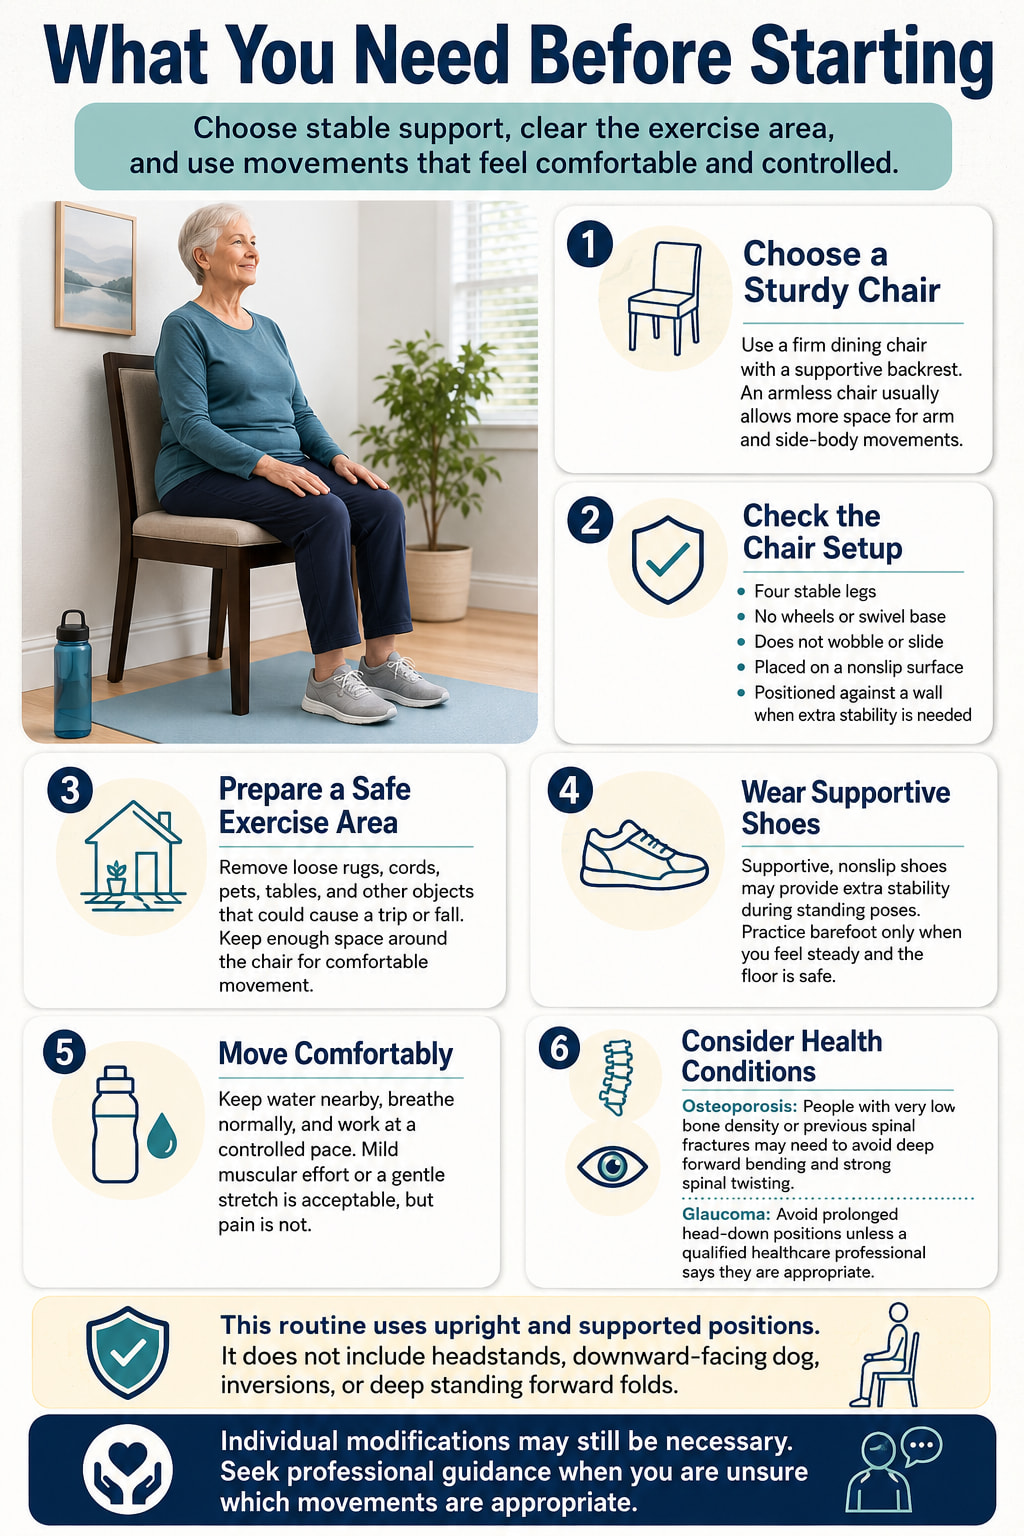
Use a sturdy armless chair with a supportive backrest. A firm dining chair is generally more practical than a soft chair or low couch.
Make sure the chair:
- Has four stable legs and no wheels
- Does not wobble or slide
- Sits on a nonslip surface or against a wall when extra support is needed
Wear supportive shoes during standing poses and remove loose rugs, cords, pets, tables, and other tripping hazards from the exercise area.
Keep water nearby, breathe normally, and move at a controlled pace. Mild muscular effort or a comfortable stretch is acceptable, but pain is not.
Important Health Considerations
The Bone Health and Osteoporosis Foundation advises people with severe osteoporosis or previous spinal fractures to obtain professional guidance and avoid excessive forward bending or strong spinal twisting.
The Glaucoma Research Foundation recommends caution with prolonged head-down positions because they may temporarily increase pressure inside the eye.
This routine uses upright and chair-supported positions and does not include inversions or deep standing forward folds.
Yoga for Seniors Over 70 at a Glance
| Yoga pose | Position | Main training goal | Beginner target |
|---|---|---|---|
| Seated Mountain Pose | Seated | Posture and breathing | 5 slow breaths |
| Seated Cat–Cow | Seated | Gentle spinal mobility | 5 repetitions |
| Seated Side Bend | Seated | Side-body mobility | 3 breaths per side |
| Seated Eagle Arms | Seated | Shoulder and upper-back mobility | 3 breaths per side |
| Seated Knee-to-Chest | Seated | Hip mobility and core control | 4–6 reps per side |
| Seated Figure-Four Pose | Seated | Outer-hip mobility | 3 breaths per side |
| Seated Staff Pose | Seated | Hamstring and ankle mobility | 3 breaths per side |
| Supported Chair Pose | Standing with support | Leg and hip strength | 5–8 reps |
| Chair-Supported Warrior II | Standing with support | Leg endurance and hip mobility | 2–3 breaths per side |
| Supported Tree Pose | Standing with support | Balance and ankle stability | 10–20 seconds per side |
10 Easy Yoga Poses for Seniors Over 70
These 10 easy yoga poses for seniors over 70 use seated and chair-supported positions to make movement safer and more accessible. Each pose includes simple form guidance, beginner modifications, and practical ways to improve mobility, posture, balance, and confidence.
1. Seated Mountain Pose
Best for: Learning upright posture, controlled breathing, and the starting position for seated yoga exercises.
Muscles worked: Abdominals, spinal erectors, upper-back muscles, hip stabilizers, and muscles that support upright posture.
Equipment needed: A sturdy chair without wheels.
Suggested sets and reps: Hold for 5–8 slow breaths. Repeat once or twice.
Rest: Rest for 15–20 seconds or continue directly into the next seated pose.
How to do it:
- Sit near the middle of the chair with both feet flat on the floor.
- Position the knees approximately over the ankles.
- Gently lengthen the top of the head toward the ceiling.
- Keep the ribs stacked over the pelvis without forcing the chest upward.
- Rest the hands on the thighs with the palms facing down or up.
- Relax the shoulders away from the ears.
- Breathe slowly through the nose if comfortable.
Common mistakes: Pushing the chest too far forward, lifting the shoulders, holding the breath, or sitting so far forward that the chair feels unstable.
Make it easier: Sit against the backrest and place a folded towel behind the lower back if needed.
Expert tip: Think about growing taller rather than pulling the shoulders aggressively backward.
2. Seated Cat–Cow
Best for: Gentle movement of the spine, pelvis, shoulders, and rib cage.
Muscles worked: Abdominals, spinal erectors, upper-back muscles, and muscles around the pelvis and rib cage.
Equipment needed: A sturdy chair without wheels.
Suggested sets and reps: Perform 5–8 slow repetitions.
Rest: Rest for 20–30 seconds after the set.
How to do it:
- Sit tall with the feet flat and hands resting on the thighs.
- Inhale and gently tilt the pelvis forward.
- Allow the chest to lift slightly without throwing the head backward.
- Exhale and gently tilt the pelvis backward.
- Allow the upper back to round only within a comfortable range.
- Return to a neutral seated position before beginning the next repetition.
- Move slowly and continue breathing throughout the exercise.
Common mistakes: Forcing the lower back into a deep arch, dropping the head, moving quickly, or holding the breath.
Make it easier: Perform only a small pelvic rocking movement while keeping the spine nearly neutral.
Safety note: People with osteoporosis or previous spinal fractures may need to avoid forceful spinal rounding.
Expert tip: The movement should travel through a comfortable range rather than become the deepest possible stretch.
3. Seated Side Bend
Best for: Improving comfortable side-body movement and reaching ability.
Muscles worked: Obliques, latissimus dorsi, quadratus lumborum, shoulder muscles, and muscles between the ribs.
Equipment needed: A sturdy chair without wheels.
Suggested sets and reps: Hold for 2–4 breaths per side. Complete one or two rounds.
Rest: Pause in the center for one breath before changing sides.
How to do it:
- Sit tall with both feet firmly on the floor.
- Hold the side of the chair with the right hand.
- Raise the left arm to a comfortable height.
- Lengthen upward through the spine.
- Lean slightly to the right without rotating the chest toward the floor.
- Keep both sides of the pelvis in contact with the chair.
- Return to the center and repeat on the opposite side.
Common mistakes: Collapsing toward the supporting arm, twisting the chest, lifting one side of the pelvis, or reaching farther than the shoulder comfortably allows.
Make it easier: Keep the reaching hand on the waist or shoulder.
Expert tip: Create length before moving sideways.
4. Seated Eagle Arms
Best for: Mobilizing the shoulders and creating a gentle stretch across the upper back.
Muscles worked: Rear deltoids, rhomboids, trapezius, rotator cuff muscles, and upper-back muscles.
Equipment needed: A sturdy chair without wheels.
Suggested sets and reps: Hold for 2–4 breaths per side. Complete one or two rounds.
Rest: Lower the arms and rest for 15–20 seconds between sides.
How to do it:
- Sit in Seated Mountain Pose.
- Raise both arms in front of the chest.
- Cross the right arm over the left.
- Bend the elbows and bring the backs of the hands toward each other.
- Use the full Eagle Arms position only if it feels comfortable.
- Keep the elbows at or below shoulder height.
- Breathe into the upper back, release, and change the arm crossing.
Common mistakes: Forcing the palms together, lifting the shoulders, arching the lower back, or continuing when the position causes shoulder pain.
Make it easier: Give yourself a hug or place each hand on the opposite shoulder.
Expert tip: The goal is a comfortable upper-back stretch, not achieving a perfect arm shape.
5. Seated Knee-to-Chest
Best for: Hip mobility, single-leg control, and gentle abdominal engagement.
Muscles worked: Hip flexors, abdominals, quadriceps, gluteal muscles, and postural muscles.
Equipment needed: A sturdy chair without wheels.
Suggested sets and reps: Perform 4–8 controlled repetitions per side.
Rest: Rest for 20–30 seconds after both sides.
How to do it:
- Sit tall with both feet flat on the floor.
- Hold the sides of the chair lightly if additional stability is needed.
- Lift the right foot slowly from the floor.
- Bring the knee upward only as far as you can without rounding the back.
- Support behind the thigh with the hands if comfortable.
- Lower the foot slowly instead of allowing it to drop.
- Complete the repetitions and change sides.
Common mistakes: Pulling forcefully on the knee, leaning backward, rounding the shoulders, holding the breath, or lifting the leg so high that the pelvis rolls backward.
Make it easier: Slide the heel forward and backward without lifting the foot.
Progression: Pause for two or three seconds at the top of each repetition.
Expert tip: Think about lifting the thigh with the hip muscles rather than pulling it upward with the hands.
6. Seated Figure-Four Pose
Best for: Gentle mobility around the outer hip and gluteal area.
Muscles worked: Gluteus maximus, gluteus medius, deep hip rotators, and muscles surrounding the hip joint.
Equipment needed: A sturdy chair without wheels.
Suggested sets and reps: Hold for 3–5 comfortable breaths per side.
Rest: Rest for 20–30 seconds before changing sides.
How to do it:
- Sit tall with both feet flat on the floor.
- Lift the right foot and place the ankle across the left thigh if comfortable.
- Keep the right foot gently flexed rather than allowing it to collapse inward.
- Let the right knee move outward naturally without pressing it down.
- Remain upright or hinge forward slightly from the hips.
- Keep the spine long and breathe slowly.
- Return the foot to the floor and change sides.
Common mistakes: Pushing down on the knee, rounding the back, twisting the pelvis, or forcing the ankle onto the thigh.
Make it easier: Rest the ankle against the opposite shin or keep the toes on the floor while opening the knee outward.
Safety note: People with a recent hip replacement or prescribed hip precautions should obtain professional guidance first.
Expert tip: Adjust the leg position before leaning forward. A higher, easier position is better than forcing range.
7. Seated Staff Pose
Best for: Hamstring mobility, ankle movement, posture, and quadriceps control.
Muscles worked: Hamstrings, calves, quadriceps, tibialis anterior, and postural muscles.
Equipment needed: A sturdy chair without wheels.
Suggested sets and reps: Hold for 3–5 breaths per side or perform 5 ankle pumps per side.
Rest: Rest for 15–30 seconds before changing legs.
How to do it:
- Sit tall with both feet flat on the floor.
- Slide the right heel forward.
- Straighten the right knee only as far as comfortable.
- Keep the heel on the floor and lift the toes toward the shin.
- Maintain a long spine and level pelvis.
- Hold the position or slowly point and flex the ankle.
- Return the foot to the starting position and change sides.
Common mistakes: Rounding forward, locking the knee forcefully, lifting the working hip, or trying to reach the toes with the hands.
Make it easier: Keep the knee slightly bent and slide the heel only a short distance.
Progression: Add five slow ankle pumps while keeping the leg extended.
Expert tip: Keep the chest upright and let the leg position create the stretch.
8. Supported Chair Pose
Best for: Building leg strength, hip control, and confidence with sitting and standing movements.
Muscles worked: Quadriceps, gluteal muscles, hamstrings, calves, abdominals, and spinal stabilizers.
Equipment needed: A sturdy chair placed against a wall or a stable countertop.
Suggested sets and reps: Perform 1–2 sets of 5–10 repetitions.
Rest: Rest for 30–60 seconds between sets.
How to do it:
- Stand behind the chair with the feet approximately hip-width apart.
- Place both hands on the backrest.
- Keep the chest lifted and gently brace the abdomen.
- Bend the knees slightly and move the hips backward.
- Lower only as far as you can while keeping the heels down.
- Press through the feet and squeeze the gluteal muscles to stand.
- Regain balance before beginning the next repetition.
Common mistakes: Allowing the knees to collapse inward, lifting the heels, rounding the back, pulling heavily on the chair, or lowering farther than can be controlled.
Make it easier: Use a shallow range and firm support from both hands.
Progression: Lower for three seconds or use lighter fingertip support.
Expert tip: Imagine reaching the hips toward a chair behind you while keeping the whole foot in contact with the floor.
9. Chair-Supported Warrior II
Best for: Leg endurance, hip mobility, posture, and controlled weight distribution.
Muscles worked: Quadriceps, gluteal muscles, hamstrings, inner thighs, calves, shoulders, and abdominals.
Equipment needed: A sturdy chair without wheels.
Suggested sets and reps: Hold for 2–4 breaths per side. Complete one or two rounds.
Rest: Stand with the feet together and rest for 20–40 seconds between sides.
How to do it:
- Stand beside the chair and hold the backrest with the nearest hand.
- Step the feet apart into a comfortable stance.
- Turn the front toes outward slightly.
- Keep the back foot in a position that feels stable rather than forcing it flat.
- Bend the front knee slightly in the same direction as the toes.
- Keep the torso upright and extend the free arm if comfortable.
- Straighten the front leg, step the feet together, and change sides.
Common mistakes: Using an excessively long stance, allowing the front knee to fall inward, twisting the knee, leaning heavily over the chair, or forcing the hips to face a specific direction.
Make it easier: Use a shorter stance and keep both hands on the chair.
Progression: Use lighter hand support or hold for one additional breath.
Expert tip: Stability is more important than creating a traditional yoga-class stance.
10. Supported Tree Pose
Best for: Balance, ankle stability, hip control, and upright posture.
Muscles worked: Foot and ankle stabilizers, calves, quadriceps, gluteus medius, hip rotators, and abdominals.
Equipment needed: A sturdy chair or countertop.
Suggested sets and reps: Hold for 10–20 seconds per side. Complete one or two rounds.
Rest: Rest for 20–40 seconds between sides.
How to do it:
- Stand beside or behind the chair and hold it with one or both hands.
- Shift most of your weight onto the left foot.
- Keep the left knee soft rather than locked.
- Turn the right knee slightly outward.
- Keep the right toes on the floor or place the foot against the left ankle.
- Stand tall and focus the eyes on a stationary point.
- Lower the foot slowly and repeat on the opposite side.
Common mistakes: Placing the foot directly against the knee joint, locking the standing knee, looking around the room, removing support too soon, or holding the breath.
Make it easier: Keep both feet on the floor and shift more weight onto one leg.
Progression: Place the foot at the opposite ankle or reduce hand pressure gradually.
Expert tip: Use the chair before you lose balance, not after.
12- to 15-Minute Beginner Yoga Routine
Complete one round of the following routine two or three times per week. Keep the effort around 2–4 out of 10, where the movements feel easy to moderately challenging.
| Order | Exercise | Starting amount |
|---|---|---|
| 1 | Seated Mountain Pose | 5 slow breaths |
| 2 | Seated Cat–Cow | 5 repetitions |
| 3 | Seated Side Bend | 3 breaths per side |
| 4 | Seated Eagle Arms | 3 breaths per side |
| 5 | Seated Knee-to-Chest | 4–6 reps per side |
| 6 | Seated Figure-Four Pose | 3 breaths per side |
| 7 | Seated Staff Pose | 3 breaths per side |
| 8 | Supported Chair Pose | 5–8 reps |
| 9 | Chair-Supported Warrior II | 2–3 breaths per side |
| 10 | Supported Tree Pose | 10–20 seconds per side |
| 11 | Seated Mountain Pose | 5 recovery breaths |
Rest for 20–40 seconds whenever needed. It is also acceptable to complete only the seated section during the first few sessions.
How Often Should Seniors Over 70 Practice Yoga?
Beginners can start with two or three yoga sessions per week. A session may last 10–20 minutes, depending on endurance and comfort.
Short sessions performed consistently are usually more practical than an occasional long session that creates excessive fatigue. Leave at least one day between sessions if the standing poses produce noticeable leg soreness.
A simple weekly schedule could include:
| Day | Activity |
|---|---|
| Monday | 12–15 minutes of chair-supported yoga |
| Tuesday | Comfortable walking or another suitable aerobic activity |
| Wednesday | Strength training appropriate for current ability |
| Thursday | Rest or gentle seated mobility |
| Friday | 12–15 minutes of chair-supported yoga |
| Saturday | Comfortable walking and light balance practice |
| Sunday | Rest or easy recreational movement |
The CDC guidelines for older adults recommend a combination of aerobic, muscle-strengthening, and balance activities each week. Adults who cannot meet the full recommendations should remain as active as their abilities and health conditions allow.
Yoga may contribute to balance, mobility, and muscular endurance, but many gentle poses do not provide enough resistance or cardiovascular demand to replace dedicated walking and strength training.
How to Progress Safely
Progress only when the current routine feels stable, controlled, and free from concerning symptoms.
Change one variable at a time:
- Add one slow breath to a holding pose.
- Add one or two repetitions to a moving pose.
- Increase a balance hold by five seconds.
- Use slightly less pressure through the supporting hand.
- Add a second round of selected poses.
- Increase from two sessions to three sessions per week.
Do not progress by forcing a joint farther, using an unstable chair, closing the eyes during balance exercises, holding the breath, or attempting advanced inversions.
A useful progression test is whether you can maintain steady breathing, controlled posture, and smooth transitions for every repetition. If form becomes less stable, return to the easier version.
Common Yoga Mistakes to Avoid After 70
Using the wrong chair
A rolling office chair, folding chair, soft armchair, or lightweight plastic chair may move or tip. Use a solid chair that remains stable when pressure is applied.
Moving too quickly
Fast transitions can make dizziness or balance loss more likely. Pause after standing and wait until you feel steady before beginning the next pose.
Forcing flexibility
A deeper stretch is not automatically a better stretch. Move until you notice gentle tension, then maintain that position without bouncing or pushing.
Holding the breath
Breath-holding can increase unnecessary tension and make the exercise feel harder. Reduce the range or effort if you cannot breathe normally.
Removing support too early
The chair is part of the exercise setup, not a sign of weakness. Continue using it until you can control the position without swaying or grabbing suddenly.
Locking the knees
Keep a slight softness in the standing knee during balance poses. Avoid pushing the joint forcefully backward.
Comparing your range with someone else
Age alone does not determine flexibility or strength. Previous injuries, joint structure, medical conditions, and training history all influence how a pose looks.
Frequently Asked Questions
Is 70 too old to start yoga?
No. A person can begin an appropriately modified yoga practice at 70 or older. The routine should match current ability, and beginners may benefit from a qualified instructor who has experience working with older adults.
Is chair yoga effective for seniors?
Chair yoga can provide useful movement, posture, breathing, and muscular-control practice. Its effects depend on the poses, session difficulty, frequency, and the person’s starting ability. It should not be described as a guaranteed treatment or fall-prevention program.
Can I do yoga without getting onto the floor?
Yes. Every pose in this routine is performed seated or standing with chair support. Floor poses are optional and are not necessary for a useful beginner session.
Can yoga help improve balance after 70?
Supported standing poses may help challenge balance-related skills, including weight shifting, ankle stability, hip control, and visual focus. However, yoga alone should not be assumed to prevent falls. People with frequent falls or unexplained balance problems should seek professional assessment.
Should seniors over 70 practice yoga every day?
Gentle breathing and comfortable seated mobility may be practiced frequently, but beginners do not need a full routine every day. Starting with two or three sessions per week allows time to monitor soreness and fatigue.
Which yoga poses should older beginners avoid?
Older beginners should generally avoid poses that exceed their strength, mobility, or balance ability. Headstands, shoulder stands, deep unsupported forward folds, forceful twists, advanced backbends, hot yoga, and unsupported single-leg poses are poor starting choices.
Can I practice yoga with arthritis or a joint replacement?
Many poses can be modified, but the correct modification depends on the affected joint, symptoms, surgery type, and medical instructions. People with a joint replacement should follow their prescribed precautions and obtain professional guidance before using positions such as Figure Four, deep knee bends, or wide standing poses.
Conclusion
Yoga for seniors over 70 should focus on control, comfort, breathing, and appropriate support rather than extreme flexibility. Begin with the seated poses, keep a stable chair nearby during all standing movements, and progress only when every position feels steady.
A consistent 10- to 15-minute routine can be a practical addition to a broader weekly plan that also includes suitable aerobic and strength-building activities.
References
- National Center for Complementary and Integrative Health: Yoga Effectiveness and Safety
- CDC: Physical Activity Guidelines for Older Adults
- PubMed: Effects of Yoga on Physical and Psychological Health Among Older Adults
- NCBI Bookshelf: Chair-Based Yoga Program for Older Adults With Multimorbidity
- Bone Health and Osteoporosis Foundation: Exercise to Stay Healthy
- Glaucoma Research Foundation: Yoga Safety With Glaucoma
This content is for informational purposes only and is not a substitute for professional medical advice.