Chair yoga exercises for men provide a practical way to move stiff hips, shoulders, hamstrings, and the spine without getting down on the floor. Using a stable chair for support, the following 10 exercises can form a gentle 10–15-minute mobility routine for beginners, office workers, active men, and older adults.
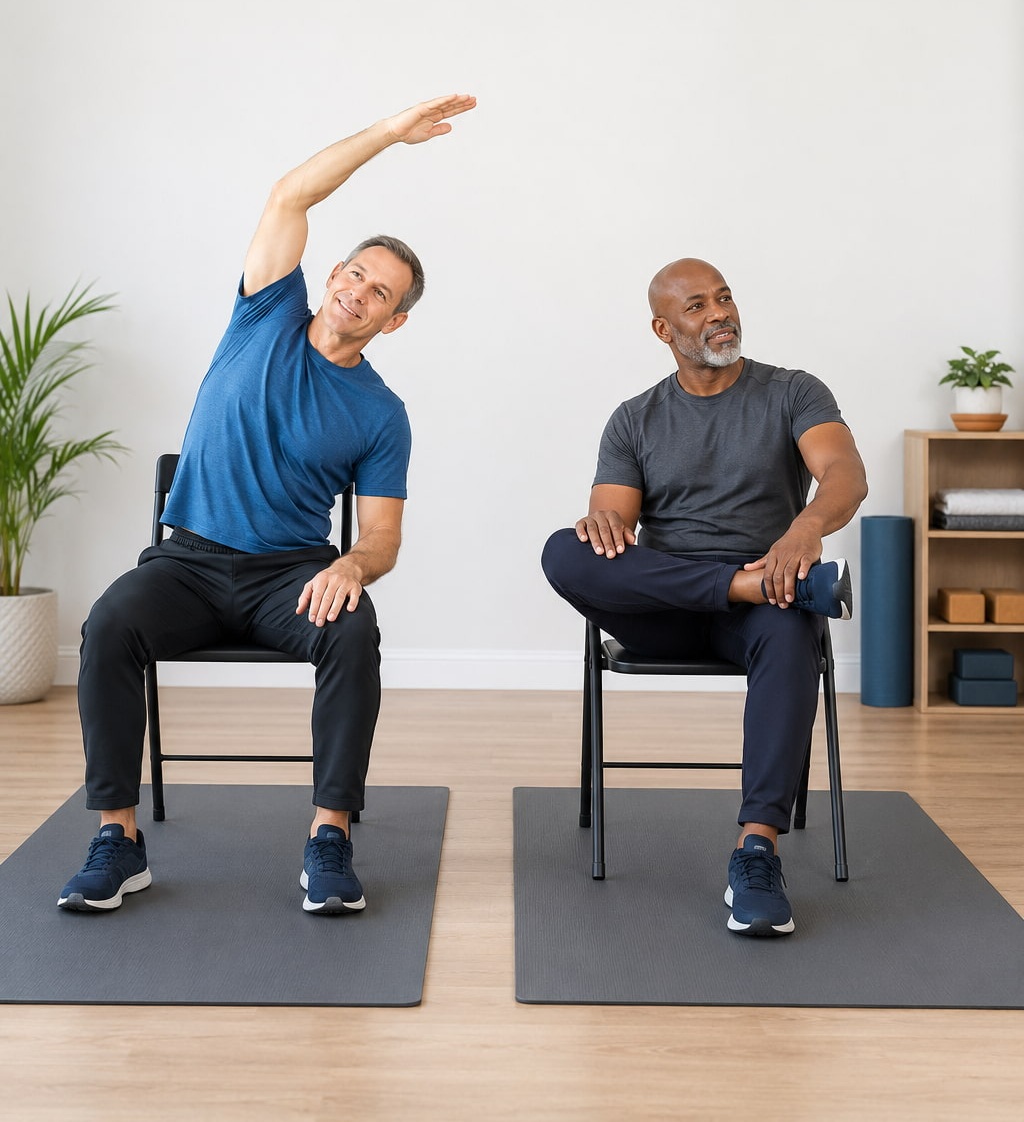
You do not need previous yoga experience or advanced flexibility. Start with a comfortable range, breathe normally, and progress by improving control rather than forcing deeper positions.
What Is Chair Yoga?
Chair yoga adapts traditional yoga poses so they can be performed while seated or while using a chair for support. It provides a practical no-floor option and makes each movement easier to adjust to your current mobility, flexibility, and balance.
A typical session combines gentle stretching, controlled joint movement, upright posture, slow breathing, and short holds. The Mayo Clinic Gentle Yoga guide includes seated and chair-supported versions of familiar yoga poses.
Chair yoga is not a separate male-only form of yoga. This routine focuses on mobility commonly useful for lifting, sports, desk work, driving, and everyday movement.
Benefits of Chair Yoga Exercises for Men
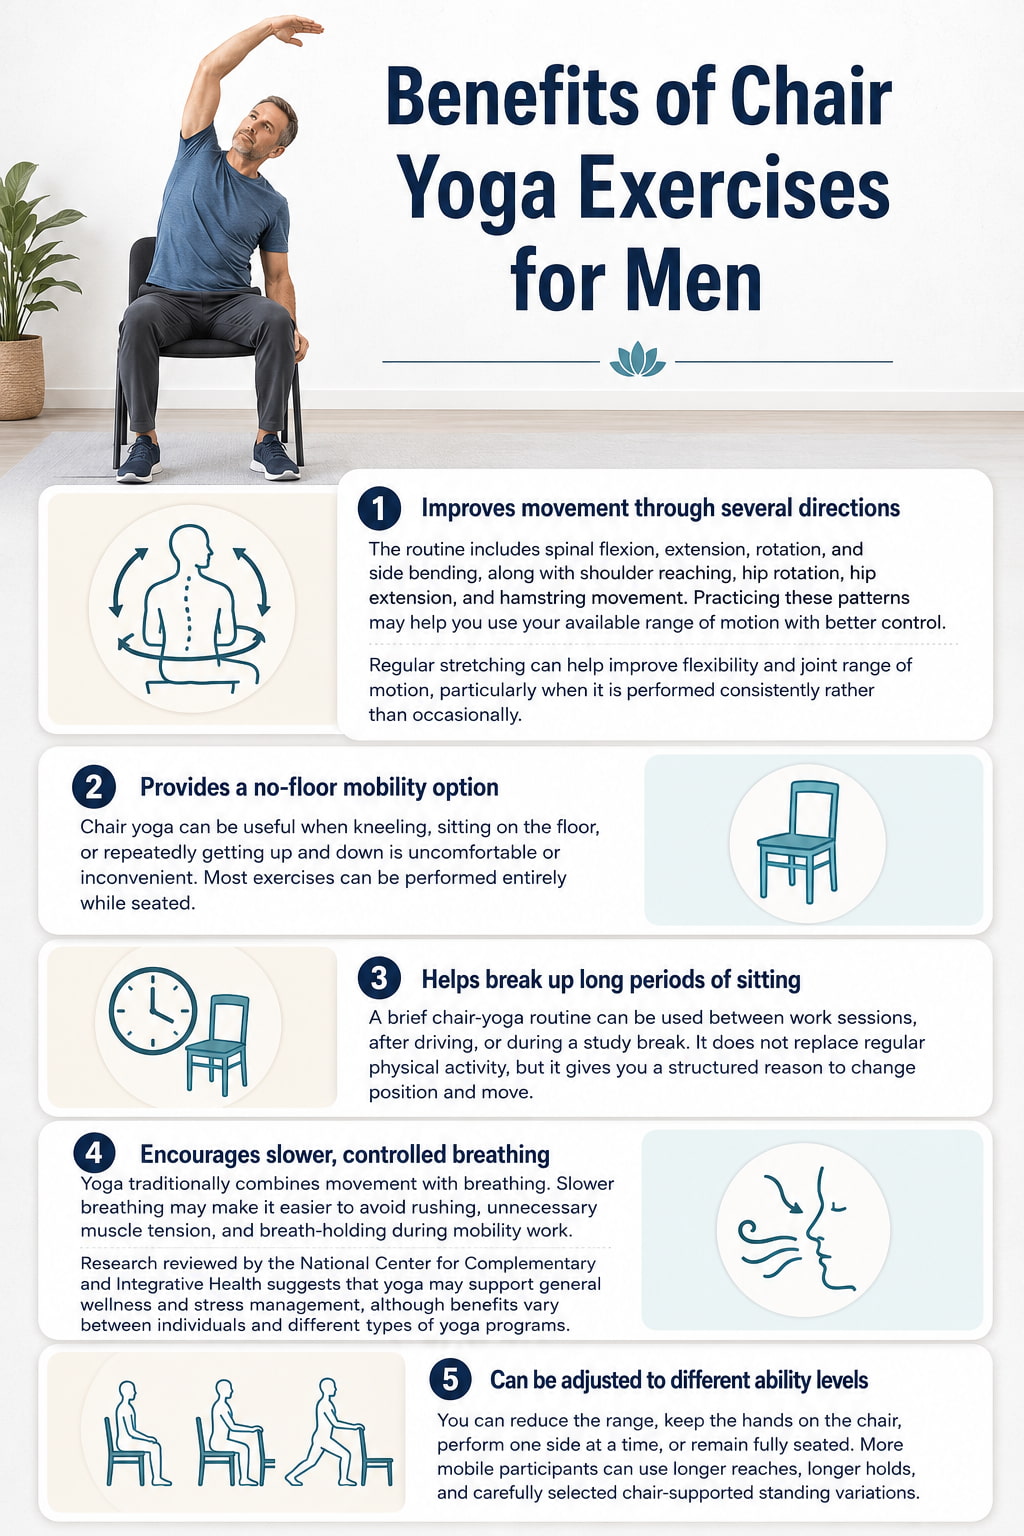
Chair yoga may help you:
- Improve shoulder, hip, and spinal mobility
- Stretch without kneeling or sitting on the floor
- Break up long periods of sitting or driving
- Practice slower, more controlled breathing
- Adjust exercises to match your current ability
The National Center for Complementary and Integrative Health notes that yoga may support general wellness and stress management, although results vary between individuals and yoga programs.
What You Need Before Starting
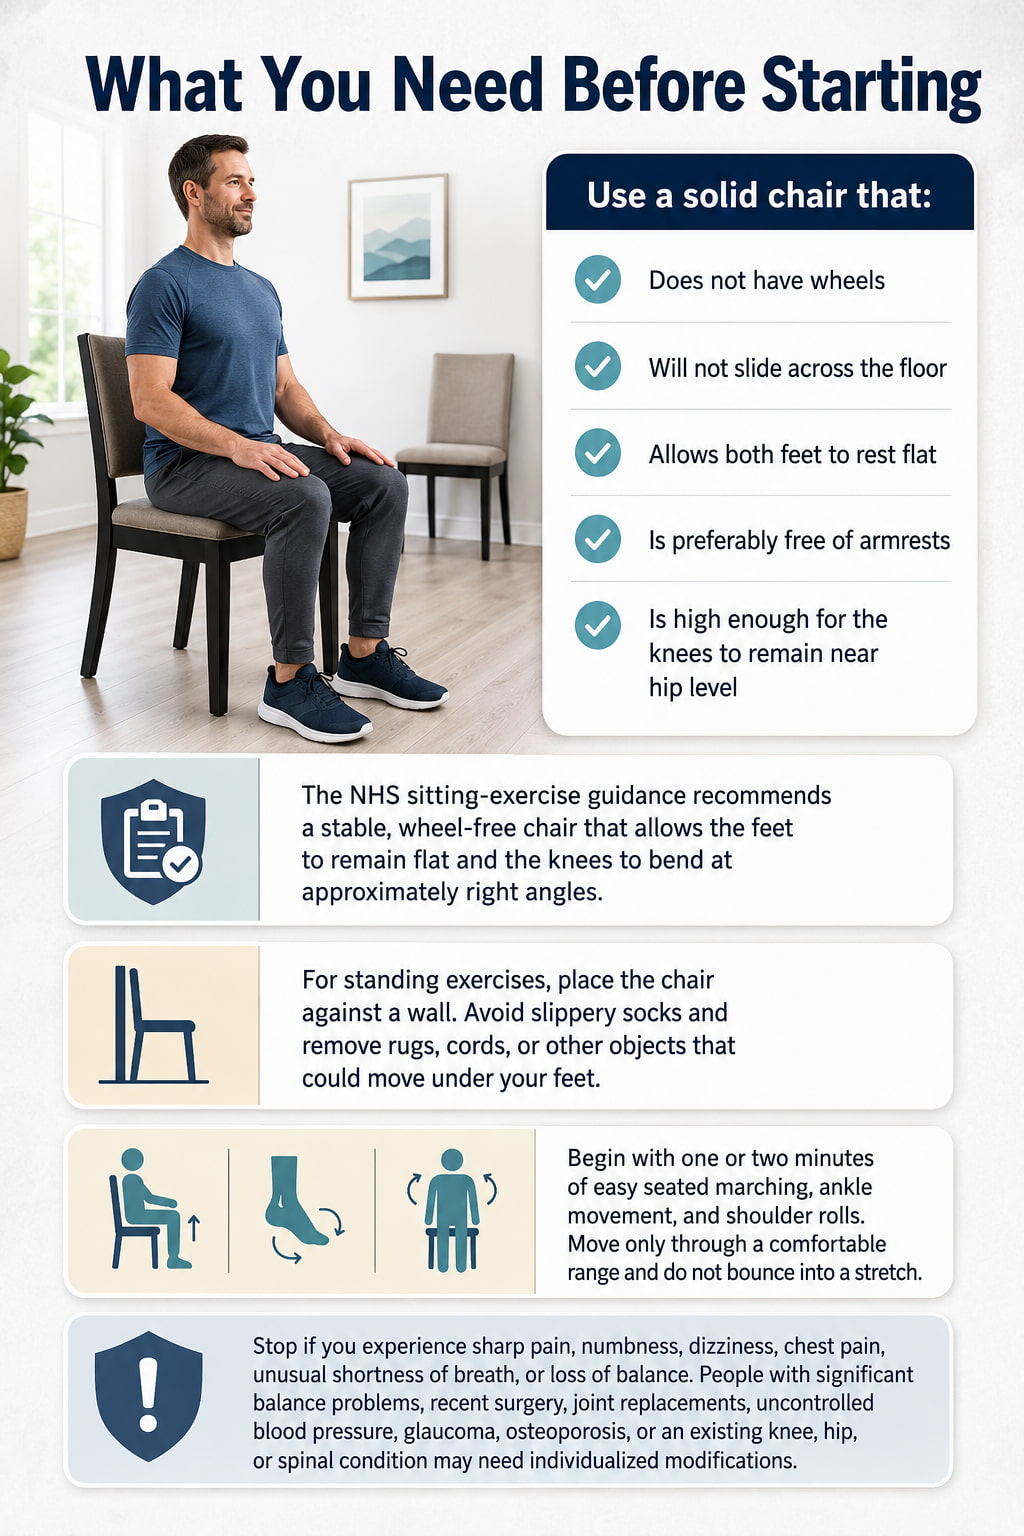
Use a sturdy chair that:
- Does not have wheels
- Will not slide across the floor
- Allows both feet to rest flat
- Is preferably free of armrests
- Keeps your knees near hip level
The NHS sitting-exercise guidance recommends a stable, wheel-free chair that allows the feet to remain flat and the knees to bend at approximately a right angle.
Place the chair against a wall before standing exercises. Remove loose rugs, cords, and other objects that could move under your feet.
Warm up with one or two minutes of easy seated marching, ankle movements, and shoulder rolls. Move slowly, breathe normally, and never force or bounce into a stretch.
Stop if you experience sharp pain, numbness, dizziness, chest pain, unusual shortness of breath, or loss of balance. Seek professional guidance when an injury, recent procedure, medical condition, or significant balance problem affects your ability to exercise safely.
10 Best Chair Yoga Exercises for Men at a Glance
Use this table to compare the main mobility focus and a practical beginner starting dose for each exercise.
| Exercise | Main mobility focus | Starting dosage | |
|---|---|---|---|
| 1 | Seated Mountain With Overhead Reach | Shoulders and upper back | 4–6 slow repetitions |
| 2 | Shoulder Rolls and Chest Opener | Chest and shoulders | 5 rolls plus 3–5 breaths |
| 3 | Seated Cat-Cow | Pelvis and spine | 5–8 repetitions |
| 4 | Seated Side Bend | Lats and side of torso | 3–5 breaths per side |
| 5 | Seated Spinal Twist | Upper-back rotation | 3–5 breaths per side |
| 6 | Seated Figure-Four | Glutes and hip rotation | 20–30 seconds per side |
| 7 | Seated Staff Pose With Hip Hinge | Hamstrings and calves | 20–30 seconds per side |
| 8 | Seated Triangle | Inner thighs and side body | 2–4 breaths per side |
| 9 | Seated Crescent Lunge | Hip flexors and thighs | 3–5 breaths per side |
| 10 | Chair-Supported Downward Dog | Shoulders, back, and hamstrings | 3–5 breaths |
10 Best Chair Yoga Exercises for Men
These chair yoga exercises target the hips, shoulders, hamstrings, and spine while using a stable chair for support. Perform each movement slowly, breathe normally, and stay within a comfortable, pain-free range.
1. Seated Mountain With Overhead Reach
Best for: Practicing upright posture, controlled breathing, and comfortable overhead shoulder movement.
Muscles worked: Deltoids and shoulder-blade muscles, with the abdominals and spinal extensors stabilizing the trunk.
Sets, reps, and rest: Perform 1–2 sets of 4–6 slow repetitions. Rest for 10–20 seconds if needed.
How to do it:
- Sit near the front of the chair with both feet flat and hip-width apart.
- Sit tall with your hands beside your thighs and shoulders relaxed.
- Inhale as you raise both arms forward or out to the sides.
- Stop at the highest comfortable position without arching your back.
- Exhale as you lower the arms slowly.
Common mistakes: Shrugging the shoulders, flaring the ribs, arching the lower back, lifting the feet, or forcing the arms overhead.
Progression or regression: Raise one arm at a time or stop at shoulder height to make it easier. Hold the overhead position for three slow breaths to make it harder.
Coaching cue: Reach the hands away from the shoulders rather than forcing them higher.
2. Shoulder Rolls and Seated Chest Opener
Best for: Loosening the shoulders and chest after prolonged sitting, driving, or upper-body training.
Muscles worked: Trapezius, rhomboids, rear deltoids, and shoulder stabilizers. The chest muscles are gently lengthened during the opener.
Sets, reps, and rest: Perform 5 slow shoulder rolls, followed by a 3–5-breath chest opener. Complete 1–2 rounds.
How to do it:
- Sit upright with both feet flat.
- Lift your shoulders gently toward your ears.
- Roll them backward and then lower them away from your ears.
- After the final roll, reach your arms slightly behind your body.
- Turn the palms forward and gently lift the chest.
- Hold while breathing normally.
Common mistakes: Moving too quickly, forcing the arms backward, lifting the chin, flaring the ribs, or pulling the shoulders down aggressively.
Progression or regression: Keep your hands on your hips for an easier version. Extend the arms farther behind you or use bent-elbow cactus arms for a greater challenge.
Coaching cue: Let the shoulder blades move around the rib cage without pushing the head forward.
3. Seated Cat-Cow
Best for: Practicing controlled movement through the pelvis and spine.
Muscles worked: Abdominals, spinal extensors, and muscles around the shoulder blades.
Sets, reps, and rest: Perform 1–2 sets of 5–8 slow repetitions. Rest for 15–20 seconds if needed.
How to do it:
- Sit tall with your hands resting on your thighs.
- Inhale as you tilt the pelvis slightly forward and lift the chest.
- Draw the shoulders gently back without throwing the head backward.
- Exhale as you tilt the pelvis backward and lightly tighten the abdominals.
- Round the back only as far as feels comfortable.
- Continue moving slowly between the two positions.
Common mistakes: Moving only the neck, forcing the lower back, collapsing quickly into the rounded position, or holding the breath.
Progression or regression: Use small pelvic tilts and keep the spine close to neutral to make it easier. Reach the arms forward during cat and draw the elbows back during cow to make it harder.
Coaching cue: Start each repetition from the pelvis and let the spine follow.
Safety note: People with osteoporosis may need to avoid deep spinal rounding and keep the back closer to neutral.
4. Seated Side Bend
Best for: Improving side-body mobility and making overhead reaching more comfortable.
Muscles worked: Obliques and spinal stabilizers, with the lats and muscles along the side of the torso being lengthened.
Sets, reps, and rest: Hold for 3–5 slow breaths per side. Complete 1–2 rounds.
How to do it:
- Sit tall with both feet flat.
- Hold the side of the chair lightly with your right hand.
- Inhale and raise your left arm overhead.
- Exhale as you lean gently toward the right.
- Keep your chest facing forward and both sides of your pelvis on the chair.
- Return to the center and repeat on the opposite side.
Common mistakes: Twisting toward the floor, lifting one side of the pelvis, shrugging the raised shoulder, or collapsing through the lower side.
Progression or regression: Keep the reaching hand on your shoulder for an easier version. Extend the opposite leg to the side or hold for additional breaths to make it harder.
Coaching cue: Reach upward before bending sideways.
5. Seated Spinal Twist
Best for: Practicing controlled upper-back rotation for reaching and turning.
Muscles worked: Obliques, spinal extensors, and deep spinal stabilizers.
Sets, reps, and rest: Hold for 3–5 slow breaths per side. Complete 1–2 rounds.
How to do it:
- Sit tall with both feet flat and knees facing forward.
- Place your right hand on the outside of your left thigh.
- Rest your left hand lightly beside or behind you on the chair.
- Inhale and lengthen through the top of your head.
- Exhale as you rotate your ribs gently toward the left.
- Return to the center and repeat on the other side.
Common mistakes: Pulling forcefully against the chair, rotating only the head, allowing the knees to shift, or collapsing the spine.
Progression or regression: Cross your arms over your chest and use a smaller rotation to make it easier. Extend both arms at shoulder height and twist without hand support to make it harder.
Coaching cue: Use your hands as guides, not as levers.
6. Seated Figure-Four
Best for: Improving hip external rotation and gently stretching the gluteal region.
Muscles worked: Gluteal muscles and deep hip rotators of the crossed leg, with the core supporting the upright position.
Sets, reps, and rest: Hold for 20–30 seconds or 3–5 breaths per side. Complete 1–2 rounds.
How to do it:
- Sit near the front of the chair with both feet flat.
- Place your right ankle above your left knee.
- Keep the right foot gently flexed.
- Allow the right knee to open without pressing down on it.
- Remain upright or hinge forward slightly from the hips.
- Return the foot to the floor and change sides.
Common mistakes: Pressing forcefully on the knee, rounding deeply through the back, twisting the pelvis, or continuing despite knee discomfort.
Progression or regression: Cross one ankle over the other instead of placing it above the knee to make the exercise easier. Add a small forward hip hinge to increase the stretch.
Coaching cue: Move the chest forward with a long spine instead of pushing the knee down.
7. Seated Staff Pose With Hip Hinge
Best for: Improving hamstring and calf mobility while practicing a controlled hip hinge.
Muscles worked: Hamstrings and calves of the extended leg, with the quadriceps and spinal extensors supporting the position.
Sets, reps, and rest: Hold for 20–30 seconds per side. Complete 1–2 rounds.
How to do it:
- Sit near the front edge of the chair.
- Keep your left foot flat and extend your right leg forward.
- Place the right heel on the floor with the toes pointing upward.
- Sit tall and place your hands on your hips or left thigh.
- Hinge forward from the hips while keeping your back long.
- Stop when you feel mild tension behind the thigh or calf.
- Return slowly and repeat on the other side.
Common mistakes: Rounding the back to reach farther, locking the knee aggressively, bouncing, or pulling forcefully on the toes.
Progression or regression: Keep the working knee slightly bent and use a smaller hinge to make it easier. Extend both legs or place the heels on a low stool to make it harder.
Coaching cue: Move the chest toward the toes rather than the forehead toward the knee.
Safety note: Maintain a neutral spine if forward rounding is uncomfortable or has been restricted by a healthcare professional.
8. Seated Triangle
Best for: Combining inner-thigh, hamstring, shoulder, and side-body mobility.
Muscles worked: Adductors and hamstrings of the extended leg, with the obliques, spinal stabilizers, and shoulders controlling the torso and arms.
Sets, reps, and rest: Hold for 2–4 slow breaths per side. Complete 1–2 rounds.
How to do it:
- Sit near the front of the chair.
- Keep your left knee bent with the foot flat.
- Extend your right leg to the side with the heel or foot supported.
- Reach both arms out at shoulder height.
- Lean gently toward the extended leg.
- Lower the right hand toward the thigh or shin while reaching the left arm upward.
- Return slowly and repeat on the opposite side.
Common mistakes: Collapsing the chest toward the floor, lifting one side of the pelvis, locking the extended knee, or forcing the lower hand downward.
Progression or regression: Keep the lower hand high on the thigh and shorten the side-leg position to make it easier. Reach the upper arm overhead or extend the leg farther to make it harder.
Coaching cue: Create space through the ribs rather than trying to reach the floor.
9. Seated Crescent Lunge
Best for: Stretching the front of the hip and thigh while maintaining upright posture.
Muscles worked: Hip flexors and quadriceps of the rear leg, with the glutes and abdominals helping stabilize the pelvis.
Sets, reps, and rest: Hold for 3–5 slow breaths per side. Complete 1–2 rounds.
How to do it:
- Sit sideways near the front edge of the chair.
- Keep the inside foot flat with the knee positioned near the ankle.
- Slide the outside leg backward and place the ball of the foot on the floor.
- Sit tall and gently brace your abdomen.
- Keep your hands on your hips or raise the arms overhead.
- Hold without forcing the rear hip forward.
- Return the rear leg and repeat on the other side.
Common mistakes: Using an unstable chair, excessively arching the lower back, twisting the pelvis, or forcing the rear leg too far backward.
Progression or regression: Keep the rear foot closer to the chair and your hands on your hips to make it easier. Raise both arms or progress to a standing chair-supported lunge to make it harder.
Coaching cue: Lightly tighten the glute of the rear leg before increasing the stretch.
10. Chair-Supported Downward Dog
Best for: Improving shoulder, upper-back, hamstring, and calf mobility while practicing a supported hip hinge.
Muscles worked: Shoulders, triceps, shoulder-blade stabilizers, spinal extensors, lats, hamstrings, and calves.
Sets, reps, and rest: Hold for 3–5 slow breaths. Complete 1–2 sets and rest for 20–30 seconds.
How to do it:
- Place a stable chair firmly against a wall.
- Stand facing the chair with your feet hip-width apart.
- Place both hands on the chair back or seat.
- Step backward and keep a slight bend in your knees.
- Push your hips back while lengthening your arms and spine.
- Keep your neck relaxed and breathe normally.
- Walk toward the chair and return upright slowly.
Common mistakes: Using a chair that can slide, locking the knees, rounding the lower back, forcing the shoulders, or standing up too quickly.
Progression or regression: Perform the movement seated with the arms reaching forward to make it easier. Place the hands on the lower chair seat and gradually straighten the legs to make it harder.
Coaching cue: Bend the knees enough to keep your back long.
Safety note: Keep the chair against a wall and remain seated if standing transitions or balance feel uncertain.
10-Minute Chair Yoga Routine for Men
Use the following sequence when you want a short full-body mobility session.
| Order | Exercise | Dosage |
|---|---|---|
| 1 | Seated Mountain With Overhead Reach | 5 repetitions |
| 2 | Shoulder Rolls and Chest Opener | 5 rolls and 3 breaths |
| 3 | Seated Cat-Cow | 6 repetitions |
| 4 | Seated Side Bend | 3 breaths per side |
| 5 | Seated Spinal Twist | 3 breaths per side |
| 6 | Seated Figure-Four | 20 seconds per side |
| 7 | Seated Staff Pose | 20 seconds per side |
| 8 | Seated Triangle | 2 breaths per side |
| 9 | Seated Crescent Lunge | 3 breaths per side |
| 10 | Chair-Supported Downward Dog | 3–5 breaths |
Frequency: Start with 2–3 sessions per week. A shorter five-minute session can also be used as a daily movement break.
Effort level: Keep the routine around 3–5 out of 10. You should feel controlled movement or mild stretching tension, not pain.
Rest: Use one or two relaxed breaths between exercises. Take longer when changing the chair position or moving from seated to standing.
Progression: Begin with one round. Once the movements feel comfortable and controlled, add one or two breaths to each hold or complete a second round. The Mayo Clinic guide suggests holding gentle-yoga positions for approximately four to six slow breaths according to individual ability.
How Often Should Men Do Chair Yoga?
Two or three sessions per week is a reasonable starting point. Consistency matters more than performing a long session occasionally.
You can also use selected exercises more frequently:
- Shoulder rolls and cat-cow during desk breaks
- Figure-four and staff pose after prolonged sitting
- Crescent lunge after driving
- Downward dog after upper-body training
- Spinal twists before recreational activities requiring rotation
Brief mobility work can be useful, but chair yoga should not replace all other exercise. Current CDC physical activity guidance recommends that adults work toward at least 150 minutes of moderate-intensity aerobic activity per week and perform muscle-strengthening activity on at least two days.
A balanced weekly plan might include chair yoga alongside walking, cycling, swimming, resistance training, or another activity appropriate for your ability.
Common Chair Yoga Mistakes
Using the wrong chair
A rolling office chair, folding chair that shifts, or lightweight dining chair can make the exercises less stable. Use a solid chair on a non-slip surface.
Forcing the range
Mobility develops through repeated, controlled exposure. Pushing harder does not guarantee faster progress and may irritate a joint or muscle.
Holding the breath
Breathe continuously. Exhale during twists, side bends, and forward hinges when that feels natural.
Turning every exercise into a passive stretch
Some positions require active posture and muscle control. Sit tall, maintain light abdominal tension, and control the return from each pose.
Moving only through the neck or lower back
During twists and back-bending movements, distribute the movement through the upper back, rib cage, pelvis, and shoulders instead of forcing one area.
Progressing to standing too early
The fully seated variation is not inferior. Move to chair-supported standing positions only when you can control the seated version and feel stable during transitions.
Frequently Asked Questions
Is chair yoga good for men who are not flexible?
Yes. Chair yoga can be scaled to your current mobility by shortening the range, bending the knees, keeping the arms lower, or using the chair for more support. Flexibility is not a requirement for starting.
Is chair yoga only for older men?
No. It can also be useful for beginners, office workers, lifters, recreational athletes, people who travel frequently, and anyone who prefers a no-floor mobility routine.
Can chair yoga improve hip mobility?
Exercises such as seated figure-four, staff pose, triangle, and crescent lunge move the hips through external rotation, flexion, abduction, and extension. Regular practice may help improve comfort and control within your available range.
Can chair yoga help tight hamstrings?
Seated staff pose, triangle, and chair-supported downward dog place the hamstrings in progressively lengthened positions. Keep the knees slightly bent when needed and avoid rounding the back simply to reach farther.
Should I do chair yoga before or after a workout?
Dynamic movements such as shoulder rolls, overhead reaches, and cat-cow can work well during a warm-up. Longer figure-four or hamstring holds usually fit better after training or in a separate mobility session.
Before heavy lifting, sprinting, or explosive activity, avoid prolonged passive stretching of the muscles you are about to use. Use controlled dynamic movements instead.
Can chair yoga replace strength training?
Not usually. Chair yoga may involve light muscular effort, but it does not provide the progressive resistance needed for comprehensive strength development. Combine it with appropriate resistance exercises for the legs, hips, back, chest, shoulders, and arms.
What should I do if one side is tighter?
Use a comfortable range on each side rather than forcing the tighter side to match the more mobile side. Start with the tighter side, use the same duration on both sides, and progress gradually.
Conclusion
Chair yoga exercises for men offer a simple way to work on shoulder, spinal, hip, and hamstring mobility without needing to get on the floor. Begin with one controlled round, use a stable chair, and focus on steady breathing and comfortable movement.
Practice the routine two or three times per week, then progress by adding breaths, improving control, or carefully introducing supported standing variations.
References
- National Center for Complementary and Integrative Health: Yoga Effectiveness and Safety
- Mayo Clinic: Gentle Yoga Guide
- Department of Veterans Affairs: Chair Yoga Handout
- NHS: Sitting Exercises
- Mayo Clinic: Stretching and Flexibility Guidance
- CDC: Adding Physical Activity as an Adult
- OpenStax: Anatomy and Physiology
This content is for informational purposes only and is not a substitute for professional medical advice.