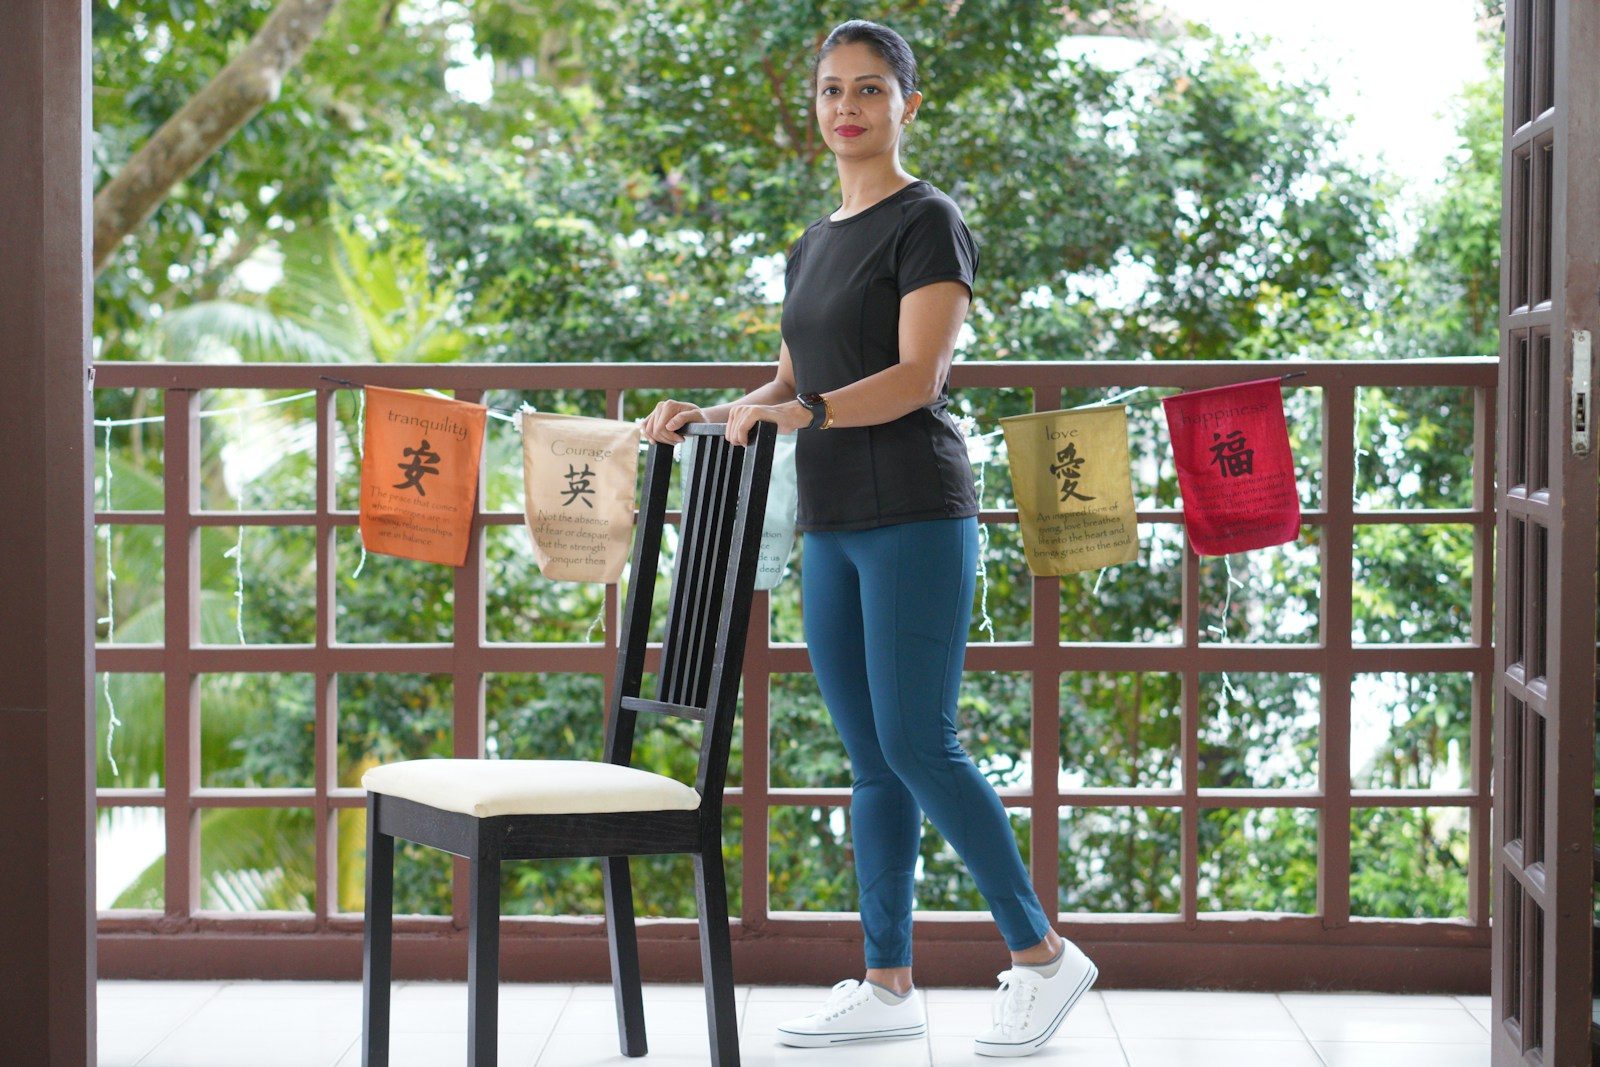
The best chair exercises for beginners combine seated movements, sit-to-stand exercises, and chair-supported standing work to train the whole body safely at home. You can use them to build basic strength, improve movement control, and become more comfortable with exercise before moving to harder variations.
A chair does more than provide a place to sit. It can reduce balance demands, give you a consistent target during squats, and provide support during standing exercises. Most beginners can start with body weight and add light resistance only after the movements feel controlled.
What Are Chair Exercises?
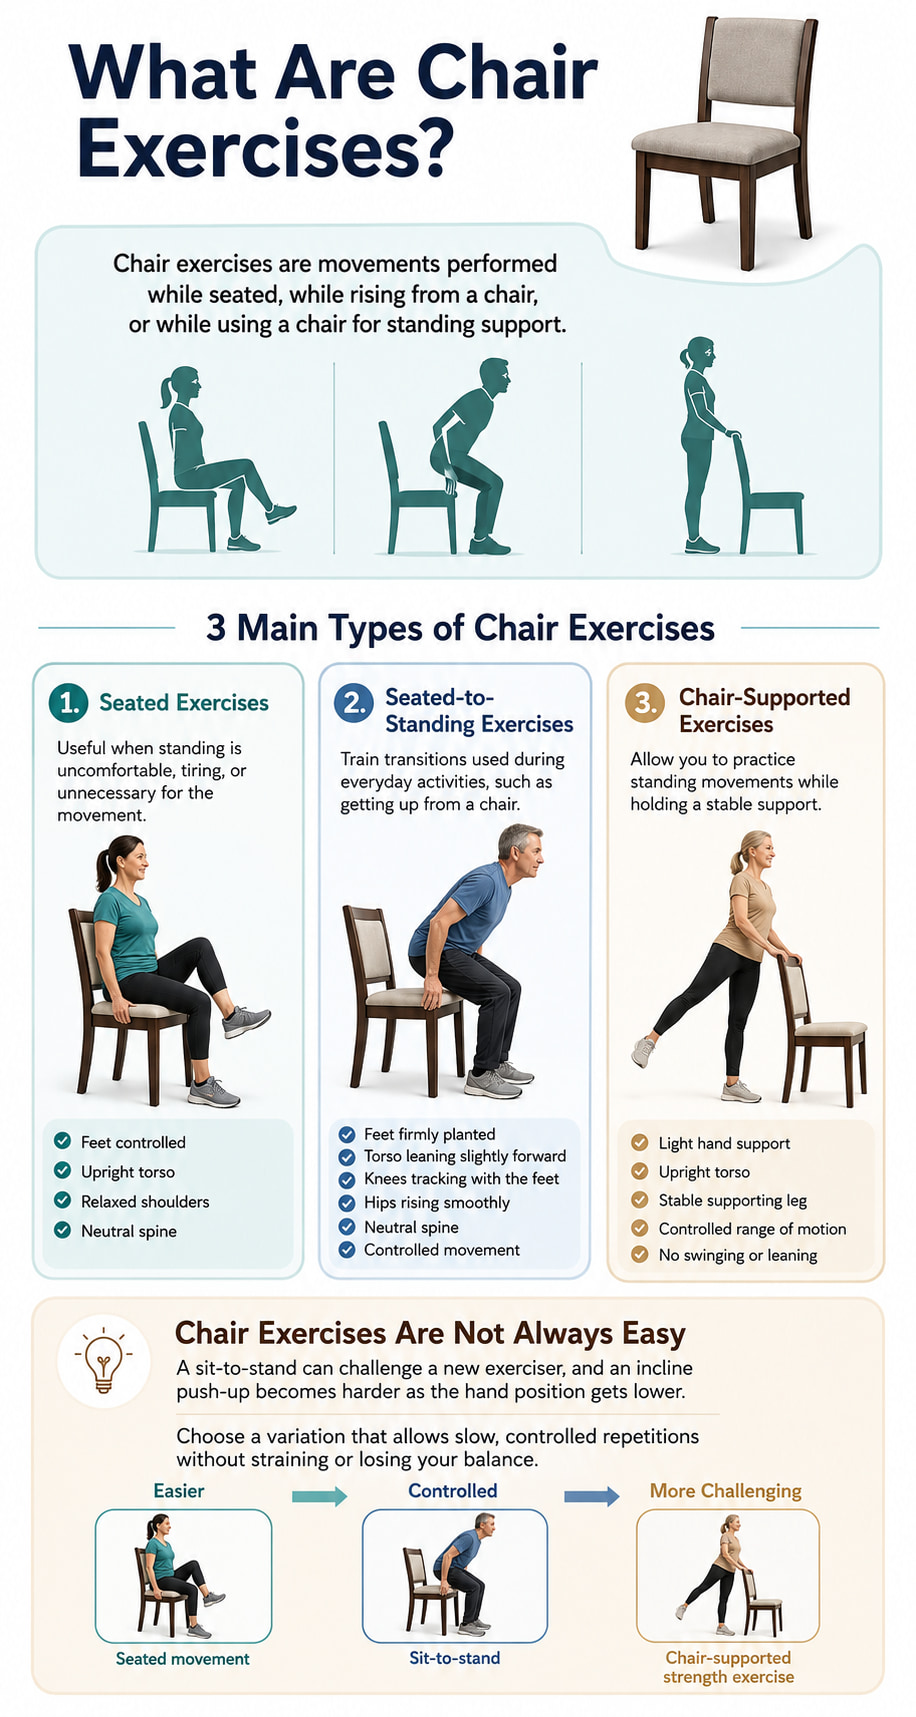
Chair exercises are movements performed while seated, while rising from a chair, or while using a chair for standing support.
They usually fall into three categories:
- Seated exercises: Useful when standing is uncomfortable, tiring, or unnecessary for the movement.
- Seated-to-standing exercises: Train transitions used during everyday activities, such as getting up from a chair.
- Chair-supported exercises: Allow you to practice standing movements while holding a stable support.
Chair exercises are not automatically easy. A sit-to-stand can be challenging for a new exerciser, and an incline push-up can become difficult when the hands are placed on a lower surface. Choose a variation that allows slow, controlled repetitions without straining or losing your balance.
How to Choose and Position Your Chair Safely
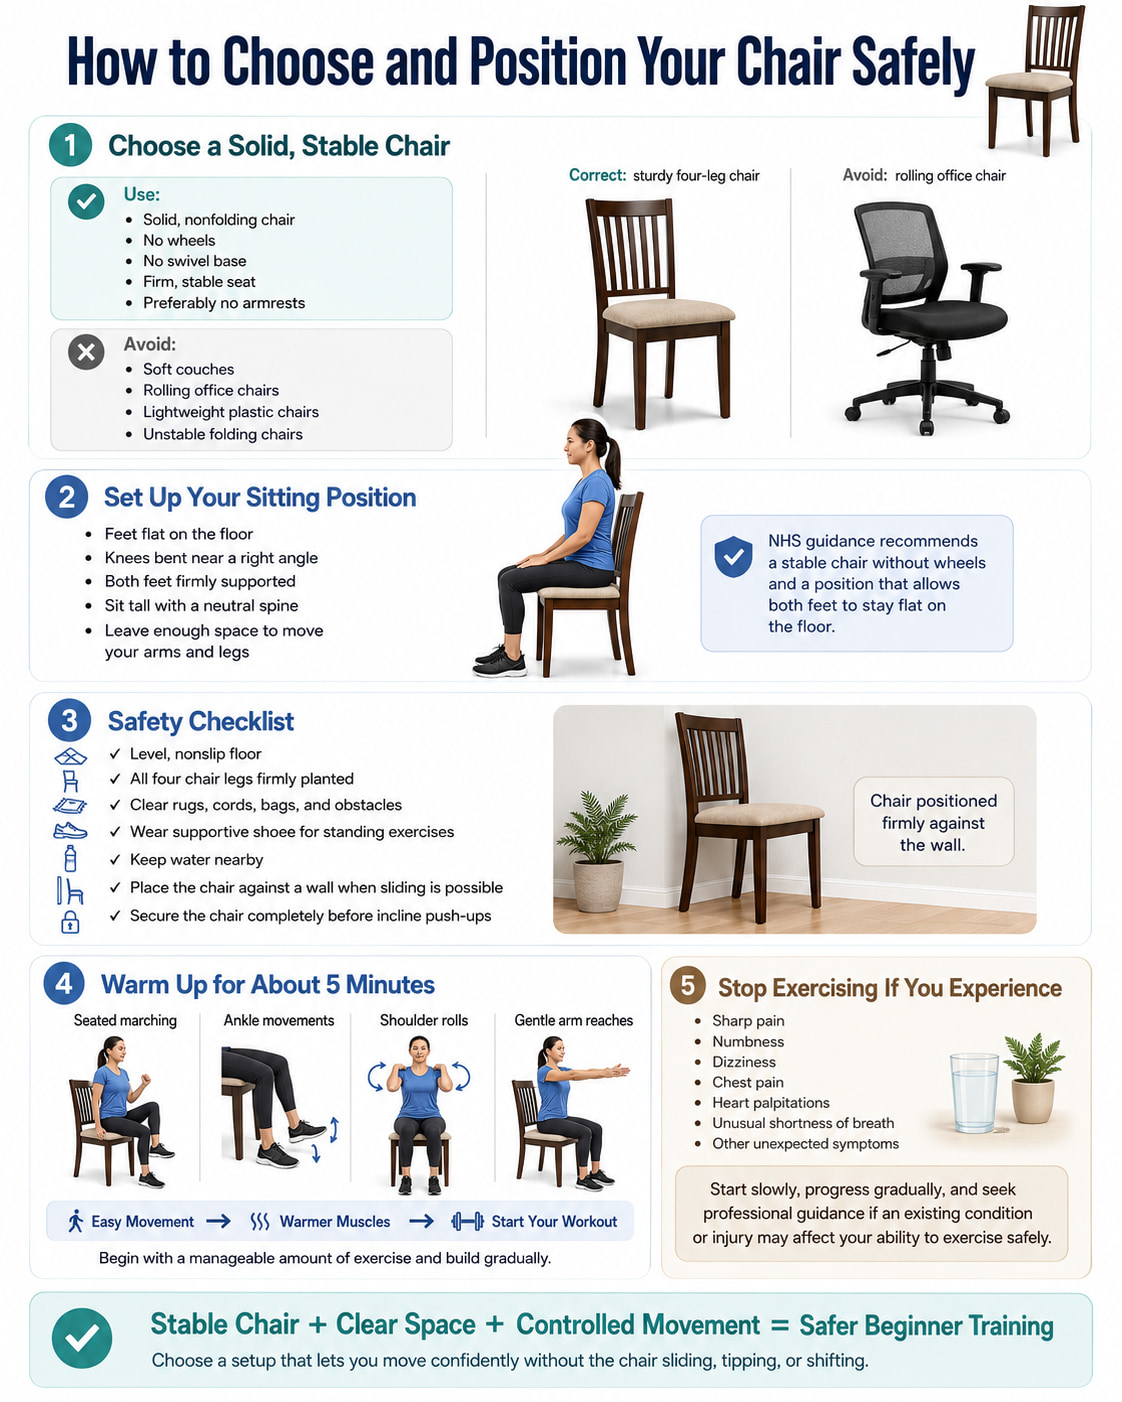
Use a solid, nonfolding chair that does not have wheels or a swivel base. Avoid soft couches, rolling office chairs, lightweight plastic chairs, and unstable folding chairs.
The NHS sitting-exercise guidance recommends a stable chair without wheels. When seated, you should be able to place your feet flat on the floor with your knees bent at approximately right angles. A chair without arms gives you more space for most movements.
Before exercising:
- Place the chair on a level, nonslip surface.
- Check that all four legs remain firmly on the floor.
- Clear loose rugs, cords, bags, and other obstacles.
- Wear supportive shoes if you will be standing.
- Keep water nearby.
- Place the chair against a wall when an exercise could cause it to slide.
- Do not perform incline push-ups on the chair unless it is heavy, stable, and completely secured.
Warm up for about five minutes with easy seated marching, ankle movements, shoulder rolls, and gentle arm reaches.
Start with a small amount of exercise and build gradually. The Physical Activity Guidelines for Americans specifically recommend that inactive people begin with manageable amounts rather than trying to meet the full weekly guidelines immediately.
Stop exercising if you experience sharp pain, numbness, dizziness, chest pain, heart palpitations, unusual shortness of breath, or other unexpected symptoms. The British Heart Foundation’s chair-exercise guidance also recommends starting slowly, progressing gradually, and seeking medical guidance when an existing condition or injury may be affected.
10 Best Chair Exercises for Beginners
These 10 chair exercises for beginners combine seated, standing, and chair-supported movements to build full-body strength, mobility, and control at home.
Start with a comfortable range and controlled reps, then gradually add repetitions, sets, or light resistance as you get stronger.
1. Seated March
Best for: Warming up, coordination, and gentle hip movement
Muscles worked: Hip flexors and quadriceps, with the abdominal muscles helping stabilize the torso
Equipment needed: A stable chair
Sets, reps, and rest: Perform 1–2 sets of 20–40 seconds. Rest for 30–45 seconds.
How to Do It
- Sit tall near the front half of the chair.
- Place both feet flat on the floor, approximately hip-width apart.
- Brace your midsection gently without holding your breath.
- Lift one foot a few inches from the floor.
- Lower it under control and repeat with the other leg.
- Continue alternating at a comfortable rhythm.
Keep your shoulders relaxed and your torso facing forward.
Common mistakes: Leaning far backward, pulling on the chair, stomping the feet, or trying to lift the knees higher than you can control. A small controlled lift is more useful than a large movement performed with momentum.
Progression or regression: Make it easier by slowing down and lifting each foot only slightly. Make it harder by marching longer, lifting the knees a little higher, or adding a gentle opposite-arm swing.
Coaching cue: Sit tall while your legs do the work.
2. Seated Knee Extension
Best for: Strengthening the front of the thighs and practicing controlled knee movement
Muscles worked: Quadriceps
Equipment needed: A stable chair
Sets, reps, and rest: Perform 1–2 sets of 8–12 repetitions per leg. Rest for 30–45 seconds.
How to Do It
- Sit upright with your feet flat and your thighs supported by the chair.
- Hold the sides of the seat lightly if needed.
- Straighten one knee until the lower leg moves forward.
- Pause briefly without forcing the knee into a locked position.
- Lower the foot slowly.
- Complete the repetitions before changing legs, or alternate sides.
Keep the thigh in contact with the chair throughout the movement.
Common mistakes: Swinging the lower leg, leaning backward, lifting the thigh, or forcing the knee completely straight when the range feels uncomfortable.
Progression or regression: Use a smaller range if full extension is difficult. Progress by adding repetitions, pausing for two or three seconds at the top, or using a very light ankle weight after you can control the bodyweight version.
Coaching cue: Lift smoothly and lower even more slowly.
3. Seated Heel and Toe Raises
Best for: Lower-leg strength, ankle movement, and foot control
Muscles worked: The calves during heel raises and the tibialis anterior along the front of the shin during toe raises
Equipment needed: A stable chair
Sets, reps, and rest: Perform 1–2 sets of 10–15 heel raises followed by 10–15 toe raises. Rest for about 30 seconds.
How to Do It
- Sit tall with both feet flat and directly beneath or slightly in front of the knees.
- Keep the balls of your feet on the floor and raise both heels.
- Pause briefly, then lower the heels slowly.
- Keep the heels down and lift the toes toward the shins.
- Pause, then return the toes to the floor.
Keep the knees facing forward rather than allowing them to fall inward or outward.
Common mistakes: Bouncing the feet, moving too quickly, rolling onto the outer edges of the feet, or allowing the knees to move excessively.
Progression or regression: Perform one foot at a time for a harder variation. Use a smaller lift if your ankles feel stiff. You can eventually progress to standing heel raises while holding the chair.
Coaching cue: Press through the whole front of the foot during heel raises.
4. Sit-to-Stand
Best for: Functional leg strength and learning the basic squat pattern
Muscles worked: Quadriceps and gluteus maximus, with help from the hamstrings, calves, and core
Equipment needed: A firm chair
Sets, reps, and rest: Perform 1–3 sets of 5–10 repetitions. Rest for 60–90 seconds.
How to Do It
- Sit near the front half of the chair with your feet approximately hip- to shoulder-width apart.
- Place the feet far enough back that the heels remain firmly planted.
- Lean your torso slightly forward while keeping your back neutral.
- Push through both feet and stand up.
- Finish tall without leaning backward.
- Move your hips back and lower yourself to the chair under control.
Lightly touch the seat before beginning the next repetition. Do not collapse or drop onto it.
The NHS strength-exercise guide includes sit-to-stands and supported standing leg exercises as practical home strength movements.
Common mistakes: Rocking repeatedly to create momentum, placing the feet too far forward, allowing the knees to collapse inward, pushing mostly through one leg, or dropping quickly onto the chair.
Progression or regression: Use your hands lightly on your thighs or a stable nearby surface if needed. Progress by crossing your arms, slowing the lowering phase, adding repetitions, or holding one light weight close to your chest.
Coaching cue: Bring your chest forward, then push the floor away.
5. Chair-Supported Side Leg Raise
Best for: Outer-hip strength and standing control
Muscles worked: Gluteus medius and gluteus minimus, with the core and standing leg providing stability
Equipment needed: A stable chair
Sets, reps, and rest: Perform 1–2 sets of 8–12 repetitions per side. Rest for 30–45 seconds.
How to Do It
- Stand behind the chair with your feet facing forward.
- Hold the chair back lightly with one or both hands.
- Shift your weight onto one leg without leaning sideways.
- Lift the opposite leg a short distance out to the side.
- Keep the toes pointing mostly forward.
- Lower the foot slowly and complete the set before changing sides.
The movement does not need to be high. Stop when you can no longer keep your torso and pelvis level.
Common mistakes: Leaning away from the working leg, turning the toes toward the ceiling, swinging the leg, gripping the chair excessively, or using a range that causes the body to tilt.
Progression or regression: Use both hands and a small range to make it easier. Progress to one-hand support, a brief pause at the top, or a light resistance band above the knees.
Coaching cue: Stay tall and move the leg, not the torso.
6. Chair-Supported Standing Hip Extension
Best for: Strengthening the glutes and practicing controlled backward leg movement
Muscles worked: Gluteus maximus and hamstrings, with the core stabilizing the pelvis and spine
Equipment needed: A stable chair
Sets, reps, and rest: Perform 1–2 sets of 8–12 repetitions per side. Rest for 30–45 seconds.
How to Do It
- Stand tall behind the chair and hold it lightly.
- Keep both knees straight but not forcefully locked.
- Brace your abdomen gently.
- Move one leg backward without tipping your chest forward.
- Stop before your lower back begins to arch.
- Return the foot slowly and repeat.
Keep the working foot facing forward and the hips square to the chair.
Common mistakes: Arching the lower back, throwing the leg backward, leaning the torso forward, turning the hip outward, or bending the supporting knee excessively.
Progression or regression: Begin with a very small backward movement. Progress by holding the top position for two seconds, reducing hand support, or adding light ankle resistance.
Coaching cue: Squeeze the glute without arching your back.
7. Seated Biceps Curl
Best for: Building basic arm strength for carrying and lifting tasks
Muscles worked: Biceps brachii, brachialis, and brachioradialis
Equipment needed: Optional light dumbbells, filled water bottles, or food cans
Sets, reps, and rest: Perform 1–2 sets of 8–12 repetitions. Rest for 45–60 seconds.
How to Do It
- Sit tall with your feet firmly on the floor.
- Hold a light weight in each hand with your arms beside your body.
- Keep your wrists straight and your elbows close to your sides.
- Bend the elbows and bring the weights toward your shoulders.
- Stop before the elbows drift far forward.
- Lower the weights slowly until the arms are comfortably extended.
The American Council on Exercise’s seated biceps curl instructions also emphasize stable feet, controlled elbow movement, neutral wrists, and avoiding back arching.
Common mistakes: Swinging the weights, bending the wrists, shrugging, leaning backward, or choosing a load that prevents a slow lowering phase.
Progression or regression: Practice without weights or curl one arm at a time. Progress by adding repetitions before increasing the weight.
Coaching cue: Keep your elbows quiet while your forearms move.
8. Seated Shoulder Press
Best for: Beginner overhead strength and improving control during reaching movements
Muscles worked: Deltoids and triceps, with the upper trapezius and serratus anterior assisting shoulder-blade movement
Equipment needed: Optional light dumbbells or water bottles
Sets, reps, and rest: Perform 1–2 sets of 6–10 repetitions. Rest for 45–60 seconds.
How to Do It
- Sit tall with your feet flat and your ribs controlled.
- Hold your hands near shoulder height with your palms facing forward or slightly inward.
- Brace your midsection without holding your breath.
- Press the hands upward through a comfortable range.
- Keep your head neutral rather than pushing it forward.
- Lower the hands slowly to shoulder height.
Your arms do not have to become completely straight overhead. Use the range you can control without pinching or forcing the shoulders.
Common mistakes: Arching the lower back, flaring the ribs, shrugging aggressively, pressing the weights together, using momentum, or forcing a painful overhead position.
Progression or regression: Begin without weights or press one arm at a time. Progress by increasing repetitions, adding a light load, or using a slower lowering phase.
Coaching cue: Reach up while keeping your ribs stacked over your hips.
9. Seated Shoulder Blade Squeeze
Best for: Upper-back control and practicing an upright seated position
Muscles worked: Middle trapezius and rhomboids, with help from the rear deltoids
Equipment needed: A stable chair
Sets, reps, and rest: Perform 1–2 sets of 8–12 repetitions with a two-second hold. Rest for 30–45 seconds.
How to Do It
- Sit tall with your arms hanging by your sides.
- Bend the elbows to approximately 90 degrees.
- Keep the shoulders relaxed away from the ears.
- Draw the shoulder blades gently toward each other.
- Hold for two seconds without arching your back.
- Release slowly and repeat.
Think of the movement as controlled rather than forceful. You do not need to squeeze as hard as possible.
Common mistakes: Shrugging, pushing the chest excessively forward, arching the lower back, pulling the elbows too far behind the body, or holding the breath.
Progression or regression: Use a smaller squeeze if the movement feels unfamiliar. Progress to a seated resistance-band row when you are ready for more pulling resistance.
Coaching cue: Slide your shoulder blades back without lifting your shoulders.
10. Chair Incline Push-Up
Best for: Beginner chest, arm, shoulder, and core strength
Muscles worked: Pectoralis major, triceps, anterior deltoids, serratus anterior, and core stabilizers
Equipment needed: A heavy, nonfolding chair that can be secured against a wall
Sets, reps, and rest: Perform 1–2 sets of 5–10 repetitions. Rest for 60–90 seconds.
How to Do It
- Place the chair with its back firmly against a wall.
- Test it carefully to make sure it cannot slide, tip, fold, or rotate.
- Place your hands on the sides of the seat, slightly wider than shoulder-width apart.
- Step your feet backward and form a straight line from your head to your heels.
- Bend your elbows and lower your chest toward the chair.
- Keep the elbows angled slightly back rather than directly out to the sides.
- Press through your hands and return to the starting position.
Do not perform this exercise if the chair moves at all. Use a wall or a fixed countertop instead.
The National Academy of Sports Medicine’s incline push-up guide recommends elevated hands, a braced core, neutral spinal alignment, controlled movement, and gradual progression to lower surfaces.
Common mistakes: Using an unsecured chair, allowing the hips to sag, raising the hips too high, pushing the head forward, flaring the elbows widely, or bouncing out of the bottom position.
Progression or regression: A wall push-up is the safest regression. A sturdy countertop is usually easier than a chair because the hands are higher. Progress by adding repetitions, lowering more slowly, or using a slightly lower fixed surface.
Coaching cue: Move your chest and hips as one unit.
Beginner Chair Workout to Try at Home
This routine uses all 10 exercises but keeps the starting volume low. Complete one round during your first sessions.
| Order | Exercise | Starting amount |
|---|---|---|
| 1 | Seated march | 30 seconds |
| 2 | Sit-to-stand | 5–10 reps |
| 3 | Seated knee extension | 8 per side |
| 4 | Chair-supported side leg raise | 8 per side |
| 5 | Chair-supported hip extension | 8 per side |
| 6 | Seated biceps curl | 8–12 reps |
| 7 | Seated shoulder press | 6–10 reps |
| 8 | Seated shoulder blade squeeze | 10 reps |
| 9 | Chair incline push-up | 5–10 reps |
| 10 | Seated heel and toe raises | 10 each |
Workout Guidelines
Rounds: Start with 1. Progress to 2 rounds when one round feels manageable.
Rest: Rest for 30–60 seconds between exercises. Take up to 90 seconds after sit-to-stands or incline push-ups when needed.
Frequency: Perform the routine 2–3 times per week on nonconsecutive days.
Effort: Aim for approximately 4–6 out of 10. Finish most sets feeling that you could complete another three or four controlled repetitions.
Tempo: Use about two seconds to lift or press and two to three seconds to return.
Breathing: Exhale during the lifting or pushing phase and inhale as you return. Do not hold your breath.
You do not have to complete all 10 exercises during your first workout. Selecting four to six movements and performing them well is better than rushing through the full routine.
Benefits of Chair Exercises for Beginners
1. They provide an accessible starting point
Chair-based training requires little space and can be performed at home. You do not need a gym membership, weight machine, or complicated setup.
The chair can also make exercise feel more manageable by providing support and a clear starting or stopping position.
2. They can build useful strength
Movements such as sit-to-stands, supported leg raises, curls, presses, and incline push-ups apply resistance to major muscle groups.
The American College of Sports Medicine’s updated resistance-training guidance reports that bodyweight exercises and home-based routines can improve strength and physical function. It also emphasizes that advanced techniques and training to complete muscular failure are not necessary for the average healthy adult.
3. They help you practice basic movement patterns
A balanced chair routine can introduce several important patterns:
- Knee extension
- Squatting and standing
- Hip abduction
- Hip extension
- Elbow flexion
- Overhead pressing
- Upper-back retraction
- Horizontal pushing
Learning these patterns with control can make it easier to progress to standing bodyweight exercises, resistance bands, or light dumbbells later.
4. They can support physical function
A systematic review of 25 studies involving 1,388 adults aged 50 and older found that chair-based exercise programs improved several measures of upper- and lower-body physical function. These results apply most directly to middle-aged and older adults, but they support chair exercise as a practical training method rather than merely a stretching routine.
5. They are easy to adjust
You can make most chair exercises easier by reducing the range of motion, performing fewer repetitions, using more hand support, or removing external weight.
You can make them harder by adding repetitions, increasing the range, slowing the lowering phase, adding a second set, or using light resistance.
How to Make Chair Exercises Easier
Use one or more of these adjustments:
- Perform fewer repetitions.
- Use a smaller range of motion.
- Move more slowly.
- Rest longer between exercises.
- Perform only one set.
- Use both hands for standing support.
- Use your hands during sit-to-stands.
- Remove dumbbells or household weights.
- Use a wall instead of a chair for incline push-ups.
- Divide the routine into separate upper- and lower-body sessions.
A regression should make the exercise controllable, not remove all effort.
How to Progress Your Chair Workout
Progress only when you can maintain good form from the first repetition to the last.
A simple progression order is:
- Reach the top of the recommended repetition range.
- Repeat that performance for two workouts with good control.
- Add a second set.
- Increase the range of motion when comfortable.
- Add a brief pause or slower lowering phase.
- Add a small amount of resistance.
- Move to a more challenging variation.
For example, progress from assisted sit-to-stands to hands-free sit-to-stands before adding weight. Progress from a wall push-up to a countertop push-up before attempting a lower chair variation.
Increase only one variable at a time. Adding more repetitions, more sets, more resistance, and a harder variation simultaneously can make it difficult to maintain good technique.
Common Chair Exercise Mistakes
Using an unstable chair
A rolling, swiveling, folding, or lightweight chair can move unexpectedly. Check the chair before every session, especially before supported standing movements.
Moving too quickly
Momentum reduces muscular control and can hide technique problems. Lift smoothly and take slightly longer to return to the starting position.
Holding the breath
Breath-holding often happens when a movement feels difficult. Exhale through the hardest portion and inhale during the easier return.
Forcing a large range
A higher leg lift or deeper movement is not automatically better. Use the largest comfortable range you can control without twisting, leaning, arching, or experiencing pain.
Depending too heavily on the chair
The chair should provide support, not carry your entire body weight during standing exercises. Hold it lightly unless you need additional assistance for balance.
Starting with too much weight
Body weight may provide enough resistance initially. Add weights only when you can complete the movement without swinging, shrugging, leaning, or speeding up.
Never making the exercises harder
Repeating the same easy routine indefinitely may limit continued strength improvements. Gradually add repetitions, sets, resistance, pauses, or harder variations.
Ignoring warning symptoms
Normal muscular effort can include warmth, mild fatigue, and heavier breathing. Sharp pain, numbness, dizziness, chest pain, unusual shortness of breath, or feeling unwell are reasons to stop.
Frequently Asked Questions
Are chair exercises effective for complete beginners?
Yes. Chair exercises can help beginners practice basic strength and movement patterns with less equipment and additional support. Their effectiveness depends on choosing an appropriate challenge and progressing gradually rather than repeating movements that always feel effortless.
How often should beginners do chair exercises?
Two or three nonconsecutive sessions per week is a practical starting point for a full-body strength routine. Gentle mobility movements can usually be performed more often if they feel comfortable.
How long should a beginner chair workout last?
A useful session can take approximately 10–20 minutes. Start with one set of four to six exercises if a longer routine feels overwhelming, then add movements or a second round over time.
Can chair exercises build muscle?
They can help build muscle when the working muscles receive enough resistance and the difficulty gradually increases. Sit-to-stands, incline push-ups, curls, presses, and resisted leg movements are more likely to build strength and muscle than very easy mobility movements alone.
Do I need dumbbells?
No. Start with body weight. When curls and presses become easy, you can use light dumbbells, water bottles, or food cans, provided you can hold them securely and keep your wrists aligned.
Can chair exercises help with weight loss?
Chair exercises can contribute to your overall physical activity and energy expenditure, but they cannot target fat loss from one body area. Long-term weight change depends on your total activity, eating habits, sleep, and other individual factors.
Do all chair exercises have to be seated?
No. A complete chair workout can include seated movements, sit-to-stands, and standing exercises performed with chair support. The best position depends on your current strength, balance, comfort, and training goal.
Conclusion
Chair exercises for beginners offer a practical way to start building strength and movement confidence without complicated equipment. Begin with a stable chair, choose four to six exercises, and complete one controlled set of each.
As your strength improves, add repetitions, a second set, a slower tempo, or light resistance. Consistent, well-controlled training is more valuable than trying to make every first workout long or difficult.
References
- American College of Sports Medicine: Updated Resistance Training Guidelines
- NHS: Sitting Exercises
- NHS: Strength Exercises
- US Office of Disease Prevention and Health Promotion: Physical Activity Guidelines Questions and Answers
- British Heart Foundation: Chair-Based Exercises
- PubMed: The Effect of Chair-Based Exercise on Physical Function in Older Adults
- National Academy of Sports Medicine: Incline Push-Up
This content is for informational purposes only and is not a substitute for medical advice.