Chair yoga exercises for beginners adapt traditional yoga movements so you can practice while seated or supported by a stable chair. They offer a practical way to work on mobility, posture, gentle muscle engagement, and controlled breathing without getting down onto the floor.
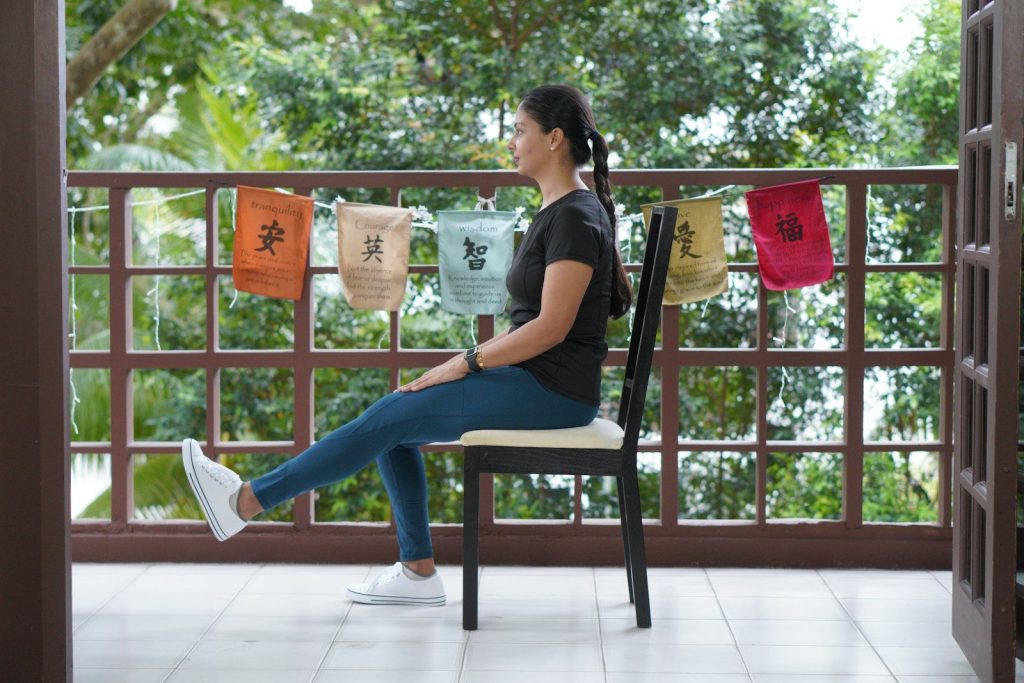
This guide covers ten beginner-friendly exercises, correct form, easier modifications, common mistakes, and a simple 15-minute chair yoga routine you can follow at home.
Chair Yoga at a Glance
| Category | Beginner recommendation |
|---|---|
| Equipment | A stable, non-wheeled chair, preferably without arms |
| Session length | About 10–20 minutes |
| Starting frequency | 2–3 sessions per week |
| Effort level | Gentle to moderate; about 2–4 out of 10 |
| Breathing | Slow, natural breathing without straining |
| Best for | Mobility, flexibility, posture, relaxation, and accessible movement |
| Main rule | Use a comfortable range and never force a pose |
What Is Chair Yoga?
Chair yoga is a modified form of yoga in which poses are performed while sitting or using a chair for support. It removes much of the need for kneeling, lying on the floor, or repeatedly moving between the floor and standing.
A chair does not make the practice ineffective. You can still coordinate movement with breathing, move your shoulders, spine, and hips through comfortable ranges, and use your postural muscles to control each position.
Chair yoga can be especially useful for:
- Complete beginners
- People who find floor exercises uncomfortable
- Adults with limited mobility
- People who want a gentle movement break
- Anyone practicing in a small space
- People returning to activity after a long break
Chair yoga should still be adapted to the individual. A pose does not need to look like the deepest version shown in a class or photograph to be useful.
Before You Start Chair Yoga
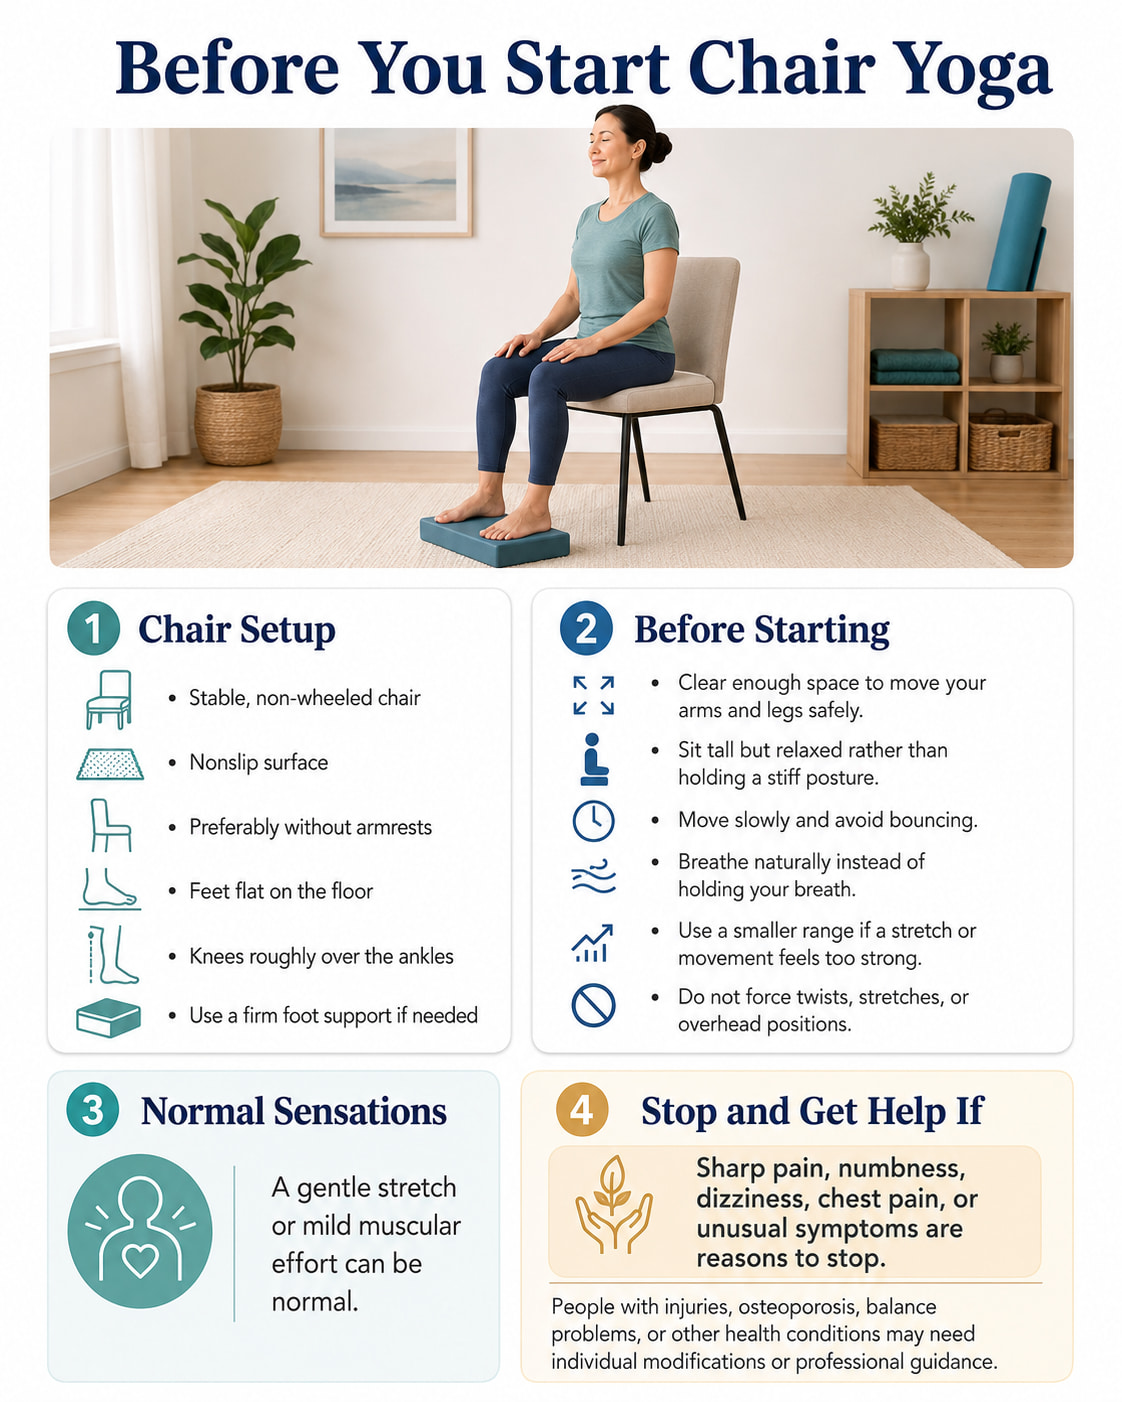
Use a stable, non-wheeled chair on a nonslip surface, preferably without armrests. Sit with both feet flat on the floor and your knees roughly over your ankles. If your feet do not reach comfortably, place a firm support underneath them.
Before starting:
- Clear enough space to move your arms and legs safely.
- Sit tall but relaxed rather than holding a stiff posture.
- Move slowly and avoid bouncing.
- Breathe naturally instead of holding your breath.
- Use a smaller range if a stretch or movement feels too strong.
- Do not force twists, stretches, or overhead positions.
A gentle stretch or mild muscular effort can be normal, but sharp pain, numbness, dizziness, chest pain, or unusual symptoms are reasons to stop.
People with injuries, osteoporosis, balance problems, or other health conditions may need individual modifications or professional guidance.
10 Best Chair Yoga Exercises for Beginners
The following sequence starts with breathing and posture, progresses through upper-body and spinal mobility, and finishes with hip and leg-focused poses. The exercise selection is consistent with beginner chair-yoga movements described by the University of Arkansas Cooperative Extension.
1. Seated Mountain Pose With Relaxed Breathing
Best for: Establishing posture, breathing control, and body awareness.
Muscles engaged: Abdominal muscles, spinal extensors, upper-back postural muscles, and hip stabilizers work lightly to support the seated position.
Time: 4–6 slow breaths.
How to Do It
- Sit tall with both feet flat and your knees positioned over your ankles.
- Rest your hands on your thighs with your palms facing down or up.
- Lengthen gently through the top of your head.
- Let your shoulders move down and away from your ears.
- Inhale slowly through your nose without lifting your shoulders.
- Exhale gradually without forcing the air out.
- Maintain the same relaxed posture for 4–6 breaths.
Common mistakes: Avoid pushing your chest excessively forward, arching your lower back, lifting your chin, or forcing very deep breaths. Your breathing should feel steady rather than strained.
Make it easier: Sit farther back and use the backrest for light support. Place a block beneath your feet when they do not reach the floor.
Coaching cue: Think “tall and relaxed,” not “stiff and rigid.”
2. Seated Shoulder Rolls and Upward Arm Sweeps
Best for: Shoulder mobility, upper-body coordination, and preparing for overhead movement.
Muscles engaged and areas stretched: Deltoids, trapezius, and muscles controlling the shoulder blades work during the movement. The chest, shoulders, and lat muscles may receive a gentle stretch.
Repetitions: 5 shoulder rolls followed by 5 arm sweeps.
How to Do It
- Begin in Seated Mountain Pose.
- Slowly lift your shoulders toward your ears.
- Roll them backward, then allow them to settle down.
- Repeat for 5 controlled circles.
- Turn your palms slightly forward.
- Inhale as you sweep your arms outward and upward.
- Stop at the highest comfortable position.
- Exhale as you lower your arms along the same path.
- Repeat for 5 repetitions.
Common mistakes: Do not shrug continuously, flare your ribs, arch your back, or force your hands directly overhead. Your arms can stop below shoulder height when necessary.
Make it easier: Raise one arm at a time or stop with both arms at shoulder height.
Progression: Pause for one comfortable breath at the top before lowering your arms.
3. Seated Cat-Cow
Best for: Gentle spinal movement, pelvic control, and coordinating movement with breathing.
Muscles engaged and areas stretched: Abdominal muscles and spinal extensors alternate between gentle engagement and lengthening. The upper back, chest, and lower back move through controlled flexion and extension.
Repetitions: 5–8 slow cycles.
How to Do It
- Sit tall with your hands resting on your thighs.
- Inhale as you tilt your pelvis slightly forward.
- Lift your breastbone gently and allow a small arch through your middle and upper back.
- Keep your neck long instead of throwing your head backward.
- Exhale as you tilt your pelvis backward.
- Draw your abdominal area inward gently and round your upper back.
- Allow your chin to move slightly toward your chest.
- Continue moving slowly between the two positions.
Common mistakes: Avoid forcing a large back arch, dropping your head backward, pulling hard with your hands, or moving faster than your breathing.
Make it easier: Perform small pelvic tilts while keeping the upper back nearly neutral.
Progression: Gradually increase the movement only when you can do so without pain, straining, or losing control.
4. Seated Crescent Side Bend
Best for: Side-body mobility and controlled lateral bending.
Muscles engaged and areas stretched: The obliques help control the movement. The latissimus dorsi, muscles between the ribs, and the side of the trunk may be gently stretched.
Time: 2–4 breaths per side.
How to Do It
- Begin in Seated Mountain Pose.
- Place your left hand on the chair seat or your left thigh.
- Inhale as you lift your right arm overhead.
- Exhale as you lean gently toward the left.
- Keep both sitting bones in contact with the chair.
- Keep your chest facing forward instead of rotating upward.
- Take 2–4 relaxed breaths.
- Return to the center and repeat on the other side.
Common mistakes: Avoid collapsing through the lower side of your waist, lifting one hip from the chair, twisting the chest, or pulling the raised shoulder toward your ear.
Make it easier: Keep the upper hand on your shoulder instead of lifting the arm overhead.
Progression: Reach through the fingertips and hold for one additional breath rather than forcing a deeper bend.
5. Seated Eagle Arms
Best for: Upper-back and shoulder mobility.
Muscles engaged and areas stretched: The rear shoulders, rhomboids, trapezius, and muscles around the shoulder blades help control the position. The back of the shoulders and upper back may be stretched.
Time: 2–4 breaths with each arm position.
How to Do It
- Sit tall and extend both arms in front of you at shoulder height.
- Cross your right upper arm underneath your left upper arm.
- Bend both elbows.
- Bring the backs of your hands toward each other.
- Bring your palms together only when that position feels comfortable.
- Lift your elbows slightly without shrugging.
- Move your forearms gently away from your face.
- Hold for 2–4 breaths.
- Release and repeat with the left arm underneath.
Common mistakes: Do not force your palms together, lift your shoulders, flare your ribs, or arch your lower back to create more arm range.
Make it easier: Give yourself a hug by placing each hand on the opposite shoulder.
Progression: Lift your elbows slightly or move your hands a little farther forward while keeping your shoulders relaxed.
6. Gentle Seated Spinal Twist
Best for: Controlled upper-back rotation and trunk awareness.
Muscles engaged and areas stretched: The obliques and spinal muscles control rotation. The chest, upper back, and muscles around the ribs may be gently stretched.
Time: 2–4 breaths per side.
How to Do It
- Sit tall with your feet flat and knees pointing forward.
- Place your hands lightly on your thighs.
- Inhale and lengthen through your spine.
- Exhale as you rotate your ribs and chest toward the right.
- Keep your pelvis and knees facing forward.
- Turn your head only as far as your neck feels comfortable.
- Hold for 2–4 natural breaths.
- Return to the center and repeat on the left.
Common mistakes: Avoid pulling yourself deeper with your hands, shifting your knees, holding your breath, or rotating mainly through the neck.
Make it easier: Cross your arms over your chest and rotate only a few degrees.
Progression: Hold for one more breath while maintaining a tall spine. Do not use your arms to force a deeper twist.
7. Seated Knee-to-Chest Pose
Best for: Hip mobility and gentle single-leg control.
Muscles engaged and areas stretched: The hip flexors help lift the thigh. The gluteal muscles and lower-back area may receive a gentle stretch.
Time: 3–5 breaths per side.
How to Do It
- Sit tall with both feet flat.
- Lift your right foot and bring your right knee toward your chest.
- Place both hands behind your right thigh.
- Keep your left foot firmly grounded.
- Draw the thigh inward only as far as comfortable.
- Keep your chest lifted instead of rounding toward the knee.
- Hold for 3–5 breaths.
- Lower the foot slowly and repeat on the opposite side.
Common mistakes: Avoid gripping directly over the kneecap, pulling aggressively, rounding your back, or lifting both feet from the floor.
Make it easier: Keep your toes on the floor and slide the foot closer to the chair without lifting it completely.
Progression: Support the leg with less help from your hands or add several slow ankle circles.
8. Seated Figure-Four Pose
Best for: Glute and outer-hip flexibility.
Muscles engaged and areas stretched: The gluteal muscles, deep hip rotators, and outer hip may be stretched. The trunk muscles work lightly to maintain posture.
Time: 15–30 seconds per side.
How to Do It
- Sit tall with both feet flat.
- Lift your right foot and place your right ankle across your left thigh.
- Position the ankle above the knee rather than directly on the kneecap.
- Flex your right foot by gently drawing your toes toward your shin.
- Allow the right knee to move outward naturally.
- Stay upright when you already feel a sufficient stretch.
- For more range, hinge forward slightly from your hips while keeping your back long.
- Hold, then switch sides.
Common mistakes: Do not press forcefully on the raised knee, allow the foot to collapse inward, round your back, or force the ankle into an uncomfortable position.
Make it easier: Cross your ankles on the floor or place the raised heel against the opposite lower leg instead of placing the ankle on the thigh.
Progression: Hinge slightly farther from the hips while maintaining a long spine and relaxed breathing.
9. Seated Hamstring Stretch With Ankle Flex
Best for: Hamstring, calf, and ankle mobility.
Muscles engaged and areas stretched: The hamstrings and calf of the extended leg are stretched. The spinal and abdominal muscles help control the hip hinge.
Time: 15–30 seconds per side.
How to Do It
- Move slightly toward the front of the chair.
- Keep your left foot flat with the left knee bent.
- Extend your right leg in front of you.
- Rest the right heel on the floor and point the toes upward.
- Keep a small bend in the right knee.
- Place both hands on your left thigh.
- Hinge forward slightly from your hips while keeping your spine long.
- Stop when you feel a gentle stretch behind the right thigh.
- Hold, then repeat on the other side.
Common mistakes: Avoid locking the straight knee, pressing your hands into it, rounding your back, bouncing, or trying to touch your toes.
Make it easier: Keep the extended heel closer to the chair and allow more bend in the knee.
Progression: Draw your toes slightly closer to your shin or hold for an additional 5–10 seconds. You do not need to reach toward your foot.
10. Seated Warrior II
Best for: Whole-body posture, hip mobility, leg engagement, and shoulder endurance.
Muscles engaged: Quadriceps, glutes, inner-thigh muscles, abdominal muscles, spinal extensors, and deltoids.
Time: 3–5 breaths per side.
How to Do It
- Turn and sit sideways on the chair, facing toward your right.
- Keep your right thigh supported and place your right foot flat beneath or slightly in front of the knee.
- Extend your left leg out to the side and slightly behind you.
- Keep the left foot flat when comfortable. You may turn the toes slightly toward the chair and lift the heel when needed.
- Open your hips and torso toward the side of the room.
- Extend both arms in opposite directions at shoulder height.
- Keep the right knee pointing in the same direction as the right toes.
- Look forward or gently over your right fingertips.
- Hold for 3–5 breaths.
- Return carefully to the center and repeat on the other side.
Common mistakes: Avoid allowing the bent knee to collapse inward, sliding too far off the chair, forcing the back foot flat, leaning heavily over the front leg, or shrugging your shoulders.
Make it easier: Keep the extended leg closer to the chair, lift the back heel, and place your hands on your hips instead of extending your arms.
Progression: Hold for one additional breath or straighten your arms fully while keeping the shoulders relaxed. Do not move the legs farther apart unless the chair remains stable and your hips stay securely supported.
15-Minute Beginner Chair Yoga Routine
Use this routine when you want to combine all ten exercises into one organized session.
| Order | Exercise | Beginner amount |
|---|---|---|
| 1 | Seated Mountain Pose | 4–6 breaths |
| 2 | Shoulder Rolls | 5 repetitions |
| 3 | Upward Arm Sweeps | 5 repetitions |
| 4 | Seated Cat-Cow | 5 cycles |
| 5 | Seated Crescent Side Bend | 2–3 breaths per side |
| 6 | Seated Eagle Arms | 2–3 breaths per arm position |
| 7 | Gentle Seated Spinal Twist | 2–3 breaths per side |
| 8 | Seated Knee-to-Chest Pose | 3 breaths per side |
| 9 | Seated Figure-Four Pose | 15–20 seconds per side |
| 10 | Seated Hamstring Stretch | 15–20 seconds per side |
| 11 | Seated Warrior II | 3 breaths per side |
| 12 | Quiet Seated Breathing | 60–90 seconds |
Rest for 15–30 seconds whenever needed. The entire session should feel gentle to moderate, not exhausting.
Suggested Weekly Schedule
Beginners can start with:
- Frequency: 2–3 days per week
- Duration: 10–15 minutes
- Effort: About 2–4 out of 10
- Rounds: One round
- Rest: As needed between exercises
After two or more weeks of comfortable practice, you can add a few breaths to selected poses or repeat a shorter second round.
How to Progress Chair Yoga Safely
Progress does not require forcing deeper stretches. Use one change at a time:
- Add one breath to a pose.
- Increase a stretch hold by 5–10 seconds.
- Use slightly less support from your hands.
- Move through a somewhat larger comfortable range.
- Repeat the routine a second time.
- Practice more consistently during the week.
- Try supported standing variations only when you can do so safely.
Increase the challenge only when you can maintain steady breathing, controlled movement, and stable posture.
A deeper position is not automatically a better position.
Benefits of Chair Yoga Exercises for Beginners
1. Makes Yoga More Accessible
A chair provides a stable base and removes the challenge of getting down to and up from the floor. This may help beginners focus more on breathing and controlled movement rather than worrying about balance or complicated transitions.
2. Supports Everyday Mobility
The exercises in this routine move the shoulders, upper back, trunk, hips, knees, and ankles. Regularly practicing comfortable movement may help you maintain or gradually improve the range of motion you use in everyday activities.
3. Builds Postural Awareness
Seated Mountain Pose, Cat-Cow, side bends, twists, and Warrior II encourage you to notice the position of your head, ribs, pelvis, and shoulders.
This does not mean you must sit rigidly upright throughout the day. The goal is to become more aware of your posture and gain better control over different positions.
4. Provides Gentle Muscle Engagement
Chair yoga is not the same as heavy resistance training, but several poses require low-level muscular effort.
Your abdominal muscles and spinal extensors help support the torso, while the shoulders, hips, and legs work during arm raises, knee lifts, and Warrior variations. Longer holds can also build light muscular endurance.
5. Encourages Controlled Breathing and Relaxation
Slow breathing can help create a calmer pace and prevent you from rushing through the routine. Yoga research suggests that regular practice may support areas such as balance, sleep, stress management, and general well-being, although results vary and research on yoga overall should not automatically be applied to every short chair routine.
6. May Help You Become More Consistent
Chair yoga requires little equipment, floor space, or setup time. That convenience can make it easier to practice regularly at home.
Consistency is usually more useful than doing an occasional long session and then stopping for several weeks.
Common Chair Yoga Mistakes
Using an Unstable Chair
A rolling, folding, or lightweight chair may shift during side bends or Warrior poses. Use a solid chair on a non-slip surface.
Forcing the Stretch
A strong pulling sensation is not required. Stay within a range where you can breathe naturally and relax the surrounding muscles.
Moving Too Quickly
Rushing reduces control and makes it harder to coordinate movement with breathing. Slow down enough to notice how each position feels.
Holding the Breath
Breath-holding often indicates that the range or effort is too difficult. Reduce the movement until you can breathe comfortably.
Slumping or Overarching
Sitting tall does not mean arching the lower back as far as possible. Aim to keep your ribs comfortably positioned over your pelvis.
Pulling With the Hands
Your hands may provide light guidance, but they should not force your knee, neck, shoulder, or torso into a deeper position.
Ignoring One-Sided Differences
One shoulder or hip may move differently from the other. Use the range that is appropriate for each side instead of forcing them to look identical.
How Often Should Beginners Practice Chair Yoga?
Start with two or three sessions per week. This provides time to learn the movements and notice how your body responds.
Short, gentle sessions may be practiced more often when they do not cause increasing soreness, joint discomfort, or fatigue. You can also perform only two or three poses as a brief movement break rather than completing the full routine every time.
Chair yoga is most useful when it is part of a broader activity plan. Adults are generally advised to combine aerobic activity with muscle-strengthening work, and older adults should also include appropriate balance activities.
Frequently Asked Questions
Is chair yoga suitable for complete beginners?
Yes. Chair yoga can be a practical starting point because it reduces floor transitions and allows most poses to be adjusted. Beginners should use small ranges, move slowly, and avoid extreme positions.
Do I need to be flexible before starting chair yoga?
No. Flexibility is not a requirement. The purpose of the routine is to practice the range you currently have and gradually improve control and comfort.
What type of chair is best for chair yoga?
Use a firm, stable chair without wheels. An armless dining-style chair usually works well because it allows more room for side bends, twists, and leg positioning.
How long should a beginner chair-yoga session last?
Ten to 20 minutes is enough for a useful beginner session. A shorter five-minute routine can also be worthwhile when you are building consistency.
Can beginners practice chair yoga every day?
A short, gentle routine may be appropriate more frequently for many people. Start with two or three days per week and increase only when you feel comfortable during and after the sessions.
Can chair yoga improve balance?
Some chair-yoga programs include supported standing exercises that may challenge balance. A completely seated routine mainly develops mobility, posture, coordination, and body awareness, so it does not challenge standing balance as much as standing balance exercises.
Is chair yoga enough exercise by itself?
Chair yoga can be a valuable part of an active lifestyle, but it may not provide enough aerobic or resistance-training stimulus by itself. When appropriate, combine it with activities such as walking, resistance exercises, and safe balance training.
Conclusion
Chair yoga exercises for beginners provide a simple way to practice movement, posture, flexibility, and controlled breathing at home. Start with a stable chair, use a comfortable range, and focus on smooth movement rather than trying to achieve the deepest possible pose.
Complete one gentle round of the routine two or three times per week. As your control improves, progress by adding a breath, extending a hold slightly, or practicing more consistently—not by forcing your joints into uncomfortable positions.
This content is for informational purposes only and is not a substitute for medical advice.
References
- National Center for Complementary and Integrative Health: Yoga Effectiveness and Safety
- University of Arkansas Cooperative Extension: How to Get Started With Chair Yoga
- University of Arkansas Cooperative Extension: Chair Yoga Exercise Guide
- NHS: Sitting Exercises
- Johns Hopkins Medicine: Benefits of Yoga
- CDC: Physical Activity Guidelines for Adults
- CDC: Physical Activity Guidelines for Older Adults