
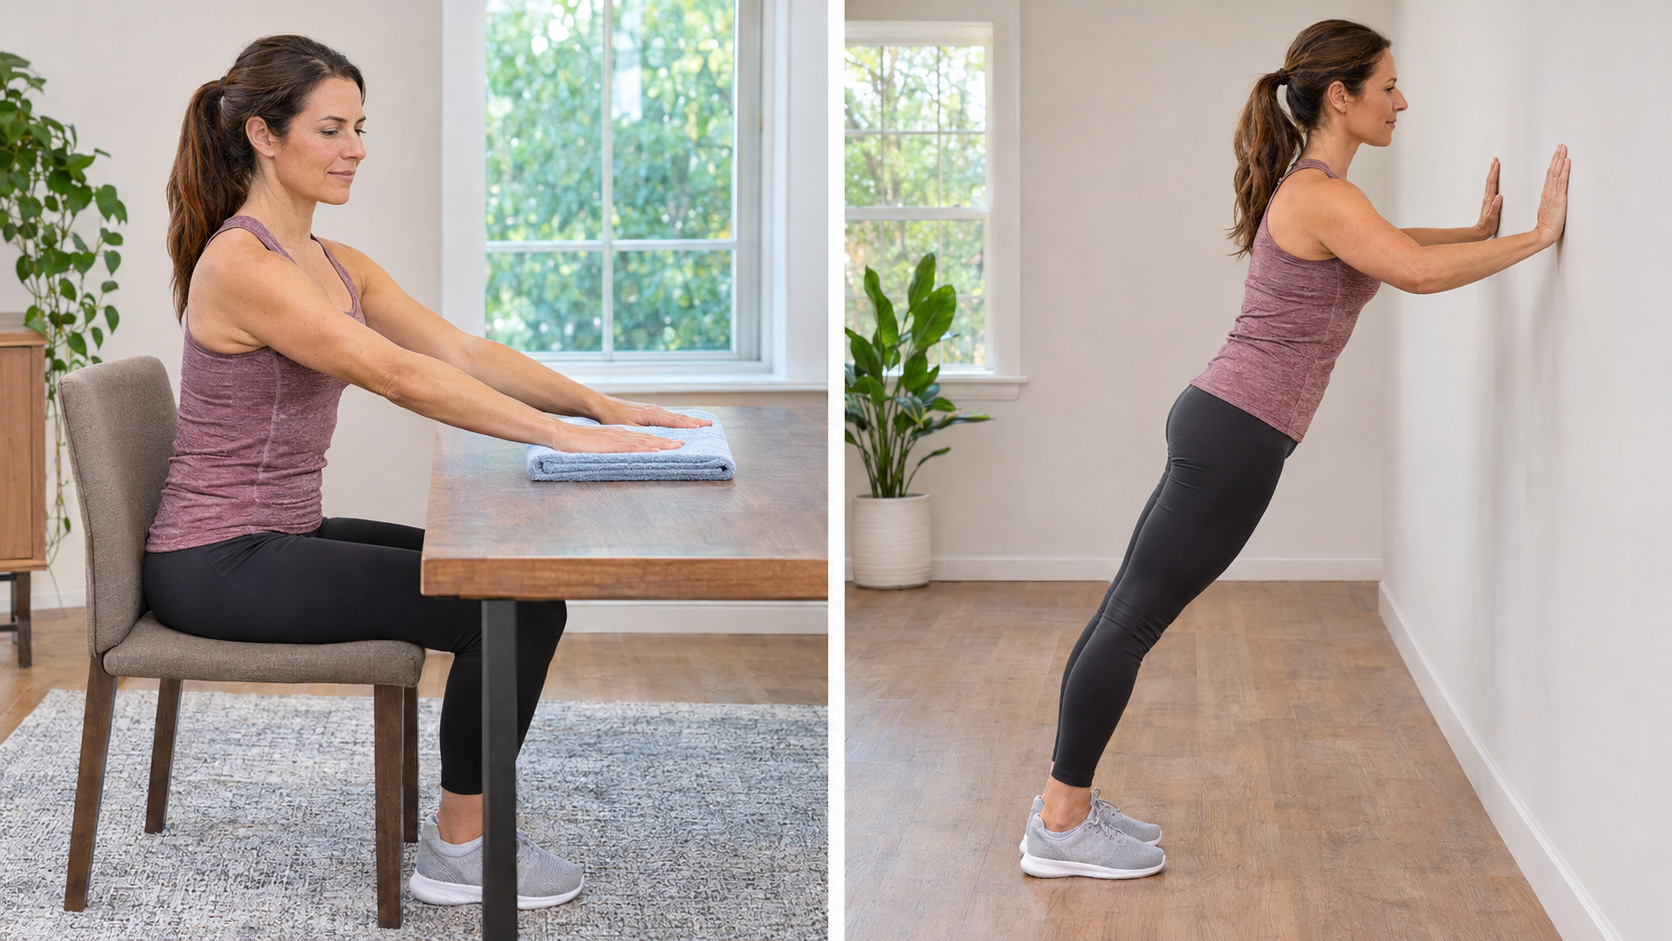
Gentle mobility work and gradual strengthening can help some shoulder problems, but the right shoulder exercises for pain depend on the cause and how your shoulder responds. Use these eight exercises as a menu—not a requirement to complete all eight. Exercise is recommended for conditions such as rotator cuff tendinopathy, but that does not make one routine appropriate for every painful shoulder.
The options below cover supported movement, stretching, rotation, pulling, pushing, and arm raises. Start with a few comfortable movements, then build gradually rather than forcing a stretch or adding resistance too soon.
Before You Try Shoulder Exercises for Pain
These are general exercise options for adults with mild symptoms that did not follow a significant injury. They are not a substitute for an assessment or an individualized rehabilitation plan. After surgery, a dislocation, or a diagnosed injury, follow your clinician’s restrictions instead of using this guide to choose your own progression.
Know When to Get Medical Help
Call 911 for shoulder or arm discomfort accompanied by chest pressure, shortness of breath, cold sweats, or lightheadedness. These can be heart attack warning signs, including when chest discomfort is absent.
Seek urgent medical assessment for sudden severe shoulder pain, inability to move the arm, a changed shoulder shape, substantial swelling, persistent numbness, or a hot, painful shoulder with fever or feeling unwell. Pain following a fall or other injury also deserves assessment rather than an exercise experiment. Arrange an appointment if your pain is worsening or has not begun improving after about two weeks.
Mobility and Strengthening Have Different Jobs
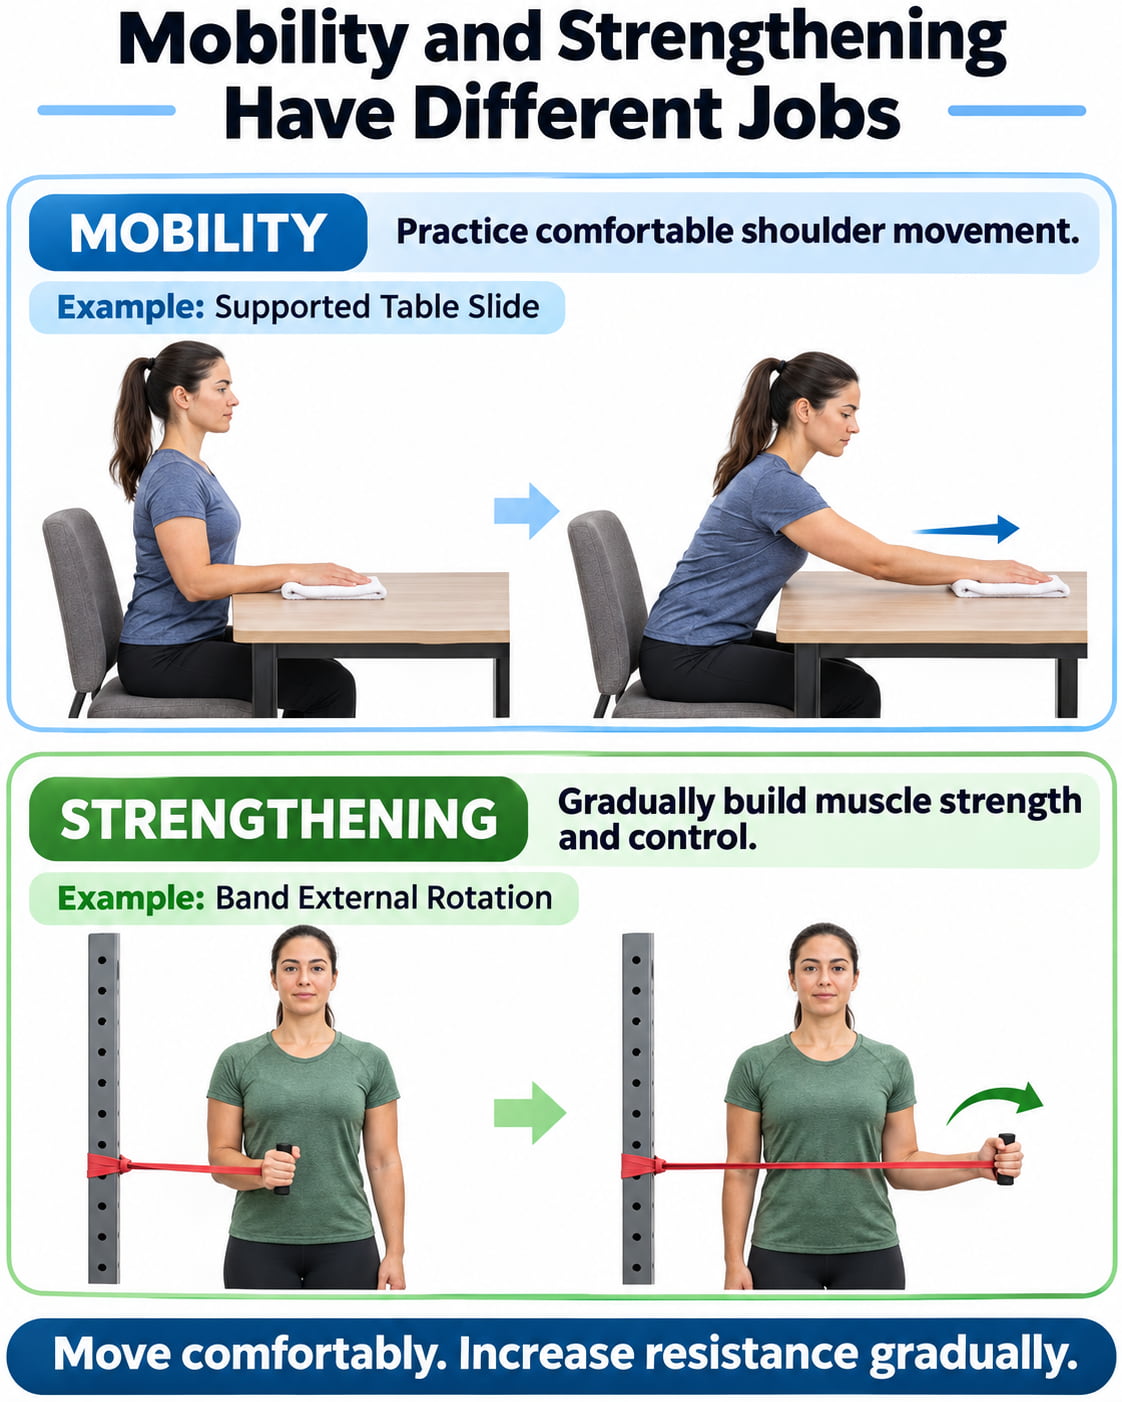
Mobility exercises let you practice reaching or rotating through a comfortable range. Supported movements, such as table slides, reduce how much work the shoulder must do to move the arm. Stretching is optional: a painful shoulder does not automatically need a stronger stretch.
Strengthening exercises gradually increase the demands on the muscles that move and support the shoulder. The four strengthening options below cover different actions, so they are not interchangeable simply because they all involve the shoulder.
The 2025 clinical practice guideline for rotator cuff tendinopathy recommends an active rehabilitation program that may include resistance training and movement-control exercises. However, the best exercise type, load, and schedule remain uncertain. A manageable program that suits your symptoms is more useful than trying to perform every available exercise.
How Much Discomfort Is Acceptable?
Start with comfortable movement rather than trying to reach a particular pain score. A gentle stretching sensation or muscle effort should not become sharp, catching, or steadily increasing pain.
Some rehabilitation programs allow a small temporary increase in discomfort. The British Elbow & Shoulder Society’s guidance says this should settle within 30 minutes and should not leave the shoulder worse the next day. Other programs, including AAOS guidance, recommend pain-free exercise. Follow any pain-monitoring instructions your clinician has given you.
For self-directed practice, reduce the range, repetitions, or resistance if symptoms increase. Stop the particular exercise if discomfort persists or repeatedly leaves you worse afterward. Stop immediately for sharp pain, new numbness, dizziness, chest pain, or other concerning symptoms, and seek appropriate medical help.
Equipment and Starting Doses
You will need a stable table or counter, a chair, a towel, a light dowel or broom handle, a wall, and a light resistance band with a suitable anchor. Small dumbbells are optional later—not necessary to begin.
The doses below are conservative starting examples, not a prescribed treatment plan. For single-arm exercises, the listed repetitions apply to each arm you choose to train. Use the videos to understand the movement, not to automatically copy their resistance levels, repetition counts, or rehabilitation schedules.
4 Shoulder Mobility Exercises
Choose one or two movements that address a comfortable restriction. You do not need all four, and you do not need to stretch a shoulder that already moves comfortably.
1. Supported, Unweighted Pendulum
This is a gentle movement option that lets the arm hang rather than actively lifting it. Treat it as mobility practice, not a rotator cuff strengthening exercise.
How to do it:
- Stand beside a stable counter or table. Place one hand on it, soften your knees, and bend forward comfortably.
- Let the other arm hang toward the floor with the hand empty and the shoulder relaxed.
- Make small circular shifts with your body weight so the hanging arm moves gently with you. Do not use your shoulder muscles to drive large circles.
- Gradually stop, reverse direction, and finish by using your supporting hand to help you return upright.
Start with: Five small circles in each direction on the shoulder being exercised.
Key correction: If you notice yourself deliberately swinging the arm, make the circles smaller and restart the movement from your body. Do not add a dumbbell to this starting version. Supported pendulums are included in MedStar Health’s shoulder exercise guidance.
2. Seated Bilateral Towel Table Slide
A table slide supports both arms while you practice forward-reaching movement. The towel helps your hands move across the surface without having to lift them.
How to do it:
- Sit facing a stable table, with both feet supported. Place your hands on a towel on the tabletop.
- Slide both hands forward together, allowing your torso to lean forward as needed.
- Stop at a comfortable stretch or before pain begins. Keep your arms supported rather than lifting them off the table.
- Slide your hands back toward you and return to an upright seated position.
Start with: One set of five to eight slow repetitions.
Key correction: Do not push your chest toward the table to chase a deeper stretch. Shorten the slide if you feel pinching or have to strain.
Make it easier: Move only a few inches at first. Increase the distance gradually as the movement becomes more comfortable. Newcastle Hospitals recommends towel-assisted table slides within a comfortable range.
3. Standing Dowel-Assisted External Rotation
This movement uses your other arm to help the shoulder rotate outward. Unlike the band exercise later in the article, it is assisted mobility—not resistance training.
How to do it:
- Stand upright holding a light dowel across the front of your body, with palms facing upward.
- Bend your elbows about 90 degrees and keep the elbow of the shoulder being exercised beside your ribs.
- Use the opposite hand to push the dowel gently sideways. Let it guide the working forearm outward while your hips and chest continue facing forward.
- Pause briefly at a comfortable stopping point, then guide the forearm back toward the starting position.
Start with: Five slow repetitions, with a two- to three-second pause if comfortable.
Key correction: The elbow stays beside your body; it should not drift outward as the whole arm moves sideways. Avoid twisting your torso to create extra range.
Make it easier: Use a smaller arc and less assistance. The movement should remain gentle rather than becoming a forceful end-range stretch. The Chartered Society of Physiotherapy’s assisted rotation instructions reinforce keeping the elbow bent and controlling the return.
4. Standing Cross-Body Shoulder Stretch
This optional stretch targets the back of the shoulder. Use it only when it produces a comfortable stretching sensation—not pressure or pinching at the front or top of the joint.
How to do it:
- Stand comfortably with your shoulders relaxed.
- Bring one arm across the front of your chest.
- Place the opposite hand on the upper arm, just above the elbow. Gently draw the arm closer until you feel a mild stretch behind the shoulder.
- Breathe normally during the hold, then release the pressure slowly and lower the arm.
Start with: Two holds of 15–20 seconds on the shoulder needing the stretch, relaxing between holds.
Key correction: Support the upper arm rather than pressing directly on the elbow. This is an explicit precaution in the AAOS crossover stretch instructions. Do not turn your torso or pull harder to increase the stretch.
When to skip it: Leave it out if bringing the arm across your chest causes joint pain. More stretching is not automatically the solution.
4 Shoulder Strengthening Exercises
Choose one or two strengthening movements initially. Use light resistance and controlled repetitions, finishing before you need to strain, swing, or change your body position.
Before using a band: Check for cracks, tears, and wear, especially near the attachment point. Use a compatible anchor installed according to the manufacturer’s directions, and follow its stretch-limit and eye-protection instructions. For example, THERABAND advises inspecting the band before use and wearing suitable eye protection.
5. Standing Single-Arm Band External Rotation
This exercise trains the shoulder’s outward rotators, including the infraspinatus and teres minor. Unlike the dowel movement, your working shoulder moves against resistance.
How to do it:
- Secure a light band at approximately elbow height. Stand sideways to the anchor and hold the band in the hand farther from it.
- Bend that elbow about 90 degrees and keep it beside your ribs. A small towel roll between your upper arm and torso can help you maintain the position.
- Rotate your forearm outward while keeping your wrist straight and your chest facing forward.
- Return slowly against the band’s pull. Do not let it snap your hand inward.
Start with: One set of eight repetitions per arm trained.
Key correction: Keep the elbow in place. Turning your torso, pulling the elbow backward, or bending the wrist changes the movement rather than increasing useful shoulder rotation.
Make it easier: Use a lighter band or a smaller comfortable arc. The band should challenge the movement without making you struggle through the last repetitions.
6. Standing Single-Arm Low Band Row
The low row adds a pulling movement for the shoulder and upper back. Keep the elbow close to your side rather than lifting it outward into a high row.
Use a light band appropriate for your shoulder; you do not need to match the resistance shown in the demonstration.
How to do it:
- Attach the band securely around waist height in front of you. Hold it in one hand with your palm facing inward.
- Stand tall with your knees relaxed and enough distance from the anchor to remove loose slack.
- Draw your elbow backward toward your side, letting the shoulder blade move toward your spine. Stop when the elbow is alongside your torso rather than pulling it far behind you.
- Slowly straighten the arm, controlling the band as it draws your hand forward.
Start with: One set of eight repetitions per arm trained.
Key correction: Keep your chest facing the anchor. If you twist, lean backward, or shrug to complete the pull, reduce the resistance.
Make it easier: Use a lighter band while preserving the same controlled movement. Physitrack’s single-arm row guidance supports the waist-height anchor and controlled return.
7. Wall Push-Up
A wall push-up provides an adjustable pushing exercise. Moving your feet closer to the wall makes the starting version less demanding; moving them farther away increases the load.
How to do it:
- Face a wall and place your palms slightly wider than shoulder width, around shoulder height or a little lower. Turn your hands outward slightly.
- Position your feet so your body leans gently toward the wall without feeling difficult to support.
- Bend your elbows and bring your body toward the wall as one unit. Keep your elbows below shoulder level.
- Press through your palms to return to the starting position without dropping your hips or thrusting your head forward.
Start with: One set of eight repetitions.
Key correction: Do not let your lower back sag while your shoulders move forward. Keep the movement small enough to maintain a straight, comfortable body position.
Make it easier: Stand closer and bend your elbows less. Progress by taking a small step farther away only after the current position feels controlled and does not aggravate symptoms.
8. Standing Bilateral Thumbs-Up Scaption Raise
Scaption means raising your arms diagonally, between straight ahead and directly out to the sides. Begin without weights and use this exercise to practice controlled arm lifting.
How to do it:
- Stand upright with empty hands at your sides and your thumbs facing forward.
- Raise both arms along a diagonal path, approximately 45 degrees forward of directly sideways. Keep your thumbs pointing upward as the arms rise.
- Stop at a comfortable height, no higher than shoulder level for this starting version. Keep your elbows straight without forcing them rigid.
- Lower your arms slowly along the same path.
Start with: One set of six to eight repetitions.
Key correction: Do not lean backward, swing your arms, or shrug to reach higher. A smaller controlled raise is preferable to forcing the shoulder-height target.
Make it easier: Reduce the lifting height. If even a small raise is painful, leave this movement out rather than pushing through.
Progression: Add a very light weight only after the unloaded version is comfortable and controlled. Merck Manual’s scaption guidance supports using a pain-free range and adding light resistance as tolerated; the CSP describes the diagonal path and shoulder-height endpoint.
How to Choose Exercises and Build a Routine
Start with one mobility exercise and one or two strengthening exercises. This gives you a manageable starting point and makes it easier to notice which movement affects your symptoms.
For supported forward reaching, choose the table slide. For comfortable outward-rotation practice, choose the dowel exercise. The cross-body stretch is an optional choice for a comfortable restriction behind the shoulder—not an essential step before strengthening.
Among the strengthening options, choose movements you can control with light effort. You do not need to include rotation, rowing, pushing, and lifting in every session.
A Three-Exercise Starting Example
This example is for someone who can perform these movements comfortably and has no restrictions that require a different plan.
Before the session, spend about five minutes walking or doing another comfortable, low-impact activity. AAOS recommends a low-impact warm-up before shoulder conditioning.
| Order | Exercise | Starting amount | Rest |
|---|---|---|---|
| 1 | Seated towel table slide | 1 set of 6 repetitions | About 30 seconds before moving on |
| 2 | Band external rotation | 1 set of 8 repetitions per side | About 60 seconds between sides and before the next exercise |
| 3 | Wall push-up | 1 set of 8 repetitions | Finish the session and assess your response |
Frequency: Begin with two strengthening sessions per week on nonconsecutive days. A brief round of the mobility exercise can be practiced on other days if it remains comfortable.
Effort: Keep the strengthening work light to moderate. Finish each set while you could still perform several controlled repetitions; do not train to failure.
Substitutions: If wall push-ups are uncomfortable but low rows are comfortable, replace the push-ups with one set of eight rows per side. If table slides do not suit you, try a small round of pendulums instead. Replace movements rather than adding every alternative to the session.
These amounts are a starting example, not a proven best dose for shoulder pain. Individual rehabilitation programs may use different frequencies, loads, and repetition ranges.
Progress One Variable at a Time
After several sessions with controlled movement and no lingering symptom increase, make one small change.
For strengthening, build from eight toward 12 repetitions. When that feels manageable, add a second set, initially returning to eight repetitions per set. Rest about 60 seconds between sets. Once two sets of 12 are comfortable, increase resistance slightly and reduce the repetitions again.
For mobility, increase the comfortable movement range before trying to hold a stronger stretch. There is no requirement to reach the same distance as someone in a demonstration.
Keep checking your response later that day and the following morning. If you are worse, return to the last amount you tolerated—or reduce it further. Repeated flare-ups are a reason to get help adjusting the program, not a reason to keep adding repetitions.
Adjust Daily Activities, Too
Avoid pairing a gentle exercise session with a sudden increase in heavy lifting, repeated overhead work, or another activity that consistently aggravates the shoulder.
You do not need to stop using the arm completely. Temporarily reduce the most irritating tasks, keep objects closer to your body when lifting, and continue comfortable movement. Newcastle Hospitals recommends modifying aggravating activities while staying active.
Your Next Step
Choose a small starting selection and note how your shoulder feels during the session, afterward, and the next morning. Progress when the movements are controlled and your response is acceptable—not simply because a certain number of days has passed.
The goal is more comfortable, capable movement in daily life, not completing all eight exercises or forcing your shoulder through someone else’s range.
References
- Rotator Cuff Tendinopathy: 2025 Clinical Practice Guideline — Journal of Orthopaedic & Sports Physical Therapy
- Rotator Cuff and Shoulder Conditioning Program — AAOS
- Exercises for Shoulder Pain — British Elbow & Shoulder Society
- Painful Shoulder — Newcastle Hospitals NHS Foundation Trust
- Shoulder Exercise Guidance — MedStar Health
- Video Exercises for Shoulder Pain — Chartered Society of Physiotherapy
- Standing Single-Arm Row — Physitrack
- Standing Shoulder Scaption — Merck Manual
- Shoulder Pain: Self-Care and When to Seek Help — NHS
- Warning Signs of a Heart Attack — American Heart Association
- THERABAND Use and Safety Precautions — Performance Health
This content is for informational purposes only and is not a substitute for medical advice.