
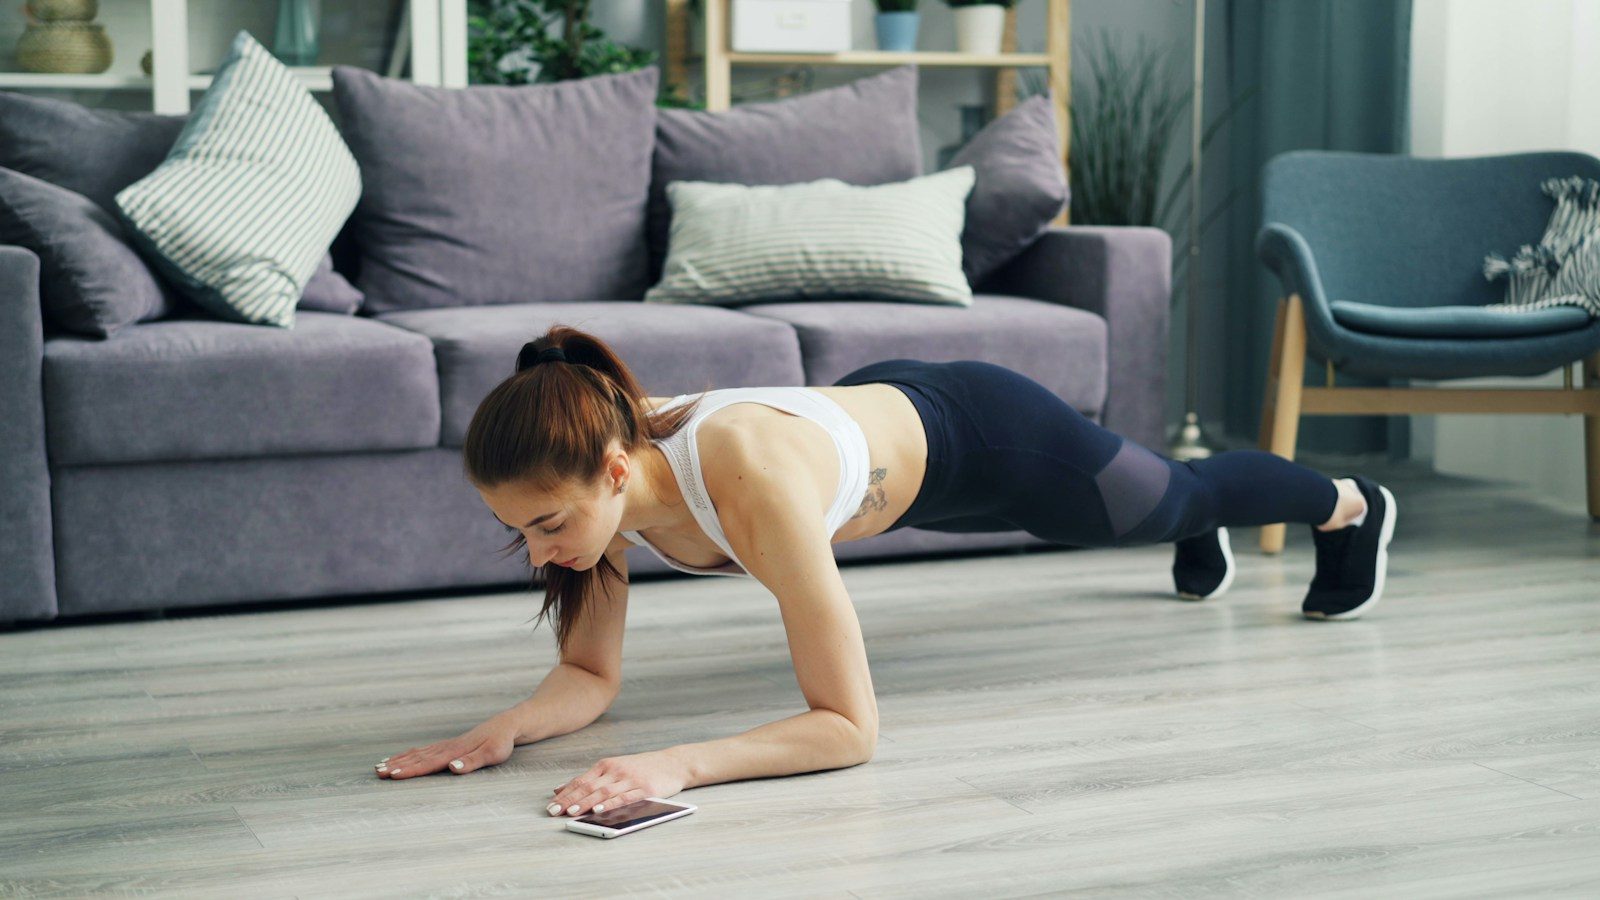
Closed chain shoulder exercises train you to support and control body weight while a hand or forearm stays planted against a surface. Wall weight shifts, push-up-plus variations, and planks are useful options for practicing the muscular control that contributes to shoulder stability.
The eight exercises below offer different levels of support and difficulty. Treat them as a menu—not one long workout—and choose movements you can perform comfortably without losing control.
What Closed Chain Shoulder Exercises Train
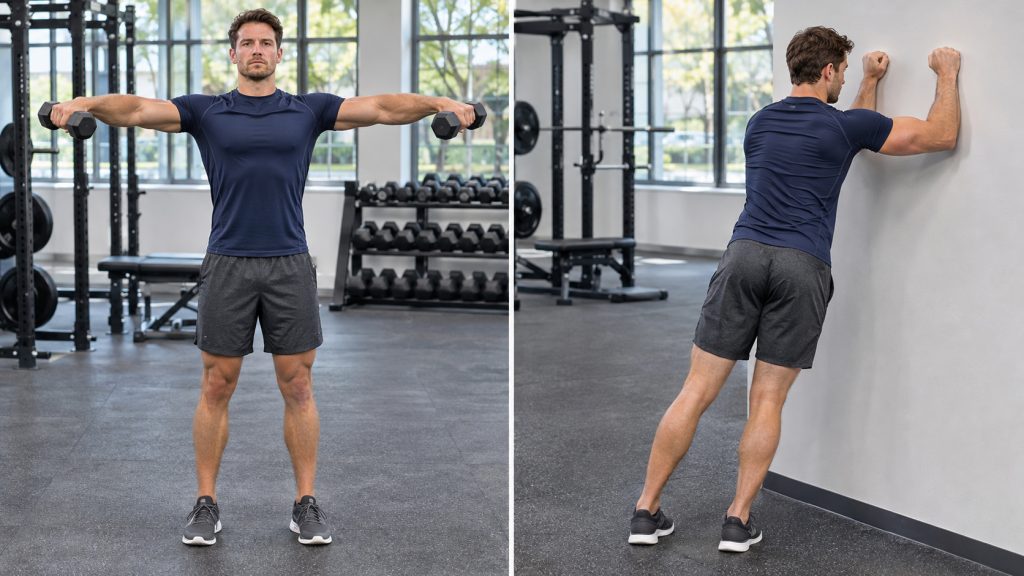
In an open chain exercise, such as a dumbbell lateral raise, your hand moves freely through space. In a closed chain exercise, the supporting hand or forearm stays anchored while your body holds position or moves around that support.
Both arms do not have to remain planted. During a bird dog or shoulder tap, the supporting arm works in a closed chain even though the other arm lifts.
Your rotator cuff helps control the upper arm within the shoulder socket. Muscles around the shoulder blade, including the serratus anterior and trapezius, help position and move the shoulder blade as you bear weight. These exercises challenge that support system alongside the trunk muscles that keep your body steady.
Stability does not mean holding your shoulder blades rigidly together. They should move with the task. The extra reach at the top of a push-up plus, for example, deliberately moves them apart around your rib cage.
Research shows that changing body position and the amount of arm support changes shoulder-muscle demand. That supports choosing an appropriate variation; it does not establish that a particular plank prevents injuries or treats every type of shoulder instability.
Choose a Starting Position You Can Control
Wall-supported exercises let you begin with a small forward lean. Floor exercises introduce different support demands, especially when you lift a hand or knee.
Forearm support avoids the bent-wrist position used in hands-on-floor exercises, but it does not automatically make an exercise easier on your shoulders. A floor forearm plank can still be demanding.
Use a solid wall and a nonslip exercise mat. For elevated variations, choose a fixed countertop or another surface that cannot slide or tip.
When to Get Guidance First
Get exercise-specific advice from a physical therapist or other qualified clinician before using this menu if your shoulder repeatedly slips or gives way, you have persistent shoulder pain, or you are recovering from a dislocation or surgery. The AAOS explanation of chronic shoulder instability describes why these symptoms need assessment rather than a generic strengthening plan.
People with posterior shoulder instability, involving instability toward the back of the joint, need particular caution with push-ups and shoulder taps—even wall-supported versions.
Stop exercising for sharp pain, numbness, dizziness, chest pain, a slipping sensation, or other concerning symptoms, and seek appropriate medical help. Chest pain accompanied by shortness of breath, lightheadedness, or pain spreading into the arm or jaw requires urgent attention.
8 Closed Chain Shoulder Exercises
The repetition and hold targets below are starting suggestions for general conditioning, not rehabilitation prescriptions.
Choose two or three exercises and begin with one set each. Build to two sets when comfortable. Rest about 45–60 seconds between sets, taking longer when needed to recover your control. For side planks, rest between sides as well.
1. Standing Forearm Wall Weight Shifts
This is a useful upright starting option for practicing weight transfer without supporting yourself through extended wrists.
How to do it:
- Face a wall and place both forearms against it, approximately shoulder-width apart. Position your feet so you can lean forward slightly without slipping.
- Gently press into the wall and shift a small amount of body weight toward your right forearm. Keep both forearms in contact with the wall.
- Return to the middle, then shift toward your left forearm. Keep your torso facing forward rather than twisting.
- Continue with small, smooth shifts, then return upright to finish.
Starting target: 6–8 shifts per side. A shift toward one side and return to the middle counts as one repetition for that side.
Common mistake: Swinging your hips or letting your forearms slide. Make the movement smaller and reduce your forward lean.
Adjust the difficulty: Move your feet closer to the wall to reduce the lean. Progress with a slightly greater lean only while your feet and forearms remain secure.
2. Wall Push-Up Plus
The wall push-up plus combines a pressing movement with an additional shoulder-blade reach. Unlike a regular wall push-up, the repetition continues briefly after your elbows straighten.
How to do it:
- Place your palms against a wall, shoulder-width apart and slightly below shoulder height. Step back into a gentle lean, keeping your body aligned.
- Bend your elbows and bring your chest toward the wall. Keep your elbows angled somewhat downward rather than flaring straight out.
- Press away until your elbows straighten. Then push gently a little farther so your shoulder blades spread around your rib cage.
- Release that extra reach back to your neutral starting position before beginning the next repetition.
Starting target: 6–10 repetitions.
Common mistake: Creating the “plus” by dropping your head and rounding your entire back. Keep your trunk steady and make the final movement through your shoulder blades.
Adjust the difficulty: Stand closer to the wall to make the press easier. When the wall version becomes comfortable, a fixed countertop can provide a more demanding incline variation.
3. Quadruped Forward-and-Back Weight Shifts
“Quadruped” simply means being on your hands and knees. This exercise lets you practice accepting and releasing weight through your shoulders while all four support points stay planted.
How to do it:
- Start on a mat with your hands beneath your shoulders and knees beneath your hips. Spread your fingers comfortably and keep your back neutral.
- Keep your hands and knees planted as you slowly shift your body forward. Allow a little more weight to move into your hands.
- Keep your elbows straight without forcing them backward, and stop the forward movement before you lose control or feel discomfort.
- Shift backward to your original all-fours position. Repeat without bouncing or sitting deeply toward your heels.
Starting target: 6–10 repetitions. One forward shift and backward return counts as one repetition.
Common mistake: Turning the drill into a push-up by repeatedly bending your elbows. Reduce the distance and move your body over your planted arms instead.
Adjust the difficulty: Use a smaller shift to begin. Increase the distance gradually rather than moving as far forward as possible.
4. Bird Dog With an Opposite-Arm-and-Leg Reach
The bird dog adds a coordination challenge: one shoulder supports your upper body while the opposite arm reaches forward and one leg extends backward.
How to do it:
- Begin on hands and knees, with your hands under your shoulders and knees under your hips. Look toward the floor and gently tighten your abdomen.
- Reach your right arm forward while extending your left leg behind you. Keep pressing through your supporting left hand.
- Lift only as far as you can without arching your lower back or turning your chest and pelvis. Pause briefly.
- Lower your hand and knee slowly, regain your balance, and repeat with the opposite arm and leg.
Starting target: 5–8 repetitions per side, with a two-second pause on each reach.
Common mistake: Reaching higher by arching your back. Think about reaching long rather than lifting high.
Adjust the difficulty: Shorten the reach or lift only one limb at a time. To practice single-arm shoulder support with less balance demand, lift one hand while keeping both knees down.
5. Bear Plank Hover
The bear hover keeps both hands planted while your bent knees lift just off the floor. It is a stationary hold—not a bear crawl.
How to do it:
- Start on hands and knees with your wrists beneath your shoulders and knees beneath your hips. Tuck your toes under.
- Gently brace your abdomen, then press through your hands and toes until your knees hover just above the mat.
- Keep your knees bent and your back steady. Continue breathing without shifting your hips upward or letting your chest sink between your arms.
- Lower both knees gently before your position begins to change.
Starting target: A 10–20-second hold.
Common mistake: Lifting your hips high and straightening your knees. Keep the hover low so the movement remains a bent-knee hold.
Adjust the difficulty: Begin with five-second holds or return to supported quadruped work. Build toward 20–30 controlled seconds before considering a more challenging variation.
6. Forearm Plank
The forearm plank provides a two-arm support hold without placing your wrists in the extended position used in a high plank. Your shoulders still need to support your upper body.
How to do it:
- Lie face down and place your forearms on the mat, with your elbows directly beneath your shoulders. Tuck your toes under.
- Tighten your abdomen and lift your body onto your forearms and toes.
- Maintain a steady line through your shoulders, hips, and heels. Keep your head aligned with your back and breathe normally.
- Lower your body gently before your lower back sags, your hips rise, or you begin shifting from side to side.
Starting target: A 10–20-second hold.
Common mistake: Chasing a longer time after your position deteriorates. End the set earlier and make the next hold equally controlled.
Adjust the difficulty: Keep your knees on the floor for a shorter-lever variation, maintaining alignment through your shoulders, hips, and knees. The linked video includes this option.
7. Bent-Knee Forearm Side Plank
This side-facing hold places the upper-body support demand on one shoulder while the bent knees shorten the body’s lever. It also challenges the muscles along the side of your trunk.
How to do it:
- Lie on your side with your knees bent and stacked. Place your lower forearm on the mat, with the elbow directly beneath your shoulder.
- Press through your forearm and lower knee to lift your hips. Bring your shoulders, hips, and knees into alignment.
- Keep your chest and pelvis facing sideways rather than rolling toward the floor or ceiling. Breathe throughout the hold.
- Lower your hips slowly, rest, and repeat on the other side.
Starting target: A 10–20-second hold per side.
Common mistake: Letting your torso sink toward the supporting shoulder. Press steadily through your forearm, and shorten the hold when that support becomes difficult.
Adjust the difficulty: Start with a five-second hold. Increase hold time before moving to a straight-leg side plank; changing the leg position is a substantial progression, not a required next step.
8. High-Plank Shoulder Taps
Shoulder taps add alternating single-arm support to a high plank. Choose this option only after you can maintain a comfortable, controlled high-plank position with both hands down.
How to do it:
- Set up on your hands and toes with your hands beneath your shoulders. Place your feet comfortably apart and gently brace your abdomen.
- Shift enough weight into your left hand to lift your right hand and touch your left shoulder.
- Return your right hand to its starting position and regain two-arm support.
- Repeat with your left hand touching your right shoulder. Alternate slowly while keeping your hips as level as possible.
Starting target: 4–6 taps per side. One shoulder touch counts as one repetition.
Common mistake: Rushing the taps and rocking your entire body. Slow down and pause with both hands planted between repetitions.
Adjust the difficulty: Widen your feet slightly or practice against a wall or fixed countertop. Avoid unstable surfaces; first develop control with predictable support.
A Simple Closed Chain Shoulder Routine
You do not need to perform all eight exercises. A useful session can combine a pressing movement, a supported weight shift, and an exercise that challenges control while a limb moves.
The following is an example for someone who can comfortably perform wall push-ups and support themselves on hands and knees. It is a general-conditioning starting point, not a treatment plan.
Warm up with about five minutes of easy walking or similar low-impact movement. Then perform a few easy practice repetitions of your selected exercises. A brief low-impact warm-up is also recommended in the AAOS shoulder-conditioning guidance.
| Order | Exercise | Sets | Repetitions | Rest after each set |
|---|---|---|---|---|
| 1 | Wall push-up plus | 1–2 | 8 | 45–60 seconds |
| 2 | Quadruped forward-and-back weight shifts | 1–2 | 8 forward-and-back cycles | 45–60 seconds |
| 3 | Bird dog | 1–2 | 5 per side, alternating, with a two-second pause | 45–60 seconds |
Complete the sets for one exercise before moving to the next. For bird dogs, five repetitions per side means ten alternating reaches in each set.
Frequency: Start with two nonconsecutive days per week. A third session is an option when you recover well and the exercises remain comfortable.
Effort: Finish each set while you could still perform a few more controlled repetitions. This is not a session for training to failure.
Time: Allow approximately 15–20 minutes for the two-set version, including the warm-up, rests, and changes in position.
Adapt the Routine Instead of Adding Everything
For an upright starting session, use forearm wall weight shifts and wall push-up plus. There is no need to add floor exercises before you can perform them comfortably.
To practice a steady bilateral hold, replace the bird dog with either the bear hover or forearm plank, using the hold targets above. You generally do not need both holds in the same short session.
To introduce side-facing support, replace the third exercise with the bent-knee side plank. Train both sides and allow rest between them. Shoulder taps are another option once your high-plank control is sufficient.
Keep the number of exercises manageable. Replacing a movement is often more useful than continually adding another one.
How to Progress Without Losing Control
Use your current performance—not the exercise’s position in the list—to decide when to progress. A bear hover, forearm plank, and side plank challenge you differently; they are not interchangeable steps on one universal ladder.
A practical checkpoint is being able to complete your chosen sets on two separate sessions with steady positioning, normal breathing, and no shoulder pain or slipping sensation. You should also avoid progressing when the session leaves you with new or increased joint symptoms later that day or the next morning.
Then change one variable at a time:
- Add a small amount of work. Increase an eight-repetition set toward ten, or add five seconds to a hold.
- Change the body angle or lever. Move from a wall to a fixed incline surface, or from a knees-supported plank to toe support.
- Reduce support only when ready. Introduce a controlled reach or tap after the corresponding two-arm position feels manageable.
When you choose a harder variation, reduce the repetitions or hold time again. Do not simultaneously increase difficulty, sets, and duration.
Unstable balls and balance pads are optional tools, not requirements for shoulder stability training. In one small laboratory study, unstable supports made balancing more difficult without consistently increasing shoulder-muscle activity. More wobbling does not automatically mean a better exercise.
For general fitness, use these movements as one part of a broader strength program rather than treating weight-bearing holds as complete shoulder training.
Start with two or three movements you can control, record the repetitions or hold times, and progress only when the same work becomes consistently comfortable. A well-supported wall exercise is a better choice than a floor variation that makes you rush, collapse, or push through symptoms.
References
- Shoulder stability and exercise loading: AAOS: Chronic Shoulder Instability; Nonoperative Management of Shoulder Instability; Uhl et al.: Shoulder Muscle Activation During Weight-Bearing Exercise; Shoulder Muscle Activity on Stable and Unstable Supports.
- Exercise guidance: Hawkes Physiotherapy: Wall-Supported Shoulder Stabilization; Cambridge University Hospitals: Scapular Stabilisation Exercises; Banff Sport Medicine: Shoulder Rehabilitation Guidance; ACE: Bird Dog; ACE: Front Plank; Stanford: Shoulder Conditioning Handout; Mayo Clinic: Core Exercise Technique; Physitrack: Alternating Shoulder Taps.
- Preparation and safety: AAOS: Shoulder Conditioning Program; NHS: Shoulder Pain; NHS: Chest Pain.
This content is for informational purposes only and is not a substitute for medical advice.