

Resistance band exercises for osteoporosis can help strengthen the muscles you use to stand up, carry everyday items, and support an upright posture. Bands offer adjustable resistance without taking up much space, making them a practical option for home strength training.
The Bone Health & Osteoporosis Foundation includes elastic bands among muscle-strengthening activities. An osteoporosis exercise plan should also include appropriate weight-bearing activity and balance work.
The seven exercises below combine seated movements with standing leg exercises. Choose the movements and resistance that suit your ability, fracture history, and any advice from your healthcare team.
Your Resistance Band Routine at a Glance
| Exercise | Main focus | Setup |
|---|---|---|
| Long-band sit-to-stand | Thighs, buttocks, rising from a chair | Chair; long band beneath both feet |
| Seated band pull-apart | Upper back and rear shoulders | Chair; long band held in both hands |
| Seated band chest press | Chest, shoulders, triceps | Chair; long band behind the back |
| Seated band biceps curl | Front of the upper arms | Chair; long band beneath both feet |
| Seated anchored band knee extension | Front of the thighs | Chair; ankle band anchored behind the foot |
| Supported standing band hip abduction | Outer hips | Ankle loop; stable hand support |
| Standing anchored band hip extension | Buttocks | Ankle band anchored in front |
Starting routine: Try one set of 8–12 controlled repetitions of each suitable exercise, twice weekly on nonconsecutive days. For single-leg movements, complete the repetitions on each side. Rest about 60–90 seconds between sets or exercises, taking longer if needed.
These are suggested starting amounts, which may differ from the demonstration videos. You do not need to complete all seven in your first session.
How to Prepare for These Exercises
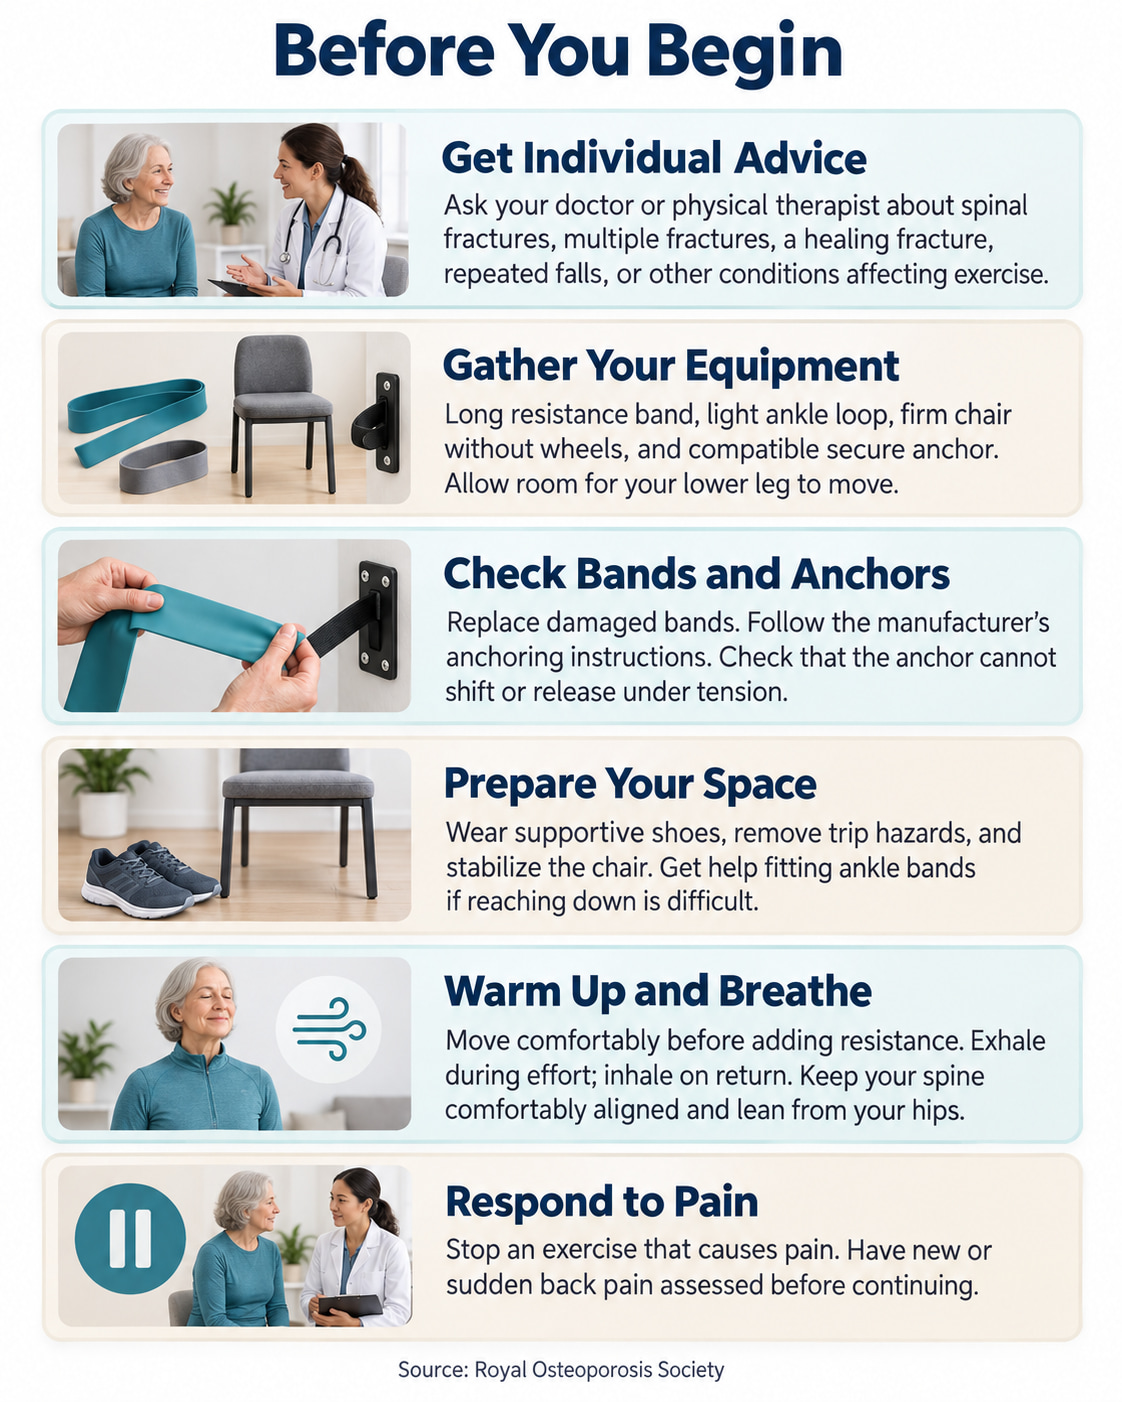
Most people with osteoporosis can exercise, but the right starting point varies. The Royal Osteoporosis Society recommends individual advice if you have spinal fractures, several previous fractures, or a fracture that is still healing. Repeated falls or difficulty exercising because of another condition also warrant help from a physical therapist.
Gather a long resistance band, a light ankle loop, a firm chair without wheels, and a compatible secure anchor for the two anchored exercises. Use a chair height that allows a stable sitting position; the knee extension also needs room for the lower leg to move freely.
- Check the equipment. Replace damaged bands. Follow the manufacturer’s anchoring instructions and check that the anchor cannot move or release under tension.
- Prepare the space. Wear supportive shoes, clear trip hazards, and keep the chair stable. Get help fitting ankle bands if reaching down is difficult.
- Warm up. Spend a few minutes moving comfortably before adding resistance.
- Move and breathe steadily. Breathe out during the effort and in as you return. Keep your spine comfortably aligned and use your hips when leaning forward.
- Respond to symptoms. Stop an exercise that causes pain. Have new or sudden back pain assessed before continuing.
7 Resistance Band Exercises for Osteoporosis
These seven resistance band exercises target your legs, hips, upper back, chest, and arms with seated and standing movements.
Start with manageable resistance, move slowly, and follow any exercise guidance from your healthcare team.
1. Long-Band Sit-to-Stand
Why it works: This movement strengthens the legs while practicing the everyday task of getting out of a chair.
Muscles worked: Quadriceps and gluteus maximus.
Equipment: Firm chair and long resistance band.
How to Do It
- Sit toward the front of the chair, with your feet about hip-width apart.
- Secure the band’s middle beneath both feet. Hold its ends at your waist.
- Lean forward from your hips and stand, keeping your hands at waist height.
- Bend your hips and knees to lower yourself slowly onto the seat.
Trainer Tip: Avoid rocking repeatedly or dropping into the chair. This setup occupies both hands; if you need your hands to rise safely, get help choosing an appropriate progression before adding the band.
2. Seated Band Pull-Apart
Why it works: Pulling the hands apart trains the muscles that move the shoulder blades and support upper-body posture.
Muscles worked: Rhomboids, middle trapezius, and rear deltoids.
Equipment: Chair and long resistance band.
How to Do It
- Sit upright with your feet planted. Hold the band with a shoulder-width, palms-down grip.
- Extend your arms forward at shoulder height.
- Keeping your arms straight, separate your hands until your shoulder blades draw together.
- Bring your hands back together slowly, controlling the band’s pull.
Trainer Tip: Keep your shoulders relaxed and torso still. Leaning backward or shrugging to stretch the band suggests that the resistance is too high.
3. Seated Band Chest Press
Why it works: The forward pressing action builds strength for everyday pushing tasks.
Muscles worked: Pectorals, front deltoids, and triceps.
Equipment: Chair and long resistance band.
How to Do It
- Sit upright with your feet flat. Pass the band behind your upper back and forward beneath your arms.
- Hold the ends with your elbows out and knuckles pointing forward.
- Press both hands forward until your arms are almost straight.
- Bend your elbows to return slowly to the starting position.
Trainer Tip: Keep your wrists aligned with your forearms. Avoid jutting your head forward or arching your lower back to finish the press.
4. Seated Band Biceps Curl
Why it works: Strengthening the elbow flexors helps with lifting and carrying everyday objects.
Muscles worked: Biceps and brachialis.
Equipment: Chair and long resistance band.
How to Do It
- Sit upright with the band’s middle secured beneath both feet.
- Hold an end in each hand using an underhand grip, arms down beside you.
- Keep your elbows beside your torso as you curl your hands toward your shoulders, palms upward.
- Lower your hands slowly until your arms are straight again.
Trainer Tip: Your upper arms should stay still. If your elbows travel forward or your torso rocks, reduce the resistance.
5. Seated Anchored Band Knee Extension
Why it works: Straightening the knee against resistance directly trains the thigh muscles used during standing and stair climbing.
Muscles worked: Quadriceps.
Equipment: Stable chair, resistance band around the working ankle, and a secure anchor behind that foot.
How to Do It
- Attach the band around one ankle, with its other end secured behind the foot.
- Sit tall on a chair with enough clearance for your lower leg to move freely.
- Keep your thigh on the seat as you straighten the working knee in front of you.
- At the end of your comfortable range, tighten the front of your thigh without forcing the knee backward.
- Bend the knee slowly to return. Complete the set, then change sides.
Trainer Tip: Avoid flicking the foot upward or leaning back to generate force. The movement should come from the knee while your thigh and torso remain steady.
6. Supported Standing Band Hip Abduction
Why it works: The outer hip muscles help control the pelvis when your weight shifts onto one leg during walking.
Muscles worked: Gluteus medius and gluteus minimus.
Equipment: Loop band around both ankles and a stable chair back or countertop for support.
How to Do It
- Position your support within reach. While seated, place the loop around both ankles, then stand with your feet about hip-width apart and hold the support.
- Keep your pelvis facing forward as you move one leg directly out to the side.
- Stop before you need to lift that hip toward your ribs, rotate your pelvis, or lean sideways.
- Return the leg slowly to the starting position.
- Finish the repetitions on one side, then switch legs.
Trainer Tip: Keep the movement sideways; do not let the leg drift forward. After the set, sit down to remove the loop before walking away.
7. Standing Anchored Band Hip Extension
Why it works: Moving the leg backward against resistance strengthens the muscles that extend the hip during walking and other daily movements.
Muscles worked: Gluteus maximus, with assistance from the hamstrings.
Equipment: Resistance band around the working ankle, secured to an anchor in front of you.
How to Do It
- Face the anchor with the band attached around one ankle.
- Stand upright and keep the working leg straight without pushing the knee into hyperextension.
- Move that leg backward slowly, keeping your pelvis facing forward and your torso upright.
- Stop before your lower back arches or your body tips forward.
- Return the leg under control. Complete the repetitions, then switch sides.
Trainer Tip: Think of moving your thigh behind you rather than lifting your foot as high as possible. If you need hand support to remain steady, have a physical therapist check a supported setup before attempting this variation.
How Often to Train and When to Progress
The Royal Osteoporosis Society’s strength guidance recommends strength exercise on two or three days each week, with a rest day between sessions, gradually building toward three sets of 8–12 repetitions.
For this routine, start with one set. Choose resistance that lets you complete each movement smoothly; the last few repetitions should take effort without making you strain or change position.
Progress in this order:
- Establish control. Use a lighter band if you cannot complete eight good repetitions.
- Build consistency. Gradually increase toward 12 repetitions, then add a second set when you recover comfortably between sessions.
- Increase resistance. When your planned sets feel easy at 12 repetitions, try the next manageable resistance and return toward eight repetitions.
Change one thing at a time. Use different resistance levels for different exercises, and record the band, repetitions, and sets so you can track progress.
A Simple Weekly Plan
| Day | Activity |
|---|---|
| Monday | Suitable exercises from this band routine |
| Tuesday | Comfortable weight-bearing activity and prescribed balance practice |
| Wednesday | Light activity or recovery |
| Thursday | Repeat the band routine |
| Friday | Comfortable weight-bearing activity and prescribed balance practice |
| Weekend | Regular movement you enjoy, with recovery as needed |
How This Fits Into an Osteoporosis Exercise Plan
These seven movements provide useful strength options, but a complete plan needs broader coverage. The Ontario Osteoporosis Strategy recommends balance and functional training at least twice weekly, alongside progressive resistance training that includes abdominal and back-extensor muscles. A physical therapist with osteoporosis training can help fill those gaps and adapt movements after a fracture.
Take particular care with rapid, repeated, heavily loaded, or end-range spinal bending and twisting. This does not mean avoiding all bending: learn to move from your hips and use techniques appropriate to your fracture risk.
For adults 65 and older, the CDC also recommends at least 150 minutes of moderate aerobic activity weekly, plus strength and balance activities. Build toward this according to your abilities and health; shorter amounts still count.
Exercise is one part of osteoporosis care. Continue following your healthcare team’s treatment plan.
Frequently Asked Questions
Can resistance bands improve bone density?
Progressive resistance exercise can help maintain or improve bone strength, and bands are one way to provide resistance. However, bone benefits depend on the exercise, loading, progression, and the bones involved. There is no established guarantee that this particular seven-exercise routine will increase your bone density.
Which resistance band color should I start with?
Color systems vary by manufacturer. Check the product’s resistance guide and choose by how well you can perform the exercise. A band that works for your legs may be too demanding for your shoulders.
Can I do the workout entirely seated?
The pull-apart, chest press, curl, and knee extension are seated exercises. You can use suitable seated movements as a starting point if standing is difficult. Ask a physical therapist to help plan safe balance and functional training around your abilities; simply sitting for every exercise leaves those needs incompletely addressed.
Start with a manageable amount, keep the movement controlled, and progress as your strength and confidence improve. A routine you can perform consistently and safely is the foundation for further progress.
This content is for informational purposes only and is not a substitute for medical advice.
References
- Strong, Steady and Straight: UK Consensus Statement on Exercise for Osteoporosis — British Journal of Sports Medicine (2022)
- Too Fit To Fracture: Exercise Recommendations for Individuals With Osteoporosis or Vertebral Fracture (2014)
- Osteoporosis Management and Fracture Prevention: Clinical Practice Guideline — Osteoporosis Canada (2023)
- Exercise for Preventing Falls in Older People Living in the Community — Cochrane (2019)
- Strength Exercise to Help Make Your Bones Stronger — Royal Osteoporosis Society
- Osteoporosis Exercise for Strong Bones — Bone Health & Osteoporosis Foundation