
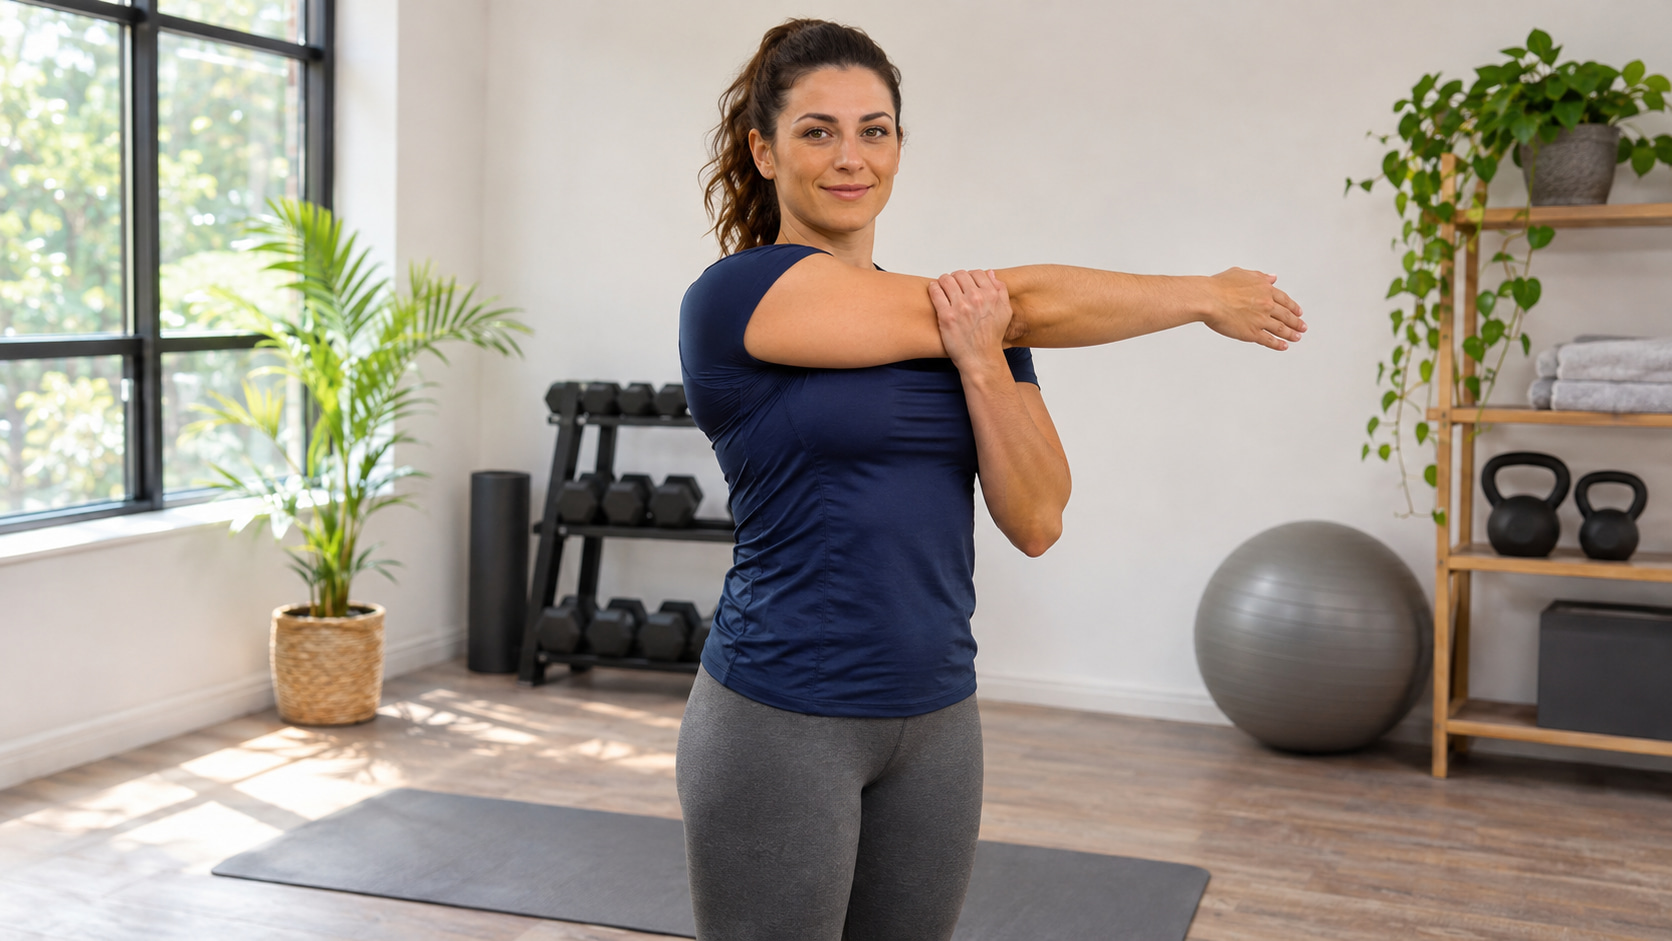
Shoulder stretching exercises can improve flexibility and help you move through a more comfortable range of motion. Choose a few stretches that match your needs, and aim for gentle tension—not pain or the deepest position possible.
The 10 options below cover reaching overhead, moving across your chest, rotating your shoulder, and reaching behind your back. You’ll also find upper-back stretches, technique corrections, and a short routine you can adapt without doing every exercise.
Before You Start: Choose the Right Shoulder Stretch
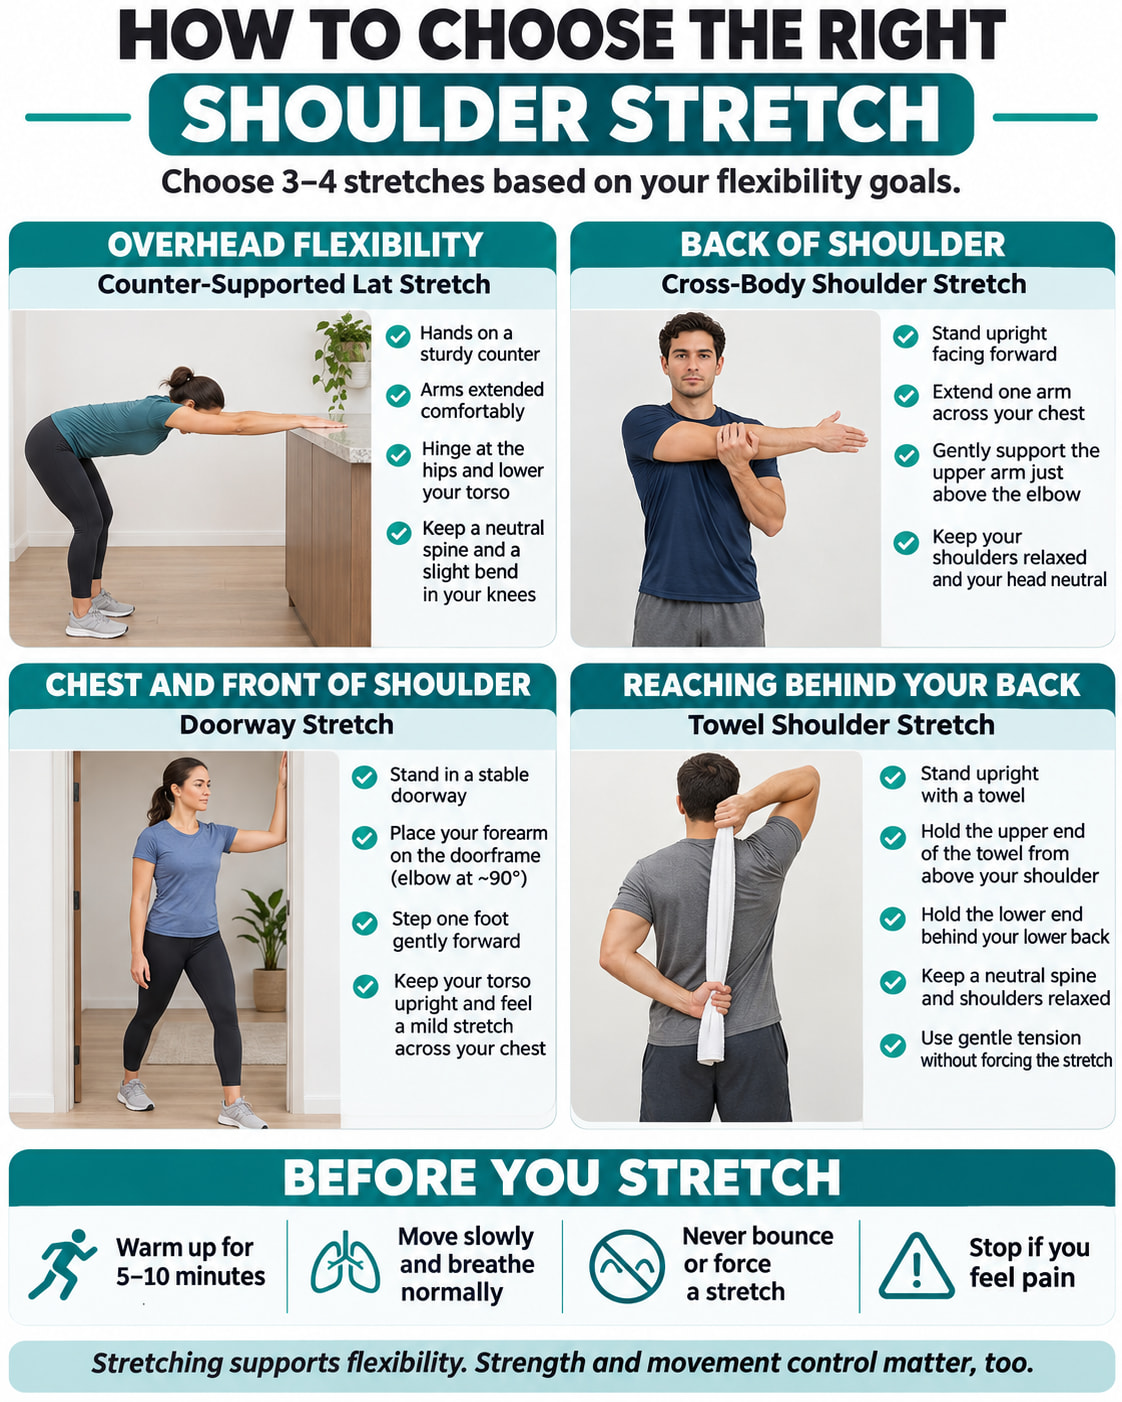
Your shoulder depends on more than the muscles covering the joint. The rotator cuff helps stabilize and move the upper arm, while muscles around the shoulder blade help position it during arm movements. Stretching addresses flexibility; strength and movement control also matter. Treat this list as one part of shoulder training, not a replacement for strengthening.
Start with three or four movements, not all 10. For an overhead-reaching focus, choose the counter-supported lat stretch or the lying assisted stretch. For the back of the shoulder, try the cross-body stretch. The doorway stretch addresses the chest and front of the shoulder, while the towel stretch practices reaching up the back.
The final two exercises emphasize the upper back and shoulder-blade region. They complement the direct shoulder stretches rather than isolating the shoulder joint.
Before stretching, spend 5–10 minutes walking or doing another light activity, or stretch after a workout when you are already warm. Move into each position slowly, breathe normally, and avoid bouncing. For demanding exercise, do not treat sustained stretching as your entire warm-up; include gradually more active movements that prepare you for the activity.
This guide is for general flexibility, not injury rehabilitation. Get individualized advice before using it after surgery or a recent injury. A shoulder that repeatedly slips, gives way, or feels unstable also needs assessment rather than an attempt to stretch farther.
10 Shoulder Stretching Exercises
The amounts below are starting examples, not a requirement to reach a particular position or complete every repetition. Some exercises use sustained holds; others use slow movements with brief pauses.
For sustained stretches, release for about 10–20 seconds between holds or sides, taking longer when needed.
1. Standing Cross-Body Shoulder Stretch
Focus: The back of the shoulder, including the posterior deltoid.
Equipment: None.
How to do it:
- Stand upright and bring your right arm across the front of your chest.
- Place your left hand on your right upper arm, just above the elbow.
- Gently draw the arm closer until you feel a stretch behind the right shoulder. Keep your torso facing forward.
- Hold comfortably, then gradually release and lower your arm. Switch sides.
Starting amount: Two 20–30-second holds per side.
Technique check: Support the upper arm rather than pressing directly on the elbow. Avoid shrugging or turning your torso to create more reach. Reduce the pull if you feel pressure at the front of the shoulder instead of a comfortable stretch behind it.
2. Single-Arm Doorway Chest Stretch
Focus: The chest and front of the shoulder.
Equipment: A fixed doorframe.
See Harvard Health’s illustrated chest and shoulder stretch.
This is the straight-arm variation, not the version with both forearms against a doorway.
How to do it:
- Stand beside the doorframe and extend your right arm to the side.
- Place your right palm against the frame slightly below shoulder height. Keep a small amount of softness in your elbow.
- Slowly turn your torso to the left, away from the supported arm, until you feel mild tension across your chest.
- Hold, then turn back toward the frame before removing your hand. Repeat on the other side.
Starting amount: Two 20–30-second holds per side.
Technique check: Turn only a small distance at first. Do not push your chest forward or force the shoulder backward. Use less rotation if the position feels intense; a stronger pull is not the goal.
3. Standing Overhead Triceps Stretch
Focus: The back of the upper arm in an overhead position.
Equipment: None.
How to do it:
- Stand upright and raise your right arm overhead.
- Bend the right elbow so your hand reaches toward the middle of your upper back.
- Place your left fingers on the right upper arm, just above the elbow. Apply light assistance until you feel a comfortable stretch along the back of the upper arm.
- Release the assisting hand, then slowly straighten and lower the raised arm. Switch sides.
Starting amount: Two 20–30-second holds per side.
Technique check: Keep your ribs from lifting and your lower back from arching to make the position look deeper. Your hand does not need to reach far down your back. Use little or no assisting pressure when simply bending the elbow provides enough stretch.
4. Standing Counter-Supported Lat Stretch
Focus: The lats along the sides of your back, using a supported overhead-reaching position.
Equipment: A fixed countertop or securely anchored work surface.
How to do it:
- Face the counter and place both palms on it about shoulder-width apart.
- Step backward and soften your knees. Keep your elbows extended without forcefully locking them.
- Move your hips backward and hinge forward, letting your torso lower between your arms while maintaining a comfortable back position.
- Stop when you feel a gentle stretch along the sides of your upper body. After holding, step closer to the counter and return upright.
Starting amount: Two 20–30-second holds total.
Technique check: Keep your weight supported through your feet rather than hanging heavily from your shoulders. Avoid dropping your chest by arching your lower back. A shallower hip hinge is the easier option.
Use a fixed surface—not a rolling chair or lightweight furniture that could slide.
5. Supine Assisted Shoulder-Flexion Stretch
Focus: Comfortable overhead reaching with your back supported.
Equipment: A mat or another firm, comfortable surface; an optional thin pillow.
Supine means lying on your back. Shoulder flexion here means raising your arms forward and overhead.
How to do it:
- Lie on your back with your knees bent and feet supported. Clasp your hands together in front of your chest.
- Slowly guide both arms toward the space above your head, using the more comfortable arm to assist as needed.
- Stop at a comfortable limit and pause briefly. Your hands do not need to touch the floor.
- Lower your clasped hands slowly toward your torso and relax before repeating.
Starting amount: Five slow repetitions, pausing for 3–5 seconds at a comfortable end position.
Technique check: Do not gain extra reach by lifting your ribs or exaggerating the arch in your lower back. Keep the movement small enough to control in both directions.
Choose this or the counter-supported stretch when you want an overhead-reaching option; you generally do not need both in a short session.
6. Standing Dowel-Assisted External-Rotation Stretch
Focus: Outward shoulder rotation with the elbow beside your body.
Equipment: A lightweight dowel or smooth broom handle.
How to do it:
- Stand upright with your right elbow beside your ribs, bent approximately 90 degrees.
- Cup one end of the dowel in your right hand and hold the shaft with your left hand.
- Use your left hand to move the dowel gently to the right, guiding your right forearm outward. Keep your elbow beside your torso and your hips facing forward.
- Hold at a mild stretch, then slowly return the forearm to its starting position. Switch sides.
Starting amount: Two 20-second holds per side.
Technique check: This is an assisted stretch, not a resisted rotation exercise. Do not let the elbow drift away from your body or rotate your whole torso to move the stick farther.
A small movement is enough when it reaches your comfortable limit.
7. Behind-the-Back Towel-Assisted Shoulder Stretch
Focus: Reaching the lower hand upward behind your back.
Equipment: A long towel.
How to do it:
- Hold one end of the towel in your right hand and bring that hand over your right shoulder, letting the towel hang behind your back.
- Reach your left hand behind your waist and grasp the lower end.
- Gently lift with the upper hand so the towel assists your lower hand a little farther up your back.
- Hold comfortably, then lower the upper hand to release the tension before letting go. Reverse your hand positions to stretch the other side.
Starting amount: Two 20-second holds per side.
Technique check: The shoulder of the lower arm is the focus. Do not tug the towel, lean forward, or try to make your hands meet.
Use a longer towel to make the setup easier. Skip this option when reaching behind your back is uncomfortable even before you apply assistance.
8. Standing Shoulder-Extension Stretch With a Dowel
Focus: Reaching your arms backward rather than overhead.
Equipment: A lightweight dowel or smooth broom handle.
How to do it:
- Stand upright and hold the dowel behind your hips with both hands, using a comfortable grip.
- Keep your elbows extended and slowly move the dowel away from your body, backward and slightly upward.
- Pause at a comfortable limit without tipping your torso forward.
- Lower the dowel gradually toward your hips and relax before repeating.
Starting amount: Five slow repetitions with a 3–5-second pause.
Technique check: Keep the movement small and your neck relaxed. Leaning forward may lift the stick higher, but it changes the exercise instead of demonstrating more shoulder range.
This differs from the towel stretch: the dowel moves both arms backward with relatively straight elbows, while the towel guides one bent arm upward behind the back.
9. Seated Clasp-and-Reach Upper-Back Stretch
Focus: The upper back and area around the shoulder blades.
Equipment: A stable chair without wheels.
How to do it:
- Sit securely with your feet supported. Interlace your fingers in front of you at about shoulder height.
- Turn your palms away and gently reach your hands forward.
- Let your shoulder blades move apart as you feel a mild stretch across your upper back. Keep your neck relaxed.
- Reduce the reach, release your hands, and lower your arms slowly.
Starting amount: Two 20–30-second holds total.
Technique check: Reach forward rather than pulling your shoulders toward your ears or collapsing your whole torso.
When interlacing your fingers is uncomfortable, place your hands together instead. This is a useful seated option, but it is an upper-back stretch—not an isolated rotator-cuff stretch.
10. Side-Lying Open-Book Stretch
Focus: Upper-back rotation with a stretch through the chest and shoulder.
Equipment: A mat and an optional pillow for your head or between your knees.
How to do it:
- Lie on your right side with your hips and knees bent approximately 90 degrees. Support your head as needed.
- Extend both arms in front of your chest with your palms together.
- Slowly open your left arm while rotating your upper back to the left. Keep your knees together and stop at a comfortable range.
- Pause, then reverse the movement until your palms meet again. Repeat before changing sides.
Starting amount: Three to five repetitions per side, pausing about 5 seconds in the open position.
Technique check: Rotate through your upper back instead of trying to force the arm behind you. Your top hand does not need to touch the floor.
Make the opening smaller when your knees start separating or your shoulder feels strained.
A Simple Shoulder-Stretching Routine
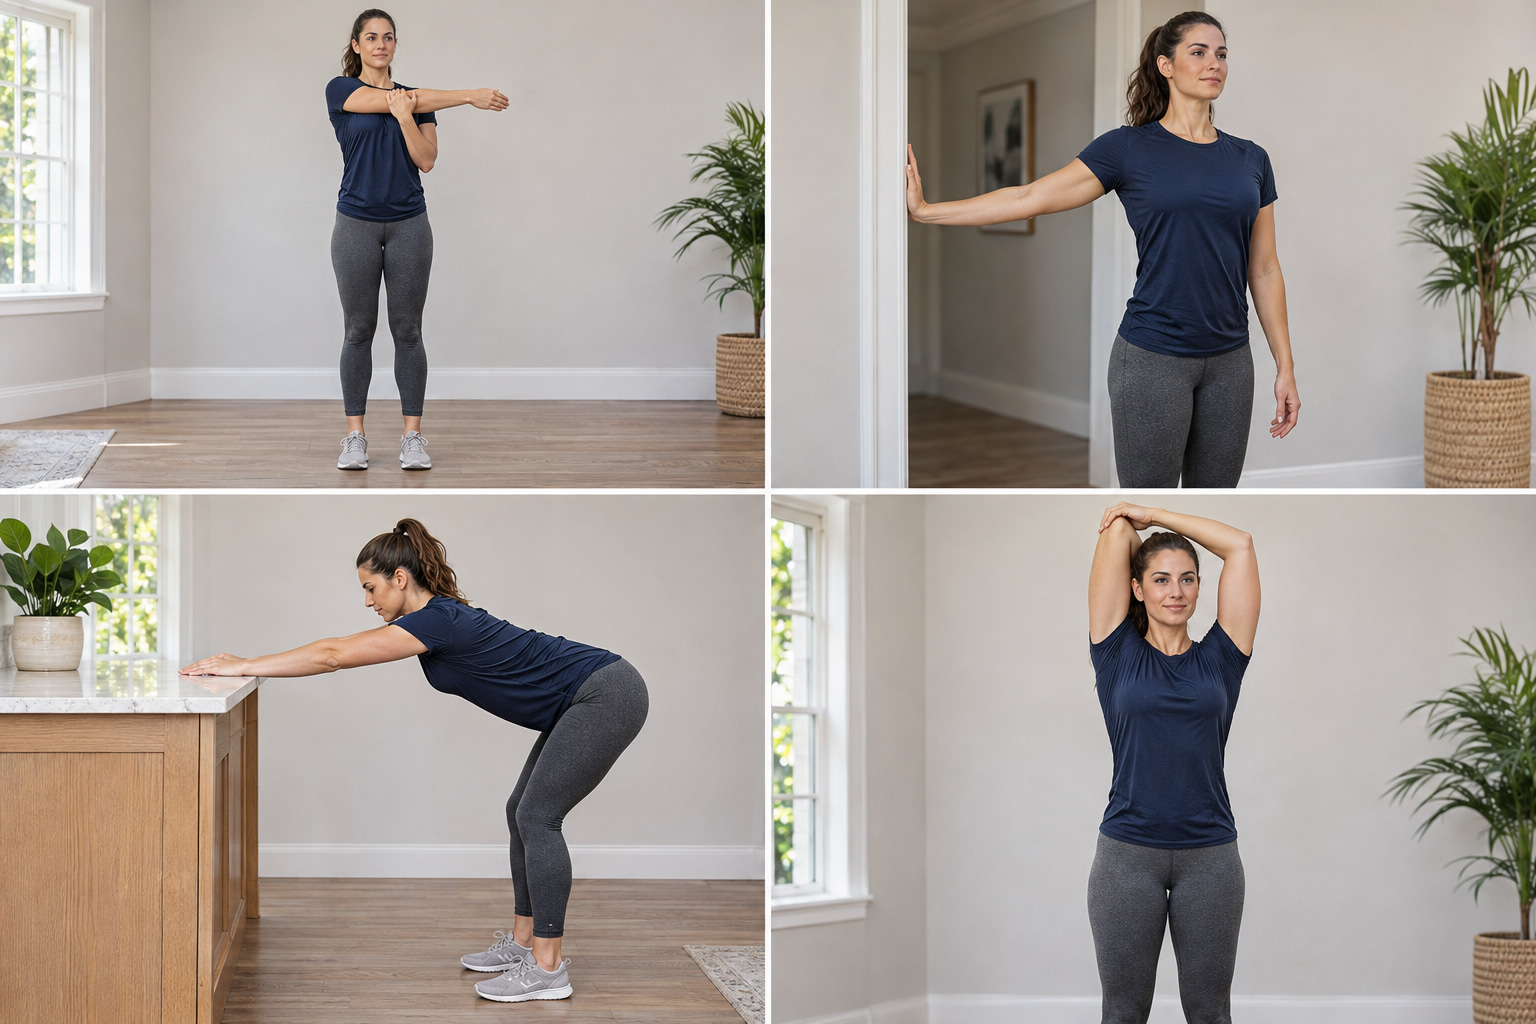
Use this four-exercise routine as a starting example. It combines posterior-shoulder, chest, lat, and upper-arm stretches without requiring you to move onto the floor.
Complete both sides of an exercise before moving to the next one.
| Order | Exercise | Amount | Hold |
|---|---|---|---|
| 1 | Standing cross-body shoulder stretch | 2 holds per side | 20–30 seconds |
| 2 | Single-arm doorway chest stretch | 2 holds per side | 20–30 seconds |
| 3 | Counter-supported lat stretch | 2 holds total | 20–30 seconds |
| 4 | Standing overhead triceps stretch | 2 holds per side | 20–30 seconds |
Allow 10–20 seconds between holds or sides to release and reposition. With both sides and normal transitions included, plan on approximately 8–12 minutes, plus a 5–10-minute warm-up when needed.
Keep the effort easy enough to breathe normally without bracing against the stretch.
How Often to Stretch
Start with two or three sessions per week. General flexibility guidance recommends regular stretching at least two to three days weekly; consistency matters more than occasionally forcing a much deeper stretch.
For your first session, doing one hold instead of two is a reasonable way to try the positions. Add the second hold when the first feels manageable.
How to Adapt the Routine
For a lying-down overhead option, replace the counter stretch with the supine assisted shoulder-flexion stretch. Use its five slow repetitions with brief pauses, rather than automatically applying the table’s longer holds.
For more upper-back emphasis, replace one stretch with the clasp-and-reach or open book. The towel and dowel exercises are options for specific reaching directions, not extra movements everyone needs to add.
Do not substitute your way around sharp pain. An exercise that reproduces concerning symptoms needs to be stopped, not intensified.
How to Progress Without Pulling Harder
Once a stretch feels comfortable during the session and does not leave you more symptomatic afterward, progress one small step at a time. For example, build a 20-second hold toward 30 seconds, or use a slightly greater range while preserving the same controlled position.
Judge progress by the movement itself: reaching overhead with less back arching, rotating without turning your torso, or reaching across your body without shrugging. A longer towel reach or a hand closer to the floor is not useful progress when it comes from compensation.
Continue appropriate shoulder-strength work alongside flexibility training. Stretching and strengthening serve different purposes; having more available range does not automatically mean you can control it well.
When Shoulder Stiffness Needs Professional Advice
Stop stretching if you develop sharp pain, numbness, persistent tingling, dizziness, or other concerning symptoms. Seek appropriate medical advice rather than repeatedly testing the same painful movement.
Arrange an assessment when shoulder pain is worsening, movement is substantially limited, or symptoms are not improving after about two weeks. Sudden severe pain, an inability to move the arm, visible deformity, marked swelling, or persistent loss of sensation requires urgent assessment.
Shoulder or arm discomfort accompanied by chest pressure, shortness of breath, sweating, or lightheadedness may be an emergency. Stop exercising and call emergency services.
For general flexibility, begin with a few comfortable movements, practice them regularly, and increase range gradually. The goal is easier, better-controlled movement—not completing every stretch or matching someone else’s position.
References
- Mayo Clinic: Stretching: Focus on Flexibility and A Guide to Basic Stretches.
- American Academy of Orthopaedic Surgeons: Rotator Cuff and Shoulder Conditioning Program and Chronic Shoulder Instability.
- American Council on Exercise: Overhead Triceps Stretch and 90 Lat Stretch.
- Harvard Health Publishing: Four Stretches to Keep Your Shoulders in Shape.
- Hospital for Special Surgery: Shoulder Muscle Anatomy and Back Exercises to Strengthen and Stretch.
- Worcestershire Acute Hospitals NHS Trust: Shoulder Injury Exercise Guidance and Assisted Shoulder-Movement Instructions.
- Health and Wellbeing Queensland: Upper-Back Stretch: Clasp and Reach.
- MedlinePlus: Rotator Cuff Exercises and the Role of Assessment.
- NHS: Shoulder Pain and Chest Pain.
This content is for informational purposes only and is not a substitute for medical advice.