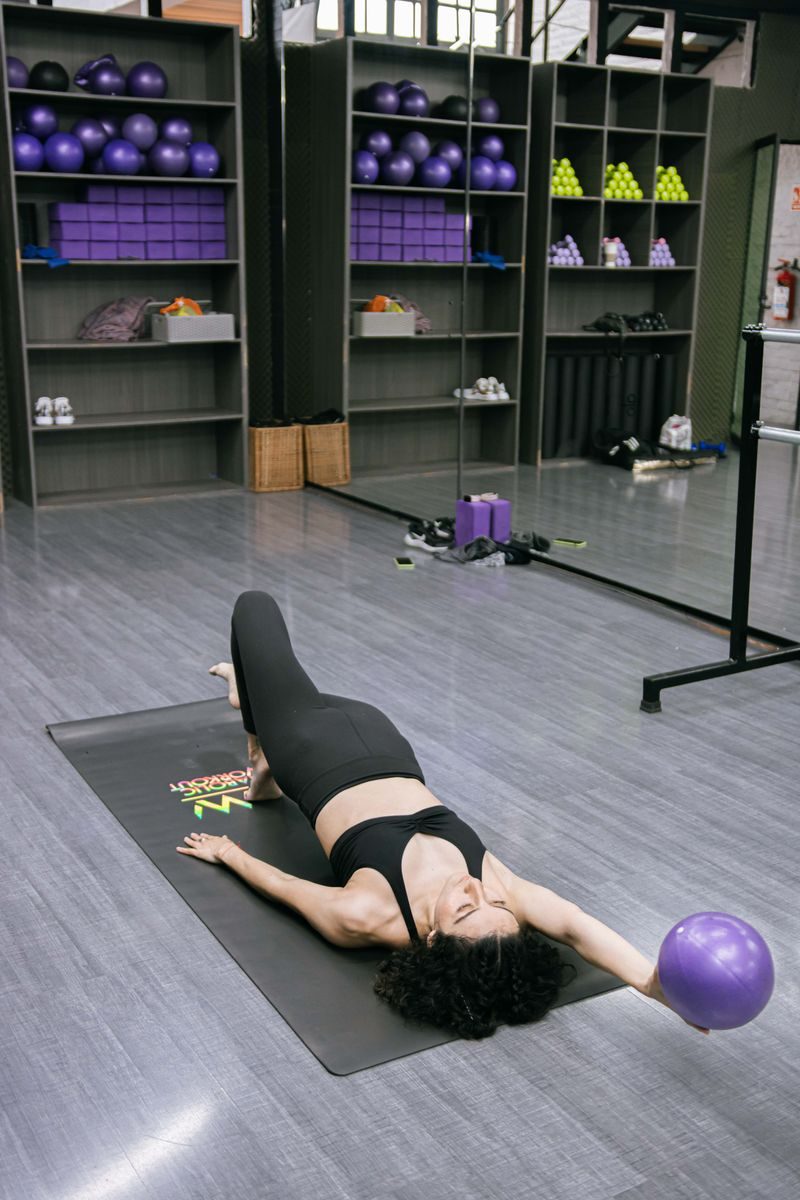
Beginner Pilates exercises can build core control and muscular endurance by teaching you to keep your trunk stable while moving your arms and legs. The following mat exercises require no special equipment, can be practiced at home, and include easier options for people who are new to Pilates.
Pilates is not limited to training the visible abdominal muscles. The Hospital for Special Surgery explains that the core also includes the back, pelvic floor, and diaphragm. A balanced beginner routine should therefore include abdominal control, hip stability, back-body strength, breathing, and coordination.
Research supports measured rather than exaggerated claims. A systematic review indexed by PubMed found that Pilates performed two or three times per week improved abdominal muscular endurance compared with no exercise. That finding does not prove that Pilates is superior to every other form of strength or core training.
Pilates Exercises for Beginners at a Glance
There is no universal scientific ranking of the “best” Pilates exercises. These ten were selected because they are accessible, scalable, and collectively train the front, sides, and back of the core.
| Exercise | Main training purpose | Easiest starting option |
|---|---|---|
| Pilates Pelvic Tilt | Learn pelvic positioning and abdominal control | Use a very small tilt |
| Pilates Heel Slide | Stabilize the trunk while moving one leg | Shorten the heel slide |
| Supine Toe Tap | Increase the challenge to the abdominal muscles | Keep one foot on the floor |
| Shoulder Bridge | Strengthen the glutes and posterior core | Use a partial lift |
| Basic Ab Curl | Practice controlled trunk flexion | Lift only slightly |
| Modified Pilates Hundred | Develop breathing coordination and endurance | Keep the head and feet down |
| Bent-Knee One-Leg Circle | Control the pelvis while the hip moves | Draw small circles |
| Side-Lying Leg Lift | Strengthen the lateral hips and side-body stabilizers | Bend the bottom knee |
| Four-Point Arm and Leg Reach | Build anti-rotation control | Move one limb at a time |
| Modified Swimming | Strengthen the posterior core | Lift only one limb at a time |
Pilates Form Basics Before You Begin
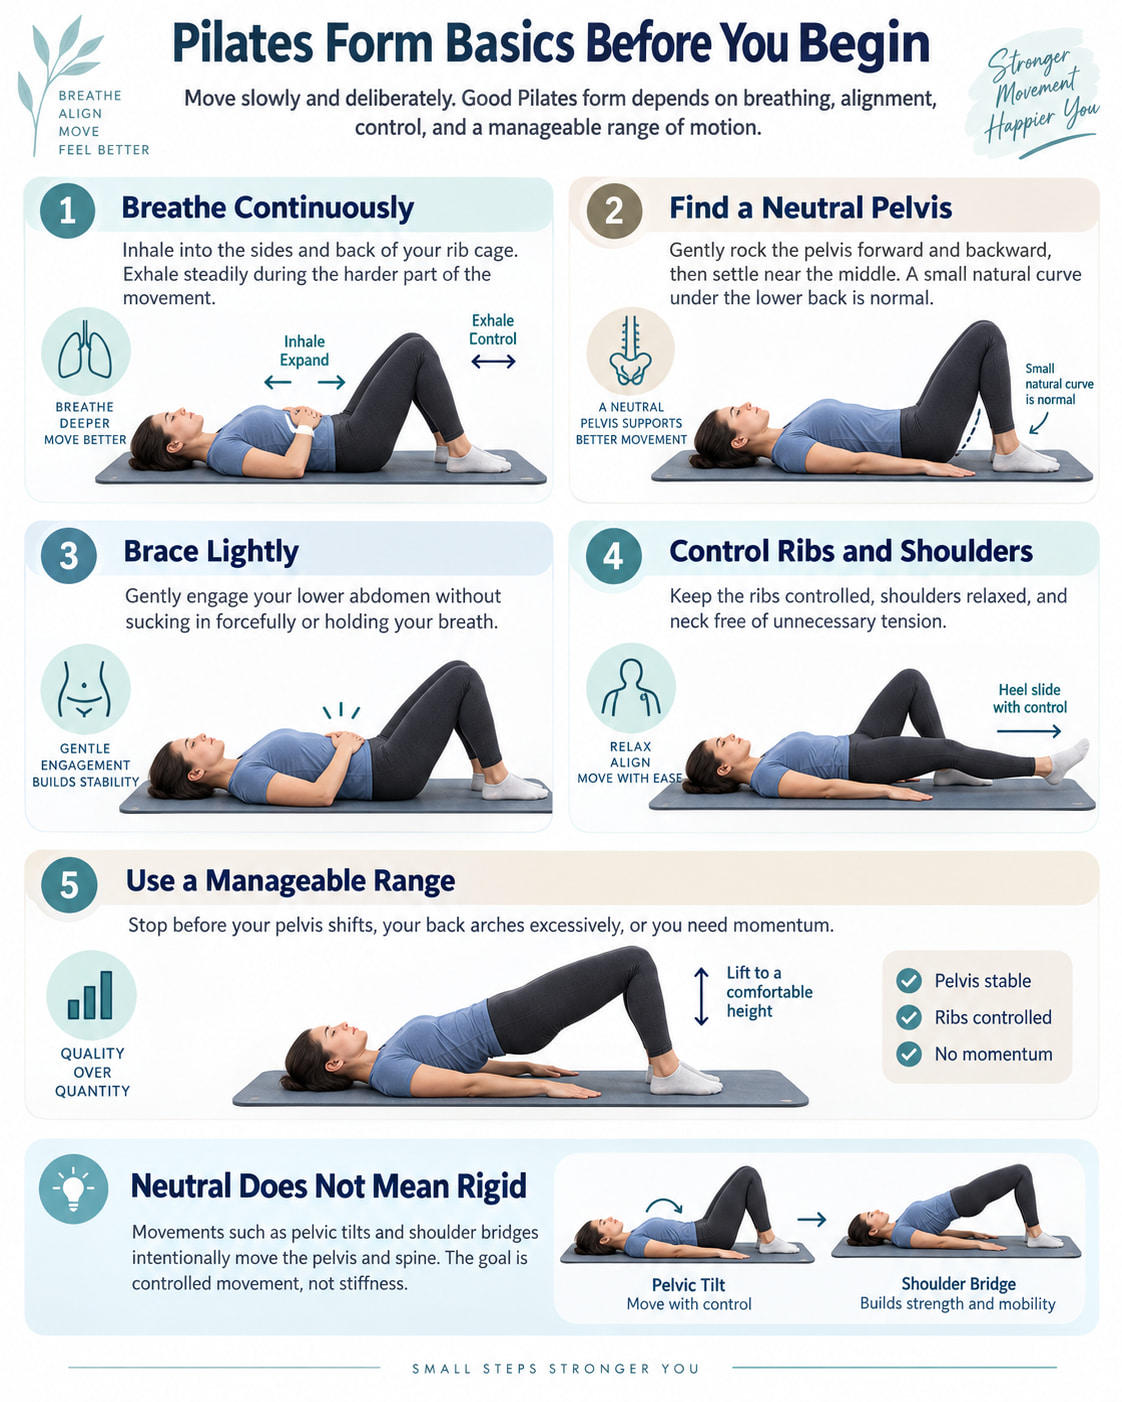
Pilates movements should feel deliberate rather than fast or forceful. The East of England Community Health and Care NHS Trust emphasizes breathing, centering, pelvic position, rib placement, shoulder control, and neutral head-and-neck alignment.
Use these principles throughout the workout:
- Breathe continuously. Inhale into the sides and back of your rib cage. Exhale steadily through your mouth during the more challenging part of the movement.
- Find a neutral pelvis. Gently rock your pelvis forward and backward, then settle near the middle. A small natural space beneath the lower back is normal.
- Brace lightly. Gently tighten your lower abdominal area as though fastening a comfortable waistband. Do not suck in forcefully or hold your breath.
- Control your ribs and shoulders. Avoid flaring the ribs, shrugging the shoulders, or tensing the neck.
- Use a manageable range. Stop a movement before your pelvis shifts, your back arches excessively, or you need momentum.
Neutral does not mean rigid. Exercises such as the pelvic tilt and shoulder bridge intentionally move the pelvis and spine, but that movement should remain controlled.
10 Best Pilates Exercises for Beginners and Core Strength
These 10 beginner Pilates exercises train the core from multiple angles while improving stability, coordination, and movement control. Start with the easier variations, move slowly, and focus on steady breathing and proper form.
1. Pilates Pelvic Tilt
Best for: Learning how the pelvis and lower spine move while gently engaging the abdominal muscles.
Muscles worked: Deep abdominal wall, rectus abdominis, obliques, and spinal stabilizers.
Equipment needed: Exercise mat.
Sets, reps, and rest: Perform 1–2 sets of 8–10 slow repetitions. Rest for 20–30 seconds.
How to do it
- Lie on your back with your knees bent, feet flat, and arms resting beside you.
- Position your feet approximately hip-width apart and begin with a small natural curve beneath your lower back.
- Inhale without changing your position.
- As you exhale, gently tip your pelvis toward your ribs so your tailbone rolls slightly forward and your lower back moves closer to the mat.
- Inhale and return to the middle position without exaggerating the lower-back arch.
Common mistakes: Pressing the back down as hard as possible, squeezing the glutes forcefully, moving the rib cage instead of the pelvis, or holding the breath. The movement should be small and smooth.
Progression or regression: Make the exercise easier by using a barely visible rocking motion. Progress by finding neutral after each repetition and maintaining that position during heel slides.
Coaching cue: Imagine your pelvis is a bowl that tips slightly toward your ribs and then returns to level.
Practicing pelvic rocking is a common way to identify the middle or neutral pelvic position used in beginner Pilates.
2. Pilates Heel Slide
Best for: Learning to move one leg without allowing the pelvis or lower back to follow it.
Muscles worked: Deep abdominals and obliques stabilize the trunk, while the hip and thigh muscles move the leg.
Equipment needed: Exercise mat. A small towel beneath the heel can help it slide on a hard floor.
Sets, reps, and rest: Perform 1–2 sets of 6–10 repetitions per side. Rest for 20–30 seconds.
How to do it
- Lie on your back with both knees bent and feet flat.
- Find a comfortable neutral pelvic position and gently brace your lower abdomen.
- Exhale as you slowly slide one heel away from your body.
- Stop before your pelvis tilts or your lower back begins to arch more.
- Inhale as you slide the heel back to the starting position, then change sides.
Common mistakes: Straightening the leg farther than you can control, allowing the opposite knee to drift, rushing the return, or pushing the abdomen outward.
Progression or regression: Shorten the slide if maintaining pelvic control is difficult. To progress, slide the leg almost straight or allow the heel to hover slightly above the floor.
Coaching cue: Move the leg, not the pelvis.
NHS clinical Pilates instructions similarly use a heel slide while keeping the opposite knee still and returning to a neutral starting position.
3. Supine Toe Tap
Best for: Progressing from heel slides to a longer and more demanding leg lever.
Muscles worked: Deep abdominal wall, rectus abdominis, internal and external obliques, and hip flexors.
Equipment needed: Exercise mat.
Sets, reps, and rest: Perform 1–2 sets of 6–8 repetitions per side. Rest for approximately 30 seconds.
How to do it
- Lie on your back with both knees bent and feet flat.
- Bring one leg into tabletop so the hip and knee are bent to approximately 90 degrees. Keep the other foot on the floor.
- Inhale to prepare and gently brace your abdomen.
- Exhale as you lower the lifted foot until the toes lightly touch the mat.
- Inhale as you return the leg to tabletop. Complete the repetitions, then switch legs.
Keep the knee angle mostly unchanged so the movement comes from the hip.
Common mistakes: Dropping the foot quickly, arching the lower back, allowing the ribs to lift, or lowering farther than the abdominal muscles can control.
Progression or regression: Return to the heel slide for an easier option. Progress by bringing both legs into tabletop and alternating toe taps, but only if the pelvis remains steady.
Coaching cue: Touch the floor quietly, as though testing the temperature of water.
Clinical Pilates resources commonly progress tabletop leg movements by lightly touching one set of toes down while the abdominal muscles control pelvic movement.
4. Shoulder Bridge
Best for: Strengthening the glutes and back of the hips while practicing controlled spinal movement.
Muscles worked: Gluteus maximus, hamstrings, spinal extensors, deep abdominals, and obliques.
Equipment needed: Exercise mat.
Sets, reps, and rest: Perform 1–2 sets of 8–10 repetitions. Rest for 30–45 seconds.
How to do it
- Lie on your back with your knees bent, feet hip-width apart, and heels comfortably close to your hips.
- Inhale to prepare.
- Exhale, gently tilt your pelvis, and begin lifting your tailbone and lower spine away from the floor.
- Continue rolling upward until your body forms a comfortable line from the shoulders toward the knees.
- Inhale at the top. Exhale as you slowly lower your spine and pelvis back to the mat.
Press through the whole foot and keep your knees pointing in the same direction as your toes.
Common mistakes: Lifting so high that the lower back arches, allowing the knees to spread or collapse inward, pushing through the neck, or turning the head while the hips are raised.
Progression or regression: Use a partial lift if the full range feels difficult. Progress to a bridge march by lifting one foot only a few inches while keeping the pelvis level.
Coaching cue: Roll the spine up and down like a string of pearls.
The Calderdale and Huddersfield NHS Foundation Trust teaches the bridge with a pelvic tilt followed by a controlled rolling lift. Its Pilates guidance also suggests bringing the heels closer if the hamstrings dominate.
5. Basic Ab Curl
Best for: Training controlled trunk flexion without relying on momentum.
Muscles worked: Rectus abdominis, internal and external obliques, and deeper trunk stabilizers.
Equipment needed: Exercise mat.
Sets, reps, and rest: Perform 1–2 sets of 6–10 repetitions. Rest for 30–45 seconds.
How to do it
- Lie on your back with your knees bent and feet flat.
- Place your hands behind your head for light support or reach your arms toward your thighs.
- Keep your pelvis near neutral and leave a small comfortable space beneath the lower back.
- Inhale to prepare.
- Exhale, gently nod your chin, and curl your head and upper shoulders away from the mat.
- Inhale as you lower with control.
Only lift as high as you can without pulling on your head or pushing your abdomen outward.
Common mistakes: Tugging on the neck, forcing the lower back flat, leading with the chin, using a fast rocking motion, or curling higher after control has been lost.
Progression or regression: Make it easier by performing only a small head nod or keeping your head down while practicing the exhale. Progress by pausing for two or three seconds at the top.
Coaching cue: Bring the lower ribs toward the pelvis rather than the chin toward the chest.
Basic Pilates ab curl guidance also emphasizes a neutral pelvis, controlled breathing, and avoiding excessive curling.
6. Modified Pilates Hundred
Best for: Coordinating breathing with abdominal endurance and controlled arm movement.
Muscles worked: Deep abdominal wall, rectus abdominis, obliques, and shoulder muscles. The hip flexors contribute more when the legs are lifted.
Equipment needed: Exercise mat.
Sets, reps, and rest: Begin with 3–5 breathing cycles. Rest for 30–45 seconds. One cycle consists of five small arm pumps while inhaling and five while exhaling.
How to do it
- Lie on your back with your knees bent and feet flat.
- Rest your arms beside your body with your palms facing down.
- Keep your head on the mat at first, or use a small ab curl if you can do so without neck tension.
- Float your arms a few inches above the mat.
- Pump them up and down through a small range while inhaling for five pumps and exhaling for five.
- Keep your pelvis and rib cage quiet throughout.
The traditional name does not mean a beginner must immediately complete 100 arm pumps.
Common mistakes: Making large arm swings, holding the breath, lifting the legs too low, tightening the jaw, or continuing after the lower back begins to arch.
Progression or regression: Keep your head, feet, and legs supported for the easiest version. Progress by lifting one leg into tabletop, then both legs, before considering straighter legs.
Coaching cue: Let the arms pulse while the torso stays still.
Beginner clinical Pilates guidance presents the Hundred in levels, beginning with the feet and head supported before progressing to one or both legs in tabletop.
7. Bent-Knee One-Leg Circle
Best for: Improving hip mobility while teaching the pelvis to remain level.
Muscles worked: Deep abdominals and obliques stabilize the trunk; the hip flexors, adductors, and abductors guide the circle.
Equipment needed: Exercise mat.
Sets, reps, and rest: Perform 5 slow circles in each direction on each leg. Rest for 20–30 seconds between sides.
How to do it
- Lie on your back with both knees bent and feet flat.
- Bring one leg into tabletop while keeping the other foot on the mat.
- Gently brace your abdomen and keep both sides of your pelvis heavy.
- Use the lifted knee to draw a small circle on the ceiling.
- Reverse the direction after five repetitions, then change legs.
The circle should come from the hip. Keep the knee bent and the lower leg relaxed.
Common mistakes: Drawing such a large circle that the pelvis rocks, twisting toward the moving leg, straightening the knee unintentionally, or moving too quickly.
Progression or regression: Make the circle smaller or perform a simple knee opening for an easier option. Progress by straightening the raised leg while keeping the circle controlled.
Coaching cue: Imagine balancing a glass of water on the opposite side of your pelvis.
Clinical Pilates guidance uses a bent-knee tabletop position before progressing to a straight-leg circle and emphasizes keeping the pelvis level.
8. Side-Lying Leg Lift
Best for: Strengthening the outer hip and improving lateral pelvic stability.
Muscles worked: Gluteus medius, gluteus minimus, tensor fasciae latae, and obliques.
Equipment needed: Exercise mat. A folded towel can support the head.
Sets, reps, and rest: Perform 1–2 sets of 8–12 repetitions per side. Rest for 20–30 seconds.
How to do it
- Lie on one side with your shoulders and hips stacked.
- Support your head with your lower arm or a folded towel.
- Bend the bottom knee for balance and keep the top leg straight.
- Reach the top leg long, keeping the foot neutral or angled slightly toward the floor.
- Exhale as you lift the leg to approximately hip height.
- Inhale as you lower it slowly without letting the hips roll backward.
Common mistakes: Turning the toes toward the ceiling, rolling the pelvis back, hiking the top hip, lifting too high, or shortening through the waist.
Progression or regression: Use a smaller lift or bend both knees for an easier variation. Progress to small leg circles while keeping the torso still.
Coaching cue: Reach the leg longer before lifting it higher.
The American Council on Exercise recommends vertically aligning the hips and shoulders and keeping the head aligned with the spine during side-lying hip abduction.
9. Four-Point Kneeling Arm and Leg Reach
Best for: Developing anti-rotation control and coordinating opposite sides of the body.
Muscles worked: Deep abdominals, obliques, multifidus, erector spinae, glutes, and shoulder stabilizers.
Equipment needed: Exercise mat.
Sets, reps, and rest: Perform 1–2 sets of 5–8 repetitions per side. Hold each reach for 2–3 seconds. Rest for approximately 30 seconds.
How to do it
- Begin on your hands and knees with your hands beneath your shoulders and knees beneath your hips.
- Keep your spine long and look toward the mat.
- Exhale as you extend one arm forward and the opposite leg backward.
- Stop when the arm and leg are approximately level with the torso.
- Keep your ribs, pelvis, and shoulders facing the floor.
- Inhale as you return with control, then change sides.
This movement is also commonly called a bird dog.
Common mistakes: Lifting the limbs too high, arching the lower back, rotating the pelvis, shifting heavily onto the supporting side, or rushing between repetitions.
Progression or regression: Start by moving only one arm or one leg. Progress by holding each full reach for five seconds or slowly drawing the elbow and opposite knee toward one another.
Coaching cue: Imagine balancing a tray across your lower back.
Bird-dog exercise guidance describes the movement as a way to stabilize the lower spine during simultaneous arm and leg movement and stresses keeping the hips level.
10. Modified Swimming
Best for: Strengthening the back of the core and coordinating opposite arm-and-leg movement.
Muscles worked: Erector spinae, multifidus, gluteus maximus, hamstrings, posterior shoulders, and deep trunk stabilizers.
Equipment needed: Exercise mat and an optional folded towel for the forehead.
Sets, reps, and rest: Perform 1–2 sets of 5–8 repetitions per side or alternate slowly for 20–30 seconds. Rest for 30–45 seconds.
How to do it
- Lie on your stomach with your legs extended and arms reaching forward.
- Rest your forehead on a folded towel so your neck remains neutral.
- Gently brace your abdomen without holding your breath.
- Exhale as you reach and lift one arm and the opposite leg a few inches.
- Keep the front of your pelvis in contact with the mat.
- Inhale as you lower, then repeat on the opposite side.
Think about length rather than height. A small controlled lift is enough.
Common mistakes: Throwing the limbs upward, lifting high enough to compress the lower back, looking forward, tightening the neck, or using rapid uncontrolled flapping.
Progression or regression: Begin by lifting only one arm or one leg. Progress to continuous alternating reaches while keeping the movements small. Use the four-point kneeling reach instead if lying on your stomach is uncomfortable.
Coaching cue: Reach toward opposite walls rather than trying to lift toward the ceiling.
Clinical Pilates guidance progresses swimming from one arm or leg at a time to coordinated opposite-limb movement while keeping the neck relaxed and avoiding excessive back arching.
Beginner Pilates Core Workout
Perform the exercises in order for one controlled round. The session should take approximately 15–20 minutes, depending on your rest periods and transition time.
| Order | Exercise | Beginner volume |
|---|---|---|
| 1 | Pilates Pelvic Tilt | 8 slow reps |
| 2 | Pilates Heel Slide | 6 reps per side |
| 3 | Supine Toe Tap | 6 reps per side |
| 4 | Shoulder Bridge | 8 reps |
| 5 | Basic Ab Curl | 6–8 reps |
| 6 | Modified Pilates Hundred | 3 breathing cycles |
| 7 | Bent-Knee One-Leg Circle | 5 circles each way per side |
| 8 | Side-Lying Leg Lift | 8 reps per side |
| 9 | Four-Point Arm and Leg Reach | 5 reps per side |
| 10 | Modified Swimming | 5 reps per side |
Rest for approximately 20–45 seconds between exercises, or long enough to restore relaxed breathing and good positioning.
Aim for a moderate effort. You should feel your muscles working, but you should still be able to breathe steadily and complete each repetition without shaking, rushing, or changing your alignment.
How Often Should Beginners Do Pilates?
Start with two or three sessions per week, ideally with a recovery day between sessions. This frequency is consistent with Pilates programs included in research that reported improvements in abdominal muscular endurance over periods of 5–12 weeks.
You do not need to increase every exercise at once. Begin with one round and progress only after you can:
- Breathe continuously through every repetition
- Keep the pelvis and rib cage controlled
- Complete both sides evenly
- Avoid momentum
- Finish without neck or lower-back discomfort
- Maintain the same movement quality from the first repetition to the last
A practical progression is to add two repetitions to selected exercises, extend a hold by one or two seconds, or move to the harder variation. Change only one factor at a time.
Common Beginner Pilates Mistakes
Moving Too Quickly
Pilates is not a race. Slower movement gives you more time to notice whether the pelvis, ribs, and shoulders are staying controlled.
Holding Your Breath
A hard abdominal brace often causes beginners to stop breathing. Reduce the range or difficulty until you can exhale smoothly through the challenging portion.
Forcing the Lower Back Flat
Neutral position normally includes a small natural curve. Some exercises use a deliberate pelvic tilt or imprint, but pressing down forcefully during every movement can create unnecessary tension.
Choosing Too Much Range
A smaller toe tap, leg circle, bridge, or swimming lift is more effective than a large movement that causes the trunk to shift.
Overusing the Neck and Hip Flexors
Keep your head supported during the Hundred or ab curl when needed. For tabletop exercises, return one foot to the floor if the front of the hips becomes more noticeable than the abdominal muscles.
Progressing Before You Have Control
Longer legs, lower leg positions, larger circles, and lifted head positions all increase difficulty. Master the supported version before changing the lever or range.
Safety Considerations
Use a supportive mat on a flat, clear surface. Stop if an exercise causes sharp pain, numbness, dizziness, chest pain, unusual shortness of breath, or other concerning symptoms.
These exercises are intended for generally healthy beginners, not as treatment for an injury or health condition. The NHS recommends seeking professional advice before beginning if you have an injury, health problem, unexplained symptoms, a recent operation or major health event, or concerns about exercising. It also advises getting guidance during pregnancy or after recently giving birth.
Frequently Asked Questions
Can Pilates exercises really strengthen your core?
Pilates can help improve core control and muscular endurance by requiring the trunk to remain stable during controlled limb movements. Research in healthy participants has found improved abdominal muscular endurance compared with no exercise, although Pilates should not be presented as automatically superior to every other training method.
Which Pilates exercise should a complete beginner learn first?
Start with the pelvic tilt and heel slide. These exercises teach breathing, pelvic awareness, and leg movement without placing the neck or spine in a demanding position.
How long should a beginner Pilates workout last?
Approximately 15–20 minutes is enough for a useful starting session. It is better to complete a short workout with precise form than a longer workout in which breathing and alignment deteriorate.
How often should beginners practice Pilates?
Two or three sessions per week is a practical starting frequency. Leave time for recovery when the abdominal, hip, or back muscles feel noticeably fatigued.
Do you need a reformer for Pilates?
No. All ten exercises in this routine can be performed on a mat without a reformer, resistance bands, weights, or other specialized equipment.
What should you do if your neck feels strained?
Keep your head on the mat during the Hundred, reduce the height of the ab curl, and avoid pulling on your head. Stop the exercise if the strain continues or becomes painful.
What should you do if your lower back arches during toe taps?
Return the foot to the floor, use a smaller lowering range, or switch back to heel slides. Progress only when you can move the leg without a noticeable change in pelvic position.
Conclusion
The best beginner Pilates exercises are not necessarily the most advanced ones. Pelvic tilts, heel slides, bridges, controlled curls, side-lying work, and opposite-limb reaches build the foundation needed for harder Pilates movements.
Practice two or three times per week, use a range you can control, and progress only when you can maintain steady breathing and stable alignment. Consistent, precise repetitions will provide more training value than rushing to complete longer or more difficult variations.
This content is for informational purposes only and is not a substitute for medical advice.