
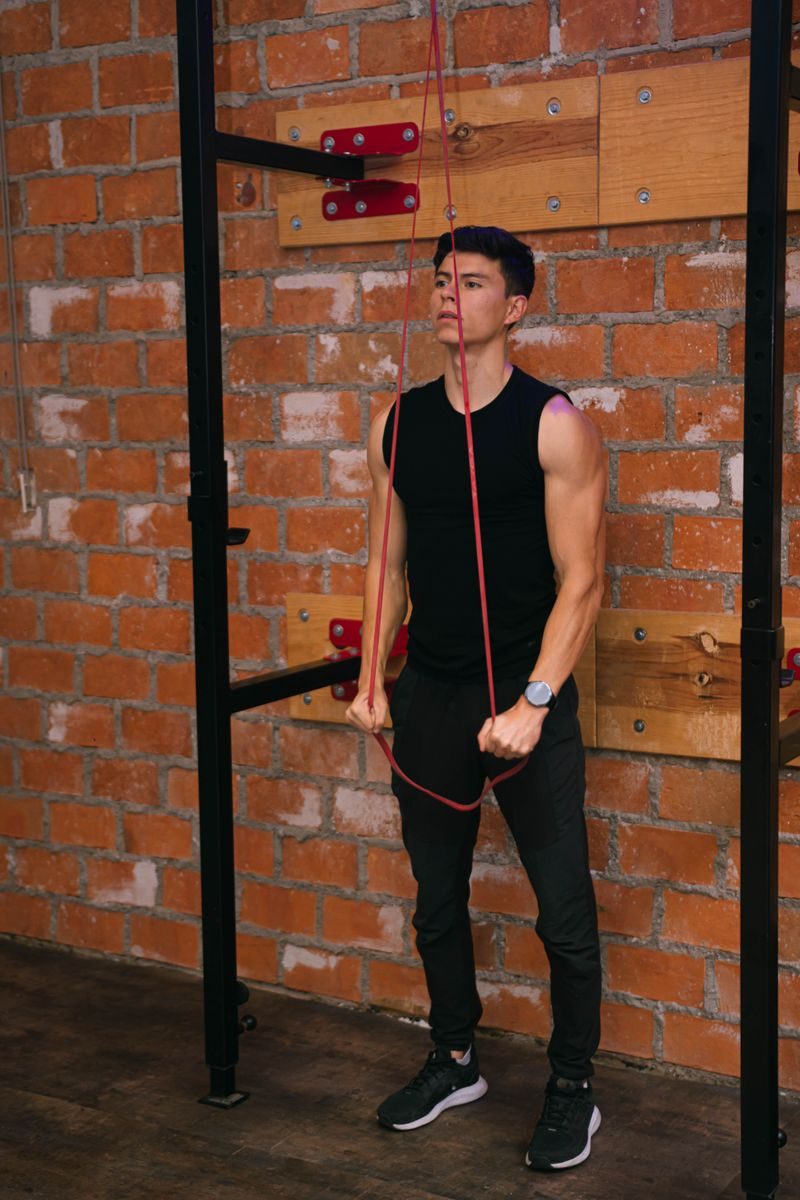
Resistance band lat exercises—including pulldowns, rows, and pullovers—can help you build a stronger back without a cable machine. The key is using a secure setup, controlling each repetition, and gradually increasing the challenge. The American College of Sports Medicine recognizes elastic bands and home-based resistance training as useful options for improving strength and muscle size.
The eight exercises below offer different setups for training at home. Choose the movements that fit your equipment, then use the sample workout to combine a few—not all eight.
Before You Start
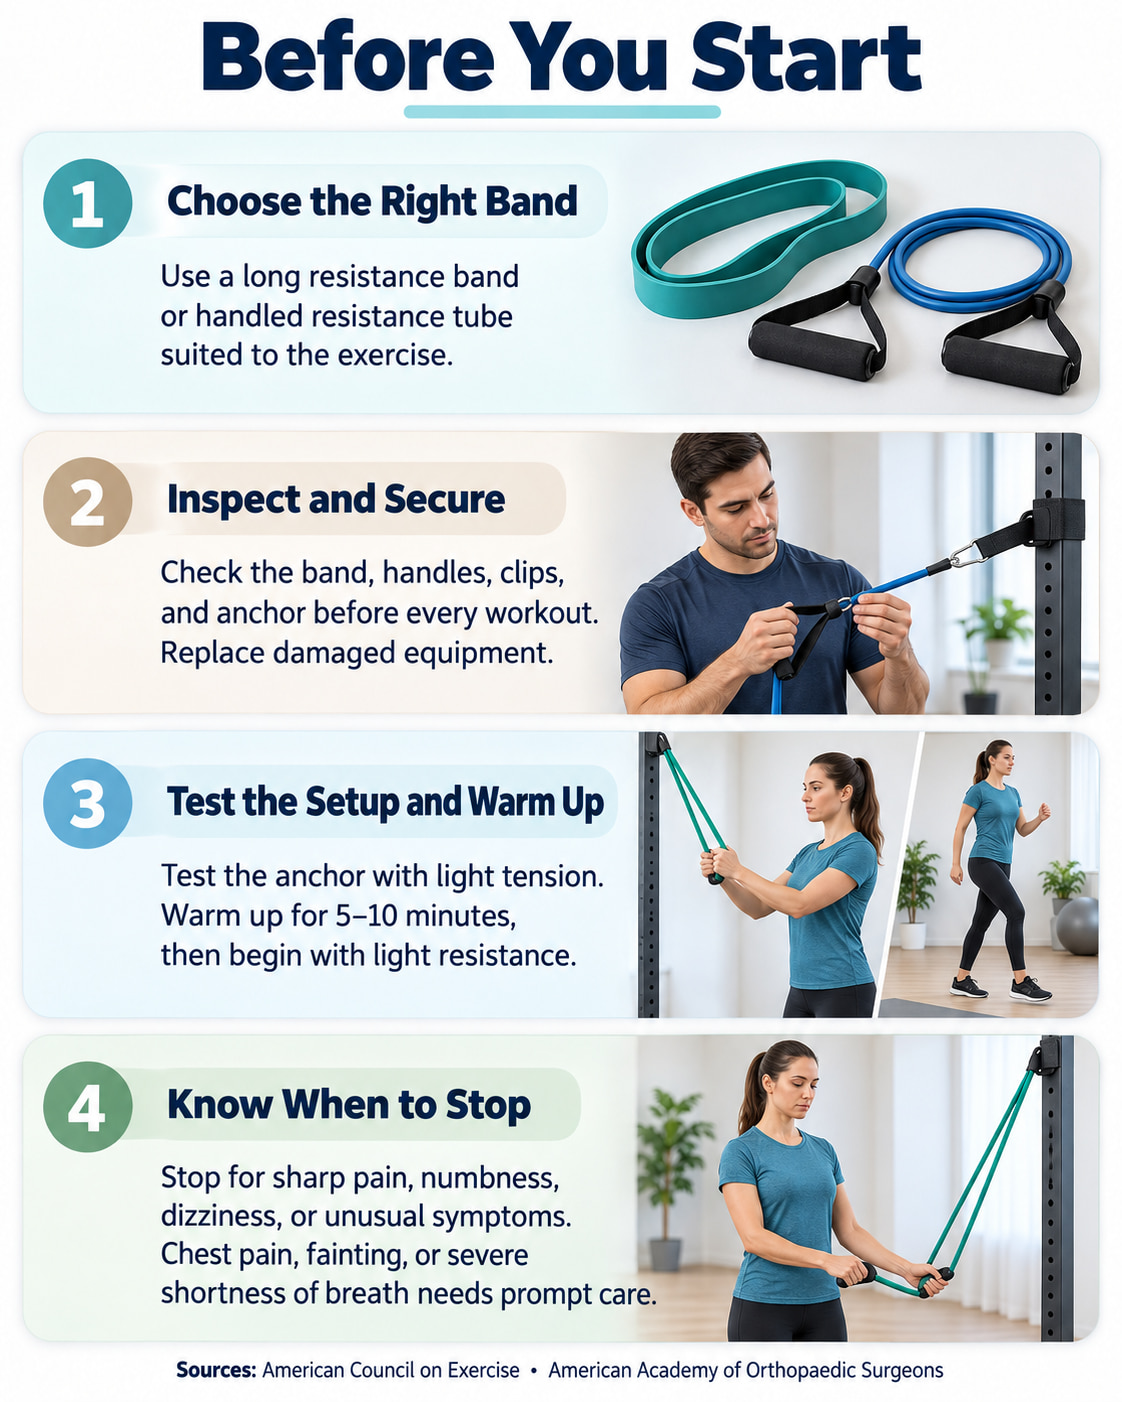
Use a long resistance band or handled tube suitable for the exercise. Inspect the band, handles, clips, and anchor before training. The American Council on Exercise recommends discarding damaged bands, checking connections, controlling the movement, and following the manufacturer’s stretching limits. Never release a stretched band suddenly.
Install compatible anchors exactly as directed. For door anchors, follow the manufacturer’s instructions for door position and prevent anyone from opening the door during your set. Test the setup with gentle tension first.
Warm up with 5–10 minutes of easy activity, then practice a few repetitions with light resistance. This follows the general preparation advice in the American Academy of Orthopaedic Surgeons shoulder-conditioning guidance.
Stop and seek professional advice for sharp pain, numbness, dizziness, or unusual symptoms. Chest pain, fainting, or severe shortness of breath during exercise requires prompt medical attention.
8 Best Resistance Band Lat Exercises
Your lats help move your upper arms down toward your body and backward from a raised position. The NCBI Bookshelf anatomy reference describes shoulder extension and adduction among the actions of the latissimus dorsi. These exercises use those actions, with assistance from other shoulder, back, and arm muscles.
Suggested starting dose: For each exercise you choose, perform 2 sets of 10–15 repetitions, or 10–15 per side. Rest 60–120 seconds between sets. Use these as starting targets, not a requirement to complete every exercise listed.
1. Tall-Kneeling Resistance Band Lat Pulldown
Best for: A two-arm overhead pull with a high anchor.
Muscles worked: Lats and assisting back and elbow-flexor muscles.
Equipment: Long-loop resistance band, compatible overhead anchor, and knee padding.
How to do it:
- Secure the band overhead. Kneel on both knees facing the anchor, keeping your hips above your knees.
- Grip one side of the hanging loop in each hand with your palms facing inward. Reach upward toward the anchor with light tension in the band.
- Keep your torso tall as you pull your elbows down beside your ribs, bringing your hands toward shoulder level.
- Slowly reach upward again without leaning backward or arching your lower back.
Common mistake: Rocking backward to finish the pull. Reduce resistance when you cannot keep your hips and torso steady.
Make it easier: Use a lighter band. Keep the same controlled movement rather than shortening each repetition to handle more tension. These positioning cues are consistent with Girls Gone Strong tall-kneeling pulldown instructions.
2. Half-Kneeling Single-Arm Band Lat Pulldown
Best for: Practicing the overhead pull one side at a time.
Muscles worked: Lats and elbow flexors, with the trunk muscles helping maintain position.
Equipment: Long-loop band, overhead anchor, and knee padding.
How to do it:
- Anchor the band above you. To train your right arm, place your right knee on the pad and your left foot on the floor in front.
- Hold the band in your right hand and reach upward and slightly forward. Keep your chest and hips facing the anchor.
- Pull your elbow down toward your right hip. Allow your forearm to rotate so your palm turns toward you as your hand approaches shoulder level.
- Return slowly to the overhead position. Complete your repetitions, then switch sides.
Common mistake: Bending sideways or turning the torso to pull farther. Keep the movement at your shoulder and elbow rather than borrowing movement from your waist.
Practical adjustment: Start with the side that feels less controlled, then match its repetitions on the other side. Use a lighter band when maintaining the half-kneeling position becomes the limiting factor. The overhead setup and trunk-control guidance are consistent with [P]rehab’s exercise instructions.
3. Standing Straight-Arm Band Pulldown
Best for: Practicing a shoulder-driven pull with minimal elbow movement.
Muscles worked: Lats, teres major, and assisting shoulder extensors, including the long head of the triceps.
Equipment: Long-loop band and overhead anchor.
How to do it:
- Secure the band overhead and face the anchor. Hold the band with both hands, approximately shoulder-width apart.
- Step back until your arms reach forward and upward with light tension. Soften your knees and maintain a slight hip hinge.
- Pull your arms down toward the fronts of your thighs, keeping a small, consistent bend in your elbows.
- Return slowly through a comfortable overhead range without lifting your ribs or swinging your torso.
Common mistake: Bending the elbows substantially and then straightening them, turning the movement into a triceps pushdown.
Make it easier: Choose a lighter band or begin closer to the anchor while preserving the arm path. You do not need to drive your hands behind your body to finish the repetition. Rehab Hero describes the same basic high-anchor, straight-arm pulling pattern.
4. Seated Resistance Band Row
Best for: A seated pulling exercise without an external anchor.
Muscles worked: Lats and upper-back muscles, with assistance from the elbow flexors.
Equipment: Long resistance band suitable for foot-secured rows and supportive shoes.
How to do it:
- Sit on the floor with your knees slightly bent. Position the middle of the band securely around the middle of both shoe soles—not across your toes.
- Hold an equal section of band in each hand and sit upright with your arms reaching forward.
- Pull your hands toward your waist, guiding your elbows backward close to your sides.
- Slowly extend your arms without rounding your back or rocking your torso forward and backward.
Common mistake: Leaning backward to move the band farther. Keep your torso position consistent throughout the set.
Setup check: Stop immediately if the band shifts toward your toes. Reposition it securely, or choose an externally anchored row instead. Mayo Clinic recommends a controlled rowing motion with the back maintained in a neutral position and the knees comfortably bent.
5. Bent-Over Resistance Band Row
Best for: A two-arm row using your feet as the anchor.
Muscles worked: Lats, rear shoulders, upper-back muscles, and elbow flexors.
Equipment: Resistance tube with handles and supportive shoes.
How to do it:
- Stand on the center of the tube with your feet approximately shoulder-width apart. Keep the tubing securely beneath the middle of both shoes.
- Hold one handle in each hand, palms facing inward. Bend your knees comfortably and hinge forward at your hips.
- Maintain your back position as you pull your elbows backward beside your torso, bringing the handles toward your lower ribs.
- Lower the handles slowly until your arms reach the starting position.
Common mistake: Standing up slightly during every pull. Your torso should remain steady rather than rising and falling with the handles.
Alternative: Use the supported single-arm row below when holding the unsupported hinge distracts you from controlling the pull. Keep a neutral back, guide the elbows close to the body, and use a smooth, controlled movement.
6. Standing Single-Arm Anchored Band Row
Best for: One-arm rowing without kneeling or sitting on the floor.
Muscles worked: Lats, upper-back muscles, rear shoulders, and elbow flexors.
Equipment: Compatible clip-style resistance tube, one handle, and a waist-height anchor.
How to do it:
- For a tube system designed for this configuration, pass the tube through the waist-height anchor and connect both ends to one handle.
- Face the anchor with your feet about hip-width apart. Hold the handle in one hand, palm facing inward, with your arm reaching forward.
- Pull your elbow backward toward your hip, bringing the handle toward your lower ribs. Keep your chest facing the anchor.
- Extend your arm slowly without allowing your torso to rotate. Repeat on the other side.
Common mistake: Turning your chest away from the anchor as you pull. Reduce the tension until you can finish the repetition without twisting.
Setup reminder: Do not improvise the two-ends-to-one-handle arrangement with equipment that is not designed for it. Peak Physio provides similar guidance for a standing resistance-band row using a waist-height pulling direction and controlled return.
7. Supported Single-Arm Resistance Band Row
Best for: A foot-secured row with your free hand providing support.
Muscles worked: Lats, upper-back muscles, rear shoulders, and elbow flexors.
Equipment: Long resistance band, supportive shoes, and a sturdy wall or fixed post.
How to do it:
- Secure the band beneath the middle of your right shoe and hold it in your right hand.
- Bend your knees comfortably and hinge forward. Place your left hand against a sturdy wall or fixed post for support.
- Pull your right elbow backward, bringing your hand toward the area just below your ribs. Keep your hips and shoulders from turning.
- Lower your hand slowly, maintaining the same supported position. Complete your repetitions and switch sides.
Common mistake: Opening your chest toward the ceiling to lift your hand higher. Stop the pull before you need to twist.
Practical adjustment: Keep the support stable as you progress. Increase the band resistance gradually rather than removing support simply to make the exercise harder. Maintain the same neutral-back and controlled-rowing principles used in the two-arm version.
8. Supine Resistance Band Pullover
Best for: A floor-based alternative to standing straight-arm work.
Muscles worked: Lats and pectoralis major, with assisting shoulder muscles.
Equipment: Long-loop band, compatible anchor beyond your head, and exercise mat.
How to do it:
- Secure the band to a suitable anchor and lie on your back with your head toward it. Position yourself so the band remains clear of your face and neck.
- Hold the band with both hands and reach toward the anchor through a comfortable overhead range.
- Bring your arms toward your thighs while keeping your elbows nearly straight and your torso steady.
- Return slowly, stopping the overhead reach before you need to arch your lower back.
Common mistake: Forcing the arms farther overhead by lifting the ribs and exaggerating the back arch.
Make it easier: Reduce resistance and use a smaller, comfortable overhead range. This is an alternative to the standing straight-arm pulldown; you do not need both in the same workout. The basic supine, anchored-band movement follows the same shoulder-extension pattern described earlier.
A Simple Resistance Band Lat Workout
Start with one pulldown and one row. Add a straight-arm exercise only after you are comfortable with the basic session.
| Exercise | Sets and repetitions | Rest |
|---|---|---|
| Tall-kneeling band lat pulldown | 2 × 10–15 | 60–120 seconds |
| Seated band row | 2 × 10–15 | 60–120 seconds |
| Optional: Standing straight-arm pulldown | 1–2 × 10–15 | 60–90 seconds |
Perform this session twice weekly on nonconsecutive days, such as Monday and Thursday. During your first few workouts, one set of each main exercise is a reasonable way to learn the movements before adding the second set.
Choose resistance that leaves approximately two or three more good repetitions possible at the end of each set. Do not continue once you need to jerk the band or change your body position.
These are practical starting recommendations. Current ACSM resistance-training guidance emphasizes regular resistance training, individualizing the program, and training all major muscle groups at least twice weekly. Reaching muscle failure is not required for general strength-training benefits.
Make Substitutions Rather Than Adding Everything
Replace the two-arm pulldown with the half-kneeling version to work one side at a time. Replace the seated row with the standing, bent-over, or supported row according to your setup.
Without a suitable overhead anchor, begin with a foot-secured row. You can still train your back without inventing an unsafe anchoring arrangement. The foot-secured options are genuine alternatives to externally anchored band exercises.
Treat this as the pulling portion of a broader program—not a complete full-body workout.
How to Choose Resistance and Keep Progressing
Choose the band for the whole repetition, not just the starting position. Band tension increases as it stretches. A band that feels easy at the beginning may become too difficult to control near the finish.
Use this progression:
- Establish a repeatable setup. Record the band, anchor height, grip position, and starting distance.
- Build repetitions first. Work toward 15 controlled repetitions on every set without changing your technique.
- Increase resistance modestly. After reaching the top of the range for two workouts, try the next manageable resistance and return toward 10 repetitions.
The two-workout checkpoint is a practical coaching rule, not a requirement. Stay with the current band longer when the next resistance level causes swinging, shortened repetitions, or loss of control.
Change one variable at a time. Increasing band resistance, adding sets, and moving farther from the anchor simultaneously makes progress difficult to judge. Never exceed the manufacturer’s stretch limit to make an exercise harder.
Keep breathing throughout each set, and control the return instead of allowing the band to pull your arms back abruptly.
Frequently Asked Questions
Can resistance bands build your lats?
Yes. Bands can provide meaningful resistance for strength and muscle growth when training is sufficiently challenging and progresses over time. Current resistance-training guidance recognizes elastic-band and home-based training as useful options. That does not mean every band workout produces the same results or that these eight variations are uniquely superior.
Are rows or pulldowns better for lat training?
They offer different pulling directions. Pulldowns bring your upper arms down from overhead, while rows bring them backward from in front of you. Both use actions involving the lats. Start with the option you can set up securely and perform well; combine one of each when your equipment allows.
Do straight-arm exercises isolate the lats completely?
No. Keeping the elbow angle relatively constant changes the movement, but it does not remove every assisting muscle. Straight-arm pulldowns also involve other shoulder extensors, and pullovers can involve the chest. Think of them as lat-focused options rather than lat-only exercises.
What should I do if an exercise bothers my shoulder or back?
Stop rather than forcing the repetition. Recheck the setup, resistance, and range of motion. An exercise that repeatedly causes pain needs professional assessment, especially after an injury or surgery. Do not treat this workout as a rehabilitation plan.
The Bottom Line
You do not need eight exercises in every session to train your lats effectively. Start with one controlled pulldown and one row, use a secu re setup, and record your repetitions and resistance.
Build consistency before adding more work. Your next progression should be a better-controlled repetition or a manageable increase in resistance—not more swinging or a less secure anchor.
References
- American College of Sports Medicine — Resistance Training Prescription for Muscle Function, Hypertrophy, and Physical Performance
Best overall source for resistance-training effectiveness, frequency, progression, effort, strength, and muscle growth. - Lopes et al. — Effects of Elastic Resistance vs. Conventional Resistance on Muscular Strength
Systematic review and meta-analysis supporting elastic resistance bands as an effective strength-training option. - NCBI Bookshelf — Anatomy, Back, Latissimus Dorsi
Useful for supporting latissimus dorsi anatomy and its roles in shoulder extension and adduction, which relate directly to pulldowns, rows, and pullovers. - American Council on Exercise — Resistance Band Workout and Safety Guidance
Highly relevant for band inspection, resistance selection, controlled movement, anchor safety, and manufacturer stretch limits. - Mayo Clinic — Seated Row With Resistance Tubing
Directly supports your seated resistance band row, including neutral posture, knee position, controlled movement, and lat involvement. - Mayo Clinic — Bent-Over Row With Resistance Tubing
Directly supports the bent-over band row setup, including foot placement, neutral spine, inward-facing grip, and close elbow path.
This content is for informational purposes only and is not a substitute for medical advice.