
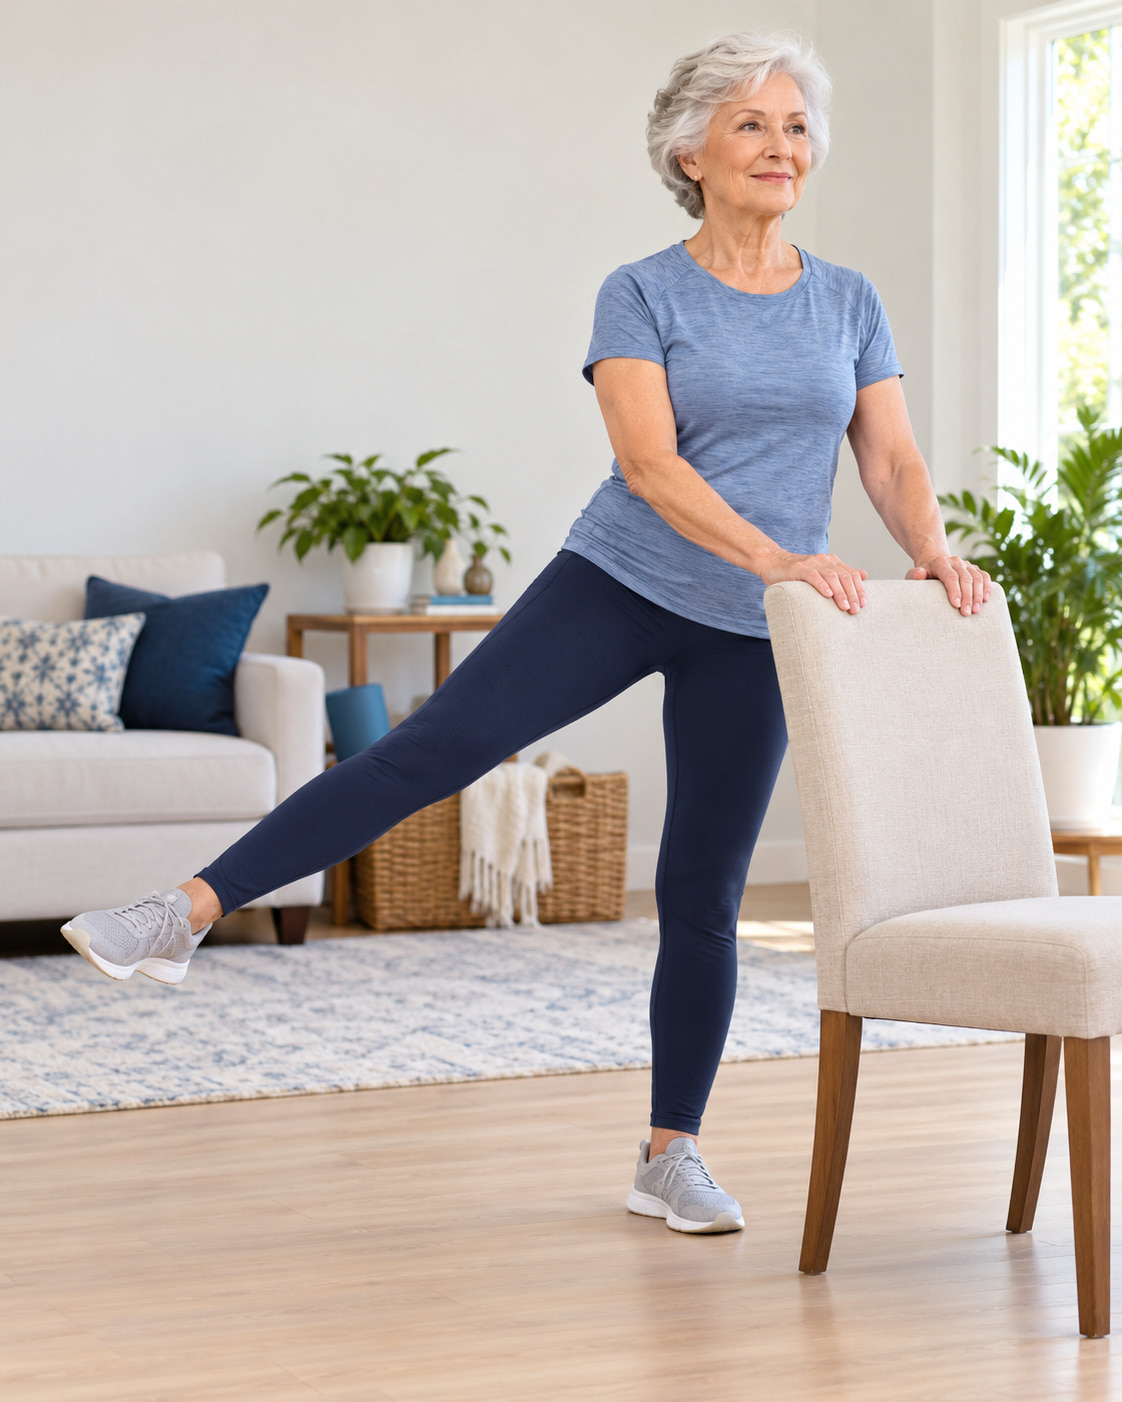
Glute exercises for senior women can help build hip and leg strength through chair sit-to-stands, supported leg lifts, and seated resistance exercises. A chair provides a seat or balance support, making these movements practical for home training.
The six options below include four movements involving standing and two performed entirely seated. You will learn the correct setup, common mistakes, easier versions, and how to combine the exercises into a manageable routine.
A Few Things to Check First
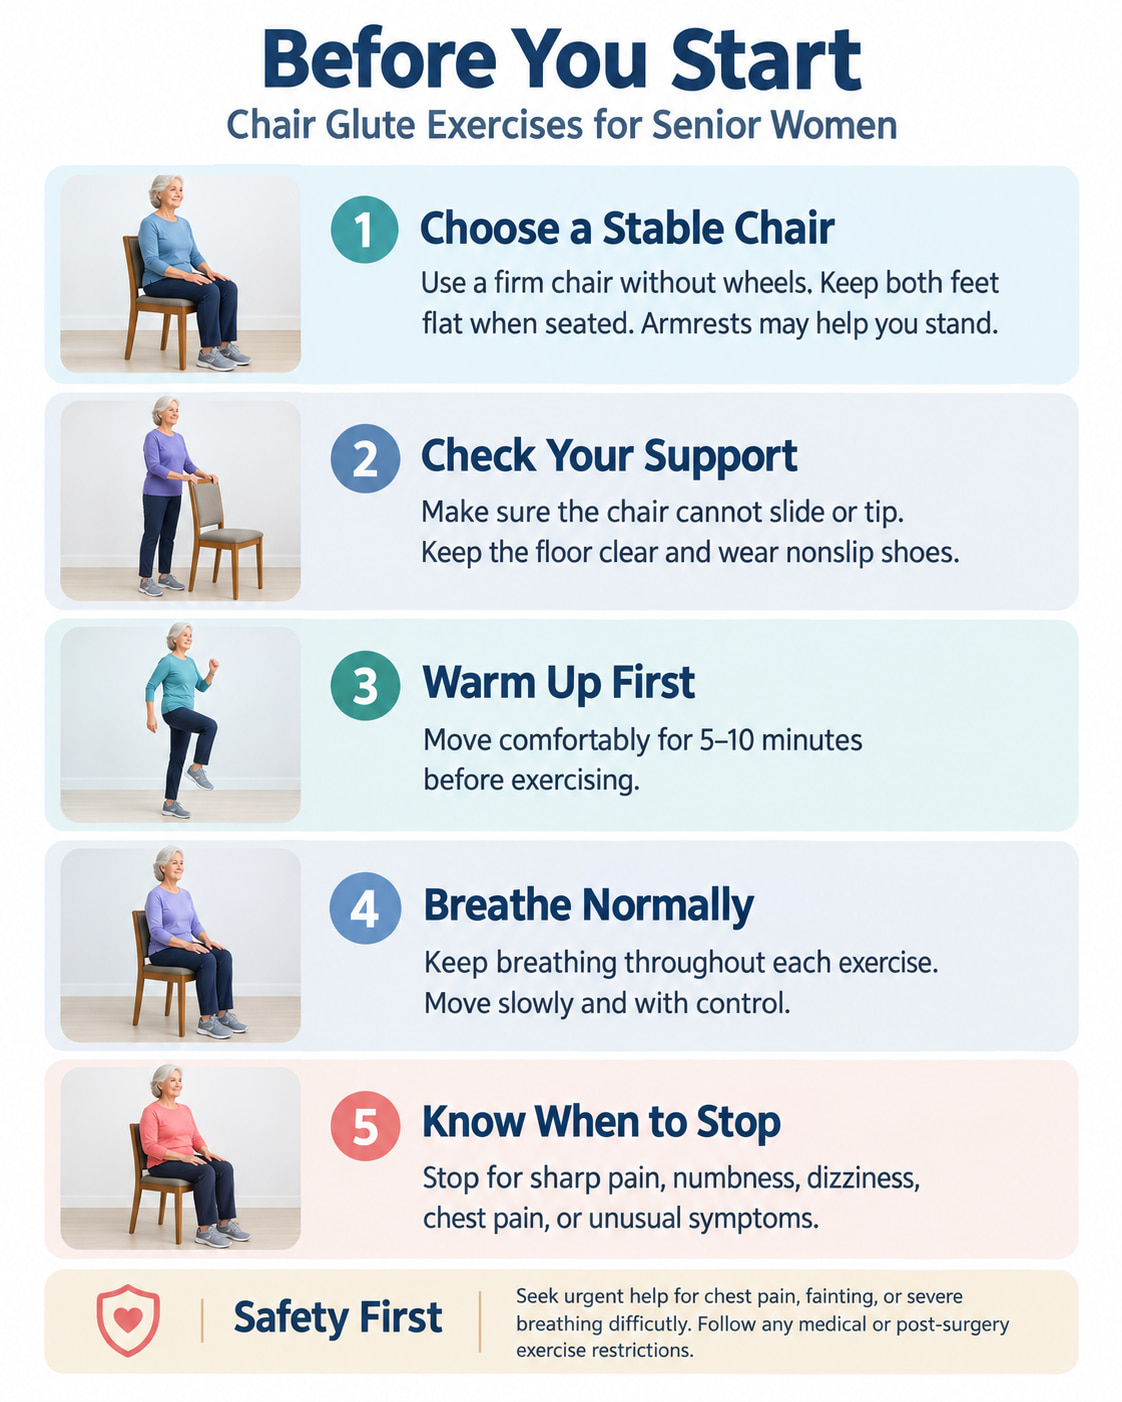
Use a firm, stable chair without wheels, on a surface where it cannot slide. Its height should let both feet rest flat when seated, following NHS guidance. Sturdy armrests can help if you need assistance standing up.
For standing exercises, check that the chair will not tip. If you need to lean heavily or pull on the backrest, use a fixed countertop or get help choosing suitable support. Keep the floor clear and wear supportive, nonslip shoes.
Warm up with 5–10 minutes of comfortable, low-impact movement, adapted to your ability. The American Academy of Orthopaedic Surgeons recommends this preparation before hip exercises.
Breathe normally throughout. Stop for sharp pain, new numbness, dizziness, chest pain, or unusual symptoms and seek appropriate help. Chest pain, fainting, or severe breathing difficulty needs urgent assessment. Follow any restrictions after surgery, and get individual guidance if standing is unsafe.
6 Best Glute Exercises for Senior Women
Choose movements you can perform with steady control. You do not need to complete all six in one session; the sample routine below shows how to select them.
Start with one set. Rest about 60–90 seconds between exercises or sets, and longer if needed.
1. Chair Sit-to-Stand
Best for: Building strength for getting out of a chair.
Muscles worked: Gluteus maximus and quadriceps, with the trunk and surrounding hip muscles providing stability.
Starting amount: 5–8 repetitions.
How to do it:
- Sit toward the front of the chair with your feet flat and approximately hip-width apart.
- Lean forward from your hips until your chest moves over your feet. Keep your neck comfortable and your spine naturally aligned.
- Press evenly through both feet to stand upright. Exhale as you rise and finish tall without leaning backward.
- Bend your hips and knees to lower yourself slowly onto the seat.
This movement follows the basic chair-rise pattern described by South Tees Hospitals NHS Foundation Trust.
Common mistakes: Rocking repeatedly to gain momentum, allowing the knees to collapse inward, or dropping onto the seat.
Make it easier: Push through sturdy armrests or use a slightly higher, firm chair that still lets your feet stay flat. Avoid loose cushions that can slide.
Progress: Gradually use less arm assistance as your legs become stronger, then build toward 8–12 controlled repetitions.
2. Chair-Supported Standing Hip Extension
Best for: Practicing controlled backward hip movement with balance support.
Muscles worked: Gluteus maximus, with assistance from the hamstrings.
Starting amount: 5–8 repetitions per leg.
How to do it:
- Stand facing the chair’s backrest and rest both hands on it.
- Keep your torso upright and gently tighten your abdomen. Shift your weight onto one leg without locking that knee.
- Move the other leg a short distance backward, keeping it nearly straight. Stop before your back arches or your chest tips forward.
- Return the foot slowly to the floor. Complete your repetitions, then switch legs.
Common mistakes: Swinging the leg, lifting it too high, bending through the lower back, or pushing your hips forward.
Make it easier: Use a smaller backward movement and return the foot to the floor between repetitions.
Progress: Add repetitions, then a second set. A brief pause at the back can help you practice control, but avoid increasing the lift by arching your spine.
3. Chair-Supported Standing Hip Abduction
Best for: Training the outer hips while maintaining balance support.
Muscles worked: Gluteus medius and minimus, with other hip muscles assisting.
Starting amount: 5–8 repetitions per side.
How to do it:
- Stand behind a stable chair and hold its back, with your feet pointing forward.
- Shift your weight onto one leg and keep the supporting knee slightly relaxed.
- Lift the other leg a short distance sideways. Keep your pelvis level, your torso upright, and your toes facing forward.
- Lower slowly, placing the foot down between repetitions. Complete the same number on the other side.
The American Heart Association uses these same basic cues for its supported side-leg raise.
Common mistakes: Leaning sideways, turning the foot outward, hiking the hip, or swinging the leg.
Make it easier: Lift the foot only slightly and keep both hands supported.
Progress: Build toward 8–12 repetitions per side, then add a second set. Keep using the chair when you need it.
4. Seated Resistance Band Hip Abduction
Best for: Adding resistance to outer-hip exercise while seated.
Muscles worked: The gluteal muscles around the outer hips, including the gluteus medius.
Equipment: A light looped resistance band in addition to your chair.
Starting amount: 8–12 repetitions.
How to do it:
- Sit upright with both feet flat and approximately hip-width apart. Position the band around your thighs, just above your knees.
- Keep your torso still and your pelvis comfortably supported on the seat.
- Gently press your knees outward against the band through a small, comfortable range.
- Pause briefly, then return slowly without letting the band pull your knees inward abruptly.
Peak Physio provides the corresponding setup and controlled outward-and-return movement.
Common mistakes: Rocking your upper body, using excessive resistance, rolling onto the outer edges of your feet, or forcing the knees too far apart.
Make it easier: Choose a lighter band or reduce the range. Inspect the band before use and replace it if damaged.
Progress: Add a second set when the current amount feels manageable. Later, try a slightly firmer band while maintaining the same controlled movement.
5. Chair-Supported Mini Squat
Best for: Practicing a squat with an adjustable depth.
Muscles worked: Quadriceps and gluteus maximus, with hip and trunk stabilizers assisting.
Starting amount: 5–8 repetitions.
How to do it:
- Stand facing the chair’s backrest, feet about hip-width apart, and rest both hands on it.
- Move your hips slightly backward and bend both knees through a small, comfortable range.
- Keep your heels down, your spine naturally aligned, and your knees moving in the same direction as your toes.
- Press through both feet to return to standing. Use the chair for balance without pulling it toward you.
Common mistakes: Lifting the heels, allowing the knees to fall inward, dropping too low, or leaning heavily on unstable support.
Make it easier: Use a very shallow bend. A few inches may be enough to practice the movement.
Progress: Gradually increase repetitions or comfortable depth while maintaining control.
Workout placement: Choose this exercise or the sit-to-stand in your first routine. You can decide which version feels more manageable without doubling up on similar movements.
6. Seated Glute Squeeze
Best for: A gentle introduction to contracting the buttock muscles.
Muscles worked: Primarily the gluteus maximus.
Starting amount: 5–8 holds of about 3 seconds.
Use the “Buttock Squeezes” section, which follows knee abduction/adduction.
How to do it:
- Sit upright with your feet flat and your arms resting comfortably on the armrests, if available, or on your thighs.
- Tighten your buttock muscles while keeping your hips on the seat.
- Hold for about three seconds while continuing to breathe. Count aloud if that helps.
- Relax completely before repeating.
Memorial Sloan Kettering Cancer Center describes this seated contraction and three-second hold in its exercise instructions.
Common mistakes: Holding your breath, pressing hard through your feet to lift your hips, or staying clenched between repetitions.
Make it easier: Use a gentler contraction or shorter hold.
How to use it: Treat this as a starting exercise or brief preparation. As your ability improves, include movements that place a greater demand on the muscles.
A Simple Twice-Weekly Chair Glute Workout
If you can stand securely with support, begin with three main exercises. Practice on two nonconsecutive days, such as Monday and Thursday.
| Movement to train | Choose one exercise | Starting amount |
|---|---|---|
| Rising or squatting | Chair sit-to-stand or chair-supported mini squat | 1 set of 5–8 repetitions |
| Backward hip movement | Chair-supported standing hip extension | 1 set of 5–8 per side |
| Sideways hip work | Standing hip abduction or seated band hip abduction | 1 set of 5–8 per side standing, or 8–12 seated repetitions |
After warming up, you may do five seated glute squeezes, holding each for three seconds, before the main exercises.
Rest 60–90 seconds between exercises, or longer until your breathing and balance feel settled. During your first sessions, focus on learning the movements. As they become familiar, the final repetitions should require effort while leaving you able to perform a few more with good form.
Build toward two sets as tolerated. If a session leaves you unusually sore or makes normal movement harder, reduce the next session’s repetitions or sets.
This routine trains only part of the body. The Centers for Disease Control and Prevention (CDC) recommends that older adults also include aerobic activity, balance activities, and strengthening for all major muscle groups.
How to Keep Making Progress
Use your control and effort to guide progression.
- Build repetitions first. For the standing exercises, begin with 5–8 repetitions and gradually build toward 8–12. Seated band hip abduction starts at 8–12 repetitions. Keep glute squeezes as short holds.
- Add a second set. For the main exercises, do this once 12 controlled repetitions feel manageable across several sessions.
- Increase resistance where appropriate. A slightly firmer band can make seated hip abduction more demanding. For standing exercises that have become easy, a qualified trainer or physical therapist can help select a suitable resisted progression.
Change one variable at a time. Continue using support when needed; you can strengthen your legs while keeping a hand on the chair.
The American College of Sports Medicine supports individualized, progressive resistance training and notes that training to muscular failure is unnecessary. Finish a set before you need to swing, strain, or lose your position.
Frequently Asked Questions
Are chair glute exercises effective for older women?
They can be useful when the exercise provides enough challenge for your current ability and becomes more demanding as you improve.
A 2025 review in BMC Geriatrics found that chair exercise programs improved lower-limb muscle endurance and some measures of physical function in postmenopausal women. The programs varied, so the findings do not establish the results of this exact six-exercise routine.
Which exercises can I do entirely while seated?
Seated resistance band hip abduction and seated glute squeezes are the two fully seated options.
They offer a starting point when standing is difficult. If you cannot stand safely without substantial help, a physical therapist can help build a broader program around your needs.
What if sit-to-stands bother my knees?
Try a firm, slightly higher chair that still allows your feet to stay flat, or use sturdy armrests for assistance. A shallow supported mini squat may feel more manageable, but only use it if comfortable.
Standing hip extension and abduction are other options that involve less repeated knee bending. Stop a painful movement and seek advice if discomfort persists or worsens.
Do I need to feel a burning sensation in my glutes?
No. A burning sensation is not a requirement for a useful set. During sit-to-stands and mini squats, you may also notice substantial effort in your thighs.
Focus on steady form, an appropriate challenge, and progress over time. If a movement feels effortless, gradually increase its difficulty instead of chasing a particular sensation.
Putting It Into Practice
Start with one chair-rise or squat exercise, one backward leg lift, and one sideways hip exercise. Practice twice weekly, keep your support stable, and increase the workload gradually. Choose the seated options when they better match your current ability.
This content is for informational purposes only and is not a substitute for medical advice.
References
- 1. BMC Geriatrics — Chair-Based Exercise and Physical Function in Postmenopausal Women (2025)
Research supporting chair-based exercises for lower-body muscle endurance, flexibility, and balance. - 2. American College of Sports Medicine — Resistance Training Guidelines (2026)
Evidence-based guidance on muscle strengthening, exercise progression, and resistance training. - 3. NHS — Strength Exercises
Practical instructions for chair sit-to-stands, supported mini squats, and standing leg exercises. - 4. American Council on Exercise — Chair Exercises for Older Adults
Guidance on seated resistance band exercises and accessible chair-based movements. - 5. Centers for Disease Control and Prevention — Physical Activity Guidelines for Older Adults
Official recommendations for strength training frequency, balance exercises, and physical activity. - 6. Memorial Sloan Kettering Cancer Center — Chair Exercises
Instructions for seated glute squeezes and other gentle chair-based exercises.