Inner thigh exercises strengthen the hip adductors—the muscles that pull your legs toward the center of your body and help control the hips and pelvis. Effective training should combine direct adductor movements with squats, lunges, and other exercises that strengthen the legs through different movement patterns.
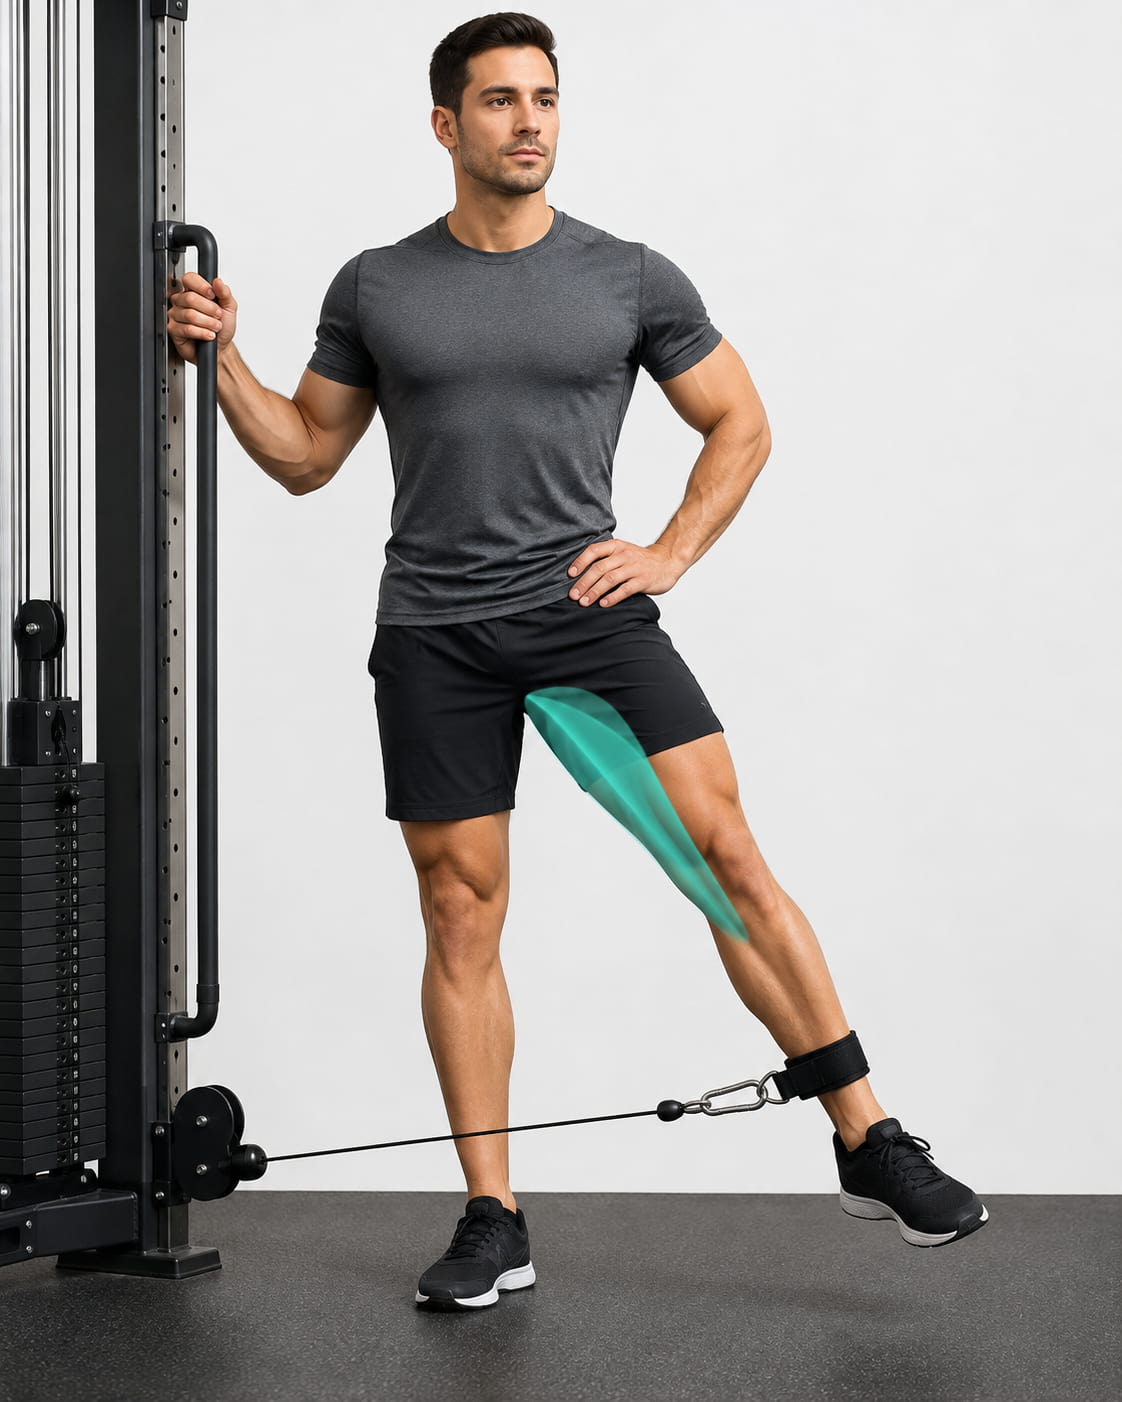
This guide covers 13 inner thigh exercises for home and gym workouts, including correct form, muscles worked, beginner modifications, progressions, and realistic programming advice.
What Muscles Do Inner Thigh Exercises Work?
The muscles commonly called the inner thighs are located along the medial, or inside, portion of the upper leg. The main muscles are:
- Adductor longus
- Adductor brevis
- Adductor magnus
- Gracilis
- Pectineus
Their primary action is hip adduction, which means moving the thigh toward the body’s midline. They also contribute to pelvic and leg control during standing, walking, squatting, lunging, and changing direction.
The adductor magnus is particularly large. Different sections of this muscle can assist with hip adduction, flexion, or extension depending on body position. The NCBI overview of the thigh adductors also describes their role in stabilizing the pelvis during walking.
Benefits of Strengthening Your Inner Thighs
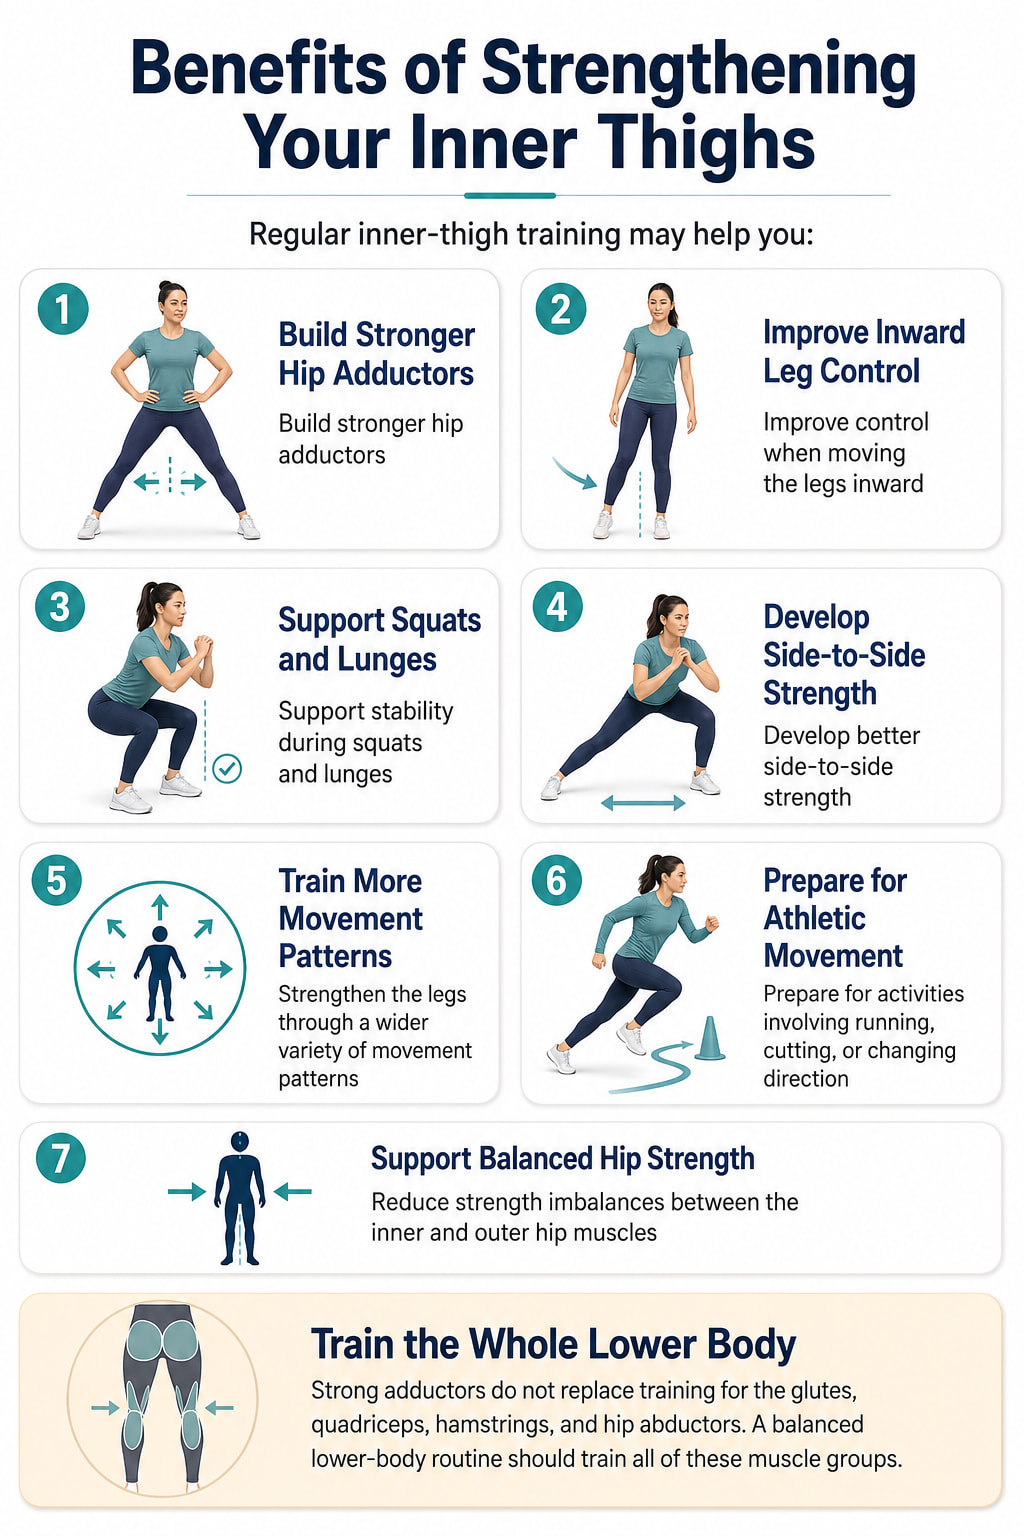
Regular inner-thigh training may help you:
- Build stronger hip adductors
- Improve control when moving the legs inward
- Support stability during squats and lunges
- Develop better side-to-side strength
- Strengthen the legs through a wider variety of movement patterns
- Prepare for activities involving running, cutting, or changing direction
- Reduce strength imbalances between the inner and outer hip muscles
Strong adductors do not replace training for the glutes, quadriceps, hamstrings, and hip abductors. A balanced lower-body routine should train all of these muscle groups.
13 Best Inner Thigh Exercises at a Glance
| Exercise | Best for | Equipment | Level | |
|---|---|---|---|---|
| 1 | Seated ball squeeze | Learning to contract the adductors | Ball or pillow | Beginner |
| 2 | Side-lying hip adduction | Direct bodyweight strength | Mat | Beginner |
| 3 | Reverse clamshell | Low-load hip control | Mat | Beginner |
| 4 | Glute bridge with squeeze | Glutes and inner thighs | Ball or pillow | Beginner |
| 5 | Wall sit with squeeze | Isometric leg endurance | Wall and ball | Beginner |
| 6 | Band hip adduction | Home resistance training | Resistance band | Beginner–intermediate |
| 7 | Cable hip adduction | Controlled progressive loading | Cable machine | Intermediate |
| 8 | Hip adduction machine | Stable direct resistance | Adduction machine | Beginner–intermediate |
| 9 | Sumo goblet squat | Compound leg strength | Dumbbell or kettlebell | Intermediate |
| 10 | Lateral lunge | Side-to-side strength | Optional weight | Intermediate |
| 11 | Slider hip adduction | Standing adductor control | Slider or towel | Intermediate |
| 12 | Cossack squat | Mobility and lateral strength | Optional weight | Intermediate–advanced |
| 13 | Copenhagen plank | Advanced adductor strength | Bench | Advanced |
You do not need to perform all 13 exercises in one session. Choose two direct adductor exercises and one or two compound leg movements that suit your ability and equipment.
13 Best Inner Thigh Exercises
These 13 inner thigh exercises combine direct adductor movements with squats, lunges, and stability work. Choose a few exercises that match your fitness level and progress gradually as your strength and control improve.
1. Seated Ball or Pillow Squeeze
Best for: Beginners learning how to activate the inner-thigh muscles.
Muscles worked: Hip adductors, especially the adductor longus, brevis, and magnus.
Equipment needed: A small exercise ball, firm pillow, or folded towel.
Sets, reps, and rest: Perform 2–3 sets of 8–12 squeezes. Hold each squeeze for 3–5 seconds and rest for 30–45 seconds between sets.
How to do it:
- Sit upright on a sturdy chair with both feet flat.
- Position a soft ball or pillow between your knees.
- Keep your feet and knees pointing forward.
- Gently press your knees inward against the object.
- Hold the contraction without holding your breath.
- Slowly release the pressure before repeating.
Common mistakes: Avoid squeezing so aggressively that you feel groin pain, lifting your feet, rounding your back, or holding your breath.
Progression: Increase the hold to 8–10 seconds or use a slightly firmer ball.
Coaching cue: Imagine bringing your knees together without allowing them to move.
2. Side-Lying Hip Adduction
Best for: Directly strengthening the inner thigh with body weight.
Muscles worked: Adductor longus, adductor brevis, adductor magnus, gracilis, and pectineus.
Equipment needed: Exercise mat.
Sets, reps, and rest: Perform 2–3 sets of 8–15 repetitions per side. Rest for 45–60 seconds.
How to do it:
- Lie on your side with your bottom leg straight.
- Bend your top leg and place its foot on the floor in front of the bottom thigh.
- Support your head and keep your torso stacked.
- Lift the bottom leg approximately 6–8 inches.
- Pause briefly at the top.
- Lower the leg slowly without dropping it.
Common mistakes: Do not roll backward, turn the toes toward the ceiling, swing the leg, or try to lift excessively high.
Progression or regression: Begin with a smaller lift. To progress, add a light ankle weight or slow the lowering phase to three seconds.
The AAOS Hip Conditioning Program includes side-lying hip adduction as a direct inner-thigh exercise and recommends progressing gradually as the movement becomes easier.
3. Reverse Clamshell
Best for: Low-load hip control and beginners who are not ready for heavier adduction exercises.
Muscles worked: Adductor magnus, adductor brevis, adductor longus, gluteus medius, and tensor fasciae latae.
Equipment needed: Exercise mat.
Sets, reps, and rest: Perform 2 sets of 10–15 repetitions per side. Rest for 30–45 seconds.
How to do it:
- Lie on your side with your hips and knees slightly bent.
- Stack your hips, knees, and feet.
- Keep your knees together.
- Rotate the top foot upward toward the ceiling.
- Move only as far as you can without rolling your pelvis backward.
- Lower the foot slowly.
Common mistakes: Avoid separating the knees, twisting the torso, or using momentum to raise the foot.
Progression: Place a light ankle weight around the top ankle.
The reverse clamshell should not be confused with a regular clamshell. The regular version mainly trains the outer-hip muscles, while the AAOS reverse clamshell instructions identify several adductors among the muscles involved.
4. Glute Bridge With Adductor Squeeze
Best for: Combining glute strength with an isometric inner-thigh contraction.
Muscles worked: Gluteus maximus, hip adductors, hamstrings, and trunk stabilizers.
Equipment needed: Small ball, pillow, or folded towel.
Sets, reps, and rest: Perform 2–3 sets of 8–12 repetitions. Rest for 45–60 seconds.
How to do it:
- Lie on your back with your knees bent and feet flat.
- Place a ball or pillow between your knees.
- Apply gentle inward pressure.
- Brace your abdomen and press through your feet.
- Lift your hips until your shoulders, hips, and knees form a comfortable line.
- Lower your hips under control while maintaining light pressure.
Common mistakes: Avoid squeezing the object as hard as possible, pushing the hips excessively high, arching the lower back, or allowing the knees to collapse outward.
Progression: Pause for two or three seconds at the top or add a light weight across your hips.
5. Wall Sit With Ball Squeeze
Best for: Building inner-thigh and quadriceps endurance.
Muscles worked: Quadriceps, hip adductors, glutes, and calves.
Equipment needed: Wall and small exercise ball or pillow.
Sets, reps, and rest: Perform 2–3 holds of 20–40 seconds. Rest for 45–75 seconds.
How to do it:
- Stand with your back against a wall.
- Place a ball or pillow between your knees.
- Step your feet slightly forward.
- Slide down the wall into a comfortable partial squat.
- Keep your knees aligned with your feet.
- Apply gentle pressure to the ball while breathing normally.
- Press through your feet to stand.
Common mistakes: Do not slide lower than you can control, allow the knees to cave inward, hold your breath, or place all your pressure on the toes.
Regression: Use a shallower wall sit and hold for 10–15 seconds.
Progression: Increase the hold gradually or hold a light weight at your chest.
6. Standing Resistance-Band Hip Adduction
Best for: Direct inner-thigh training at home.
Muscles worked: Adductor longus, brevis, magnus, gracilis, and pectineus.
Equipment needed: Resistance band and a secure low anchor.
Sets, reps, and rest: Perform 2–3 sets of 10–15 repetitions per leg. Rest for 45–60 seconds.
How to do it:
- Attach the band to a secure anchor near ankle height.
- Stand sideways to the anchor and place the band around the nearer ankle.
- Hold a chair or stable support if needed.
- Shift your weight onto the outside leg.
- Pull the banded leg inward across or toward the center of your body.
- Pause briefly and return slowly.
Common mistakes: Avoid leaning away from the anchor, swinging the leg, rotating the toes outward, or allowing the band to pull your leg back quickly.
Progression: Use a stronger band, increase the range slightly, or take three seconds to return to the starting position.
Coaching cue: Keep your belt line level while the leg moves.
7. Standing Cable Hip Adduction
Best for: Progressively loading the adductors with measurable resistance.
Muscles worked: Hip adductors, with the standing-leg glutes and core assisting with balance.
Equipment needed: Cable machine and ankle cuff.
Sets, reps, and rest: Perform 2–4 sets of 8–15 repetitions per leg. Rest for 45–75 seconds.
How to do it:
- Set the cable to its lowest position.
- Attach the cuff to the ankle nearest the machine.
- Stand sideways and hold the machine for support.
- Keep the supporting knee slightly bent.
- Pull the working leg toward the center of your body.
- Pause without twisting your hips.
- Return slowly until you feel controlled tension.
Common mistakes: Avoid using too much weight, leaning the torso, bending the working knee excessively, or allowing the cable to pull the leg outward.
Progression: Add the smallest available weight increase after you can complete every repetition without shifting your pelvis.
8. Seated Hip Adduction Machine
Best for: Stable, direct adductor resistance in a gym.
Muscles worked: Adductor longus, brevis, magnus, gracilis, and pectineus.
Equipment needed: Seated hip adduction machine.
Sets, reps, and rest: Perform 2–4 sets of 10–15 repetitions. Rest for 60–90 seconds.
How to do it:
- Adjust the seat and starting position to a comfortable range.
- Sit with your back supported and feet on the machine platforms.
- Hold the handles and brace your trunk lightly.
- Bring your thighs together under control.
- Pause briefly when the pads come close together.
- Allow your legs to reopen slowly.
Common mistakes: Do not force an extremely wide starting position, bounce the weight stack, shorten every repetition, or use a load that causes your hips to shift.
Progression: Increase the weight only after completing the full range with a controlled return.
This machine is useful, but it should not be the only leg exercise in your routine. Combine it with squats, lunges, hinges, and glute exercises.
9. Sumo Goblet Squat
Best for: Training the adductors as part of a compound lower-body movement.
Muscles worked: Quadriceps, gluteus maximus, adductor magnus, other hip adductors, calves, and trunk stabilizers.
Equipment needed: Dumbbell or kettlebell. Beginners can use body weight.
Sets, reps, and rest: Perform 2–4 sets of 6–12 repetitions. Rest for 60–120 seconds.
How to do it:
- Stand wider than hip-width with your toes turned slightly outward.
- Hold a weight close to your chest.
- Brace your trunk and keep your whole foot planted.
- Bend your hips and knees to lower into a squat.
- Keep your knees moving in the same direction as your toes.
- Descend only as far as you can maintain control.
- Push through the floor to stand.
Common mistakes: Avoid choosing an excessively wide stance, allowing the knees to collapse inward, lifting the heels, rounding the lower back, or forcing unnecessary depth.
Regression: Use body weight and squat to a bench or box.
Progression: Increase the weight gradually or use a slower three-second descent.
A wide stance can increase the contribution of the adductors, but sumo squats still train several major leg muscles. They should be viewed as a compound leg exercise rather than a completely isolated inner-thigh movement.
10. Lateral Lunge
Best for: Building side-to-side leg strength and control.
Muscles worked: Hip adductors, quadriceps, glutes, hamstrings, and calves.
Equipment needed: None initially. A dumbbell can be added later.
Sets, reps, and rest: Perform 2–4 sets of 6–10 repetitions per side. Rest for 60–90 seconds.
How to do it:
- Stand tall with your feet approximately hip-width apart.
- Step to one side.
- Bend the stepping knee while pushing your hips backward.
- Keep the opposite leg long but not forcefully locked.
- Keep both feet pointing mostly forward.
- Push through the bent leg to return to standing.
- Repeat on the opposite side.
Common mistakes: Avoid stepping so far that the bent knee collapses inward, lifting the heel, rounding forward, or pushing off mainly with the straight leg.
Regression: Perform the movement while holding a stable support or use a smaller step.
Progression: Hold one dumbbell at your chest or a dumbbell in each hand.
The ACE side-lunge exercise guide recommends keeping the working knee aligned with the foot and shortening the step when that alignment cannot be maintained.
11. Slider Hip Adduction
Best for: Training standing adductor strength with minimal equipment.
Muscles worked: Hip adductors, quadriceps, glutes, and trunk stabilizers.
Equipment needed: Exercise slider. A folded towel may work on a smooth floor.
Sets, reps, and rest: Perform 2–3 sets of 8–12 repetitions per side. Rest for 60 seconds.
How to do it:
- Stand with one foot on the floor and the other on a slider.
- Hold a stable support if needed.
- Bend the supporting knee slightly.
- Slide the other foot slowly out to the side.
- Keep most of your weight over the supporting leg.
- Pull the sliding foot back toward the center using your inner thigh.
- Stand tall before repeating.
Common mistakes: Avoid sliding farther than you can control, dropping the pelvis, locking the supporting knee, or pulling the foot inward with a sudden jerk.
Regression: Use a very short sliding distance and hold a countertop.
Progression: Increase the sliding distance or perform the movement without hand support.
12. Cossack Squat
Best for: Developing lateral leg strength, hip mobility, and adductor control.
Muscles worked: Hip adductors, quadriceps, glutes, hamstrings, calves, and trunk stabilizers.
Equipment needed: None. A light counterweight can make balance easier.
Sets, reps, and rest: Perform 2–3 sets of 5–8 repetitions per side. Rest for 60–90 seconds.
How to do it:
- Begin in a wide stance.
- Shift your weight toward one leg.
- Bend that knee while pushing your hips backward and downward.
- Keep the opposite leg long.
- Allow the toes of the straighter leg to lift when needed.
- Keep the working foot planted and the knee aligned with the toes.
- Push through the working leg to return to the center.
Common mistakes: Avoid forcing excessive depth, allowing the heel of the working leg to lift, rounding the lower back, or collapsing the knee inward.
Regression: Hold a sturdy support and use a shallow range. You can also perform a supported side-to-side squat without straightening the opposite leg fully.
Progression: Hold a dumbbell at your chest or pause briefly at the bottom.
The Cossack squat requires more mobility than a standard lateral lunge. It is not necessary to reach the floor or achieve a very deep position for the exercise to be useful.
13. Copenhagen Plank
Best for: Advanced adductor strength and sports preparation.
Muscles worked: Hip adductors, obliques, transverse abdominis, glutes, and shoulder stabilizers.
Equipment needed: Padded bench or sturdy platform.
Sets, reps, and rest: Begin with 2–3 holds of 10–20 seconds per side. Rest for 60–90 seconds. Dynamic repetitions can be introduced later.
How to do it:
- Lie on your side with your forearm beneath your shoulder.
- Place the knee of your top leg on a padded bench.
- Bend the bottom leg underneath you.
- Press the top knee into the bench.
- Lift your hips until your body forms a straight line from shoulder to knee.
- Keep your trunk facing forward.
- Lower under control.
Common mistakes: Avoid beginning with the ankle-supported version, allowing the hips to sag, twisting toward the floor, placing the elbow too far from the shoulder, or continuing after your form changes.
Regression: Use the bent-knee, short-lever variation described above. You can also keep the lower leg on the floor for partial assistance.
Progression: Straighten the top leg and support the ankle on the bench. Later, add slow lifts of the lower leg.
Copenhagen adduction training has been shown to increase hip-adduction strength in athletic populations. A large trial also found fewer reported groin problems in male soccer players following a progressive adductor-strengthening program, but this does not guarantee injury prevention for every person or sport.
Sample Inner Thigh Workout at Home
Perform this workout twice per week with at least one recovery day between sessions.
| Exercise | Sets and reps |
|---|---|
| Side-lying hip adduction | 2 × 10–15 per side |
| Glute bridge with squeeze | 2 × 10–12 |
| Supported lateral lunge | 2 × 6–10 per side |
| Wall sit with ball squeeze | 2 × 20–30 seconds |
Rest for 45–75 seconds between sets. Use an effort of approximately 6–7 out of 10, meaning you could complete another two or three controlled repetitions when each set ends.
How to progress the home workout
When you can complete the highest number of repetitions without swinging, twisting, or losing alignment:
- Add one or two repetitions
- Add a third set
- Increase the hold time by five seconds
- Use a stronger resistance band
- Add a light dumbbell
- Progress to a more difficult exercise
Change only one variable at a time.
Sample Gym Inner Thigh Workout
This routine can be added to a lower-body workout twice per week.
| Exercise | Sets and reps |
|---|---|
| Sumo goblet squat | 3 × 8–12 |
| Cable hip adduction | 3 × 10–15 per side |
| Lateral lunge | 2–3 × 6–10 per side |
| Short-lever Copenhagen plank | 2 × 10–20 seconds per side |
Rest for 60–120 seconds after squats and lunges and 45–90 seconds after direct adductor exercises.
Beginners can replace the Copenhagen plank with the hip adduction machine or seated ball squeeze.
How Often Should You Train Your Inner Thighs?
Most people can train the inner thighs two times per week as part of a balanced lower-body program. More frequent training may be appropriate when sessions are light, but demanding Copenhagen planks, loaded lunges, and heavy squats require more recovery.
The American College of Sports Medicine physical activity guidance recommends muscle-strengthening activity on at least two days per week. ACSM’s updated 2026 resistance-training position stand also emphasizes consistency, individualized programming, and progressive resistance rather than unnecessarily complicated routines.
A practical weekly structure is:
- Beginners: 2 sessions with 2–3 inner-thigh exercises
- Intermediate lifters: 2 sessions with 3–4 exercises divided between them
- Athletes: 2–3 exposures using carefully managed direct and compound work
Avoid performing every exercise in this guide during the same workout. More exercises do not automatically produce better results.
Where Should Inner Thigh Exercises Go in a Workout?
Exercise order depends on the movement.
Perform demanding compound exercises early:
- Sumo squats
- Lateral lunges
- Cossack squats
Perform direct or lower-load exercises afterward:
- Band adduction
- Cable adduction
- Adduction machine
- Ball squeezes
- Side-lying adduction
Copenhagen planks can be performed after the main strength exercises or during a separate short accessory session. Avoid saving them for the very end when you are too fatigued to keep your hips aligned.
Common Inner Thigh Exercise Mistakes
Using too much range of motion
A wider stance or deeper side lunge is not always better. Stop where you can keep the feet planted, knees aligned, and spine controlled.
Allowing the knees to collapse inward
During squats and lunges, keep each knee moving in the same general direction as the toes. Reduce the range, stance width, or load when you cannot maintain this position.
Swinging through direct adduction exercises
Band and cable adduction should be controlled in both directions. Use less resistance when you need momentum to move the leg.
Training only with squeezes
Ball squeezes are useful for learning to contract the adductors, but they provide limited progression. Combine them with side-lying, band, cable, machine, squat, or lunge variations.
Progressing the Copenhagen plank too quickly
Begin with the knee supported. Progress to ankle support only after you can maintain a level pelvis without discomfort.
Ignoring recovery
The adductors can become sore after lateral lunges, Cossack squats, or Copenhagen planks. Avoid adding high training volume simply because inner-thigh work was previously missing from your routine.
Safety Tips Before You Start
Warm up for 5–10 minutes with walking, cycling, bodyweight squats, or another easy activity. The AAOS Hip Conditioning Program similarly recommends low-impact activity before performing hip-strengthening exercises.
Use these precautions:
- Begin with a small, comfortable range of motion.
- Use support during standing exercises when your balance is uncertain.
- Keep resistance light while learning the movement.
- Do not force the legs into an unusually wide position.
- Increase volume gradually, especially with lateral and Copenhagen exercises.
- Expect muscular effort, but not sharp groin, hip, or knee pain.
- Stop if you experience sharp pain, numbness, dizziness, chest pain, or unusual symptoms.
People recovering from a groin strain, hip injury, knee injury, or surgery should follow guidance from an appropriate healthcare professional rather than using a general exercise list as rehabilitation.
Frequently Asked Questions
What is the best exercise for the inner thighs?
There is no single best exercise for everyone. Side-lying, band, cable, and machine hip adduction provide direct inner-thigh resistance. Sumo squats and lateral lunges train the adductors together with the other major leg muscles.
A practical routine combines at least one direct adduction exercise with one squat or lunge variation.
Are sumo squats enough to strengthen the inner thighs?
Sumo squats can strengthen the adductors, particularly the adductor magnus, but they also rely heavily on the quadriceps and glutes. Adding direct adduction exercises provides a more complete training stimulus.
Can inner thigh exercises reduce inner thigh fat?
Inner-thigh exercises can strengthen and build the muscles, but they cannot guarantee fat loss from that specific area. Localized resistance-training research does not support relying on one body-part exercise to selectively remove nearby fat. Overall fat loss is influenced by total activity, nutrition, genetics, sleep, and other individual factors.
How long does it take to strengthen the inner thighs?
You may notice improved control within several weeks, but visible or measurable strength changes usually require consistent, progressive training over a longer period. Your starting ability, workout frequency, resistance, recovery, and overall program all affect the timeline.
Track progress by repetitions, resistance, exercise difficulty, and movement quality rather than expecting a specific appearance by a fixed date.
Why do I feel inner thigh exercises near my groin?
The adductor muscles attach close to the pelvis, so muscular effort may be felt high on the inside of the thigh. However, sharp, sudden, or increasing groin pain is not a normal training goal. Stop the exercise and seek appropriate professional advice when symptoms persist.
Is the Copenhagen plank suitable for beginners?
The full ankle-supported Copenhagen plank is usually too demanding for beginners. Start with ball squeezes, side-lying adduction, band adduction, or the knee-supported Copenhagen variation.
Should I stretch my inner thighs before training?
Do not force long, intense stretches immediately before heavy strength exercises. Begin with a general warm-up and controlled movements such as shallow lateral lunges. Gentle stretching can be performed afterward when it feels comfortable.
Conclusion
The best inner thigh exercises include both direct hip-adduction movements and compound exercises that train the entire lower body. Start with controlled options such as seated squeezes, side-lying adduction, and band adduction. Add sumo squats, lateral lunges, slider exercises, or Copenhagen planks as your strength and control improve.
Choose a few appropriate movements, train them consistently twice per week, and progress only when you can maintain good form.
References
- NCBI: Anatomy of the Thigh Adductor Muscles
- American Academy of Orthopaedic Surgeons: Hip Conditioning Program
- American College of Sports Medicine: Resistance Training Position Stand
- American College of Sports Medicine: Physical Activity Guidelines
- American Council on Exercise: Side Lunge Exercise Guide
- PubMed: Copenhagen Adduction Exercise and Eccentric Strength
- PubMed: Adductor Strengthening Program and Groin Problems
This content is for informational purposes only and is not a substitute for medical advice.
8 thoughts on “13 Best Inner Thigh Exercises to Build Stronger Legs”