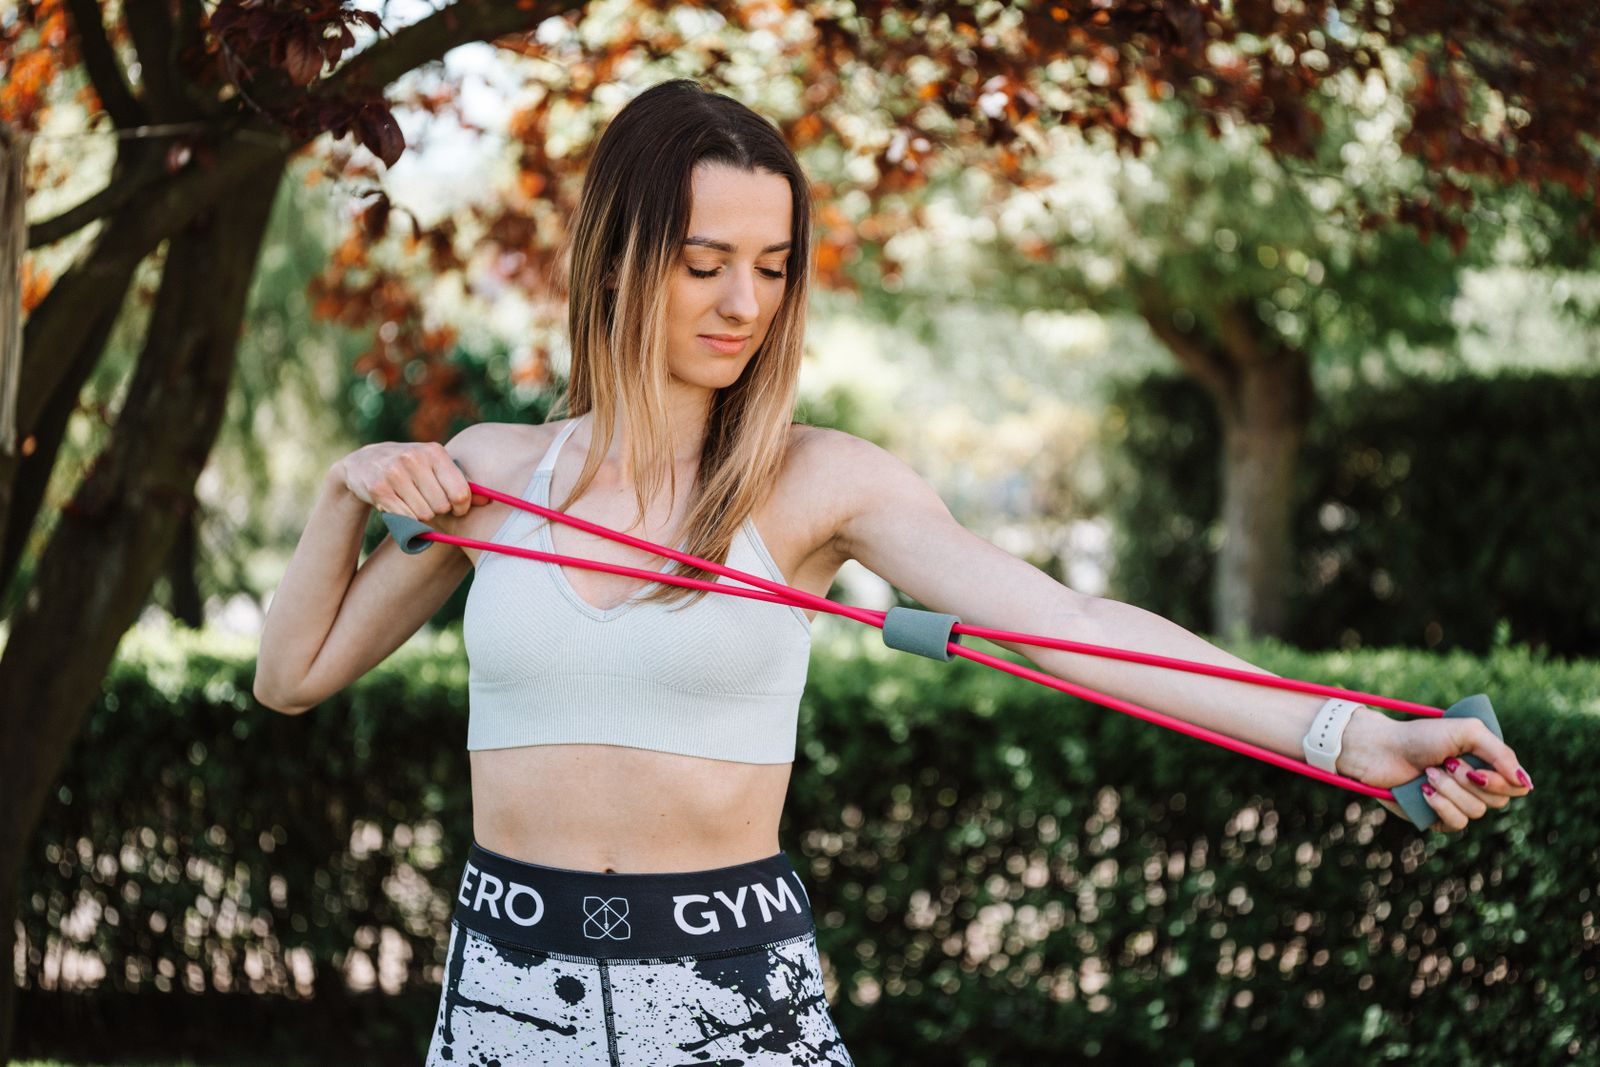
Figure 8 resistance band exercises can train your chest, back, shoulders, and arms; pairing them with bodyweight leg and core exercises creates a practical full-body workout. This guide explains six band movements, three complementary exercises, and how to combine them without forcing a short band into an unsuitable setup.
A figure-8 band has two connected loops, often with padded grips. Its compact design is different from a long resistance tube or a mini-loop band, so exercise selection needs to match the equipment. Balego lists movements such as pull-aparts, presses, rows, curls, and shoulder rotations for this type of band.
Before You Start
Choose a light band that lets you control the entire movement. You should not need to lean, twist, or shorten every repetition just to overcome its resistance.
Inspect the tubing, grips, and connection points before training. The American Council on Exercise recommends discarding damaged bands, avoiding sudden releases, and following the manufacturer’s stretching limits. Ordinary handles should not be placed over your feet because they can slip off.
The seated row and curl below require a product-approved foot anchor. Some figure-8 exercise guides show foot-supported arrangements, but that does not make them appropriate for every product. The Figure 8 Exercise Band Instruction Sheet demonstrates specific foot-supported setups that should only be used when they match your band’s own instructions. Otherwise, skip them rather than improvise an attachment.
For this starter workout, spend several minutes walking or marching, then rehearse your chosen movements without resistance. Keep breathing throughout each set.
Stop exercising and seek professional help for sharp pain, numbness, dizziness, chest pain, or other unusual symptoms. Chest pain, fainting, or severe breathing difficulty warrants urgent medical attention.
Six Figure 8 Resistance Band Exercises
These movements cover pulling, pressing, arm work, and shoulder rotation. The suggested sets and repetitions are starting points, not requirements to push through poor form.
1. Chest-Level Pull-Apart
Best for: Upper-back and rear-shoulder accessory work.
Muscles worked: Rear deltoids and the muscles that draw your shoulder blades together.
Suggested starting dose: 1–2 sets of 10–15 repetitions; rest about 60 seconds.
How to do it:
- Stand with your feet hip-width apart and knees comfortably unlocked.
- Hold one grip in each hand, palms down, with your arms forward at chest height and elbows slightly bent.
- Pull your hands apart while keeping that small elbow bend.
- Stop before your shoulders shrug or your torso leans backward, then return slowly.
Common mistakes: Turning the movement into a row by bending your elbows, lifting the band toward your neck, or forcing the hands farther apart than the band permits.
Use a lighter band when you cannot separate your hands smoothly. The goal is controlled shoulder movement, not the widest possible stretch.
2. Seated Single-Arm Row
Best for: Back training with one arm at a time.
Muscles worked: Back muscles, rear shoulders, and elbow flexors.
Equipment: A mat and a figure-8 band specifically approved for this foot-supported setup.
Suggested starting dose: 1–2 sets of 8–12 repetitions per side; rest 60–90 seconds.
How to do it:
- Sit upright on the floor. Position the working-side foot in the approved loop arrangement, with the contact point beneath the arch of your shoe.
- Hold the other grip in the same-side hand, palm down. Rest your free hand on the opposite bent knee.
- Bend your working elbow and bring your hand toward the outside of your lower ribs.
- Return under control, keeping your torso steady rather than rocking backward and forward.
Common mistakes: Rounding your back, pulling the shoulder toward your ear, or using a foot placement that can slide.
The band must allow the movement without excessive tension at the start. Do not compensate for an unsuitable working length by hunching toward your foot.
3. Standing Chest Press
Best for: Training a pressing movement without a bench.
Muscles worked: Chest, front shoulders, and triceps.
Suggested starting dose: 1–2 sets of 8–12 repetitions; rest 60–90 seconds.
How to do it:
- Place the band across your upper back, below your neck, and hold one grip in each hand.
- Bring your hands beside your chest, with elbows below shoulder height and wrists straight.
- Adopt a comfortable staggered stance and gently brace your abdomen.
- Press both hands forward at chest height until your elbows are comfortably extended.
- Bend your elbows slowly to return, without allowing the band to snap you backward.
Common mistakes: Arching your lower back, shrugging, flaring the elbows high, or forcefully locking them.
Equipment check: Skip this variation when your band is too short to fit around your back and permit a controlled press within its stretching limit.
4. Seated Single-Arm Biceps Curl
Best for: Direct arm work in a seated position.
Muscles worked: Biceps and other elbow flexors.
Equipment: A sturdy, armless chair and a band approved for the foot-supported arrangement.
Suggested starting dose: 1–2 sets of 8–15 repetitions per arm; rest about 60 seconds.
How to do it:
- Sit upright with both feet supported. Secure one loop at the working-side foot exactly as your product’s instructions specify.
- Hold the other grip in the same-side hand, palm facing upward.
- Keep your upper arm close to your torso and bend your elbow to bring your hand toward your shoulder.
- Lower slowly without bending your wrist or swinging your elbow forward.
Common mistakes: Leaning backward, lifting your shoulder, or curling your wrist instead of maintaining a firm grip.
Mayo Clinic emphasizes smooth movement, a straight wrist, and an elbow kept close to the body during resistance-tubing curls. Those arm mechanics apply here, although Mayo Clinic’s demonstration uses a different tubing setup.
5. Self-Anchored Triceps Pressdown
Best for: Training the back of the arm without an external anchor.
Muscles worked: Triceps.
Suggested starting dose: 1–2 sets of 8–15 repetitions per arm; rest about 60 seconds.
How to do it:
- To train your right arm, hold one grip firmly against your right shoulder with your left hand.
- Hold the other grip in your right hand and bring your right upper arm beside your torso.
- Straighten your right elbow to move your hand downward while the left hand stays still.
- Bend the elbow slowly to return, then complete the other side.
Common mistakes: Moving the anchoring hand, swinging the working upper arm, or leaning sideways to finish the repetition.
Start with light resistance. End the set when you can no longer hold the anchor steady; moving both hands changes the exercise.
6. Bilateral Shoulder External Rotation
Best for: Light, controlled shoulder accessory work.
Muscles worked: The rotator-cuff muscles involved in turning the upper arms outward.
Suggested starting dose: 1–2 sets of 10–15 repetitions; rest about 60 seconds.
How to do it:
- Hold one grip in each hand with your elbows bent approximately 90 degrees.
- Keep your upper arms beside your ribs and your forearms pointing forward.
- Keeping the elbows close to your sides, rotate your forearms outward to separate your hands.
- Stop before your elbows drift away from your body, then return slowly.
Common mistakes: Turning the movement into a pull-apart, squeezing excessively through the upper back, or choosing resistance that barely allows movement.
This is not a heavy pulling exercise. Choose a light band and a comfortable range rather than trying to match the resistance used for rows or presses.
Three Bodyweight Exercises to Complete the Workout
These exercises train the legs, hips, and abdomen without using the figure-8 band. Keeping them separate avoids adding an unnecessary grip task or an unapproved foot attachment.
7. Bodyweight Squat
Best for: Training a basic lower-body movement.
Muscles worked: Quadriceps and glutes, with the trunk muscles helping maintain position.
Suggested starting dose: 1–2 sets of 8–15 repetitions; rest 60–90 seconds.
How to do it:
- Stand slightly wider than hip-width, with your toes turned out comfortably.
- Brace gently and bend your hips and knees together, lowering down and slightly back.
- Keep your feet supported and your knees moving in the same direction as your toes.
- Stop at a depth you can control without lifting your heels or rounding your back.
- Push through your feet to stand, allowing your hips and torso to rise together.
These movement checkpoints are consistent with the American Council on Exercise bodyweight squat guidance.
Common mistakes: Collapsing the knees inward, lifting the heels, or forcing a deeper squat after losing control.
Beginner option: Place a sturdy chair behind you as a depth target. Touch down gently rather than dropping onto the seat.
8. Glute Bridge
Best for: Practicing hip extension from the floor.
Muscles worked: Glutes, with assistance from the hamstrings and trunk stabilizers.
Equipment: A mat or comfortable, firm surface.
Suggested starting dose: 1–2 sets of 10–15 repetitions; rest about 60 seconds.
How to do it:
- Lie on your back with your knees bent and feet flat, approximately hip-width apart.
- Rest your arms beside you and gently tighten your abdomen.
- Press through your feet and lift your hips until your shoulders, hips, and knees form a comfortable line.
- Pause briefly without arching your lower back, then lower under control.
The National Academy of Sports Medicine emphasizes controlled hip extension and avoiding excessive lower-back arching.
Common mistakes: Pushing the hips unnecessarily high, flaring the ribs, or bouncing through the repetition.
Start with a smaller lift when maintaining a controlled trunk position is difficult.
9. Bent-Knee Dead Bug
Best for: Practicing trunk control while the arms and legs move.
Muscles worked: Abdominal muscles.
Equipment: A mat.
Suggested starting dose: 1–2 sets of 5–8 repetitions per side; rest about 60 seconds.
How to do it:
- Lie on your back and lift your legs so your knees are above your hips, bent approximately 90 degrees.
- Raise your arms with your elbows above your shoulders and comfortably bent.
- Gently brace your abdomen.
- Slowly lower one heel and the opposite hand toward the floor.
- Move only as far as you can without increasing the arch in your lower back.
- Return to the starting position and alternate sides.
The American Council on Exercise dead bug exercise guide similarly emphasizes maintaining trunk control while the opposite arm and leg move.
Common mistakes: Reaching farther by arching the back, moving too quickly, or holding your breath.
Beginner option: Reduce the reaching distance. A smaller controlled movement is preferable to touching the floor while losing your trunk position.
How to Build Your Full-Body Workout
You do not need to perform all nine exercises every session. Start with the five main movements below, then add one or two accessories according to your time and tolerance.
The following is a suggested beginner routine, not a requirement to complete every available set.
| Exercise | Starting sets and repetitions | Role |
|---|---|---|
| Bodyweight squat | 1–2 × 8–15 | Main lower-body movement |
| Seated single-arm row | 1–2 × 8–12 per side | Main pull; approved foot setup required |
| Standing chest press | 1–2 × 8–12 | Main push; sufficient band length required |
| Glute bridge | 1–2 × 10–15 | Hip extension |
| Bent-knee dead bug | 1–2 × 5–8 per side | Direct abdominal work |
| Chest-level pull-apart | 1 × 10–15 | Optional accessory |
| Seated single-arm curl | 1 × 8–15 per side | Optional accessory |
| Triceps pressdown | 1 × 8–15 per side | Optional accessory |
| Shoulder external rotation | 1 × 10–15 | Optional light accessory |
Frequency: Start with two nonconsecutive sessions per week. The American College of Sports Medicine recommends training the major muscle groups at least twice weekly and emphasizes building a resistance-training routine that can be maintained consistently.
Rest and effort: For this routine, rest approximately 60–90 seconds between sets, taking longer when needed to recover your breathing and control. Finish most sets with around two or three technically sound repetitions still possible.
Begin with one set while learning the movements. Add a second set to the main exercises once the first set feels manageable and you are recovering comfortably between sessions.
An exercise that does not fit your band should be omitted or replaced with appropriately designed equipment—not completed using a makeshift anchor.
How to Progress Without Overstretching the Band
Use a simple progression rule: first improve control, then add repetitions, and only then increase resistance.
For example, begin a press with eight controlled repetitions. Gradually work toward 12. When you can complete every planned set at the top of the range in two consecutive sessions without leaning or rushing, consider a slightly stronger band.
Change one variable at a time. Increasing band resistance, adding sets, and adding repetitions simultaneously makes it harder to judge what you can tolerate.
For bodyweight squats and bridges, first improve your comfortable movement range and repetition control. When those movements become too easy, additional resistance or a more demanding variation may be useful—but that does not require attaching the figure-8 band.
Never use excessive stretching as your progression method. The manufacturer’s working-length limit still applies, regardless of how strong you become.
Are Figure 8 Resistance Band Exercises Effective?
Elastic bands are a legitimate resistance-training option. The American College of Sports Medicine’s updated guidance recognizes that elastic-band and home-based resistance training can improve strength, muscle size, and physical function.
That evidence supports resistance-band training generally. It does not establish that the figure-8 shape is superior to other equipment or that this exact nine-move routine has been tested.
The practical decision is whether your equipment provides enough resistance, permits an appropriate movement range, and allows you to progress. A compact band can be useful without being suitable for every exercise.
Frequently Asked Questions
Is a figure-8 band the same as a mini-loop band?
No. A figure-8 band has two connected loops, commonly with hand grips. A mini-loop is a single continuous loop. Do not assume an exercise designed for a loop around the thighs or ankles transfers directly to a figure-8 product.
Can beginners use figure-8 resistance bands?
Yes, provided the resistance and setup are manageable. Start with light resistance, a few suitable movements, and controlled repetitions. A beginner does not need several hard sets of every exercise on the first day.
Can I use a figure-8 band for leg exercises?
Some products and exercise guides include lower-body options, but the attachment method must match the particular band. A listing that mentions “leg exercises” does not establish that every handle or loop is safe to place around your foot. Follow your product’s instructions rather than copying a generic band setup.
What should I do when the band is too short?
Choose another exercise or a band designed with a longer working length. Do not force extra range by jerking, leaning, or stretching beyond the manufacturer’s limit. A stronger effort does not make an unsuitable setup appropriate.
Do I need to train to failure?
No. Current resistance-training guidance does not identify training to failure as consistently necessary for the average healthy adult. For this beginner routine, prioritize steady technique and stop before the next repetition would require compensation.
The Bottom Line
Use figure 8 resistance band exercises where the equipment fits the movement: controlled pulls, presses, curls, and shoulder work. Add clearly separated leg and abdominal exercises to build a more complete session.
Start with the five main movements, add accessories selectively, and record your repetitions. Progress through better control and appropriate resistance—not through awkward anchors or excessive band stretch.
This content is for informational purposes only and is not a substitute for medical advice.