
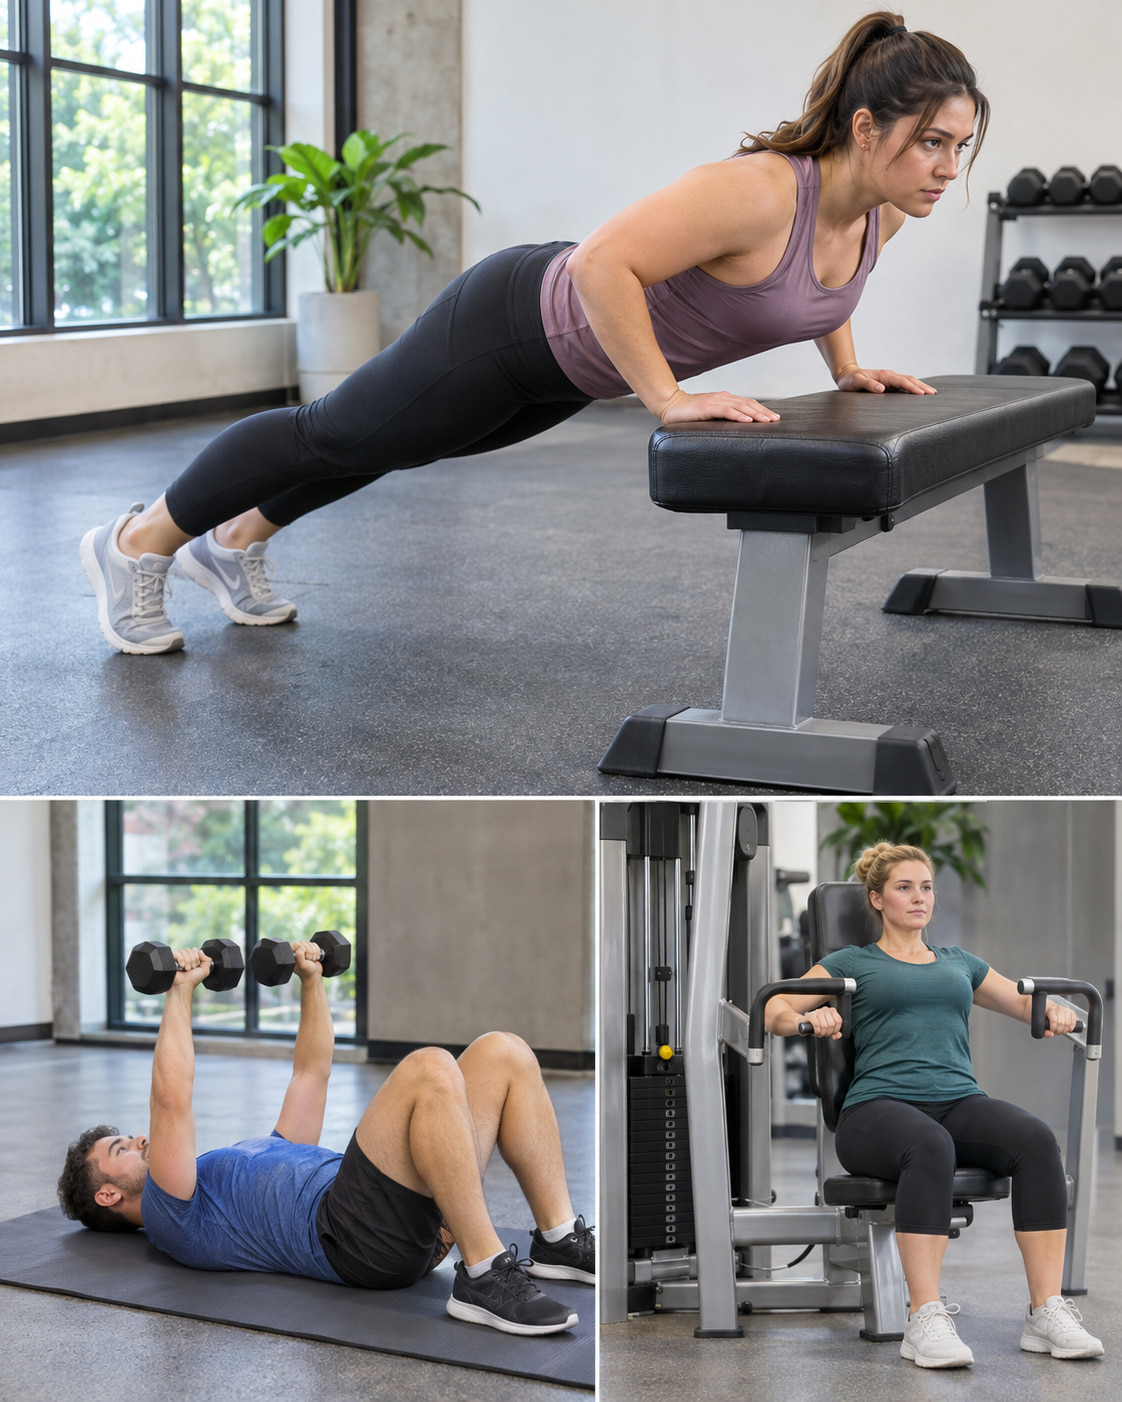
Good chest exercises for beginners include wall push-ups, hands-elevated push-ups, dumbbell presses, resistance-band presses, and supported machine exercises. Start with one pressing exercise that matches your strength and equipment—not all seven in one workout.
Below, you’ll learn how to choose your starting point, perform each movement, and increase the challenge without rushing into heavier weights or harder variations.
How to Choose Chest Exercises for Beginners
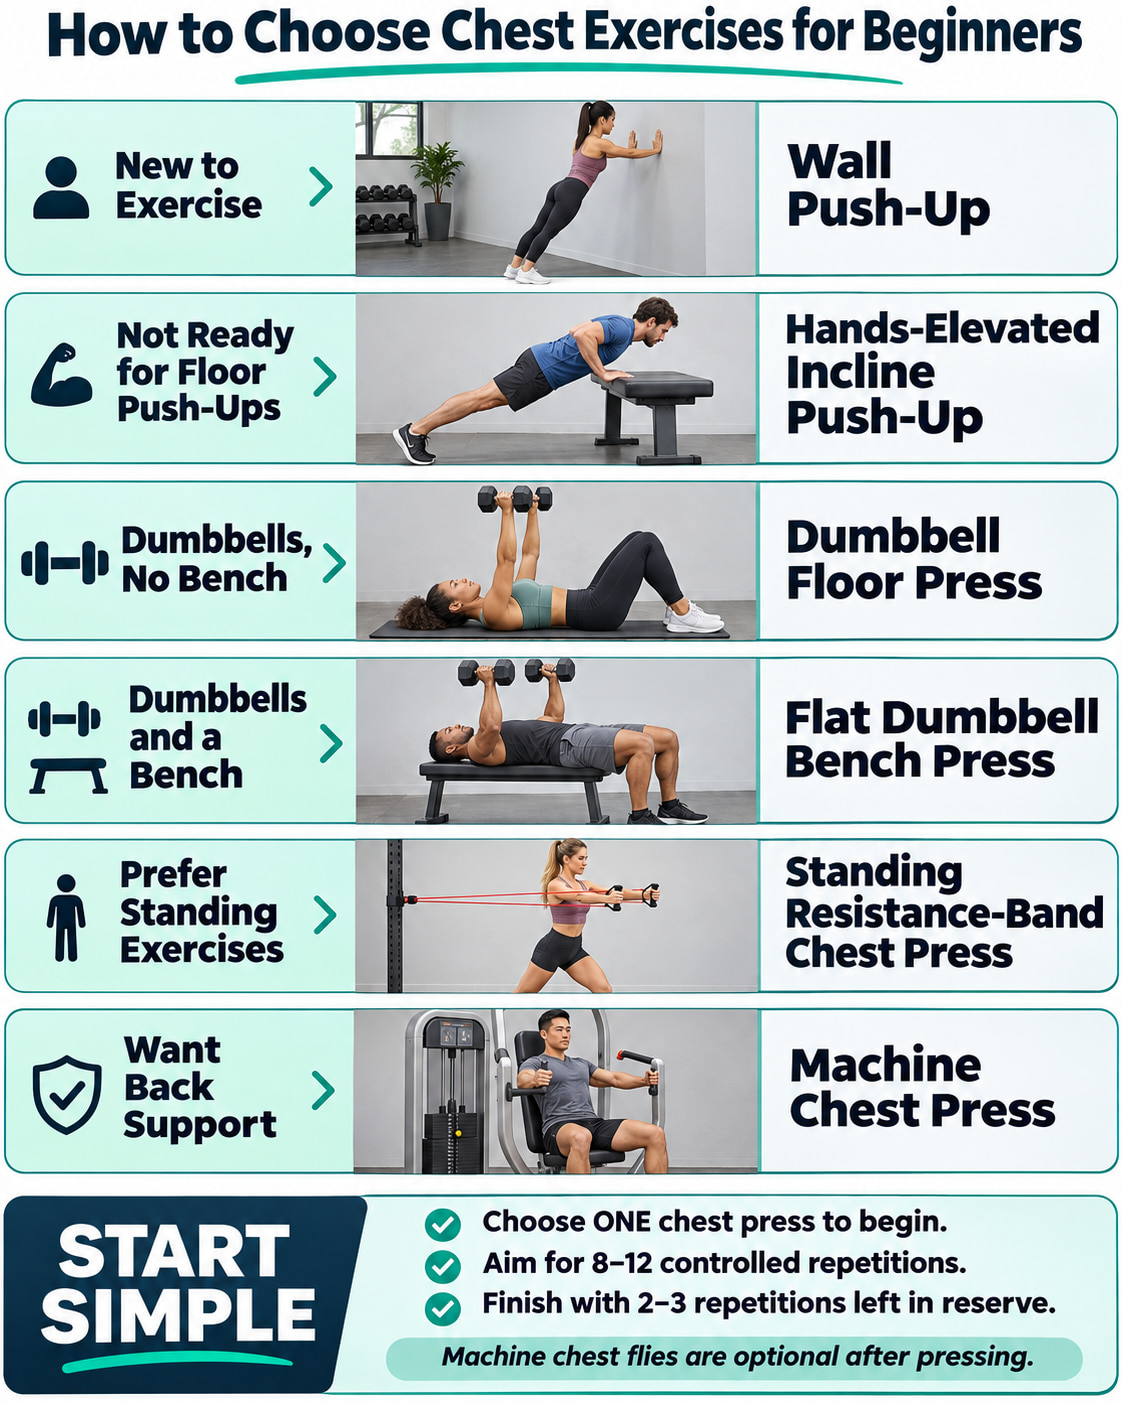
Your starting exercise should let you practice controlled repetitions without struggling to get into position. You do not need to master floor push-ups before using weights, and you do not need a bench to begin.
Use this table to narrow your choices:
| Your starting point | An exercise to consider |
|---|---|
| You want a gentle standing option without equipment | Wall push-up |
| Wall push-ups feel manageable, but floor push-ups are too difficult | Hands-elevated incline push-up |
| You have dumbbells but no bench | Dumbbell floor press |
| You have a bench and can comfortably position light dumbbells | Flat dumbbell bench press |
| You prefer standing and have a secure resistance-band anchor | Standing resistance-band chest press |
| You want a seated gym exercise with back support | Machine chest press |
The machine chest fly is an optional addition after a press. You do not need it to start, and you do not need to combine several presses just because they use different equipment.
What These Exercises Train
Your pectoralis major, the large chest muscle, helps bring your upper arms toward the front of your body. During presses and push-ups, your triceps straighten your elbows and your front shoulder muscles assist. Push-ups also require your trunk muscles to help maintain your body position. Feeling your arms work does not automatically mean you are doing the exercise incorrectly.
A fly uses a different movement: you bring your arms together while maintaining a small bend in your elbows, rather than repeatedly bending and straightening them. That makes it an accessory option, not a required replacement for pressing.
Progressive resistance training can improve strength and muscle size, but no single piece of equipment is essential. The American College of Sports Medicine’s resistance-training guidance emphasizes consistent training and individual preferences rather than a complicated program or mandatory training to failure.
Choose a Manageable Starting Difficulty
For the starting routine in this guide, use a resistance or push-up height that allows 8–12 controlled repetitions, finishing while you think you could perform another two or three with similar technique. For the optional machine fly, use 10–15 repetitions.
Those extra repetitions are an estimate—not something you need to test by continuing until you cannot move. During your first sessions, prioritize learning the movement.
Breathe out during the press or closing movement and breathe in during the return. Avoid holding your breath, rushing, or adding resistance when you cannot control the current difficulty.
7 Chest Exercises for Beginners and How to Progress Them
The first six exercises are pressing options. Choose one as your main chest exercise, then use the sample routine below to decide how much to do.
1. Wall Push-Up
Best for: Starting with bodyweight resistance while standing.
Equipment: A clear wall and a nonslip floor.
A wall push-up lets you practice bending and straightening your arms while keeping your body aligned. Your distance from the wall helps determine the challenge.
How to do it:
- Face a wall and place your palms against it at approximately chest height, with your fingers pointing upward.
- Step back until your arms are straight and some of your weight rests through your hands. Keep your body aligned rather than bending at the hips.
- Slowly bend your elbows to bring your chest toward the wall. Let your elbows angle back rather than spreading straight out to the sides.
- Press through your palms to return to the starting position.
Common mistake: Reaching toward the wall with your chin while your chest stays behind. Move your chest and hips together, keeping your head in line with your body.
Make it easier: Stand closer to the wall.
Progress it: Build controlled repetitions, then try a push-up with your hands on a high, fixed countertop. Avoid moving so far from the wall that your feet begin to slip.
2. Hands-Elevated Incline Push-Up
Best for: Building toward floor push-ups without taking on the full challenge immediately.
Equipment: A fixed countertop or stable exercise bench that cannot slide or tip.
Here, “incline” means your hands are elevated and your feet remain on the floor. Raising your feet would create a different, generally harder variation.
How to do it:
- Place your hands slightly wider than shoulder width on the support.
- Walk your feet back until your body forms a straight line from head to heels. Tighten your abdomen and glutes gently.
- Bend your elbows and lower your chest toward the support. Keep your elbows angled back rather than flared directly sideways.
- Push the support away to return to the starting position, moving your shoulders and hips together.
Common mistake: Letting your hips sag or reaching forward with your head to finish the repetition. Use a higher support when you cannot maintain your body position.
Make it easier: Raise your hand support.
Progress it: Gradually use lower supports. A high countertop, a lower fixed surface, and a stable bench can provide stepping-stones toward floor push-ups. Each change should still allow controlled repetitions.
3. Two-Arm Dumbbell Floor Press
Best for: Training with dumbbells when you do not have a bench.
Equipment: Two light dumbbells and a clear floor space; an exercise mat is optional.
The floor limits how far your upper arms descend. This provides a shorter pressing range than a bench press, but it does not guarantee that the exercise will feel comfortable for everyone.
How to do it:
- Sit with the dumbbells close to your hips. Carefully lie back, keeping the weights close to your body. Bend your knees, plant your feet, and keep your hips on the floor.
- Position the dumbbells beside your chest. Turn your palms slightly inward—between facing your feet and facing each other—and keep your wrists straight.
- Press both dumbbells upward together, without knocking them into each other.
- Lower slowly until the backs of your upper arms gently contact the floor. Pause without bouncing, then repeat.
Common mistake: Bouncing your elbows off the floor or lifting your hips to finish the press. Keep the movement controlled and reduce the weight when needed.
Make it easier: Use lighter dumbbells that you can position and put down smoothly.
Progress it: Add repetitions first, then increase the weight in a small increment. Moving to a bench is an option, not a requirement.
4. Flat Dumbbell Bench Press
Best for: Beginners who have a bench and are ready to practice controlling two free weights.
Equipment: A stable flat bench and two dumbbells.
Choose light weights while learning the setup. Getting into and out of position matters as much as completing the repetitions.
How to do it:
- Lie on a flat bench with your head, upper back, and hips supported. Plant your feet on the floor or a stable raised platform. Ask for assistance positioning the dumbbells when needed.
- Hold the weights beside your chest with your palms facing toward your feet. Keep your wrists aligned with your forearms and your shoulders comfortably supported.
- Press both dumbbells upward together until your arms are straight, without forcefully snapping your elbows.
- Lower slowly toward the sides of your chest through a comfortable range. Maintain your support points and avoid an exaggerated back arch.
Common mistake: Lowering farther than you can control or bending your wrists backward. Use less weight and keep the dumbbells balanced over your forearms. Arrange assistance finishing the set when necessary rather than dropping the weights.
Make it easier: Reduce the load. Choose the floor press when a floor-limited range better suits your setup.
Progress it: Increase repetitions before adding weight. Keep the same controlled depth as the load rises.
5. Standing Anchored Resistance-Band Chest Press
Best for: A standing home-training option with adjustable resistance.
Equipment: A resistance tube with two handles and a compatible, securely installed anchor.
Use a chest-height anchor behind you for this variation—not a low anchor that changes the press into an upward movement.
How to do it:
- Inspect the tube, handles, clips, and anchor. Install the anchor at chest height according to the manufacturer’s instructions, then test it gently.
- Face away from the anchor. Hold a handle beside each side of your chest and place one foot ahead of the other in a comfortable staggered stance.
- Keep your wrists straight and torso steady as you press both handles forward at chest height.
- Slowly return your hands beside your chest. Do not let the resistance pull your elbows far behind your body.
Common mistake: Rocking your torso to move the handles or allowing the tubing to travel near your neck. Reduce the resistance and check the anchor height.
Make it easier: Use a lighter band.
Progress it: Build repetitions, then increase resistance within the manufacturer’s limits. Do not keep walking farther from the anchor until the band is overstretched. Never release stretched tubing suddenly.
6. Seated Machine Chest Press
Best for: Learning a loaded press with back support and a guided movement path.
Equipment: A selectorized chest-press machine with a weight stack.
Take time to adjust the machine rather than using the previous person’s settings.
How to do it:
- Select a light weight and adjust the seat so the handles sit near mid-chest height. Where adjustable, set the starting position so you are not reaching far behind your chest.
- Sit with your back supported and feet firmly on the floor or footrests. Wrap your thumbs around the handles and keep your wrists straight.
- Press both handles forward while keeping your back against the pad. Extend your arms without forcefully locking your elbows.
- Return slowly to the starting position without letting the weight stack slam.
Common mistake: Lifting your shoulders or peeling your upper back away from the pad to finish the press. Check the seat height and reduce the weight.
Make it easier: Lower the weight setting and ask gym staff to help adjust the seat and starting range.
Progress it: Add the smallest suitable weight increment after you reach your repetition target. Keep using the backrest; removing support is not necessary to make progress.
7. Seated Machine Chest Fly
Best for: Optional chest work after a pressing exercise.
Equipment: A chest-fly machine with handgrips and back support.
These instructions describe the handle-based version, not a pec deck that supports your forearms on pads.
How to do it:
- Adjust the seat so you can hold the handles around chest height with your elbows slightly below shoulder level. Set a comfortable opening position rather than reaching far behind your shoulders.
- Sit with your back against the pad and feet supported. Hold the vertical handles with your palms facing each other and a small bend in your elbows.
- Bring your arms together in front of your chest while keeping that elbow bend nearly unchanged.
- Slowly reopen your arms to the starting position. Stop before the machine pulls you into an uncomfortable stretch.
Common mistake: Bending and straightening your elbows so much that the fly becomes a press. Use a lighter weight and keep the movement focused on bringing your upper arms together.
Make it easier: Reduce the resistance and adjust the starting range.
Progress it: Build to the top of your repetition range before increasing the load. Do not chase a deeper stretch as a progression.
A Simple Beginner Chest Routine
Use this as the chest portion of a broader strength routine, not a complete full-body workout. Include training for your back, legs, and other major muscle groups elsewhere in the session or week.
Aim for two nonconsecutive chest-training days, such as Monday and Thursday. This fits the broader recommendation to train all major muscle groups at least twice weekly while allowing recovery between sessions.
Your Starting Session
Begin with 5–10 minutes of comfortable aerobic activity, such as brisk walking or easy cycling. Then rehearse your chosen press with an easier variation or lighter resistance.
| Order | Exercise or activity | Sets and repetitions | Rest |
|---|---|---|---|
| 1 | Easier practice set of your chosen press | 1 set of 5–8 easy repetitions | About 60 seconds |
| 2 | One main press from exercises 1–6 | 1–2 working sets of 8–12 repetitions | 90–120 seconds between sets |
| 3 | Optional machine chest fly | 1–2 working sets of 10–15 repetitions | 60–90 seconds between sets |
A working set is one of the sets intended to challenge you, rather than the easier practice set.
Start with one working set of your main press and skip the fly while learning. Build toward two pressing sets once you can maintain your technique and recover comfortably. Add the optional fly only when the pressing work already feels manageable.
At home, you can simply omit the machine fly. There is no need to replace it with a second exercise immediately.
Finish working sets with approximately two or three controlled repetitions still available. Rest longer when you need more time to regain steady breathing or feel ready to repeat the movement.
Allow roughly 15–25 minutes for the warm-up, setup, and two to four working sets. A single-exercise session may take less time; equipment waits or additional rest can make it longer.
These numbers are a practical starting example, not a requirement that every beginner must follow exactly.
When to Make Your Chest Exercises Harder
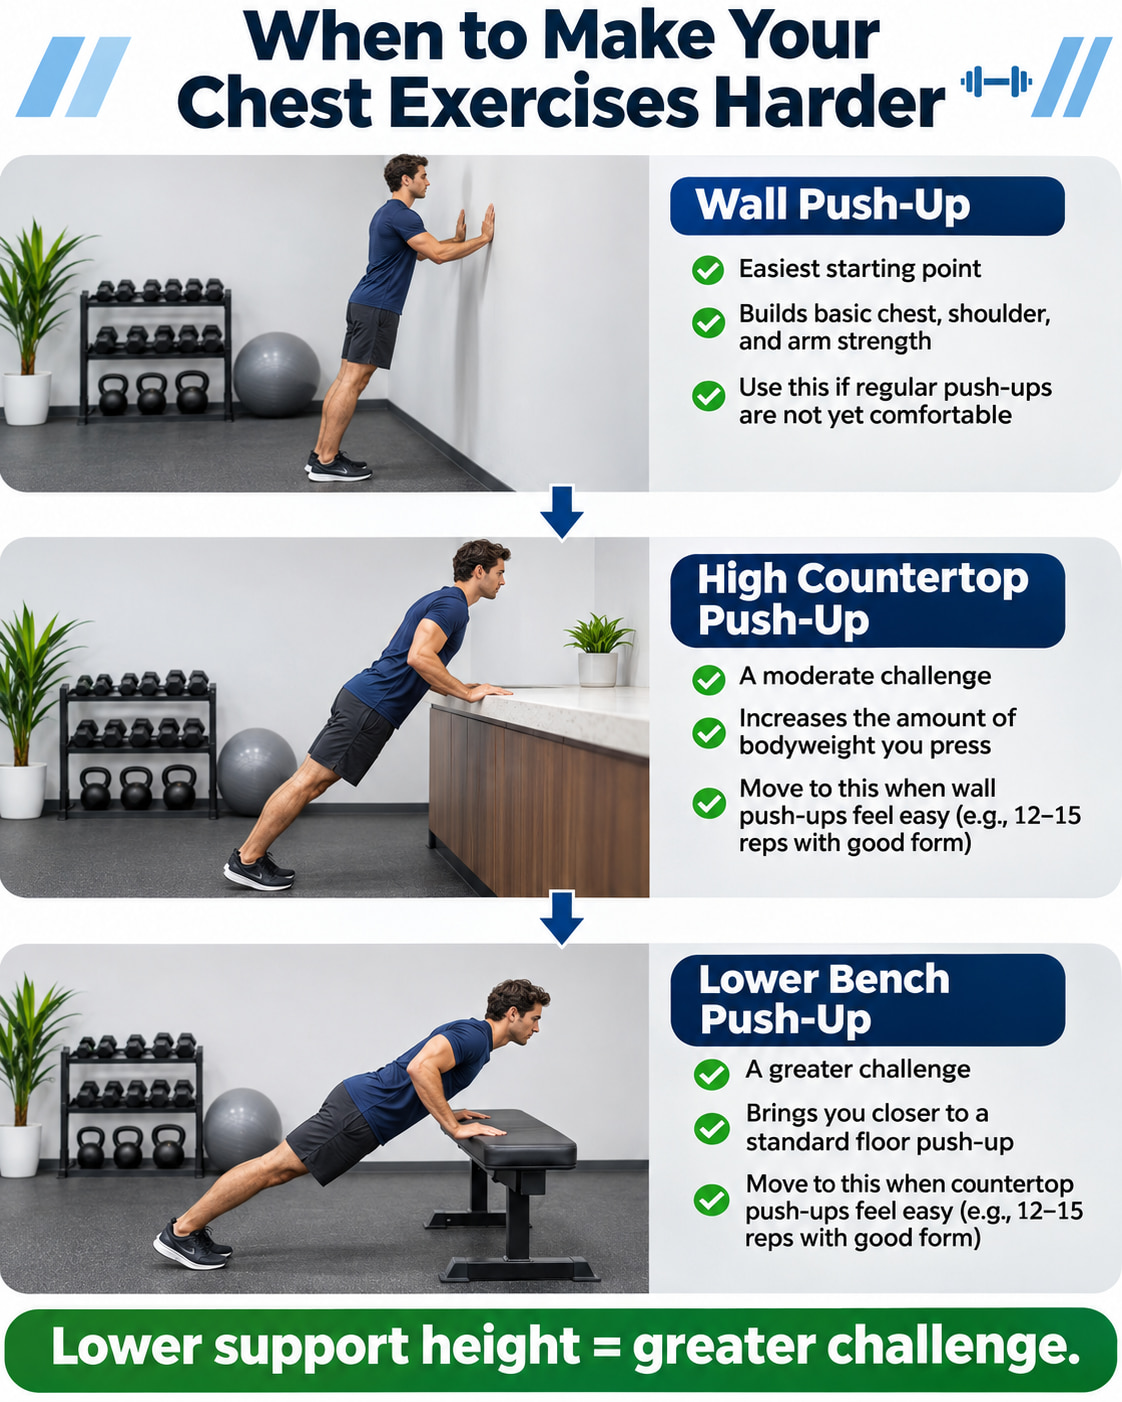
Progress the exercise when your performance supports it—not because another week has passed.
A useful rule is to increase difficulty after you reach the top of your repetition range on every planned working set for two consecutive sessions, while maintaining a consistent range of motion and still having a little effort in reserve.
For example, suppose you perform two dumbbell floor-press sets using the same weights:
| Session | First set | Second set | Next step |
|---|---|---|---|
| 1 | 10 repetitions | 8 repetitions | Keep the same weights |
| 2 | 11 repetitions | 10 repetitions | Keep building repetitions |
| 3 | 12 repetitions | 12 repetitions | Repeat the performance |
| 4 | 12 repetitions | 12 repetitions | Consider a small weight increase |
After increasing the weight, returning to the lower end of the range is expected. A jump that prevents you from completing eight controlled repetitions is too large for this particular plan.
Change one thing at a time. Lower your push-up support, increase the dumbbell or machine load, or choose a stronger band. Avoid increasing resistance, adding sets, and shortening rest periods together.
For wall and incline push-ups, record your hand-support height and foot position. For dumbbells and machines, record the weight and repetitions. For bands, note the specific band and your distance from the anchor so you can recreate the setup.
There is no requirement to progress every session. When repetitions become rushed, your range shortens, or you need momentum to finish, keep the same difficulty or make it easier. Gradual loading should follow—not replace—consistent technique.
When to Stop or Get Help
Stop exercising for sharp pain, numbness, dizziness, chest pain or pressure, unusual breathlessness, or other concerning symptoms. Seek appropriate medical advice rather than trying to train through them. New or unexplained chest pain, severe breathing difficulty, or fainting requires urgent medical attention.
When the issue is uncertainty about technique or equipment setup, ask a qualified trainer to help you adjust the exercise. Do not assume a movement is appropriate simply because it is labeled “beginner.”
Start With One Exercise You Can Repeat Well
Choose one press that fits your equipment and current ability. Practice it twice a week, record your repetitions, and increase the challenge only when your technique remains consistent.
Your next step is simple: select your starting exercise and complete an easy practice set before deciding on your working difficulty.
References
- American College of Sports Medicine: Updated resistance-training guidance
- Mayo Clinic: Weight-training technique and safety
- NHS: Strength exercises, including the wall press-up
- NASM: Incline push-up exercise guide
- ACE exercise guides: Dumbbell chest press and seated machine chest press
- Muscle & Strength: Dumbbell floor press instructions
- Meglio: Resistance-tube setup, safety, and exercise guide
- PureGym: Machine chest fly instructions
- Better Health Channel: Exercise warning signs and when chest pain requires urgent help
1 thought on “7 Chest Exercises for Beginners With Easy Progressions”