Pilates mat exercises for seniors can provide a gentle way to practice core control, hip strength, posture, mobility, and coordinated movement at home. This beginner-friendly routine avoids advanced roll-ups, demanding planks, and complicated exercise sequences.
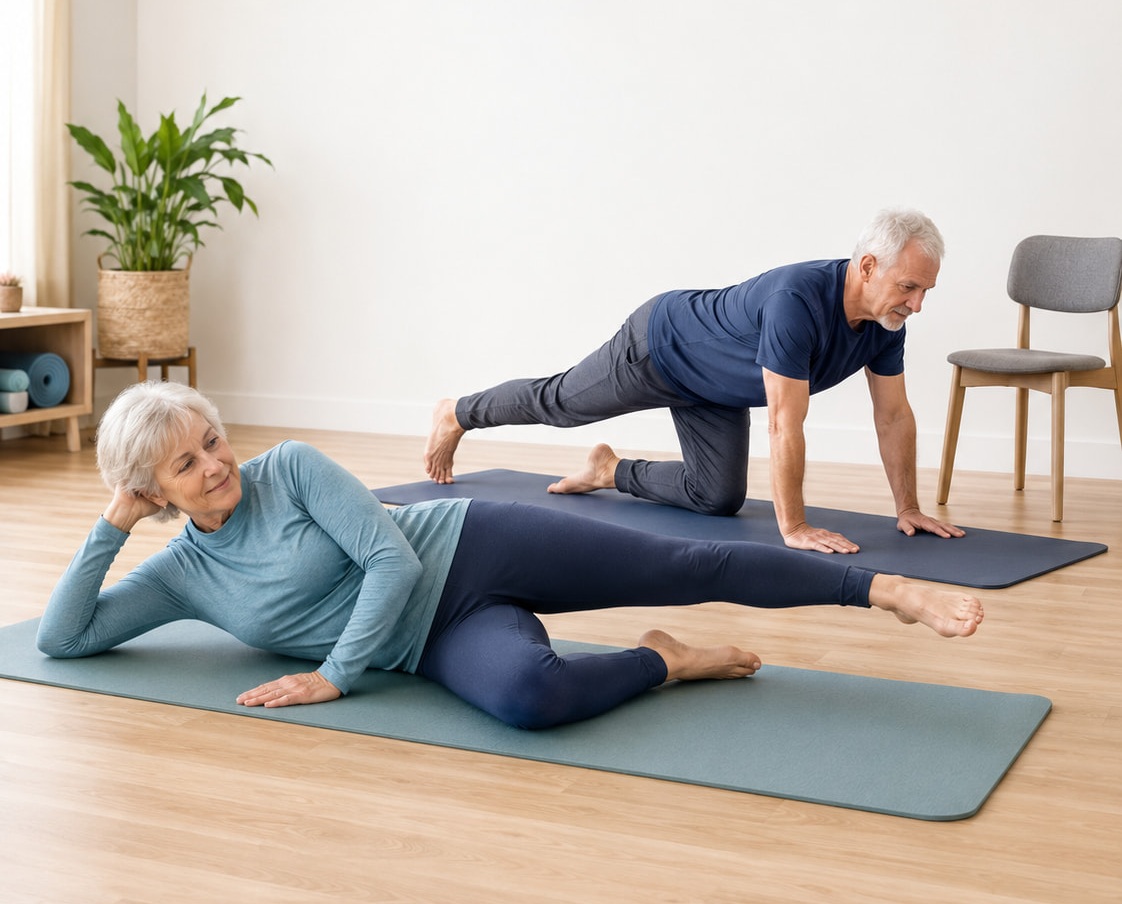
The exercises require enough mobility to get down to the floor and return to standing safely. Seniors who find floor transfers difficult should choose a chair-based routine instead. The NHS chair-based Pilates workout is specifically designed for people who prefer chair support or have difficulty exercising on the floor.
Are Pilates Mat Exercises Safe for Seniors?
Pilates mat exercises can be suitable for many older adults when the movements match the person’s current strength, mobility, balance, and health.
Pilates emphasizes controlled movement, breathing, posture, and body awareness rather than speed or momentum. The NHS beginner Pilates guidance recommends its beginner workout for people learning the basics or returning after time away from exercise.
However, being labeled “gentle” does not make every exercise appropriate for every person. Traditional Pilates movements such as full roll-ups, rollovers, deep spinal rounding, advanced planks, and double-leg lifts may be too demanding for some seniors.
This routine is most appropriate for older adults who:
- Can get down to the mat and stand up again safely
- Can lie on their back and side comfortably
- Can support themselves briefly on their hands and knees
- Do not have medical restrictions that prevent floor exercise
- Can follow instructions and control each movement without rushing
A qualified physical therapist or appropriately trained Pilates instructor can provide individualized modifications when health conditions, previous injuries, balance limitations, or significant joint stiffness affect movement.
Potential Benefits of Pilates for Seniors
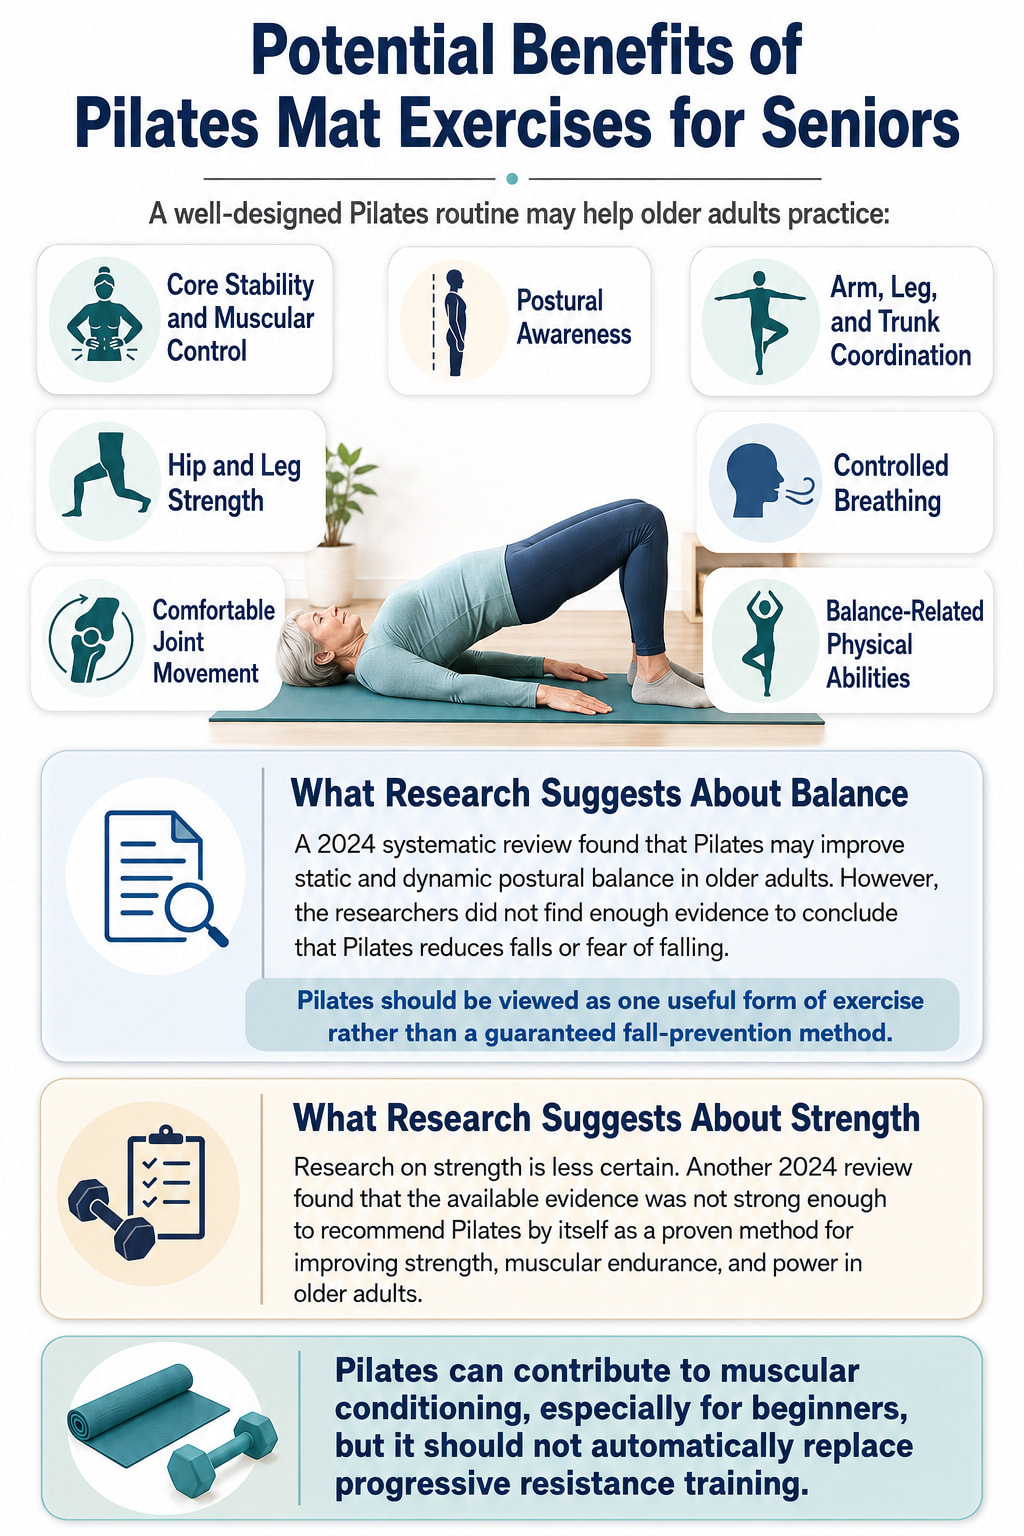
Gentle mat Pilates may help older adults practice:
- Core control
- Hip and leg strength
- Postural awareness
- Comfortable mobility
- Coordination
- Controlled breathing
- Balance-related abilities
Pilates can contribute to muscular conditioning, especially for beginners. However, it should complement rather than automatically replace walking, standing balance exercises, and progressive strength training.
What You Need for This Workout
You only need a few basic items:
- A nonslip exercise or Pilates mat
- A folded towel or small pillow for head support
- Enough clear space to extend your arms and legs
- A stable chair or countertop nearby for getting down and standing up
- Comfortable clothing that allows unrestricted movement
Use a mat that provides cushioning without being so soft that your body sinks into it. A very soft bed is usually less stable and can make it harder to control the exercises.
Safety Tips Before You Begin
Start with a short range of motion and a small number of repetitions. You should feel the muscles working, but the exercises should not cause sharp or increasing pain.
Keep these guidelines in mind:
- Move slowly enough to remain in control.
- Continue breathing throughout each repetition.
- Use a pillow if lying flat strains your neck.
- Rest whenever your technique begins to change.
- Do not force a joint into a painful position.
- Avoid quickly changing from lying to standing if you become lightheaded.
- Keep a stable chair nearby for floor transfers.
- Stop if you experience sharp pain, numbness, dizziness, chest pain, unusual shortness of breath, or other concerning symptoms.
People recovering from surgery, a recent fracture, or a serious illness should obtain appropriate professional guidance before beginning a new exercise routine.
Pilates and Osteoporosis
Most people with osteoporosis can remain physically active, but certain Pilates exercises may require modification.
The Royal Osteoporosis Society’s Pilates guidance recommends avoiding excessive spinal flexion, particularly when the movement is uncontrolled, repetitive, sudden, or performed with the spine under load. It advises using smooth, controlled movements within a comfortable range.
If you have osteoporosis:
- Do not forcefully round or flatten your spine.
- Avoid full roll-ups, roll-downs, and loaded forward bending unless a qualified professional has approved them.
- Keep your spine long and comfortable during bridges and bird dogs.
- Use smaller movements instead of trying to reach an extreme range.
- Seek individualized advice if you have had spinal fractures or multiple previous fractures.
10 Pilates Mat Exercises for Seniors
The following routine favors basic, controlled patterns such as heel slides, bridges, clamshells, side-lying leg lifts, and quadruped stability exercises. Similar movements are commonly used in NHS physiotherapy exercise programs.
Complete the exercises in order when possible. The first movements teach breathing and trunk control before the routine progresses to the hips and larger muscle groups.
1. Pilates Breathing With a Gentle Core Brace
Best for: Learning controlled breathing and gentle abdominal engagement.
Muscles worked: Diaphragm, deep abdominal muscles, and other muscles that stabilize the trunk.
Sets, reps, and rest: Perform 5 to 8 slow breaths. Rest whenever needed.
How to do it:
- Lie on your back with your knees bent and feet flat on the mat.
- Place a folded towel under your head if your chin points upward or your neck feels strained.
- Rest your hands around the lower sides of your ribs.
- Breathe in through your nose and allow your ribs to expand gently into your hands.
- Exhale slowly and lightly tighten your lower abdomen as though fastening a comfortable pair of pants.
- Maintain a relaxed neck, jaw, and shoulders.
Common mistakes: Pulling the stomach inward as hard as possible, lifting the shoulders, holding the breath, or forcefully pressing the lower back into the floor.
Coaching cue: Expand the ribs as you inhale; gently narrow the waist as you exhale.
2. Supine Arm Arcs
Best for: Practicing shoulder movement while keeping the ribs and trunk controlled.
Muscles worked: Shoulders, upper back, chest, and abdominal stabilizers.
Sets, reps, and rest: Perform 5 to 8 repetitions. Rest for 20 to 30 seconds if needed.
How to do it:
- Remain on your back with your knees bent and feet planted.
- Extend your arms toward the ceiling with your palms facing each other.
- Inhale to prepare.
- Slowly move both arms toward the floor behind your head.
- Stop before your ribs lift, your back arches, or your shoulders become uncomfortable.
- Exhale and return your arms to the starting position.
Common mistakes: Trying to touch the floor at all costs, flaring the ribs, arching the lower back, shrugging the shoulders, or moving too quickly.
Easier option: Move one arm at a time or use a smaller range.
Coaching cue: Let the shoulders move while the ribs remain quiet.
3. Gentle Pelvic Tilt
Best for: Improving awareness and control of the pelvis and lower trunk.
Muscles worked: Abdominals, glutes, and muscles surrounding the lower back and pelvis.
Sets, reps, and rest: Perform 5 to 8 slow repetitions.
How to do it:
- Lie on your back with your knees bent and feet hip-width apart.
- Begin with your lower back in a comfortable, natural position.
- Exhale and gently tip the front of your pelvis toward your ribs.
- Allow your lower back to become slightly heavier against the mat without pushing forcefully.
- Inhale and return to your comfortable starting position.
- Keep the movement small and smooth.
Common mistakes: Squeezing too hard, lifting the hips into a bridge, pushing the feet into the floor, holding the breath, or forcefully flattening the spine.
Osteoporosis modification: Keep the movement very small and comfortable. Do not repeatedly force the spine into a strongly rounded position.
Coaching cue: Imagine your pelvis as a shallow bowl that tips slightly toward you.
4. Heel Slide
Best for: Building core control while moving one leg.
Muscles worked: Deep abdominals, hip flexors, quadriceps, and hamstrings.
Sets, reps, and rest: Perform 5 to 8 repetitions per side. Rest for 20 to 30 seconds.
How to do it:
- Lie on your back with both knees bent and feet flat.
- Gently engage your abdominal muscles without holding your breath.
- Slowly slide your right heel away from your body.
- Extend only as far as you can without increasing the arch in your lower back.
- Slide the heel back to the starting position.
- Repeat with the other leg.
Common mistakes: Sliding the foot too far, allowing the pelvis to rotate, arching the lower back, lifting the heel, or rushing the return.
Easier option: Make the slide shorter.
Harder option: Slide the leg closer to straight while keeping the trunk controlled.
Coaching cue: Move the leg without letting the pelvis follow it.
5. Bent-Knee Fallout
Best for: Practicing hip mobility while keeping the pelvis stable.
Muscles worked: Deep abdominals, inner thighs, outer hips, and hip rotators.
Sets, reps, and rest: Perform 5 to 8 repetitions per side.
How to do it:
- Lie on your back with your knees bent and feet approximately hip-width apart.
- Keep your pelvis relaxed and level.
- Slowly allow your right knee to open a comfortable distance toward the side.
- Keep the left knee and both sides of your pelvis still.
- Bring the right knee back to the center with control.
- Repeat on the other side.
Common mistakes: Letting both knees move, rolling the pelvis, forcing the knee toward the floor, or moving farther than the hip comfortably allows.
Easier option: Move the knee only a few inches.
Coaching cue: The thigh moves, but the belt line stays level.
6. Supine Knee Fold
Best for: Progressing abdominal control by briefly lifting one foot from the mat.
Muscles worked: Abdominals, hip flexors, and pelvic stabilizers.
Sets, reps, and rest: Perform 5 to 8 repetitions per side. Rest for up to 30 seconds.
How to do it:
- Lie on your back with your knees bent and feet flat.
- Exhale and gently brace your abdomen.
- Lift one foot a few inches from the floor while keeping the knee bent.
- Stop before your pelvis tips or your back arches.
- Lower the foot quietly to the mat.
- Alternate sides.
Common mistakes: Pulling the knee forcefully toward the chest, lifting both feet before adequate control is developed, gripping the neck, or allowing the pelvis to rock.
Easier option: Unweight the heel without fully lifting the foot.
Harder option: Pause for one or two seconds with the foot raised.
Coaching cue: Make the foot light before lifting it.
7. Glute Bridge
Best for: Strengthening the hips and back of the legs.
Muscles worked: Gluteus maximus, hamstrings, abdominals, and spinal stabilizers.
Sets, reps, and rest: Perform 8 to 10 repetitions. Rest for 30 to 45 seconds.
How to do it:
- Lie on your back with your knees bent and feet flat.
- Position your feet about hip-width apart and close enough that you can press through your heels.
- Gently brace your abdomen and tighten your glutes.
- Lift your hips as one controlled unit.
- Stop when your hips are comfortably raised without arching your lower back.
- Pause briefly, then lower slowly.
Common mistakes: Pushing the hips too high, arching the lower back, allowing the knees to fall inward or outward, pressing through the toes, or holding the breath.
Easier option: Lift the hips only a few inches.
Harder option: Add a two- or three-second pause at the top.
Osteoporosis modification: Lift and lower the trunk as one controlled unit rather than deliberately curling the spine one vertebra at a time.
Coaching cue: Lift from the hips, not from the lower back.
8. Clamshell
Best for: Strengthening the side of the hips with minimal balance demands.
Muscles worked: Gluteus medius, gluteus minimus, and other hip rotators.
Sets, reps, and rest: Perform 8 to 10 repetitions per side. Rest for 20 to 30 seconds between sides.
How to do it:
- Lie on your side with your knees bent and feet together.
- Support your head with your lower arm or a folded towel.
- Stack your shoulders and hips.
- Keep your feet touching as you slowly lift the top knee.
- Stop before your pelvis begins rolling backward.
- Lower the knee with control.
Common mistakes: Rolling backward, separating the feet, lifting the knee too high, twisting through the lower back, or performing fast repetitions.
Easier option: Use a smaller opening.
Harder option: Place a light resistance band above the knees after you can perform the bodyweight version correctly.
Coaching cue: Imagine there is a wall directly behind your back.
9. Side-Lying Leg Lift
Best for: Building lateral hip strength and controlled single-leg movement.
Muscles worked: Gluteus medius, gluteus minimus, outer hip muscles, and abdominal stabilizers.
Sets, reps, and rest: Perform 6 to 10 repetitions per side. Rest for 20 to 30 seconds.
How to do it:
- Lie on your side with your bottom knee bent for support.
- Keep the top leg straight and position it in line with, or slightly behind, your body.
- Point the kneecap and toes forward rather than toward the ceiling.
- Brace your abdomen gently.
- Lift the top leg approximately 6 to 12 inches.
- Lower slowly without allowing your pelvis to roll.
Common mistakes: Lifting the leg too high, turning the toes upward, hiking the top hip, rocking backward, or swinging the leg.
Easier option: Rest the top leg on a pillow between repetitions.
Harder option: Pause briefly at the top or add a light ankle weight only after mastering the unweighted version.
Coaching cue: Reach the heel away before lifting the leg.
10. Modified Bird Dog
Best for: Improving trunk stability, coordination, and control of the shoulders and hips.
Muscles worked: Abdominals, spinal stabilizers, glutes, shoulders, and upper-back muscles.
Sets, reps, and rest: Perform 5 to 8 repetitions per side. Rest for 30 to 45 seconds.
How to do it:
- Begin on your hands and knees with your hands below your shoulders and knees below your hips.
- Keep your back in a comfortable neutral position.
- Gently brace your abdomen.
- Slide one foot backward along the floor while keeping your hips level.
- Return the knee beneath your hip and switch sides.
- When this is easy, lift the extended leg slightly without arching your back.
Common mistakes: Lifting the leg too high, twisting the pelvis, shifting heavily to one side, letting the lower back sag, or looking upward.
Easier option: Lift one arm while keeping both knees on the mat, or slide one leg without lifting it.
Harder option: Extend the opposite arm and leg at the same time.
Wrist or knee modification: Place a folded towel under the knees. For sensitive wrists, use your fists, exercise on forearms, or skip the movement if the position remains uncomfortable.
Coaching cue: Reach long rather than lifting high.
15-Minute Gentle Pilates Mat Workout for Seniors
Use the following structure for a simple home session.
Preparation
- Pilates breathing: 5 slow breaths
- Supine arm arcs: 5 repetitions
- Gentle pelvic tilts: 5 repetitions
Core Control
- Heel slides: 5 per side
- Bent-knee fallouts: 5 per side
- Supine knee folds: 5 per side
Hip and Lower-Body Strength
- Glute bridges: 8 repetitions
- Clamshells: 8 per side
- Side-lying leg lifts: 6 per side
Coordination
- Modified bird dog: 5 per side
Rest for approximately 20 to 45 seconds between exercises, or longer when necessary. Changing positions slowly may help prevent lightheadedness.
Aim for an effort of approximately 3 to 5 out of 10. The routine should feel purposeful but controlled, and you should still be able to breathe normally.
How Often Should Seniors Do Mat Pilates?
Two sessions per week is a practical starting point. A third weekly session can be added when you recover comfortably and can maintain good technique.
Avoid assuming that more frequent exercise will automatically produce better results. Technique and consistency matter more than completing a large number of repetitions.
A simple weekly schedule could include:
- Monday: Gentle Pilates routine
- Tuesday: Walking or another aerobic activity
- Wednesday: Rest or light mobility
- Thursday: Gentle Pilates routine
- Friday: Walking and standing balance exercises
- Weekend: Recreational activity, strength training, or rest as appropriate
The CDC’s physical activity guidance for adults 65 and older recommends a weekly combination of aerobic activity, muscle-strengthening exercise on at least two days, and balance activities. Pilates can contribute to a broader routine, but a gentle mat session may not challenge every major muscle group sufficiently.
How to Make the Workout Easier
Use one or more of these modifications:
- Perform only five repetitions of each movement.
- Shorten the range of motion.
- Rest after every exercise.
- Support your head with a folded towel.
- Practice the bird dog with only one arm or leg moving.
- Lift the hips only slightly during the bridge.
- Complete the first six exercises and add the side-lying exercises later.
- Choose chair Pilates when floor transfers are not safe.
The goal is not to copy the largest possible movement. The goal is to control the range you currently have.
How to Progress Safely
Progress only when you can complete every repetition without holding your breath, losing alignment, rushing, or causing pain.
Use this order:
- Increase from 5 repetitions to 8.
- Progress toward 10 controlled repetitions.
- Add a brief pause at the hardest part of an exercise.
- Add a second set to two or three exercises.
- Increase the movement range slightly.
- Add a light resistance band to bridges or clamshells.
- Progress the bird dog from one-limb movement to opposite arm-and-leg movement.
Change only one variable at a time. Do not progress by moving faster.
Common Pilates Mistakes Seniors Should Avoid
Holding the Breath
Breath-holding can create unnecessary tension and make the movements harder to control. Exhale during the most demanding part of the exercise and inhale during the easier phase.
Forcing the Lower Back Flat
A gentle abdominal brace does not require forcefully pushing the spine into the mat. Maintain a position that feels controlled and comfortable.
Using Too Much Range
A larger movement is not always a better movement. Stop before the pelvis rotates, the ribs lift, the back arches, or a joint becomes uncomfortable.
Moving Too Quickly
Momentum reduces muscular control. Use a steady pace and make the return phase as controlled as the lifting phase.
Progressing Too Soon
Adding bands, ankle weights, longer lever positions, or more repetitions before mastering the basic movement can reduce exercise quality.
Ignoring Floor-Transfer Difficulty
Getting down and standing up are part of a mat workout. Use a stable support and an established transfer method. Choose chair-based exercise when the transfer itself is unsafe.
Frequently Asked Questions
Is mat Pilates good for seniors?
Mat Pilates can be useful for seniors who want to practice controlled movement, core stability, hip strength, posture, and coordination. Exercise selection and difficulty should reflect the person’s current ability rather than age alone.
Can Pilates improve balance in older adults?
Research suggests Pilates may improve static and dynamic balance. However, there is not enough evidence to promise that Pilates alone prevents falls. Seniors who want to improve balance should also include appropriately supported standing exercises.
What should I do if I cannot get down to the floor?
Choose standing or chair-based Pilates instead. Do not practice floor transfers alone when you are unsure whether you can return to standing safely.
Is Pilates safe for seniors with osteoporosis?
Many people with osteoporosis can perform modified Pilates exercises. Strong spinal rounding, forceful roll-ups, and uncontrolled loaded bending may need to be avoided. People with spinal fractures, multiple previous fractures, or uncertainty about their condition should seek individualized professional guidance.
Can I do these exercises with arthritis?
Some people with arthritis tolerate gentle Pilates well, particularly when they use a comfortable range and supportive positioning. Joint symptoms and limitations vary, so exercises should be modified individually. Do not force a stiff or painful joint.
Do I need a thick Pilates mat?
Use enough cushioning to make lying and kneeling comfortable, but avoid a surface so soft that it feels unstable. A folded towel can provide extra support beneath the knees or head.
Can Pilates replace walking or strength training?
Not completely. Walking and similar activities develop aerobic fitness, while progressive resistance exercises can provide a stronger muscular challenge. Older adults benefit from combining aerobic, strength, and balance-related activities across the week.
Conclusion
Pilates mat exercises for seniors should emphasize control, comfortable movement, breathing, and appropriate modifications—not advanced positions or high repetition counts.
Start with one round of the ten exercises, use a small range, and progress only when your technique remains steady. Combine Pilates with walking, suitable resistance training, and supported standing balance work for a more complete weekly routine.
Stop exercising and seek professional help if you experience sharp pain, numbness, dizziness, chest pain, unusual shortness of breath, or other concerning symptoms.
This content is for informational purposes only and is not a substitute for medical advice.
References
- NHS: Pilates for Beginners
- NHS: Chair-Based Pilates Workout
- CDC: Physical Activity Guidelines for Older Adults
- Royal Osteoporosis Society: Pilates and Osteoporosis
- PubMed: Pilates Exercises and Postural Balance in Older Adults
- PubMed: Pilates Exercises, Strength, Endurance, and Muscle Power in Older Adults
- PubMed: Effects of Mat Pilates on Physical Function in Older Adults