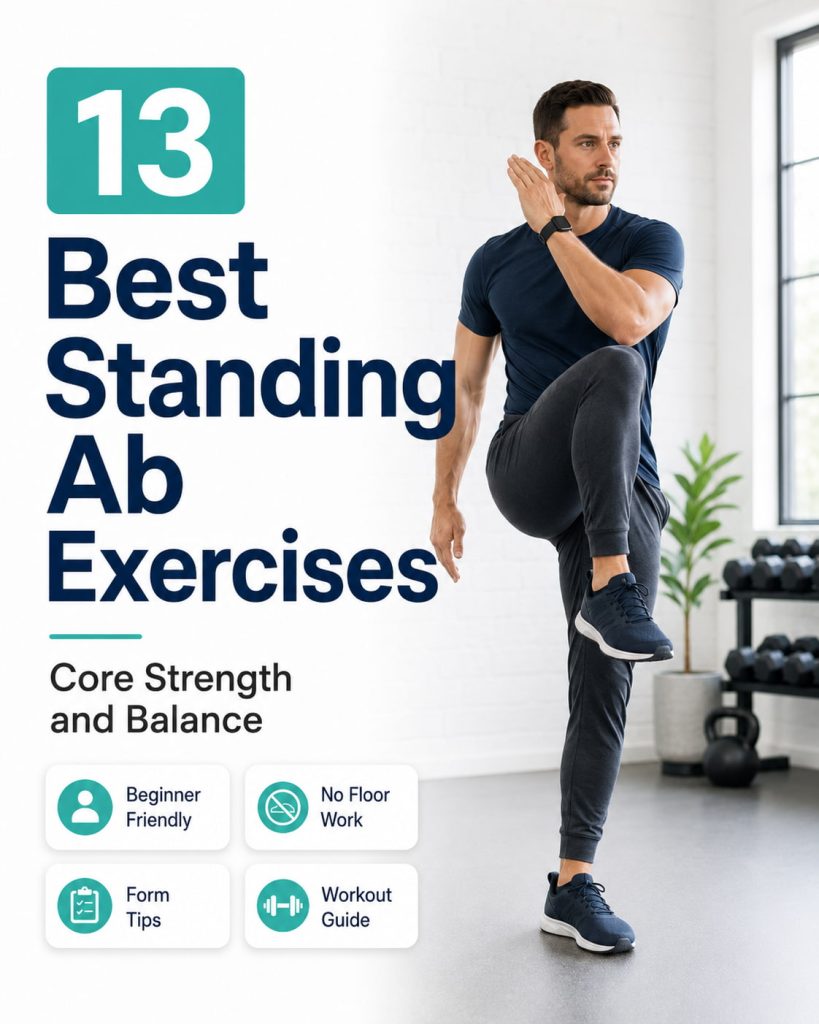
Standing ab exercises train your core while you stay upright, making them useful for building trunk strength, balance, posture, and real-world movement control. Instead of lying on the floor for crunches, you use standing marches, rotations, side bends, carries, and anti-rotation drills to challenge your abs from a more functional position.
These exercises can fit into a warm-up, strength workout, low-impact home routine, or short core finisher. You can start with no-equipment movements and progress to dumbbells, resistance bands, cables, or medicine balls as your control improves.
What Are Standing Ab Exercises?
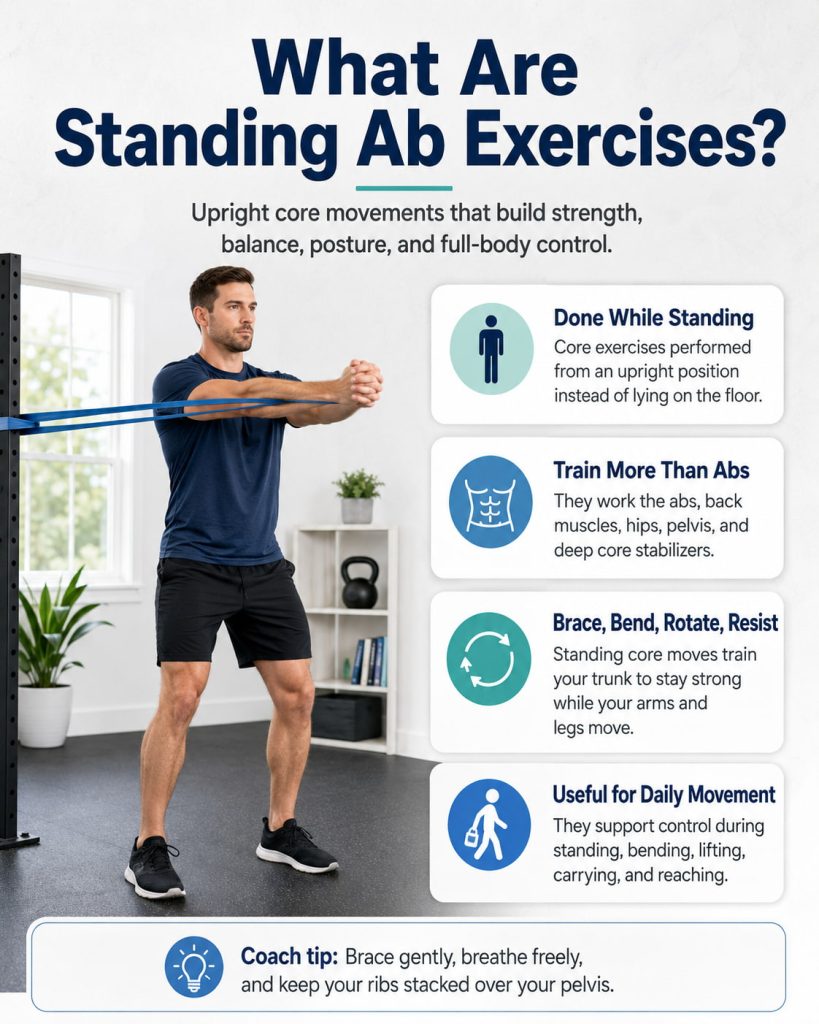
Standing ab exercises are core movements performed from an upright position. They train your trunk to brace, bend, rotate, resist rotation, stabilize your hips, and control your posture while your arms and legs move.
That matters because your core is not only your “six-pack.” Mayo Clinic explains that core muscles include the abdominal muscles, back muscles, and muscles around the pelvis, and that stronger core muscles can make many physical activities easier. Mayo Clinic also recommends breathing freely during core exercises and focusing on the deep abdominal muscle known as the transversus abdominis.
Standing core work is especially useful because it connects your abs with your hips, shoulders, legs, and balance system. Cleveland Clinic notes that your core is involved in common daily movements such as standing, bending, lifting, and carrying. Cleveland Clinic also includes Pallof presses among useful core exercises for different levels.
Muscles Worked During Standing Ab Exercises
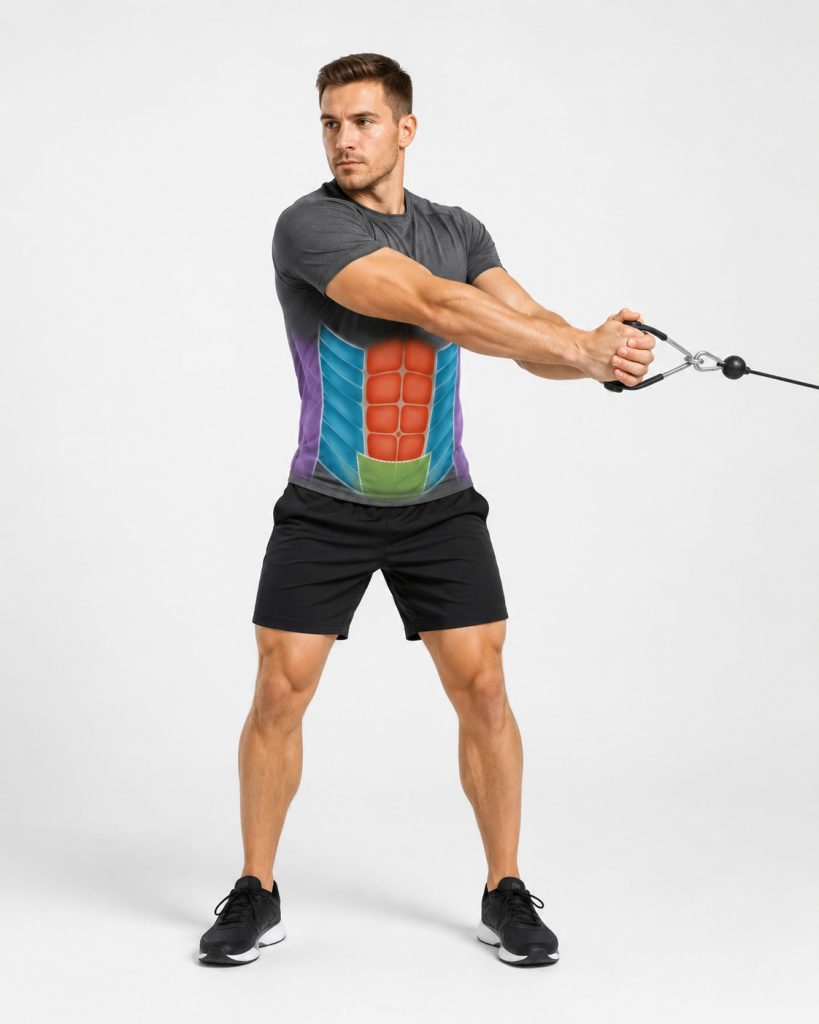
Standing ab exercises mainly train the rectus abdominis, transverse abdominis, internal obliques, external obliques, and deep spinal stabilizers. Depending on the movement, they can also involve the glutes, hip flexors, adductors, calves, shoulders, upper back, chest, grip muscles, and legs.
Rotation-based exercises like wood chops and trunk rotations emphasize the obliques. Anti-rotation exercises like Pallof presses and suitcase carries challenge the deep core and lateral trunk muscles. Marching and knee-drive movements add hip flexor, glute, and balance demand. Loaded carries train the core to stay tall while the body moves under load.
13 Best Standing Ab Exercises
Use these standing ab exercises from easiest to hardest. Start with the version you can control without pain, breath-holding, or leaning. Move slowly first, then add speed, load, or range of motion only when your form stays clean.
1. Standing March
Best for: Beginners, warm-ups, balance practice, low-impact core activation, and learning how to brace while moving one leg at a time.
Muscles worked: Transverse abdominis, rectus abdominis, hip flexors, glutes, calves, deep spinal stabilizers, and postural muscles of the upper back.
Why it stands out: The standing march looks simple, but it teaches an important core skill: keeping your ribs, pelvis, and spine steady while one leg moves. It is a good starting point before harder standing ab exercises like cross-body knee drives or offset marches.
Suggested sets and reps: Perform 2 to 3 sets of 20 to 40 total marches. Use a slow tempo at first, lifting for 1 second and lowering for 1 second. Keep the effort around RPE 4 to 6.
Beginners: Hold a wall, chair, or countertop lightly for balance. Lift each knee only as high as you can without leaning back.
Intermediate: March without support and pause for 1 second at the top of each knee lift.
Advanced: Hold one light dumbbell at your chest or use a slow overhead reach with each march.
Rest: Rest 30 to 45 seconds between sets, or use it as a warm-up drill before strength training.
How to do it:
- Stand tall with your feet hip-width apart.
- Brace your core gently as if preparing for a light cough.
- Lift one knee toward hip height without leaning backward.
- Keep your ribs stacked over your pelvis.
- Lower the foot with control.
- Repeat on the other side and alternate smoothly.
Common mistakes: Leaning back, swinging the knee up, holding your breath, letting the standing foot collapse inward, or rushing the movement until balance breaks down.
Expert tip: Think “zipper up through the front of the body.” Your knee moves, but your torso stays tall and quiet.
Exercise variations: Try a slow march, high-knee march, wall-supported march, dumbbell front-rack march, or offset-loaded march.
Easier variation: March in place while holding a chair with one or both hands.
Harder variation: Use an offset dumbbell hold on one side to challenge anti-rotation and lateral core control.
2. Standing Bicycle Crunch
Best for: Training the abs and obliques without getting on the floor.
Muscles worked: Rectus abdominis, internal and external obliques, transverse abdominis, hip flexors, glutes, and spinal stabilizers.
Why it stands out: The standing bicycle crunch mimics the cross-body pattern of a floor bicycle crunch but is usually easier to modify. It trains rotation, balance, and coordination while keeping the movement low impact.
Suggested sets and reps: Perform 2 to 3 sets of 8 to 12 reps per side. Move slowly enough to feel the obliques working instead of bouncing.
Beginners: Use a small range of motion and bring the elbow only slightly toward the opposite knee.
Intermediate: Pause briefly each time the knee and opposite elbow move toward each other.
Advanced: Add a light dumbbell held at the chest or perform the movement with a slower 3-second return.
Rest: Rest 30 to 60 seconds between sets.
How to do it:
- Stand with your feet hip-width apart and hands lightly behind your head.
- Brace your core and keep your chest tall.
- Lift your right knee while rotating your left elbow toward it.
- Return to the starting position with control.
- Repeat on the opposite side.
- Alternate sides without pulling on your neck.
Common mistakes: Pulling the head forward, collapsing the chest, rounding the back, twisting too aggressively, or rushing through the reps.
Expert tip: Lead the movement with your ribs and upper trunk, not your neck. Your hands should rest lightly behind your head.
Exercise variations: Try slow standing bicycle crunches, alternating bicycle crunches, same-side standing crunches, or a standing bicycle with a knee pause.
Easier variation: Keep your hands on your hips and rotate your torso slightly toward the lifted knee.
Harder variation: Slow each rep down and pause for 2 seconds at the top.
3. Standing Cross-Body Knee Drive
Best for: Oblique training, balance, athletic warm-ups, and low-impact cardio-core work.
Muscles worked: Obliques, rectus abdominis, transverse abdominis, hip flexors, glutes, calves, shoulders, and upper back.
Why it stands out: This exercise combines a knee drive with a diagonal arm pull. It trains your core to coordinate the upper and lower body while you stay balanced on one leg.
Suggested sets and reps: Perform 2 to 3 sets of 10 to 15 reps per side. For conditioning, use 30 seconds per side at a controlled pace.
Beginners: Keep both hands lower and drive the knee only halfway up.
Intermediate: Reach both arms overhead and pull down across the body as the knee lifts.
Advanced: Add a light resistance band anchored above shoulder height or increase speed while keeping clean posture.
Rest: Rest 30 to 60 seconds between sides or sets.
How to do it:
- Stand tall with your weight on your left foot.
- Reach both hands up and slightly to the left.
- Brace your core.
- Drive your right knee up and across your body.
- Pull your hands down toward the right knee.
- Return to the reach position and repeat before switching sides.
Common mistakes: Turning it into a sloppy bounce, leaning backward, collapsing the standing hip, or letting the knee pull the torso out of position.
Expert tip: Imagine pulling a rope down across your body while your ribs stay controlled.
Exercise variations: Try a slow cross-body knee drive, banded diagonal knee drive, standing mountain climber, or low-impact cross-body march.
Easier variation: Tap the moving foot down between reps and reduce the knee height.
Harder variation: Use a light band or perform the exercise without touching the moving foot down between reps.
4. Overhead Side Bend
Best for: Beginner oblique training, side-body mobility, posture awareness, and learning controlled lateral flexion.
Muscles worked: Internal and external obliques, transverse abdominis, quadratus lumborum, lats, shoulders, and spinal stabilizers.
Why it stands out: The overhead side bend trains the sides of your trunk through a controlled range of motion. It is a good no-equipment option before adding dumbbells or cables.
Suggested sets and reps: Perform 2 sets of 8 to 12 reps per side. Use a slow 2-second bend and 2-second return.
Beginners: Keep your hands on your hips or reach one arm overhead instead of both.
Intermediate: Reach both arms overhead and keep your hips still.
Advanced: Hold a light towel overhead with tension or use a light plate only if your shoulders feel comfortable.
Rest: Rest 30 to 45 seconds between sets.
How to do it:
- Stand with your feet about hip-width apart.
- Reach both arms overhead or place one hand on your hip.
- Brace your core and stand tall.
- Slowly bend your torso to one side.
- Keep both feet planted and avoid twisting.
- Return to center and repeat on the other side.
Common mistakes: Arching the lower back, twisting instead of side bending, shrugging the shoulders, pushing the hips too far sideways, or forcing a painful range.
Expert tip: Move like you are sliding between two walls. Bend sideways without rotating forward or backward.
Exercise variations: Try single-arm overhead side bends, towel overhead side bends, or slow alternating side bends.
Easier variation: Place one hand on your hip and use a smaller range of motion.
Harder variation: Hold a light dumbbell or plate overhead only if you can keep your ribs down and shoulders relaxed.
5. Standing Dumbbell Side Bend
Best for: Oblique strength, lateral core control, and building loaded side-bending strength.
Muscles worked: Obliques, quadratus lumborum, transverse abdominis, grip, upper traps, spinal stabilizers, and glute medius.
Equipment needed: One dumbbell or kettlebell.
Why it stands out: The standing dumbbell side bend adds external load to lateral core training. Used correctly, it can strengthen the side of the trunk. Used incorrectly, it often turns into fast leaning with poor control, so form matters.
Suggested sets and reps: Perform 2 to 3 sets of 8 to 12 reps per side. Use a moderate load that lets you move slowly and return to tall posture.
Beginners: Start with bodyweight side bends before adding a dumbbell.
Intermediate: Hold one dumbbell at your side and use a controlled range.
Advanced: Use a heavier dumbbell, but only if you can avoid twisting or yanking your torso.
Rest: Rest 45 to 75 seconds between sets.
How to do it:
- Stand tall with your feet hip-width apart.
- Hold one dumbbell at your side.
- Brace your core and keep your shoulders level.
- Slowly lower the dumbbell down the side of your thigh.
- Stop before your torso twists or your hips shift.
- Use your side abs to return to the starting position.
Common mistakes: Going too heavy, bouncing at the bottom, rotating the torso, bending forward, or doing endless reps with no control.
Expert tip: Keep the movement small and strong. The goal is not to see how far the dumbbell can travel; the goal is to control your trunk.
Exercise variations: Try kettlebell side bends, cable side bends, or a slow bodyweight side bend.
Easier variation: Do the overhead side bend or bodyweight side bend first.
Harder variation: Use a slightly heavier dumbbell and a 3-second lowering phase.
6. Standing Cross-Body Toe Touch
Best for: Dynamic core control, hamstring mobility, warm-ups, and beginner-friendly rotation practice.
Muscles worked: Obliques, rectus abdominis, transverse abdominis, hip flexors, hamstrings, glutes, calves, and upper back.
Why it stands out: This movement trains diagonal coordination across the body. It works well in warm-ups because it combines controlled rotation, hip movement, and light balance demand.
Suggested sets and reps: Perform 2 sets of 8 to 12 reps per side. Keep the tempo smooth and controlled.
Beginners: Touch the opposite knee or shin instead of the toe.
Intermediate: Reach toward the opposite foot while keeping the spine long.
Advanced: Add a small pause at the bottom and return slowly without losing balance.
Rest: Rest 30 to 45 seconds between sets.
How to do it:
- Stand with your feet wider than hip-width.
- Extend your arms out to the sides.
- Brace your core and keep your spine long.
- Hinge slightly and rotate to reach your right hand toward your left foot.
- Return to standing with control.
- Repeat on the other side.
Common mistakes: Rounding the back aggressively, forcing the hamstring stretch, moving too fast, locking the knees hard, or letting the head drop.
Expert tip: Hinge and rotate with control. You do not need to touch your toe for the exercise to work.
Exercise variations: Try opposite-knee touches, opposite-shin touches, alternating toe touches, or slow windmill-style reaches.
Easier variation: Reach toward the opposite knee or thigh.
Harder variation: Slow the lowering phase and pause for 1 second near the bottom.
7. Standing Trunk Rotation
Best for: Learning controlled rotation, warming up the core, and improving trunk awareness.
Muscles worked: Obliques, transverse abdominis, rectus abdominis, spinal stabilizers, hips, shoulders, and upper back.
Why it stands out: Standing trunk rotation teaches you to rotate through a controlled range without throwing your spine around. It is a simple way to prepare for wood chops, rotational slams, and sports-style movement.
Suggested sets and reps: Perform 2 sets of 10 to 15 reps per side. Use a slow, smooth rhythm.
Beginners: Keep your hands on your chest and rotate only a small amount.
Intermediate: Extend your arms in front of you and keep the hips mostly stable.
Advanced: Hold a light medicine ball or dumbbell close to your chest.
Rest: Rest 30 to 45 seconds between sets.
How to do it:
- Stand with your feet hip-width to shoulder-width apart.
- Soften your knees and brace your core.
- Hold your hands at chest height.
- Rotate your torso to one side without forcing the range.
- Return to center.
- Rotate to the other side and continue alternating.
Common mistakes: Swinging the arms, twisting through the lower back too aggressively, locking the knees, losing balance, or holding the breath.
Expert tip: Rotate from your upper trunk while your hips stay controlled. Smooth movement beats big movement.
Exercise variations: Try arms-crossed trunk rotation, medicine ball trunk rotation, banded trunk rotation, or split-stance trunk rotation.
Easier variation: Sit on a bench or reduce the rotation range.
Harder variation: Hold a light medicine ball close to your chest and pause at the end of each rotation.
8. Standing Wood Chop
Best for: Oblique strength, rotational power control, athletic core training, and full-body coordination.
Muscles worked: Obliques, transverse abdominis, rectus abdominis, glutes, quads, hamstrings, shoulders, upper back, and hip rotators.
Equipment needed: Medicine ball, dumbbell, cable machine, or resistance band.
Why it stands out: The wood chop trains the core in a diagonal pattern, which makes it useful for rotational sports and everyday reaching or lifting patterns. ACE describes the standing wood chop as a functional but advanced movement that should be learned in stages before adding more range and rotation. ACE
Suggested sets and reps: Perform 2 to 3 sets of 8 to 12 reps per side. Start light and keep the movement controlled before adding speed.
Beginners: Use a light medicine ball or no weight and keep the ball close to your body.
Intermediate: Use a band or cable and rotate through the hips and trunk together.
Advanced: Use a stronger band, cable, or medicine ball and add a more athletic pivot.
Rest: Rest 45 to 75 seconds between sets.
How to do it:
- Stand with your feet about shoulder-width apart.
- Hold a light medicine ball, dumbbell, band handle, or cable handle.
- Start with your hands high on one side of your body.
- Brace your core.
- Move your hands diagonally down across your body.
- Let your hips rotate naturally if using the advanced version.
- Return with control and repeat before switching sides.
Common mistakes: Using too much weight, rounding the back, yanking with the arms, twisting the knees, or letting the lower back take over.
Expert tip: Keep the movement connected. Your arms guide the load, but your hips and core control the pattern.
Exercise variations: Try high-to-low wood chops, low-to-high wood chops, cable wood chops, band wood chops, or medicine ball wood chops.
Easier variation: Practice the diagonal path with no weight and keep your torso more stable.
Harder variation: Use a cable or band and add a controlled pivot through the back foot.
9. Pallof Press
Best for: Anti-rotation core strength, posture, spinal control, and beginner-to-intermediate strength training.
Muscles worked: Transverse abdominis, obliques, rectus abdominis, glutes, shoulders, chest, upper back, and deep spinal stabilizers.
Equipment needed: Resistance band or cable machine.
Why it stands out: The Pallof press is one of the best standing ab exercises because it trains your core to resist rotation. Instead of twisting, you fight the pull of the band or cable and keep your torso still. ACE cues the standing anti-rotation press with feet hip-width apart, knees slightly bent, a tall back, and a controlled press forward with a brief hold.
Suggested sets and reps: Perform 2 to 4 sets of 8 to 12 reps per side, or hold each press for 2 to 5 seconds.
Beginners: Use a light band and stand closer to the anchor point.
Intermediate: Step farther from the anchor to increase band tension.
Advanced: Use a split stance, half-kneeling variation, overhead Pallof press, or Pallof press with a step-out.
Rest: Rest 45 to 75 seconds between sides or sets.
How to do it:
- Anchor a band at chest height or set a cable at chest height.
- Stand sideways to the anchor with your feet hip-width apart.
- Hold the handle at the center of your chest.
- Brace your core and squeeze your glutes lightly.
- Press your hands straight forward.
- Hold without letting your torso rotate.
- Bring your hands back to your chest with control.
Common mistakes: Letting the band twist your torso, shrugging the shoulders, arching the lower back, locking the knees, or using too much resistance.
Expert tip: Your body should look boring during this exercise. The band wants movement, but your torso stays quiet.
Exercise variations: Try standard Pallof presses, Pallof holds, Pallof press step-outs, overhead Pallof presses, or split-stance Pallof presses.
Easier variation: Stand closer to the band anchor and shorten the hold.
Harder variation: Step farther from the anchor or pause longer with your arms fully extended.
10. Anti-Rotation Reverse Lunge
Best for: Combining core stability, balance, hip control, and lower-body strength.
Muscles worked: Obliques, transverse abdominis, glutes, quads, hamstrings, adductors, calves, shoulders, and deep spinal stabilizers.
Equipment needed: Resistance band or cable machine.
Why it stands out: This exercise adds lower-body movement to anti-rotation training. Your core has to resist the band or cable while your legs perform a reverse lunge, making it more challenging than a basic Pallof press.
Suggested sets and reps: Perform 2 to 3 sets of 6 to 10 reps per side. Keep the load light enough that you can lunge without twisting.
Beginners: Master the reverse lunge and Pallof press separately before combining them.
Intermediate: Hold the band at your chest while stepping into the reverse lunge.
Advanced: Press the band forward during each reverse lunge and pause at the bottom.
Rest: Rest 60 to 90 seconds between sets.
How to do it:
- Anchor a band at chest height.
- Stand sideways to the anchor and hold the band at your chest.
- Brace your core and stand tall.
- Step one foot back into a reverse lunge.
- Keep your torso facing forward without rotating toward the anchor.
- Drive through the front foot to stand back up.
- Repeat before switching sides.
Common mistakes: Rotating toward the band, stepping too narrow, letting the front knee cave inward, rushing the lunge, or using more band tension than you can control.
Expert tip: Think of your ribs and pelvis as headlights. Keep both headlights pointing straight ahead.
Exercise variations: Try a banded anti-rotation reverse lunge, cable anti-rotation lunge, split-stance anti-rotation hold, or Pallof press lunge.
Easier variation: Hold a split stance without lunging and resist the band pull.
Harder variation: Press the band forward at the bottom of each reverse lunge.
11. Suitcase Carry
Best for: Lateral core strength, grip, posture, anti-side-bending control, and full-body stability.
Muscles worked: Obliques, transverse abdominis, quadratus lumborum, glutes, traps, forearms, shoulders, calves, and spinal stabilizers.
Equipment needed: One dumbbell, kettlebell, or loaded carry handle.
Why it stands out: The suitcase carry is simple but highly effective. Holding weight on one side forces your core to resist leaning, twisting, and collapsing. It is one of the most practical standing core drills because it closely resembles carrying a bag in daily life.
Suggested sets and reps: Perform 2 to 4 carries of 20 to 40 yards per side, or 20 to 45 seconds per side. Choose a load that feels challenging but does not pull you out of alignment.
Beginners: Use a light dumbbell and walk slowly for short distances.
Intermediate: Increase the load or distance while keeping your shoulders level.
Advanced: Use a heavier kettlebell or perform suitcase marches instead of walking.
Rest: Rest 45 to 90 seconds between carries.
How to do it:
- Stand tall with one dumbbell or kettlebell at your side.
- Grip the handle firmly.
- Brace your core and keep your shoulders level.
- Walk slowly without leaning toward or away from the weight.
- Keep your steps controlled.
- Switch sides and repeat for the same distance or time.
Common mistakes: Leaning away from the weight, hiking one shoulder, walking too fast, letting the weight bump into your leg, or losing rib and pelvis alignment.
Expert tip: Imagine balancing a glass of water on your head. Stay tall and level with every step.
Exercise variations: Try suitcase carries, suitcase marches, front-rack carries, overhead carries, or uneven farmer’s carries.
Easier variation: Use a lighter dumbbell and walk a shorter distance.
Harder variation: Use a heavier load or perform slow suitcase marches in place.
12. Farmer’s Carry
Best for: Full-body strength, core endurance, posture, grip, and loaded walking.
Muscles worked: Transverse abdominis, obliques, spinal stabilizers, traps, forearms, shoulders, glutes, quads, hamstrings, calves, and upper back.
Equipment needed: Two dumbbells, kettlebells, or farmer’s handles.
Why it stands out: The farmer’s carry trains your core to hold a strong position while both sides of the body are loaded. ACE lists the farmer’s carry as a full-body integrated dumbbell exercise and cues walking a set distance while keeping the back straight.
Suggested sets and reps: Perform 2 to 4 carries of 20 to 50 yards, or 20 to 60 seconds. Use a load that challenges your grip and posture without causing your shoulders to round.
Beginners: Start with light dumbbells and shorter carries.
Intermediate: Increase distance before increasing weight.
Advanced: Use heavier loads, slower steps, or carry at the end of a strength workout as a finisher.
Rest: Rest 60 to 120 seconds between carries.
How to do it:
- Stand between two dumbbells or kettlebells.
- Pick them up with a flat back and strong grip.
- Stand tall with your arms at your sides.
- Brace your core and keep your shoulders down and back.
- Walk with controlled steps.
- Set the weights down safely when finished.
Common mistakes: Rounding the shoulders, rushing, shrugging, holding the breath, leaning backward, or choosing a load that ruins posture.
Expert tip: Carry the weights like you are trying to look taller with every step.
Exercise variations: Try dumbbell farmer’s carries, kettlebell farmer’s carries, trap-bar carries, or timed farmer’s holds.
Easier variation: Use lighter dumbbells and walk a shorter distance.
Harder variation: Use heavier weights or extend the carry time while keeping posture clean.
13. Rotational Medicine Ball Slam
Best for: Advanced core power, conditioning, rotational coordination, and athletic training.
Muscles worked: Obliques, rectus abdominis, transverse abdominis, glutes, quads, hamstrings, calves, shoulders, lats, chest, and upper back.
Equipment needed: Slam ball or non-bouncing medicine ball.
Why it stands out: The rotational slam is a powerful standing ab exercise that trains the core, hips, and shoulders together. ACE describes the rotational slam as a full-body movement that starts with the ball overhead and uses a squat and twist to slam the ball to one side before alternating sides. ACE
Suggested sets and reps: Perform 2 to 4 sets of 4 to 8 reps per side. Keep the reps crisp and stop the set before power or control drops.
Beginners: Do not start here. Learn standing trunk rotations and wood chops first.
Intermediate: Use a light slam ball and move at a controlled speed.
Advanced: Use a moderate slam ball and perform explosive reps while maintaining safe hip and spine mechanics.
Rest: Rest 60 to 120 seconds between sets.
How to do it:
- Stand with your feet about shoulder-width apart.
- Hold a slam ball with both hands.
- Bring the ball overhead while bracing your core.
- Rotate and squat slightly as you slam the ball down to one side.
- Catch or collect the ball safely.
- Lift it overhead again and slam to the opposite side.
Common mistakes: Using a ball that bounces unpredictably, slamming with a rounded back, twisting the knees, losing control of the ball, or doing too many tired reps.
Expert tip: Power should come from the ground up. Use your feet, hips, trunk, and arms together instead of only throwing with your shoulders.
Exercise variations: Try rotational slams, front slams, side slams, scoop tosses, or half-kneeling medicine ball throws if you have a safe wall and proper coaching.
Easier variation: Practice a slow medicine ball wood chop without slamming.
Harder variation: Use a slightly heavier slam ball or add a short reset between explosive reps to keep power high.
How to Choose the Right Standing Ab Exercises
Choose standing ab exercises based on your goal and current control. If you are new to core training, start with standing marches, standing bicycle crunches, overhead side bends, and cross-body knee drives. These build coordination without much equipment.
- If your goal is stronger obliques, include side bends, trunk rotations, wood chops, and Pallof presses.
- If your goal is better balance, use marches, cross-body knee drives, suitcase carries, and anti-rotation lunges.
- If your goal is athletic power, progress toward wood chops and rotational medicine ball slams.
A good rule is to progress only when you can keep your ribs down, breathe steadily, avoid lower-back discomfort, and finish each set without twisting, leaning, or rushing.
Benefits of Standing Ab Exercises
Standing ab exercises can help you train your core without needing a mat, bench, or floor space. They are also easier to add between strength exercises, before cardio, or at the end of a workout.
They may help build better balance because many standing core drills require single-leg control, weight shifting, or a stable base while the upper body moves. They can also strengthen the obliques, which help control side bending and rotation.
Another benefit is that standing ab work often feels more athletic. Exercises like wood chops, Pallof presses, loaded carries, and rotational slams train the core to create or resist movement through the trunk. ACE describes the standing anti-rotation press as an intermediate core exercise using a band or cable, with the goal of pressing forward while keeping the body tall and controlled. ACE
Beginner Standing Ab Workout
Use this workout 2 to 3 days per week. Keep the effort around RPE 5 to 6. Rest 30 to 60 seconds between exercises.
| Exercise | Sets | Reps |
|---|---|---|
| Standing March | 2 | 20 total reps |
| Standing Bicycle Crunch | 2 | 8 reps per side |
| Overhead Side Bend | 2 | 8 reps per side |
| Standing Cross-Body Knee Drive | 2 | 10 reps per side |
| Standing Trunk Rotation | 2 | 10 reps per side |
Progress by adding 2 reps per side, slowing the tempo, or adding one extra set. Do not add weight until you can control the no-equipment version.
Intermediate Standing Core Workout With Weights
Use this routine 2 days per week after your main strength workout or as a short standalone session. Keep most sets around RPE 6 to 8 and stop before your form breaks.
| Exercise | Sets | Reps or Time |
|---|---|---|
| Pallof Press | 3 | 8 to 12 reps per side |
| Standing Wood Chop | 3 | 8 to 10 reps per side |
| Suitcase Carry | 3 | 20 to 40 yards per side |
| Farmer’s Carry | 2 | 30 to 45 seconds |
| Rotational Medicine Ball Slam | 2 | 4 to 6 reps per side |
Progress by adding time, distance, or light resistance. Add load slowly because standing core exercises can become sloppy when the weight is too heavy.
How Often Should You Do Standing Ab Exercises?
Most people can train standing abs 2 to 4 days per week, depending on intensity. Light no-equipment movements can work well in warm-ups. Heavier exercises like loaded carries, Pallof presses, wood chops, and rotational slams should be programmed like strength exercises with enough rest and recovery.
The CDC recommends adults include muscle-strengthening activity at least 2 days per week as part of a complete activity plan. CDC lists muscle-strengthening activities for all major muscle groups, including the abdomen, as part of adult activity recommendations.
ACSM’s 2026 resistance training update also emphasizes consistency, individualization, and the usefulness of different training tools, including bodyweight, bands, and home-based routines. ACSM
Common Mistakes to Avoid
The biggest mistake is moving too fast. Standing ab exercises should feel controlled. If you swing through every rep, you may miss the core training effect and turn the movement into momentum.
Another mistake is arching the lower back. Keep your ribs stacked over your pelvis, especially during marches, overhead side bends, Pallof presses, and wood chops.
Do not use heavy weights too soon. A heavy dumbbell side bend or wood chop can quickly shift stress away from the abs and into the lower back, shoulders, or hips if your form is not ready.
Avoid holding your breath. Breathe steadily, brace lightly, and keep your jaw and shoulders relaxed.
Safety Tips and Progression Guidelines
Start with low-impact movements and a comfortable range of motion. Stop if you feel sharp pain, numbness, dizziness, chest pain, or unusual symptoms. If you have back problems, osteoporosis, recent surgery, balance concerns, pregnancy-related concerns, or a medical condition, speak with a qualified healthcare professional before starting or progressing core exercises.
Progress in this order: better control first, more reps second, longer sets third, and heavier load last. For balance-based exercises, keep a wall, chair, or rack nearby until you feel stable.
Standing ab exercises should challenge your trunk, but they should not create pinching, sharp pain, or a feeling that your spine is being forced.
FAQ
Are standing ab exercises effective?
Yes, standing ab exercises can be effective when you use controlled form, proper bracing, and the right level of resistance. They train your abs, obliques, deep core muscles, hips, and posture in an upright position.
Can standing ab exercises replace crunches?
They can replace crunches if your main goal is functional core strength, balance, and trunk control. Crunches mainly train spinal flexion, while standing core exercises can train rotation, anti-rotation, side bending, carrying, and balance.
What is the best standing ab exercise for beginners?
The standing march is one of the best starting exercises because it is low impact and easy to modify. Standing bicycle crunches, overhead side bends, and standing trunk rotations are also beginner-friendly when performed slowly.
What is the best standing ab exercise for obliques?
Pallof presses, standing wood chops, standing bicycle crunches, suitcase carries, and dumbbell side bends are strong options for the obliques. Use a mix of rotation and anti-rotation exercises for better overall core development.
Can I do standing ab exercises every day?
Light standing core drills can often be done frequently, especially as part of a warm-up. Heavier loaded exercises should not be trained hard every day. Give your muscles time to recover, especially after carries, weighted side bends, wood chops, or medicine ball slams.
Do standing ab exercises burn belly fat?
Standing ab exercises strengthen and condition the muscles of your core, but they do not directly burn fat from one specific area. For body composition changes, combine strength training, regular physical activity, enough recovery, and nutrition habits that fit your goals.
Conclusion
Standing ab exercises are a practical way to train your core without lying on the floor. Start with simple movements like standing marches, bicycle crunches, and side bends, then progress to Pallof presses, wood chops, carries, and rotational slams as your strength and balance improve.
The best approach is simple: move with control, breathe steadily, brace your core, and choose exercises that match your current level. Use these movements 2 to 4 times per week to build stronger, more useful core strength from the ground up.
This content is for informational purposes only and is not a substitute for professional medical advice.
References
- American Council on Exercise: Standing Anti-Rotation Press
- American Council on Exercise: Standing Wood Chop
- American Council on Exercise: Farmer’s Carry
- American Council on Exercise: Rotational Slam
- Mayo Clinic: Exercises to Improve Your Core Strength
- Cleveland Clinic: Core Exercises for All Levels
- CDC: Adult Activity Guidelines
- ACSM: Updated Resistance Training Guidelines