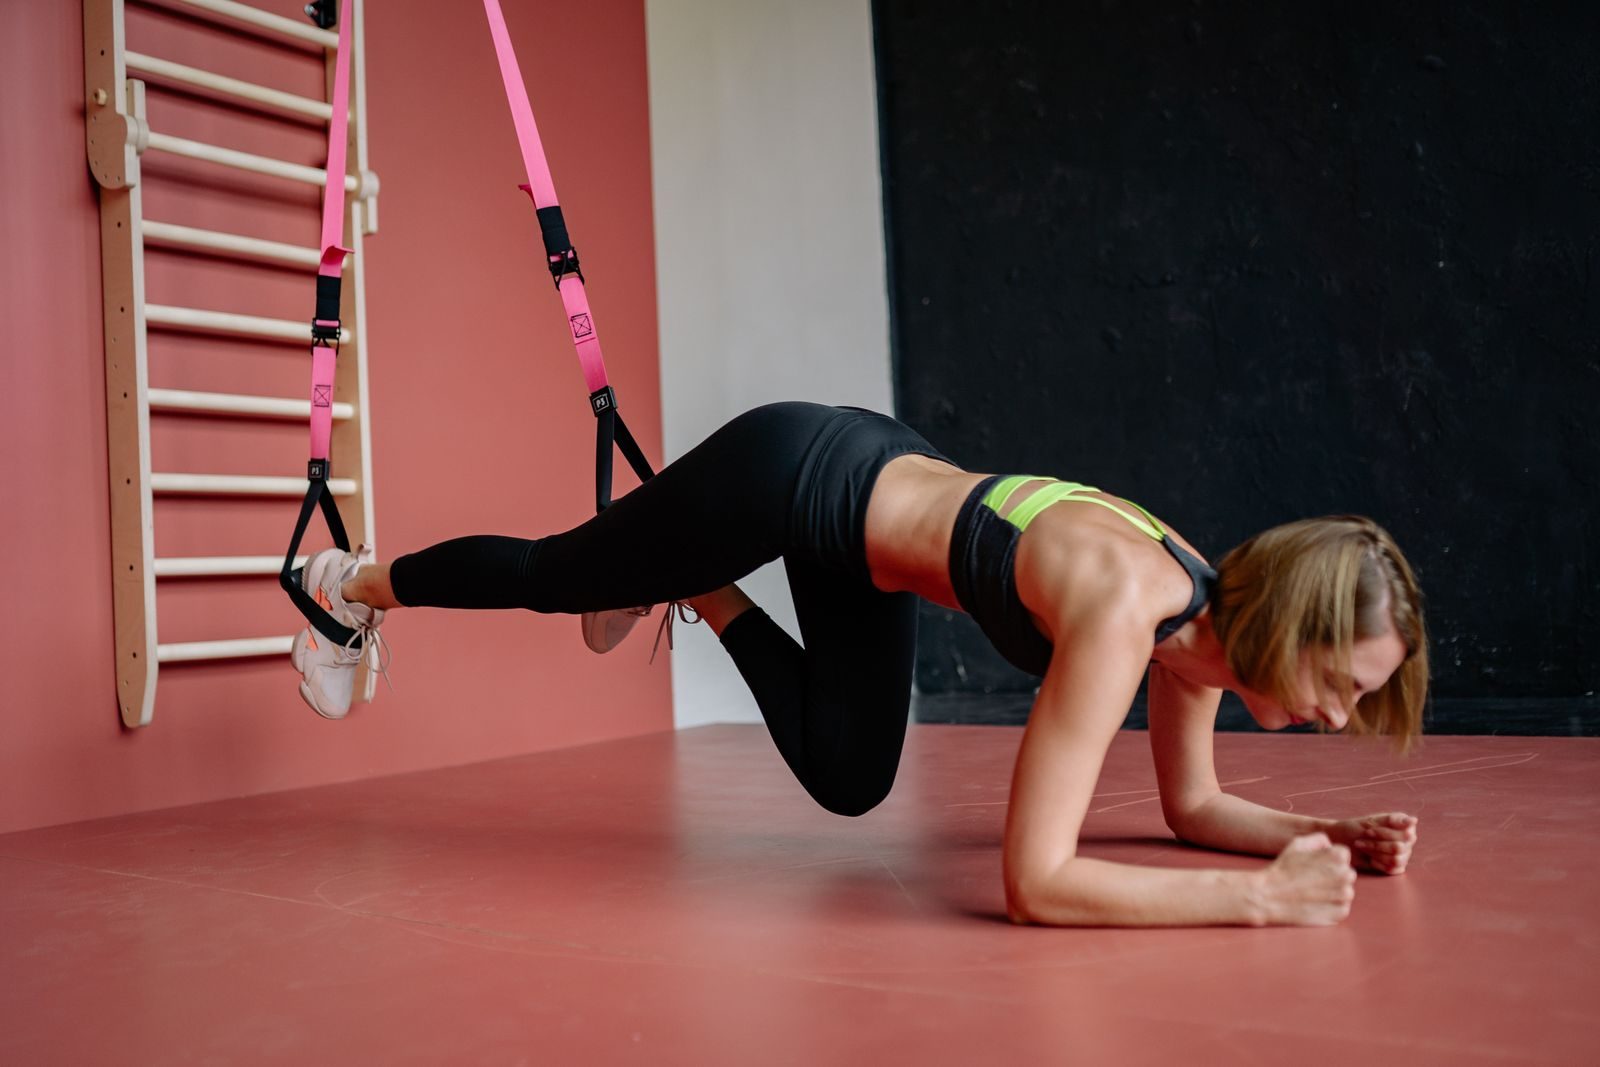
TRX leg exercises can build lower-body strength when you use the straps for controlled support and make the movements progressively more challenging. A suspension trainer lets you practice squats, lunges, hip hinges, bridges, hamstring curls, and calf raises with resistance adjusted to your ability.
The key is not simply holding the handles or adding instability. Your legs still need to work hard enough to create a training effect. This guide explains the best exercises, correct form, suitable progressions, and how to organize them into an effective TRX leg workout.
TRX Leg Exercises at a Glance
| Exercise | Best for | Main muscles | Difficulty | Starting target |
|---|---|---|---|---|
| TRX Squat | Foundational lower-body strength | Quadriceps and glutes | Beginner | 2–3 sets of 8–15 |
| TRX Assisted Reverse Lunge | Single-leg control | Glutes and quadriceps | Beginner | 2–3 sets of 6–10 per side |
| TRX Split Squat | Stationary unilateral strength | Quadriceps and glutes | Beginner–intermediate | 2–3 sets of 8–12 per side |
| TRX Rear-Foot Suspended Lunge | Challenging single-leg strength | Glutes, quadriceps, and hamstrings | Intermediate | 2–3 sets of 6–10 per side |
| TRX Assisted Pistol Squat | Advanced single-leg strength | Quadriceps and glutes | Intermediate–advanced | 2–3 sets of 5–8 per side |
| TRX Side-to-Side Lunge | Lateral strength and hip control | Glutes, quadriceps, and adductors | Beginner–intermediate | 2–3 sets of 8–12 per side |
| TRX Single-Leg Hip Hinge | Posterior-chain strength | Hamstrings and glutes | Intermediate | 2–3 sets of 8–12 per side |
| TRX Glute Bridge | Hip-extension strength | Glutes and hamstrings | Beginner | 2–3 sets of 10–15 |
| TRX Hamstring Curl | Direct hamstring training | Hamstrings and glutes | Intermediate | 2–3 sets of 8–12 |
| TRX Calf Raise | Lower-leg strength | Gastrocnemius and soleus | Beginner | 2–4 sets of 10–20 |
Strap-length labels such as short, mid-length, fully lengthened, and mid-calf are starting points. The exact buckle position may vary with the suspension-trainer model and anchor height.
Can TRX Leg Exercises Build Strength?
TRX exercises use your body weight as resistance. Standing exercises can also use the straps for balance or assistance, while floor exercises place the feet in the cradles to create resistance and instability.
The current American College of Sports Medicine resistance-training position stand concludes that progressive resistance training can improve strength, muscle size, power, balance, endurance, and physical function. Strength development generally benefits from controlled full-range movement, sufficiently challenging resistance, two to three working sets, and training at least twice per week.
TRX training can meet those requirements, especially for beginners and intermediate exercisers. However, pulling hard with your arms during squats and lunges reduces the amount of work performed by your legs. As you improve, use less hand assistance, increase the range of motion, choose harder single-leg variations, or add external resistance.
A 2024 randomized trial published in Scientific Reports involving young male Navy personnel found that eight weeks of suspension training performed three times per week improved several physical-performance and lower-extremity movement measures. Deep squat-jump performance did not significantly improve, and the narrow military sample means the results should not be applied to everyone without caution.
How to Set Up Your TRX Safely
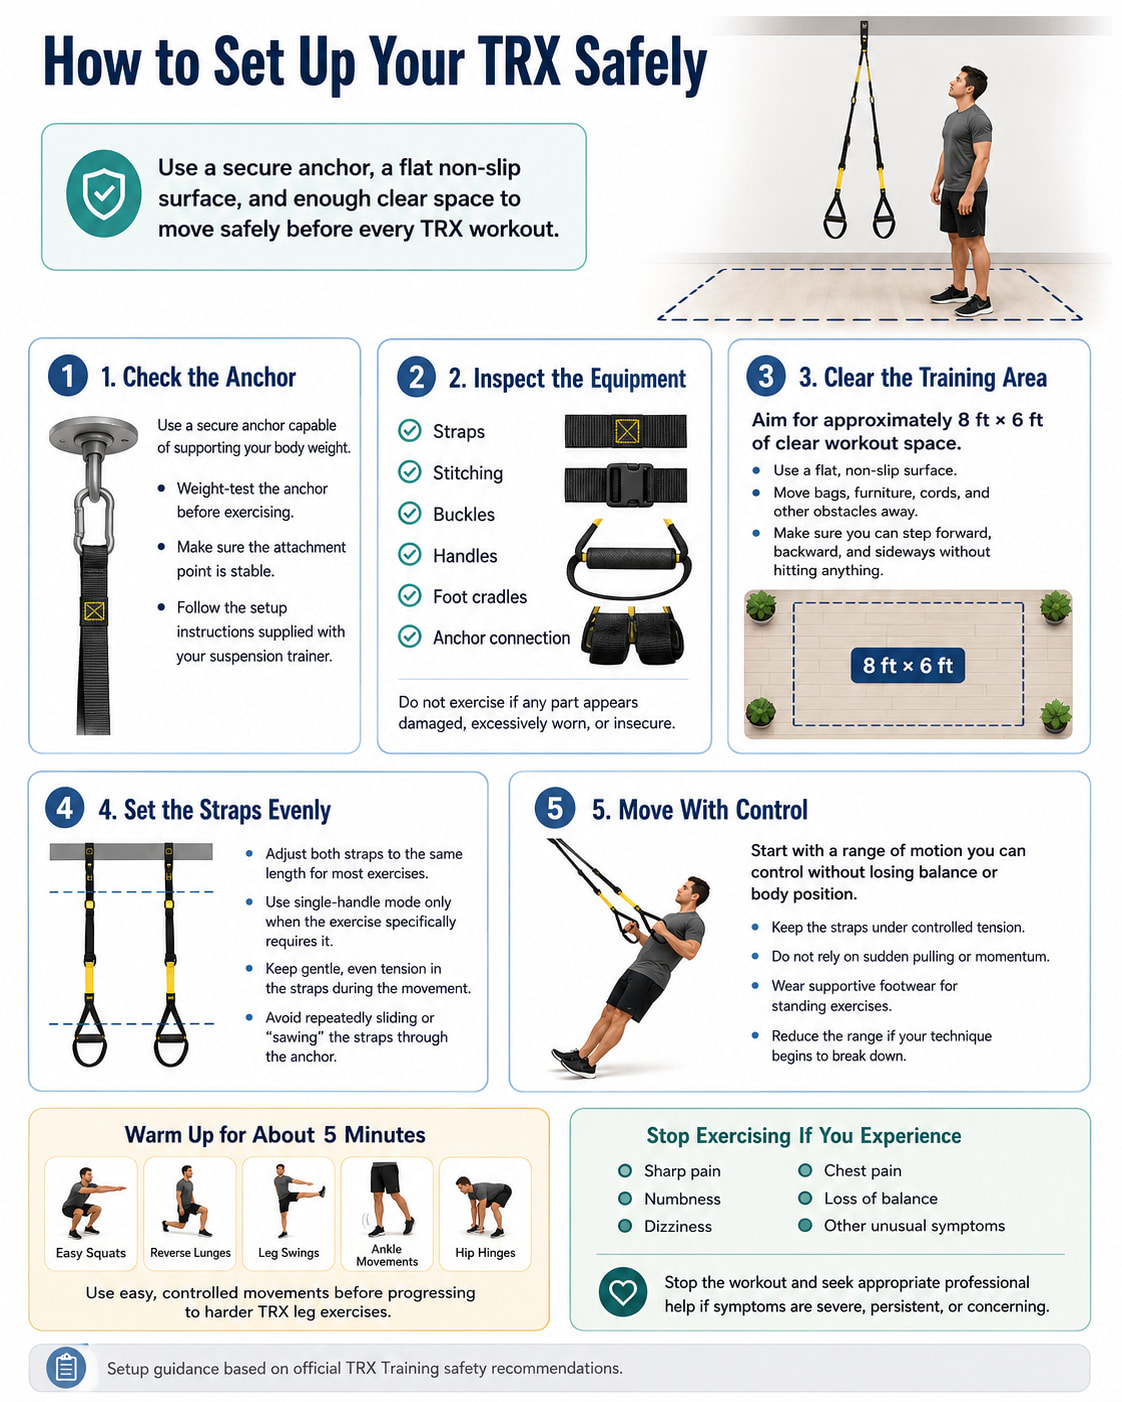
Before exercising, follow the instructions supplied with your suspension trainer. Official TRX Training setup and safety guidance recommends a secure anchor capable of supporting your body weight, a flat non-slip surface, and a clear workout area approximately 8 feet long by 6 feet wide.
Before every workout:
- Inspect the straps, stitching, buckles, handles, cradles, and anchor for damage.
- Weight-test the anchor before beginning.
- Keep the floor clear of bags, furniture, cords, and other obstacles.
- Adjust both straps evenly unless the exercise specifically requires single-handle mode.
- Maintain even strap tension without repeatedly sliding or “sawing” the straps through the anchor.
- Wear supportive footwear for standing exercises.
- Start with a range of motion you can control.
Warm up for approximately five minutes with easy squats, alternating reverse lunges, leg swings, ankle movements, and hip hinges.
Stop exercising if you experience sharp pain, numbness, dizziness, chest pain, loss of balance, or other unusual symptoms.
10 Best TRX Leg Exercises for Lower-Body Strength
These TRX leg exercises cover the major lower-body movement patterns. You do not need to perform all ten in one session. Most workouts only need four to six well-chosen exercises.
1. TRX Squat
Best for: Learning squat mechanics and building foundational lower-body strength.
Muscles worked: Quadriceps and gluteus maximus, with assistance from the adductors, hamstrings, calves, and trunk muscles.
Equipment and setup: Set the straps to a short or mid-length position. Face the anchor and hold the handles around chest height.
Sets, reps, and rest: Perform 2–3 sets of 8–15 repetitions. Rest for 60–90 seconds.
How to Do It
- Stand with your feet approximately hip- to shoulder-width apart and create light tension in the straps.
- Brace your trunk, bend your hips and knees, and lower into a squat.
- Keep your heels planted and allow your knees to track in the same direction as your toes.
- Descend only as far as you can maintain control, then press through your whole foot to stand.
- Finish tall without leaning backward or pulling yourself up with your arms.
Common mistakes: Hanging backward from the handles, pulling excessively with the arms, lifting the heels, allowing the knees to collapse inward, or rushing the bottom position.
Regression or progression: Use more arm support and a shallower range if needed. Progress by reducing hand assistance, squatting deeper, adding a pause, slowing the lowering phase, or wearing a weighted vest.
Coaching cue: Use the straps as a guide, not a tow rope.
Official TRX exercise guidance emphasizes keeping the straps under tension while leaving most of the work to the lower body.
2. TRX Assisted Reverse Lunge
Best for: Developing single-leg strength while the handles provide balance assistance.
Muscles worked: Gluteus maximus and quadriceps, with help from the hamstrings, adductors, calves, and hip stabilizers.
Equipment and setup: Use a mid-length strap position. Face the anchor with the handles near your ribs.
Sets, reps, and rest: Perform 2–3 sets of 6–10 repetitions per side. Rest for 60–90 seconds.
How to Do It
- Stand tall with your feet approximately hip-width apart and light tension in the straps.
- Step one foot backward, landing on the ball of the rear foot.
- Bend both knees and lower the back knee toward the floor.
- Keep the front heel planted and the front knee aligned with the foot.
- Push through the front foot to return to standing, then repeat on the other side.
Common mistakes: Taking an excessively short step, lifting the front heel, placing the feet on a tightrope-width line, pulling with the arms, or allowing the front knee to collapse inward.
Regression or progression: Keep the feet stationary and perform a supported split squat if the stepping motion is difficult. Progress by using less assistance, adding a knee drive, or holding a dumbbell or kettlebell.
The reverse-lunge pattern in TRX strength-training guidance uses a controlled backward step and keeps the front heel grounded.
3. TRX Split Squat
Best for: Building unilateral leg strength without the balance demands of stepping between repetitions.
Muscles worked: Quadriceps and gluteus maximus, with the hamstrings, adductors, calves, and core assisting.
Equipment and setup: Set the straps to mid-length and face the anchor. Place one foot forward and the other behind you.
Sets, reps, and rest: Perform 2–3 sets of 8–12 repetitions per side. Rest for 60–90 seconds.
How to Do It
- Hold the handles with your elbows close to your sides and the straps under light tension.
- Place the front foot flat on the floor and support the rear foot on the ball of the foot.
- Lower the back knee toward the floor while keeping your torso tall.
- Keep the front knee tracking over the toes and the front heel grounded.
- Push through the front foot to straighten both legs.
Common mistakes: Using an overly narrow stance, forcing the rear heel down, shifting entirely onto the toes, twisting the pelvis, or pulling the torso upward with the handles.
Regression or progression: Shorten the range and use more strap support if needed. Progress by reducing assistance, elevating the front foot slightly, adding a pause, or holding external weight.
TRX guidance classifies the split squat as a beginner exercise and recommends a mid-length strap setting with the torso kept upright.
4. TRX Rear-Foot Suspended Lunge
Best for: Increasing the balance and control demands of a rear-foot-elevated lunge.
Muscles worked: Gluteus maximus and quadriceps, with assistance from the hamstrings, adductors, calves, and hip stabilizers.
Equipment and setup: Set the straps to mid-calf length. Place them in single-handle mode or bring the foot cradles together according to the manufacturer’s instructions. Face away from the anchor.
Sets, reps, and rest: Perform 2–3 sets of 6–10 repetitions per side. Rest for 75–120 seconds.
How to Do It
- Place the top of one foot securely in the cradle with the suspended foot beneath the anchor.
- Step the grounded foot forward until you can stand comfortably without the strap pulling you backward.
- Brace your trunk and keep your hips facing forward.
- Bend the grounded knee and hip while allowing the suspended leg to travel behind you.
- Lower under control, then drive through the grounded foot to return to standing.
Common mistakes: Standing too close to the anchor, twisting the pelvis, bouncing out of the bottom, letting the grounded knee collapse inward, or allowing the suspended leg to swing uncontrollably.
Regression or progression: Master the regular TRX split squat first. You can also hold a stable support while learning the suspended version. Progress by adding external resistance or a longer controlled lowering phase.
TRX instructions use a mid-calf setup with the suspended foot positioned beneath the anchor and classify this as a more advanced single-leg movement.
5. TRX Assisted Pistol Squat
Best for: Developing advanced single-leg squat strength while using the handles for balance.
Muscles worked: Quadriceps and gluteus maximus, with assistance from the hamstrings, calves, hip stabilizers, and core.
Equipment and setup: Set the straps to mid-length and face the anchor.
Sets, reps, and rest: Perform 2–3 sets of 5–8 controlled repetitions per side. Rest for 90–120 seconds.
How to Do It
- Stand on one leg in line with the anchor and hold the handles with light tension.
- Extend the nonworking leg in front of you.
- Push your hips back and bend the working knee to lower under control.
- Keep the working foot planted and the knee aligned with the toes.
- Use only enough assistance to maintain position, then drive through the working foot to stand.
You do not need to reach the floor. Use the deepest range you can control without the heel lifting or the knee collapsing.
Common mistakes: Pulling aggressively with the arms, forcing excessive depth, rolling onto the inside of the foot, rounding the lower back, or allowing the working knee to move inward.
Regression or progression: Begin with a TRX-assisted single-leg squat to a chair or box. Progress by lowering the box, reducing hand assistance, pausing at the bottom, or adding a light load.
TRX guidance lists the pistol squat as an intermediate exercise and recommends using the straps primarily for balance rather than hanging backward from them.
6. TRX Side-to-Side Lunge
Best for: Training lateral movement, inner-thigh strength, and hip control.
Muscles worked: Gluteus maximus, gluteus medius, quadriceps, and adductors, with help from the hamstrings and calves.
Equipment and setup: Set the straps to a short or mid-length position. Face the anchor and begin with a wide stance.
Sets, reps, and rest: Perform 2–3 sets of 8–12 repetitions per side. Rest for 60–90 seconds.
How to Do It
- Hold the handles near chest height with light strap tension.
- Shift your weight toward one leg while pushing that hip backward.
- Bend the working knee while keeping the opposite leg relatively straight.
- Keep both feet planted and the working knee aligned with the toes.
- Push through the working foot to return to the center, then repeat on the other side.
Common mistakes: Letting the foot roll inward, allowing the knee to collapse, rotating the torso, lifting the heel, or using the arms to pull back to the center.
Regression or progression: Begin with a shallow side-to-side weight shift. Progress by increasing the range, using less support, holding a weight at your chest, or performing a step-out lateral lunge.
TRX coaching emphasizes sitting the hips back, controlling the movement, and avoiding excessive backward leaning on the straps.
7. TRX Single-Leg Hip Hinge
Best for: Strengthening the posterior chain while improving single-leg hip control.
Muscles worked: Hamstrings and gluteus maximus, with assistance from the adductor magnus, trunk muscles, and foot and ankle stabilizers.
Equipment and setup: Set the straps to mid-length and face the anchor.
Sets, reps, and rest: Perform 2–3 sets of 8–12 repetitions per side. Rest for 60–90 seconds.
How to Do It
- Hold the handles around chest height and shift your weight onto one leg.
- Keep a small bend in the working knee and lift the other foot behind you.
- Push your hips backward as your torso inclines forward and the free leg extends behind you.
- Keep your hips square and your spine neutral.
- Stop when you feel controlled hamstring tension, then drive the working hip forward to stand.
Common mistakes: Turning the movement into a squat, rotating the pelvis, locking the working knee, rounding the back, or reaching forward from the shoulders instead of hinging at the hip.
Regression or progression: Use a kickstand position with the rear toes lightly touching the floor. Progress by reducing strap assistance, adding a pause, or holding a dumbbell in one hand.
TRX coaching describes keeping the hips square and maintaining a long, controlled position through the torso and raised leg.
8. TRX Glute Bridge
Best for: Building hip-extension strength with less balance demand than standing exercises.
Muscles worked: Gluteus maximus, with assistance from the hamstrings, adductor magnus, and trunk muscles.
Equipment and setup: Fully lengthen the straps. Lie on your back beneath or close to the anchor and place your heels in the foot cradles.
Sets, reps, and rest: Perform 2–3 sets of 10–15 repetitions. Rest for 60–90 seconds.
How to Do It
- Lie on your back with your knees bent to approximately 90 degrees and your heels secured in the cradles.
- Keep your feet flexed, knees approximately hip-width apart, and arms resting on the floor.
- Brace your trunk and gently tuck your pelvis.
- Press your heels into the cradles and raise your hips.
- Stop when your shoulders, hips, and knees form a straight diagonal line, squeeze the glutes briefly, and lower slowly.
Common mistakes: Arching the lower back, pushing through the toes, flaring the ribs, letting the knees separate, or raising the hips higher than you can control.
Regression or progression: Begin with a regular floor glute bridge. Progress to a single-leg TRX bridge or the TRX hip press, which combines hip extension with knee flexion.
TRX guidance recommends fully lengthened straps, flexed feet, and a controlled hip lift without excessive spinal arching.
9. TRX Hamstring Curl
Best for: Training knee flexion and the posterior chain without a leg-curl machine.
Muscles worked: Hamstrings, with assistance from the glutes, calves, and trunk muscles.
Equipment and setup: Set the straps to mid-calf length. Lie on your back facing the anchor and place your heels securely in the cradles.
Sets, reps, and rest: Perform 2–3 sets of 8–12 repetitions. Rest for 75–120 seconds.
How to Do It
- Begin with your legs straight, feet flexed, arms on the floor, and hips raised.
- Keep your knees parallel and press both heels evenly into the cradles.
- Bend your knees and pull your heels toward your glutes.
- Keep your hips elevated instead of allowing them to drop.
- Pause briefly, then straighten your legs slowly while maintaining hip position.
Common mistakes: Letting the hips sag, jerking the heels inward, pushing excessively through the hands, losing even tension between the straps, or shortening the return phase.
Regression or progression: Use a shorter range or keep the hips on the floor while learning the curl. Progress to a full elevated curl, a TRX hip press, or a single-leg hamstring curl.
TRX guidance recommends keeping the hips lifted, the knees parallel, and the return phase controlled. Strap height may also need adjustment if the setup creates uncomfortable pressure behind the knees.
10. TRX Calf Raise
Best for: Strengthening the muscles responsible for raising the heel and supporting the ankle.
Muscles worked: Gastrocnemius and soleus, with assistance from smaller foot and ankle stabilizers.
Equipment and setup: Set the straps to short or mid-length. Face the anchor and hold the handles lightly for balance.
Sets, reps, and rest: Perform 2–4 sets of 10–20 repetitions. Rest for 45–75 seconds.
How to Do It
- Stand tall with your feet approximately hip-width apart and your weight distributed across the balls of both feet.
- Use only light hand pressure on the handles.
- Raise your heels as high as you can without rolling the ankles outward.
- Pause briefly at the top.
- Lower your heels slowly until they return to the floor.
Keep your knees mostly straight to emphasize the gastrocnemius. A small knee bend places relatively more demand on the soleus.
Common mistakes: Bouncing through repetitions, rolling onto the outer toes, pulling with the arms, shifting the hips forward, or shortening the lowering phase.
Regression or progression: Use more hand assistance or a smaller range if needed. Progress to a single-leg version, slower lowering, longer pauses, or added external resistance.
TRX calf-raise guidance recommends rising evenly through the forefoot, pausing at the top, and lowering under control.
How to Build a TRX Leg Workout
Choose four to six exercises rather than automatically performing all ten. A balanced workout should usually contain:
- One squat variation.
- One lunge or split-squat variation.
- One hip hinge or bridge.
- One hamstring-focused exercise.
- One lateral or calf exercise when time allows.
Perform the most technically demanding movement near the beginning of the session. For example, complete pistol squats or suspended lunges before easier glute bridges and calf raises.
Most sets should finish with approximately two or three technically sound repetitions still possible. When balance, range of motion, or alignment begins to break down, the set is finished even if you have not reached the planned repetition target.
Beginner TRX Leg Workout
Complete this workout twice per week on nonconsecutive days.
| Exercise | Sets and reps |
|---|---|
| TRX Squat | 2 sets of 8–12 |
| TRX Assisted Reverse Lunge | 2 sets of 6–10 per side |
| TRX Side-to-Side Lunge | 2 sets of 6–10 per side |
| TRX Glute Bridge | 2 sets of 10–15 |
| TRX Calf Raise | 2 sets of 12–20 |
Rest: 60–90 seconds between sets.
Effort: Finish each set with approximately 2–3 good repetitions remaining.
Progression: When you can complete the top of the repetition range for every set with stable form, reduce your hand assistance slightly or increase the controlled range of motion.
Intermediate TRX Leg Workout
Complete this workout twice per week with at least one recovery day between sessions.
| Exercise | Sets and reps |
|---|---|
| TRX Assisted Pistol Squat or Split Squat | 3 sets of 5–10 per side |
| TRX Rear-Foot Suspended Lunge | 3 sets of 6–10 per side |
| TRX Single-Leg Hip Hinge | 3 sets of 8–10 per side |
| TRX Hamstring Curl | 3 sets of 8–12 |
| TRX Calf Raise | 3 sets of 12–20 |
Rest: 75–120 seconds after demanding exercises and 45–75 seconds after calf raises.
Effort: Finish most sets with 1–3 controlled repetitions remaining.
Progression: Add repetitions first. Once you reach the top of the range, reduce assistance, increase control, or add a suitable external load.
How to Make TRX Leg Exercises Harder
Progress the exercises gradually instead of changing several variables at once.
Use Less Hand Assistance
This is one of the most important progressions for standing TRX leg exercises. Hold the handles lightly and let your lower body support more of your weight.
Increase the Range of Motion
Squat or lunge deeper only while your heels remain grounded and your hips, knees, and feet stay controlled.
Slow the Lowering Phase
Take two to four seconds to lower into a squat, lunge, hinge, bridge, or hamstring curl. Avoid making the movement so slow that you have to reduce the range or lose position.
Add a Pause
Pause for one or two seconds in the most difficult controlled position, such as the bottom of a split squat or the shortened position of a hamstring curl.
Progress to Single-Leg Variations
Move from a bilateral squat to a split squat, then to an assisted pistol squat. Move from a two-leg bridge or hamstring curl to a single-leg variation only after you can keep the pelvis stable.
Add External Resistance
A weighted vest, dumbbell, kettlebell, or sandbag can increase the challenge when body weight is no longer sufficient. Add weight only after you can perform the unweighted version with consistent form.
TRX exercise guidance similarly recommends using harder variations or adding external load as strength improves.
Benefits of TRX Leg Exercises
Adjustable Support
The handles can help beginners maintain balance while practicing squats, lunges, and single-leg exercises. The amount of assistance can then be reduced as strength and confidence improve.
Multiple Movement Patterns
TRX leg training can include bilateral squats, unilateral lunges, lateral movements, hip hinges, hip extension, knee flexion, and ankle work.
Convenient Posterior-Chain Training
Exercises such as the glute bridge and hamstring curl provide direct glute and hamstring work without a weight machine.
Useful for Home and Travel Workouts
A suspension trainer is portable and can support a full lower-body session in a relatively small training area when it is attached to an appropriate anchor.
Additional Balance and Control Demands
Suspended and single-leg exercises can challenge balance and movement control. However, instability should not be assumed to make an exercise more effective.
A study published in PLOS ONE comparing a suspended lunge with a conventional Bulgarian squat found no significant increase in front-leg muscle activation from suspension alone, although force measurements differed between conditions. Choose the version that matches your training goal and that you can progressively load with good technique.
Common TRX Leg-Training Mistakes
Pulling Too Much With the Arms
The handles should not perform most of the work during squats, split squats, lunges, or pistol squats. Use only enough support to maintain balance and alignment.
Allowing the Straps to Go Slack
Slack straps can cause sudden movement and make it harder to control your position. Maintain light, even tension.
Progressing to Suspended Exercises Too Soon
A suspended lunge is not the best starting point for someone who cannot yet control a supported split squat. Build the movement pattern first.
Moving Too Quickly
Fast repetitions can hide balance problems and reduce muscular control. Lower under control and avoid bouncing out of the bottom.
Forcing a Greater Range of Motion
A deeper squat or lunge is not automatically better. Use the greatest range you can control without the heels lifting, knees collapsing, or spine losing position.
Treating Every Session as a Fast Circuit
Short rest periods may improve conditioning, but they can also reduce performance during strength-focused sets. Rest long enough to repeat the exercise with good force and technique.
Performing All Ten Exercises in One Workout
The exercises are a selection library, not a required circuit. Choose a smaller group that covers your main movement patterns.
Failing to Progress
Repeating the same easy variation indefinitely is unlikely to keep producing meaningful strength improvements. Gradually adjust assistance, range, repetitions, tempo, exercise difficulty, or external load.
Frequently Asked Questions
Are TRX leg exercises suitable for beginners?
Yes. TRX squats, supported split squats, assisted reverse lunges, glute bridges, and calf raises are practical starting choices. Beginners should delay pistol squats and rear-foot suspended lunges until they have adequate single-leg control.
Are TRX squats easier than regular squats?
They can be easier when you lean backward and use your arms for assistance. When the handles are used only lightly, the leg demand may be similar to a bodyweight squat. Added pauses, reduced assistance, single-leg variations, or external load can make the movement harder.
Can TRX leg exercises build muscle?
They may help build muscle when the exercises challenge the target muscles, use an appropriate range of motion, and become progressively harder. Advanced exercisers may need external resistance or more difficult unilateral variations to continue progressing.
How often should you perform a TRX leg workout?
Two lower-body sessions per week are a practical starting point for most people. Leave at least one recovery day between demanding sessions and adjust the frequency based on your total training, exercise difficulty, and recovery.
Which TRX exercises are best for the hamstrings?
The TRX hamstring curl directly trains knee flexion, while the single-leg hip hinge trains the hamstrings through a hip-hinge pattern. The glute bridge and suspended lunge also involve the hamstrings as assisting muscles.
Can TRX replace weighted leg training?
A TRX can provide a substantial lower-body workout for beginners, home exercisers, and people training with limited equipment. However, advanced strength goals may be easier to pursue with barbells, dumbbells, kettlebells, or machines because those tools allow resistance to be increased more precisely.
How tightly should you hold the TRX handles?
Hold them firmly enough to control the straps, but do not squeeze or pull harder than necessary. During standing leg exercises, the goal is usually to use the minimum assistance needed to maintain good form.
Conclusion
TRX leg exercises are most effective when the straps improve your control without removing the challenge from your legs. Start with supported squats, reverse lunges, split squats, bridges, and calf raises. Progress toward pistol squats, suspended lunges, single-leg hinges, and hamstring curls as your strength and balance improve.
Choose four to six exercises per session, train consistently, and make one small progression whenever you can complete your current program with controlled form.
This content is for informational purposes only and is not a substitute for medical advice.
References
- American College of Sports Medicine — Resistance Training Prescription for Muscle Function, Hypertrophy, and Physical Performance in Healthy Adults
- Aguilera-Castells et al. — Muscle Activation in Suspension Training: A Systematic Review
- Scientific Reports — Effects of Suspension Training on Physical Fitness and Lower-Extremity Biomechanical Factors
- PLOS ONE — Muscle Activity During Bulgarian Squats and Suspended Lunges
- TRX Training — Official TRX Exercise Guide
- TRX Training — TRX Leg Exercises for Lower-Body Strength
1 thought on “10 Best TRX Leg Exercises for Lower-Body Strength”