
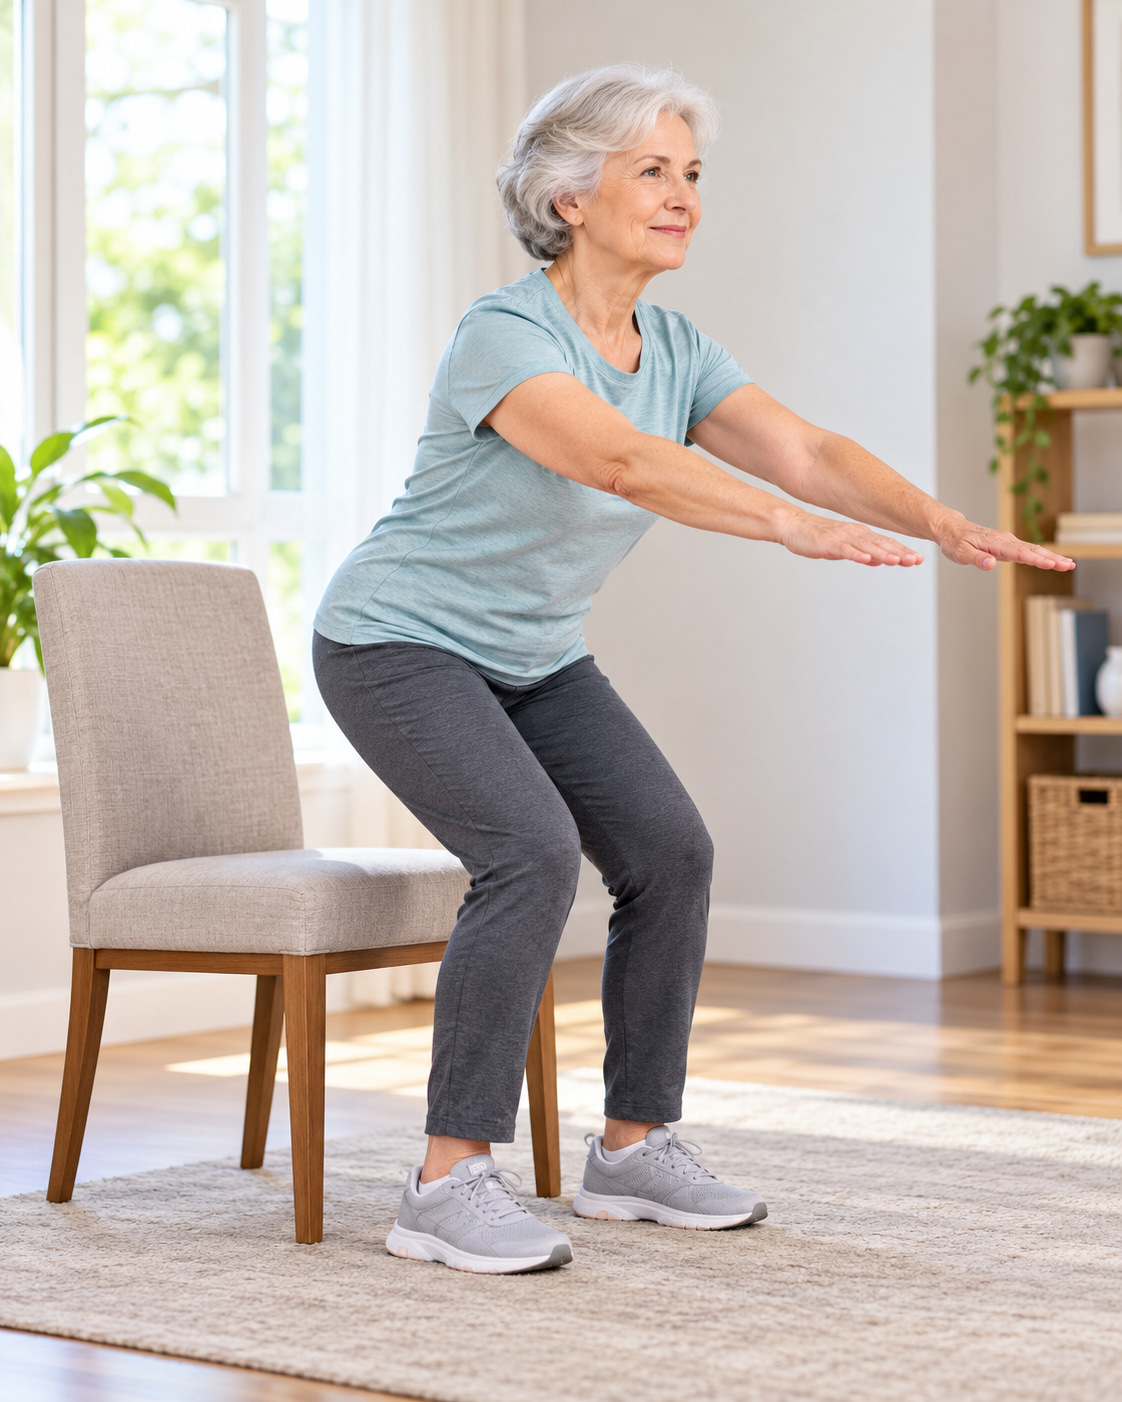
Glute exercises for seniors can strengthen the hips, support better balance, and make everyday activities like standing, walking, and climbing stairs easier. Strong glute muscles help stabilize the pelvis and control lower-body movement, especially when shifting weight from one leg to the other.
The seven exercises below include chair-based, supported standing, and floor-based options. Most require little or no equipment, making them practical for older adults who want to improve strength and mobility at home.
7 Best Glute Exercises for Seniors
These seven exercises target the glutes through different movements, including hip extension, sideways leg raises, stepping, and standing from a chair.
Beginners should start with the supported standing exercises and add more challenging movements only when they feel steady and confident.
1. Chair Sit-to-Stand
Best for: Building glute and leg strength for getting up from chairs, using the bathroom, and other everyday movements.
Muscles worked: Gluteus maximus, quadriceps, and hamstrings, with assistance from the core.
Equipment needed: A sturdy, nonrolling chair.
Sets, reps, and rest: Start with 1–2 sets of 6–10 repetitions. Rest 60–90 seconds between sets.
How to Do It
- Sit toward the front of a sturdy chair positioned against a wall, with your feet flat and approximately hip-width apart.
- Move your feet slightly behind your knees and lean forward gently from your hips.
- Press through both feet to stand upright, straightening your hips and knees.
- Pause briefly in a comfortable standing position.
- Push your hips backward and slowly lower yourself onto the chair with control.
Common mistakes: Rocking excessively to gain momentum, allowing the knees to collapse inward, or dropping onto the chair. Move slowly and keep your weight balanced over both feet.
Make it easier or harder: Use the chair’s armrests or a slightly higher seat if standing is difficult. To progress, use less hand assistance or lower yourself more slowly.
2. Supported Standing Hip Abduction
Best for: Strengthening the outer glutes that help stabilize the pelvis during walking and sideways movements.
Muscles worked: Primarily the gluteus medius and minimus, with assistance from other hip stabilizers.
Equipment needed: A sturdy chair or countertop for support.
Sets, reps, and rest: Perform 1–2 sets of 8–12 repetitions per leg. Rest 30–60 seconds as needed.
How to Do It
- Stand upright beside a sturdy countertop or chair and hold it for balance.
- Keep your feet approximately hip-width apart and your supporting knee slightly relaxed.
- Slowly raise one leg out to the side, keeping the knee relatively straight and the kneecap facing forward.
- Lift only as high as you can without leaning your body or rotating your hips.
- Lower the leg slowly and complete the repetitions before switching sides.
Common mistakes: Leaning sideways, turning the toes outward, swinging the leg, or lifting it too high. A smaller controlled movement keeps the work focused on the hip muscles.
Make it easier or harder: Begin with a small sideways movement or slide your foot across the floor. Progress by adding a light resistance band when you can control the movement comfortably.
3. Supported Standing Hip Extension
Best for: Strengthening the gluteus maximus and improving the hip extension strength used during walking, standing, and climbing stairs.
Muscles worked: Gluteus maximus and hamstrings, with assistance from the core and supporting hip muscles.
Equipment needed: A stable countertop or chair.
Sets, reps, and rest: Begin with 1–2 sets of 8–12 repetitions per leg. Rest 30–60 seconds as needed.
How to Do It
- Stand facing a sturdy countertop and hold it with both hands.
- Keep your feet hip-width apart, shoulders relaxed, and torso upright.
- Shift your weight onto one leg while keeping the supporting knee slightly bent.
- Slowly extend your opposite leg backward a short distance without arching your lower back.
- Pause briefly, then return your foot to the starting position with control.
- Complete the repetitions before switching legs.
Common mistakes: Arching the lower back, leaning forward, rotating the hips, or swinging the leg backward. Focus on moving from the hip rather than trying to lift the foot as high as possible.
Make it easier or harder: Start by sliding one foot backward along the floor. When comfortable, increase the movement slightly or introduce light ankle resistance.
4. Counter-Supported Side Steps
Best for: Practicing sideways movement, improving lower-body coordination, and strengthening the hip muscles that help control weight shifts.
Muscles worked: Gluteus medius and minimus, quadriceps, and other hip stabilizers.
Equipment needed: A long, stable countertop for support.
Sets, reps, and rest: Perform 1–2 rounds of 5–10 steps in each direction. Rest approximately 45–60 seconds between rounds.
How to Do It
- Stand facing a sturdy countertop, with your hands resting on it for balance.
- Keep your feet hip-width apart, knees slightly bent, and eyes looking forward.
- Take a small, controlled step to the right with your right foot.
- Bring your left foot toward your right, maintaining a comfortable gap between your feet.
- Continue stepping sideways for the planned number of steps.
- Reverse direction and repeat, leading with your left foot.
Common mistakes: Crossing the feet, taking steps that are too large, leaning heavily to one side, or moving too quickly. Keep your hips relatively level and use steady, deliberate steps.
Make it easier or harder: Start with just two or three steps in each direction while maintaining hand support. Progress by increasing the number of controlled steps. Reduce hand support only when balance is reliable and it is safe to do so.
Supported sideways walking is also included in NHS Inform’s strength and balance exercise guidance.
5. Low Step-Ups With a Handrail
Best for: Building the leg and glute strength needed for climbing stairs, stepping onto curbs, and controlling body weight on one leg.
Muscles worked: Gluteus maximus and quadriceps, with assistance from the hamstrings, calves, and core.
Equipment needed: A low, stable step or bottom stair with a secure handrail.
Sets, reps, and rest: Start with 1–2 sets of 6–8 repetitions per leg. Rest 60–90 seconds between sets.
How to Do It
- Stand in front of a low step with a secure handrail within reach.
- Hold the handrail and place your entire right foot firmly on the step.
- Press through your right foot to lift your body upward, keeping your knee aligned with your toes.
- Bring your left foot up toward the step, lightly touching down if needed for balance.
- Slowly lower your left foot back to the floor while keeping your right foot on the step.
- Complete the repetitions, then switch legs.
Common mistakes: Pushing excessively from the trailing leg, pulling yourself upward using the handrail, allowing the knee to collapse inward, or stepping down too quickly. Choose a step height that allows smooth, controlled movement.
Make it easier or harder: Use a lower step and secure hand support. Once the movement becomes comfortable, gradually increase repetitions before considering a higher step.
Important: Step-ups are more demanding than standing leg raises. Seniors with significant balance difficulties should use a safer alternative or seek guidance from a physical therapist.
6. Glute Bridge
Best for: Strengthening the gluteus maximus without requiring standing balance.
Muscles worked: Primarily the gluteus maximus, with assistance from the hamstrings and trunk stabilizers.
Equipment needed: An exercise mat or comfortable, nonslip floor surface.
Sets, reps, and rest: Begin with 1–2 sets of 8–12 repetitions. Rest approximately 60 seconds between sets.
How to Do It
- Lie on your back with your knees bent and feet flat on the floor, approximately hip-width apart.
- Rest your arms beside your body and relax your head and shoulders.
- Gently tighten your abdominal muscles and squeeze your glutes.
- Press through both feet and slowly lift your hips toward the ceiling.
- Stop when your shoulders, hips, and knees form a roughly straight line, without arching your lower back.
- Pause briefly, then lower your hips slowly to the floor.
Common mistakes: Lifting too high, arching the lower back, allowing the knees to collapse inward, or pushing mainly through the toes. Keep your movement controlled and your feet firmly planted.
Make it easier or harder: Start with a smaller hip lift. To increase the challenge, add a brief pause at the top before lowering.
Safety note: Only perform floor exercises if you can safely get down and return to standing. Otherwise, use chair sit-to-stands or supported standing hip extensions.
7. Side-Lying Clamshell
Best for: Strengthening the outer and deep hip muscles without requiring standing balance.
Muscles worked: Gluteus medius, gluteus maximus, gluteus minimus, and deep hip rotators.
Equipment needed: A comfortable exercise mat or firm padded surface.
Sets, reps, and rest: Perform 1–2 sets of 8–12 repetitions on each side. Rest approximately 30–60 seconds as needed.
How to Do It
- Lie on your side with your knees bent and your head supported comfortably.
- Stack your hips and knees, keeping your feet together.
- Gently tighten your abdominal muscles to keep your torso stable.
- Slowly lift your top knee while keeping your feet touching.
- Stop before your pelvis begins rotating backward.
- Lower the knee slowly, complete your repetitions, and switch sides.
Common mistakes: Rolling backward, separating the feet, moving too quickly, or opening the knee farther than the hips can control. A small movement with stable hips is more useful than a large movement performed with poor form.
Make it easier or harder: Use a smaller opening or fewer repetitions. Progress gradually with a light mini resistance band above your knees.
The American Academy of Orthopaedic Surgeons’ hip conditioning program also includes the clamshell as a strengthening exercise for the hip muscles.
Why Strong Glutes Matter for Balance and Mobility
Your glutes are a group of three muscles located around the back and sides of your hips.
According to Cleveland Clinic’s gluteal muscle anatomy guide, these muscles help support body weight, stabilize the pelvis, and control lower-body movement.
Each muscle contributes differently:
| Glute Muscle | Main Function | Everyday Benefit |
|---|---|---|
| Gluteus maximus | Extends the hip | Helps with standing, stair climbing, and rising from a chair |
| Gluteus medius | Moves the leg sideways and stabilizes the pelvis | Supports control when walking or shifting weight |
| Gluteus minimus | Assists hip movement and pelvic stability | Helps maintain controlled lower-body movement |
Can Stronger Glutes Improve Balance?
Stronger glutes can contribute to better balance by improving the strength and control of the hips and pelvis.
However, balance depends on more than muscle strength. Coordination, vision, inner-ear function, sensation in the feet, and other lower-body muscles also play important roles.
The U.S. Preventive Services Task Force recommends exercise programs for older adults at increased risk of falls. Effective programs commonly combine balance, walking, functional movements, and strength training.
The takeaway: Glute strengthening is a useful part of improving physical function, but it works best alongside appropriate balance exercises and regular physical activity.
Beginner Glute Workout for Seniors
You do not need to perform all seven exercises in one session.
For beginners, start with four supported movements that train the glutes without requiring floor exercises or specialized equipment.
Simple Home Workout
| Exercise | Sets | Reps |
|---|---|---|
| Chair Sit-to-Stand | 1–2 | 6–10 |
| Supported Standing Hip Abduction | 1 | 8–10 per leg |
| Supported Standing Hip Extension | 1 | 8–10 per leg |
| Counter-Supported Side Steps | 1–2 | 5–10 steps each direction |
Workout instructions:
- Warm-up: Walk comfortably or perform other easy movements for 5 minutes.
- Frequency: Begin with 2 nonconsecutive days per week. Progress to 3 days if appropriate and recovery is comfortable.
- Rest: Take approximately 60–90 seconds between challenging sets, or longer when needed.
- Effort: Finish each set feeling that you could perform another 2–3 controlled repetitions.
- Progression: Add repetitions gradually. When the upper repetition range feels comfortable, consider a second set before increasing resistance.
For stronger seniors: Add low step-ups with a handrail. Glute bridges or clamshells can also be included if getting onto and off the floor is safe.
The CDC’s physical activity guidelines for older adults recommend muscle-strengthening activities at least twice weekly, along with aerobic activity and exercises that improve balance.
This glute routine can support the strength portion of an exercise plan, but it should not replace training the other major muscle groups or practicing balance.
Safety Tips for Seniors Doing Glute Exercises
The goal is to challenge your muscles while keeping movements stable and comfortable.
1. Use Reliable Support
A sturdy countertop or secure handrail is preferable to an unstable chair or movable furniture. Keep support within easy reach during standing exercises.
2. Start With a Comfortable Range of Motion
You do not need to lift your legs high or squat deeply to benefit from these exercises. Begin with movements you can control without excessive leaning, twisting, or discomfort.
3. Avoid Holding Your Breath
Breathe normally during every repetition. Exhale during the more demanding part of the movement and inhale as you return to the starting position.
4. Progress Gradually
Increase repetitions, sets, or resistance one at a time. Do not remove hand support simply to make an exercise more difficult if doing so compromises safety.
5. Choose Exercises That Match Your Mobility
Standing exercises may be easier for seniors who cannot get onto the floor. Those with significant balance difficulties, a history of falls, recent surgery, or movement restrictions should obtain individualized exercise guidance.
Stop exercising if you experience sharp pain, numbness, dizziness, chest pain, unusual shortness of breath, or other concerning symptoms. Seek appropriate medical assistance, particularly for severe or persistent symptoms.
Frequently Asked Questions
1. What Is the Best Glute Exercise for Seniors?
Chair sit-to-stands are among the most practical starting exercises because they strengthen the glutes and thighs while practicing an important everyday movement.
Supported standing hip abduction is another useful choice, especially for training the muscles that stabilize the pelvis during walking.
The best exercise depends on your current strength, mobility, and balance.
2. Can Stronger Glutes Help Improve Balance?
Yes. Stronger glute muscles can improve hip stability and support better control during walking, standing, and weight shifting.
However, strengthening alone does not guarantee improved balance or prevent every fall. A complete routine should also include balance practice appropriate to your abilities.
3. How Often Should Seniors Exercise Their Glutes?
Most seniors can begin with two glute-strengthening sessions per week on nonconsecutive days, provided the exercises are appropriate for their health and ability.
With experience, some may benefit from three weekly sessions. Recovery and movement quality should guide progression.
4. Can Seniors Strengthen Their Glutes Without Weights?
Yes. Chair sit-to-stands, standing hip extensions, supported side leg raises, glute bridges, and clamshells all use body weight or simple movements to challenge the glutes.
As strength improves, additional repetitions, sets, or light resistance may be useful.
5. What Glute Exercises Can Seniors Do Without Getting on the Floor?
Chair sit-to-stands, supported standing hip abduction, standing hip extension, and counter-supported side steps are good options.
Low step-ups may also be suitable for seniors who can safely use a step with a secure handrail.
6. How Long Does It Take Seniors to Strengthen Their Glutes?
Progress depends on starting strength, exercise difficulty, frequency, nutrition, and recovery.
With consistent training over several weeks, you may notice improved movement control or that repetitions feel easier. More substantial strength gains generally require continued progressive training over time.
Rather than focusing on a fixed timeline, track whether you can complete more controlled repetitions, use less assistance safely, or perform daily activities more comfortably.
The Bottom Line
The best glute exercises for seniors are movements that strengthen the hips while remaining safe, practical, and appropriate for individual abilities.
Start with chair sit-to-stands, supported hip abduction, standing hip extensions, and counter-supported side steps. Add step-ups, bridges, or clamshells when you can perform them comfortably and safely.
Two consistent strength sessions per week, combined with appropriate balance activities, are a practical starting point for supporting mobility and maintaining lower-body strength as you age.
References
- CDC — Physical Activity Guidelines for Older Adults
- Cleveland Clinic — Gluteal Muscles: Anatomy and Function
- U.S. Preventive Services Task Force — Falls Prevention in Older Adults
- NHS Inform — Strength and Balance Exercises
- American Academy of Orthopaedic Surgeons — Hip Conditioning Program
- Mayo Clinic — Step-Up Exercise
- NHS — Balance Exercises
This content is for informational purposes only and is not a substitute for medical advice.