
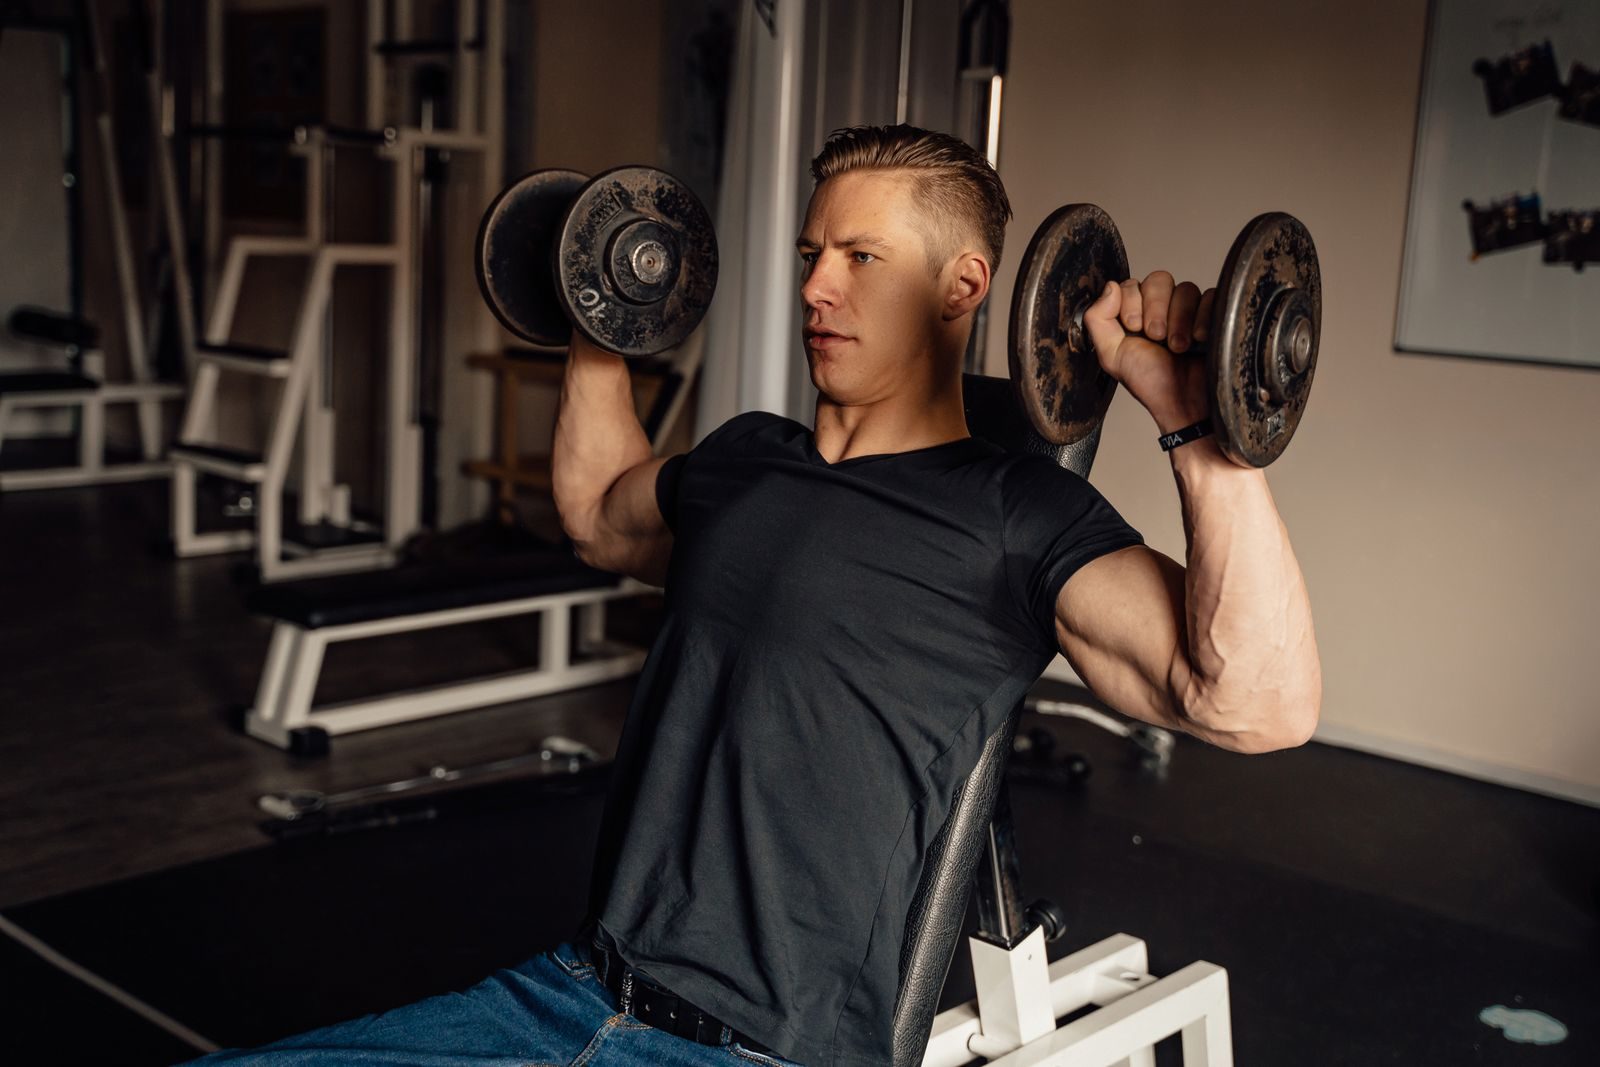
The best shoulder exercises for a balanced routine include presses and raises for strength, rotator-cuff and shoulder-blade work for control, and gentle movements for comfortable range of motion. Use these 12 exercises as a menu—not a workout you must complete from start to finish.
Below, you’ll find clear instructions, starting sets and repetitions, common mistakes, and a sample routine. The right choices depend on your equipment, training experience, and the upper-body work you already do.
How to Choose Shoulder Exercises for Your Goal
Train more than the muscles you see in the mirror
Your shoulder muscles have different jobs. The deltoids cover the front, side, and back of the shoulder. Presses, lateral raises, and reverse flys emphasize these areas differently, which is why doing several versions of the same press is not the only way to build a shoulder routine.
The rotator cuff is a group of four muscles that helps control the upper-arm bone in its socket. Meanwhile, muscles around your shoulder blades—including the trapezius and serratus anterior—help position the shoulder blades as your arms move. Overhead movement involves this whole system, not just the deltoids.
That distinction explains the variety below: some exercises train larger loaded movements, while others emphasize rotation or controlled shoulder-blade movement.
Match the exercise to the task
For general shoulder strength, start with three or four strengthening exercises: a press, a row or rear-shoulder movement, and one or two raises or control exercises.
For mobility practice, choose one or two movements from the second section. Wall slides and open books involve controlled movement; cross-body and doorway stretches involve gentle holds. They serve different purposes from lifting progressively heavier weights.
For an existing upper-body program, consider replacing overlapping exercises rather than adding this entire routine. A shoulder session should fit your weekly training, not simply sit on top of all your other pressing and pulling.
Your shoulder blades should move as your arms rise. Avoid interpreting “good posture” as keeping them permanently squeezed down and together during every exercise.
Set up before you start
Depending on your choices, you’ll need dumbbells, a resistance band with a suitable anchor, a stable bench or chair, and floor space. Inspect bands for damage, secure attachments according to the manufacturer’s instructions, and follow its stretching limits and eye-protection guidance. Never rely on an unsecured door or improvised attachment.
Warm up with approximately five to ten minutes of easy activity, then perform a light practice set of your first loaded exercise. This guide is for general fitness, not an injury-rehabilitation or postoperative program.
Shoulder Exercises for Strength and Control
The doses below are starting examples, not requirements for every reader. Begin with one set while learning a movement, then build to the suggested two sets.
For loaded exercises, choose resistance that leaves you able to perform roughly two or three more controlled repetitions at the end of a set. For low-load control exercises, stop before your position starts to deteriorate. Training to failure is not necessary for general strength development.
As a starting rest guide, allow 90–120 seconds for presses and rows and 45–90 seconds for lighter exercises. For one-arm movements, complete both sides, taking time to reset, then rest before the next round.
1. Standing Dumbbell Shoulder Press
This is the main overhead-strength option in the list. It works the deltoids, particularly the front portion, with help from the triceps.
Equipment: Two dumbbells.
How to do it:
- Stand with your feet about shoulder-width apart. Hold the dumbbells near shoulder level, palms forward, with your elbows slightly in front of your torso.
- Brace your abdomen and press both weights overhead. Let your arms straighten without leaning backward or using a leg drive.
- Lower the dumbbells smoothly toward the starting position. Use a depth you can control without forcing your shoulders into an uncomfortable position.
Common mistake: Arching your lower back to finish the repetition. Reduce the weight when you cannot keep your torso steady.
Starting dose: Two sets of 8–12 repetitions.
Practice the movement with very light weights first. The goal is a controlled overhead press, not getting the heaviest possible dumbbells above your head. The basic standing setup and movement follow Physitrack’s shoulder-press guidance.
2. Standing Dumbbell Lateral Raise
The lateral raise gives you a way to emphasize the side of your shoulders without adding another overhead press.
Equipment: Two light dumbbells.
How to do it:
- Stand with the dumbbells beside your thighs, palms facing inward. Keep a small bend in your elbows and hold that angle.
- Raise your arms outward under control until they reach approximately shoulder height. Keep your wrists straight rather than deliberately tipping your thumbs downward.
- Lower the weights slowly to your sides without swinging your torso to start the next repetition.
Common mistake: Using momentum or turning the movement into a shrug. Choose lighter weights when your torso starts rocking or your shoulders rise before your arms.
Starting dose: Two sets of 10–15 repetitions.
For this variation, shoulder height is the target—not a requirement to keep lifting higher. ACE’s lateral-raise instructions also emphasize controlled movement and a steady torso.
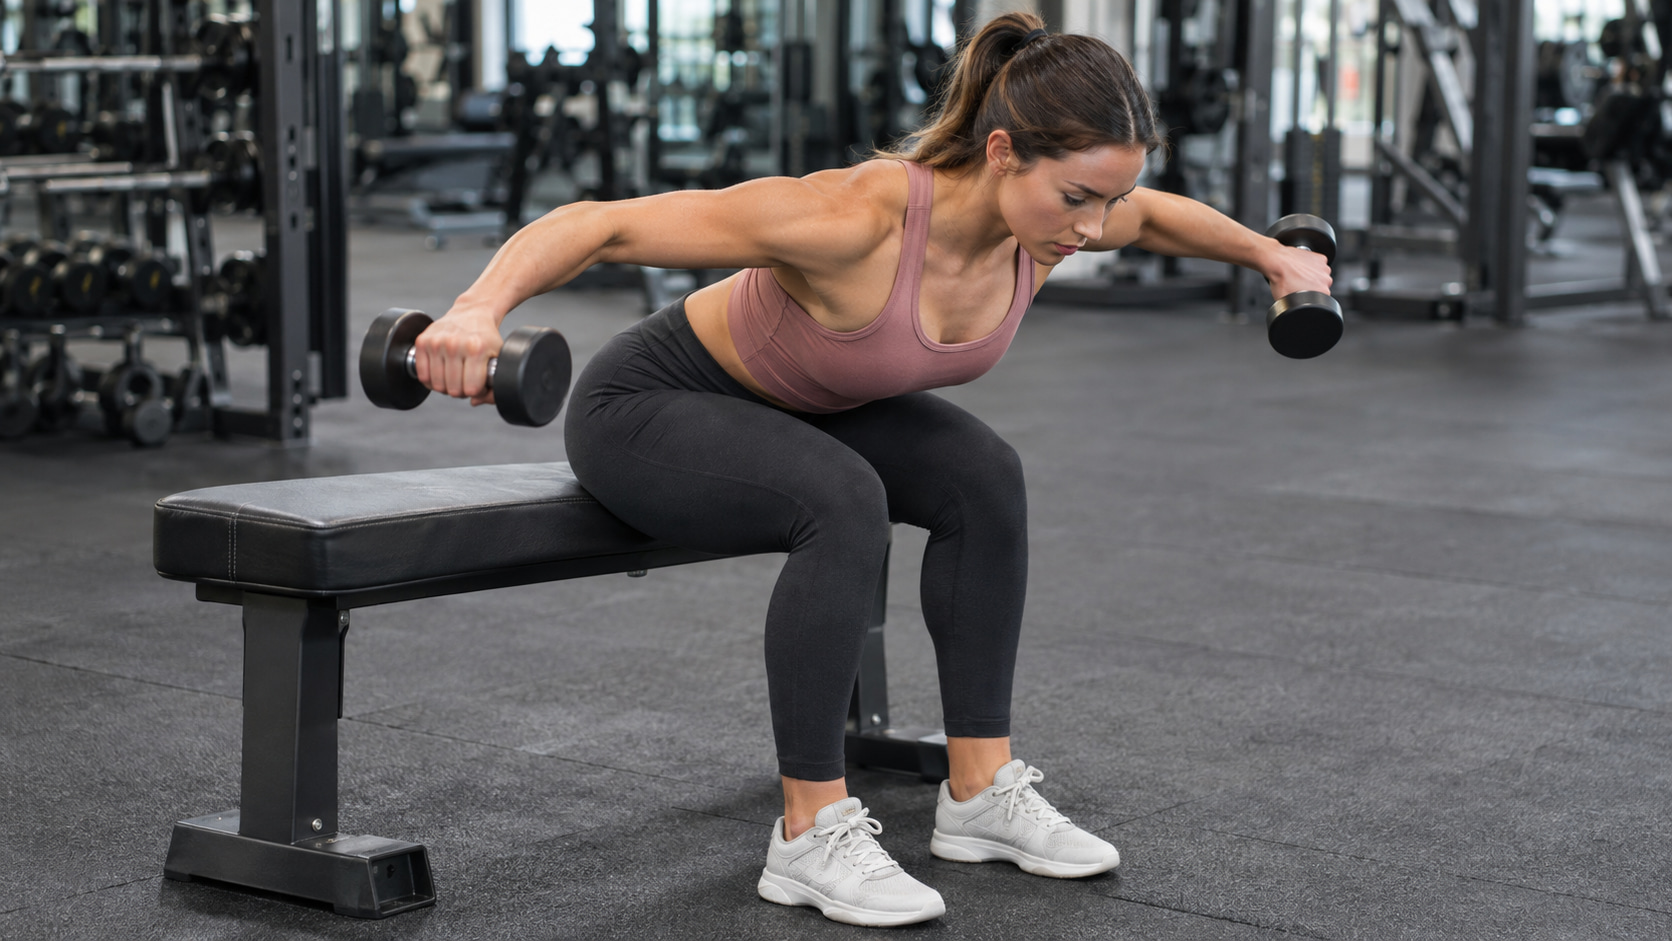
3. Seated Bent-Over Dumbbell Reverse Fly
The reverse fly trains the back of the shoulders and upper back. It offers a different emphasis from presses and lateral raises.
Equipment: Two light dumbbells and a stable bench or chair.
How to do it:
- Sit with your feet planted. Hinge forward from your hips, keeping your back comfortable and your neck aligned with your torso. Let the dumbbells hang beside your calves.
- With your palms facing each other and elbows slightly bent, lift your arms outward. Stop around the point where your upper arms are level with your torso.
- Lower the weights smoothly while keeping the same small elbow bend.
Common mistake: Bending your elbows more as you lift, turning the fly into a row. Think about moving your arms outward rather than pulling the dumbbells toward your ribs.
Starting dose: Two sets of 10–15 repetitions.
Keep the weights light enough that you do not need to lift your chest or swing them upward. Mayo Clinic’s seated reverse-fly guidance provides an additional technique reference.
4. Standing Single-Arm Resistance-Band Row
The band row trains your lats, upper-back muscles, rear shoulders, and elbow flexors. It is a supporting exercise for the shoulder complex rather than a deltoid-isolation movement.
Equipment: A resistance band or tube, suitable anchor, and compatible handle when required.
How to do it:
- Secure the band in front of you at approximately stomach height. Face the anchor, hold the band or handle in one hand with your palm inward, and step back until there is light tension.
- Pull toward your side, keeping your elbow close to your body. Let the shoulder blade move back without rotating your torso.
- Extend your arm gradually, controlling the band as it pulls you toward the anchor. Complete the repetitions, then change sides.
Common mistake: Twisting your body to pull farther. Keep your chest facing the anchor and reduce the resistance when necessary.
Starting dose: Two sets of 8–12 repetitions per side.
Keep a secure grip throughout. Do not release the band while it is stretched.
5. Standing Band External Rotation
External rotation trains the muscles that turn your upper arm outward, including the infraspinatus and teres minor. This version keeps the elbow beside your ribs rather than raised to shoulder height.
Equipment: A light resistance band and secure anchor; an optional small towel.
How to do it:
- Stand sideways to the anchor with your working arm farther from it. Hold the band with your elbow bent about 90 degrees beside your ribs. Place a small towel between your upper arm and torso when helpful.
- Rotate your forearm outward, keeping your wrist straight and your upper arm beside your body.
- Return slowly without allowing the band to pull you inward abruptly.
Common mistake: Moving your elbow away from your ribs or turning your torso to create extra range. Use a lighter band and a smaller, controlled movement.
Starting dose: Two sets of 10–15 repetitions per side.
Merck’s external-rotation instructions reinforce the arm-at-side position and controlled return.
6. Standing Band Internal Rotation
Internal rotation moves the upper arm in the opposite direction. It involves the subscapularis, one of the rotator-cuff muscles, along with assisting muscles such as the pectoralis major. Treat it as an optional accessory—not a compulsory addition to every shoulder session.
Equipment: A light resistance band and secure anchor; an optional small towel.
How to do it:
- Stand sideways with your working arm nearest the anchor. Hold the band with your elbow bent about 90 degrees and your upper arm beside your torso.
- Rotate your forearm inward across your abdomen. Keep your elbow in place and your wrist straight.
- Return to the starting position slowly, without turning your chest toward the anchor.
Common mistake: Pulling with your whole body or bending your wrist to finish. Reduce resistance until the movement comes from the shoulder.
Starting dose: Two sets of 10–15 repetitions per side.
Use a manageable arc rather than forcing your hand as far across your body as possible.
7. Incline Straight-Arm Scapular Push-Up
This exercise practices shoulder-blade movement under body-weight resistance. Unlike a regular push-up, your elbows remain straight while your shoulder blades move together and apart.
Equipment: A sturdy elevated surface, such as a secured bench or countertop.
How to do it:
- Place your hands on the elevated surface and step back into an inclined plank. Keep your elbows straight and your head, torso, and hips aligned.
- Let your shoulder blades move toward each other so your chest lowers a small distance between your shoulders.
- Push the surface away, spreading your shoulder blades apart. Keep your hips steady as you return to the starting position.
Common mistake: Bending your elbows or letting your lower back sag. Make the movement smaller and use a higher support when needed.
Starting dose: Two sets of 8–12 controlled repetitions.
Adjust the difficulty: A higher surface reduces the challenge. Progress toward a lower surface only when you can keep the movement controlled without bending your elbows.
8. Prone Floor Y Raise With a Hold
The prone Y raise is a low-load shoulder and upper-back control exercise. Start without weights and focus on a small, deliberate lift.
Equipment: A mat; an optional folded towel for forehead support.
How to do it:
- Lie face down with your arms diagonally overhead in a Y. Point your thumbs upward and keep your neck aligned with your torso.
- Lift your arms slightly off the floor. Keep the movement small enough that you do not need to throw your head back or lift your chest.
- Hold for about five seconds, then lower your arms and relax briefly before repeating.
Common mistake: Trying to lift higher by arching your lower back. A small arm lift is enough for this variation.
Starting dose: Two sets of 4–6 repetitions, holding each lift for five seconds.
The hold makes these repetitions different from ordinary raises. Begin with fewer repetitions when necessary; ACE’s prone stabilization guidance uses short holds rather than heavy loading.
Shoulder Mobility Exercises and Stretches
Use these options for controlled movement practice or gentle stretching. You do not need to push to your maximum range or make both sides look identical.
Wall slides also involve shoulder-blade control, while the open book emphasizes upper-back rotation. Neither should be confused with a heavy shoulder-strength exercise.
9. Facing-Wall Forearm Slide
Use this drill to practice reaching upward while keeping your torso steady.
Equipment: A smooth wall.
How to do it:
- Face the wall and place your forearms against it, with your elbows roughly shoulder-width apart and your hands above your elbows.
- Apply gentle pressure into the wall as you slide your forearms upward. Keep them approximately parallel and let your shoulder blades move with your arms.
- Stop before you need to lean backward or arch your lower back. Slide down slowly to the starting position.
Common mistake: Chasing extra height by pushing your ribs forward. End the movement earlier and keep your abdomen gently engaged.
Starting dose: One or two sets of 6–10 slow repetitions, with an optional brief pause at the top.
For this version, keep contact with the wall. There is no resistance band, foam roller, or deliberate lift-off. The linked FoundationPT tutorial provides the setup and movement cues.
10. Side-Lying Open Book
The open book practices rotation through your upper back. It belongs here as a supporting mobility movement, not because it directly strengthens the rotator cuff.
Equipment: A mat and an optional pillow for your head.
How to do it:
- Lie on your side with your hips and knees comfortably bent, knees stacked, and arms extended together in front of your chest.
- Keep your knees together as you lift your top arm and open it toward the other side. Allow your upper body to rotate, and let your head follow as comfortable.
- Pause briefly, then bring your arm and upper body back slowly. Finish the repetitions before changing sides.
Common mistake: Rolling your knees backward or forcing your moving hand to the floor. Keep the lower body steady and use a smaller opening.
Starting dose: One or two sets of 5–8 repetitions per side.
The goal is comfortable rotation, not reaching a particular floor position. NHS open-book guidance describes a slow opening and controlled return.
11. Standing Cross-Body Shoulder Stretch
This is a simple stretch for the back of the shoulder.
Equipment: None.
How to do it:
- Stand comfortably and bring one arm across the front of your chest.
- Place your opposite hand on the upper arm, above the elbow. Gently draw the arm closer until you feel a mild stretch behind the shoulder.
- Hold while breathing normally, then release gradually and repeat on the other side.
Common mistake: Pulling directly on the elbow or forcing the arm farther across your chest. Keep the pressure on the upper arm and reduce it if the front of your shoulder feels pinched.
Starting dose: Two holds of 20–30 seconds per side.
AAOS specifically advises supporting the upper arm rather than applying pressure to the elbow in its crossover arm-stretch instructions.
12. Doorway Chest Stretch
The doorway stretch targets the chest and front of the shoulders.
Equipment: A stable doorway.
How to do it:
- Stand in the doorway with both forearms against the frame. Bend your elbows and position them approximately at shoulder height.
- Take a small step forward until you feel a gentle stretch across your chest and the front of your shoulders.
- Hold without bouncing, then step back to release the tension before lowering your arms.
Common mistake: Leaning forward aggressively or arching the lower back. Use a smaller step and keep your torso comfortably aligned.
Starting dose: Two holds of 20–30 seconds.
This should feel like a gentle stretch, not pressure deep inside the shoulder. Hospital for Special Surgery’s doorway-stretch guidance also advises avoiding lower-back strain.
A Simple Shoulder Strength and Mobility Routine
Here is one starting session using four strengthening exercises and two mobility options. It is an example for general fitness, not a universal prescription.
Schedule it on two nonconsecutive days, such as Monday and Thursday, provided it fits your other training. ACSM’s resistance-training guidance recommends training the major muscle groups at least twice weekly; that does not require a separate shoulder-only workout.
Warm up first, including a light practice set of the press and row.
| Order | Exercise | Sets and repetitions | Rest |
|---|---|---|---|
| 1 | Forearm wall slide | 1 × 6–8 slow repetitions | Move on when ready |
| 2 | Standing dumbbell shoulder press | 2 × 8–12 | 90–120 seconds |
| 3 | Standing single-arm band row | 2 × 8–12 per side | 90–120 seconds after both sides |
| 4 | Standing dumbbell lateral raise | 2 × 10–15 | 45–90 seconds |
| 5 | Standing band external rotation | 2 × 10–15 per side | 45–90 seconds after both sides |
| 6 | Doorway chest stretch | 2 × 20–30-second holds | About 20 seconds between holds |
For one-arm exercises, take enough time to change sides and reset your position. The rest periods are starting ranges, not deadlines.
Allow roughly 25–35 minutes, including the warm-up, equipment changes, and work on both sides. Take longer when learning the movements.
Adapt the selection without doing everything
On another session, replace the lateral raise with the reverse fly to give the rear shoulders more direct attention. For a control-focused session, use the incline scapular push-up or prone Y raise in that accessory slot instead.
Use the open book in place of the wall slide when upper-back rotation is the movement you want to practice. Choose the cross-body stretch instead of the doorway stretch when you prefer a gentle stretch behind the shoulder. These are different options, not identical substitutes.
Keep the selection manageable. Adding every remaining exercise is not the next progression.
Progress resistance before adding lots of exercises
For the loaded movements, use this practical progression rule: when you can complete both sets at the top of the repetition range, with steady technique and about two repetitions still possible, repeat that performance for another session. Then increase the resistance by the smallest practical amount and return toward the lower end of the range.
For example, move from two sets of 8 presses toward two sets of 12 before increasing the dumbbell weight. This is an illustrative way to apply progressive resistance, not a mandatory timetable.
For mobility work, look for smoother movement and less need to compensate. Do not measure success only by reaching higher, pulling harder, or holding longer.
When to Modify or Stop
Reduce the resistance or range when you cannot control a movement. Stop for sharp pain, numbness, dizziness, or other concerning symptoms rather than trying to finish the set.
Get medical guidance for persistent or worsening shoulder pain, a recent injury, or postoperative restrictions. Sudden severe pain, loss of sensation, or inability to move the arm warrants prompt assessment.
Chest pain or pressure—especially with shortness of breath, sweating, or lightheadedness—requires emergency help, not a shoulder stretch. Call 911 in the United States.
Make Your Next Session Simple
Choose a small combination you can perform well, record the resistance and repetitions, and repeat it consistently. Build strength through gradual loading, practice mobility without forcing range, and let the rest of your weekly training guide how much shoulder work you add.
References
- American College of Sports Medicine: 2026 resistance-training guidance.
- American Academy of Orthopaedic Surgeons: Rotator cuff and shoulder conditioning program.
- American Council on Exercise: Deltoid training, lateral raise, and prone shoulder stabilization.
- National Academy of Sports Medicine: Shoulder anatomy and overhead movement.
- Mayo Clinic and Physitrack: Seated reverse fly and standing dumbbell shoulder press.
- Merck Manual: Standing external rotation and standing internal rotation.
- Prehab and Bodylastics: Incline scapular push-up and standing single-arm band row.
- NHS and Hospital for Special Surgery: Upper-back movement exercises and stretching instructions.
- Performance Health: Resistance-band use and safety.
- NHS and American Heart Association: When to seek help for shoulder pain and heart-attack warning signs.
This content is for informational purposes only and is not a substitute for medical advice.
6 thoughts on “12 Best Shoulder Exercises for Strength and Mobility”